Table of Contents
Advertisement
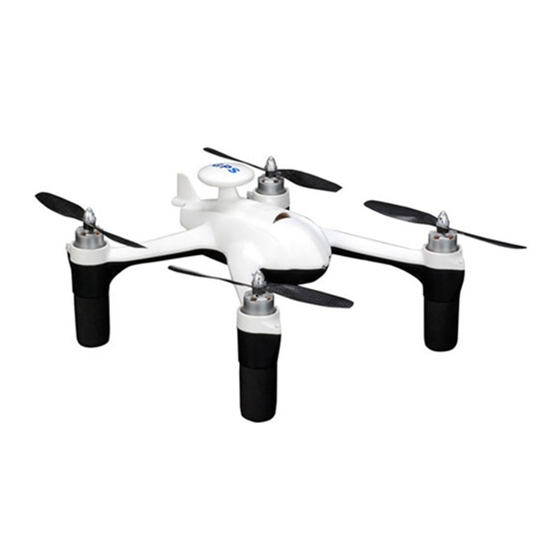
APOLLO A1
QUADCOPTER OPERATOR'S MANUAL
Quadcopter Rotor-Drone
Operator's Manual
Thank you for purchases the Idea-Fly Apollo A1 GEN2 quadcopter. The Apollo A1 is a ready-to-fly quad-rotor
heli designed for quadcopter enthusiasts and amateur photography/video hobbyists alike. The integrated
flight-control system includes GPS that provides precise Position-Hold, Fail-Safe, Semi-Autopilot and
Return-to-Home functions. Equipped with high-performance brushless motors, ESCs and carbon fiber propellers,
the Apollo A1 is a top-of-the-line, fully-featured advanced quadcopter. Advanced performance has never been
so easy!
Ready to take amateur video and images? The Apollo A1 includes a 2-axis, auto-stabilization camera mount
ready for any GoPro, Boscam or similar-sized action video camera (not included). The Apollo A1 puts you in
control too. While flying in auto-hover mode, you'll not only have stabilization of the camera, you'll have tilt
control directly from the transmitter.
It's very important that you read through all of the information included with your quadcopter and fully
understand not only how to operate your quadcopter, but also to fully understand the responsibility you
have for its proper use - both for your safety and the safety of others.
If you have any questions about setting up or flying your quadcopter after you've read this Operator's Manual and
viewed the included How-To videos, please contact the Authorized Hobby People/Affiliates service department
using the information in the Service and Support section on page 2 before trying to fly your quadcopter.
APOLLO A1
1
Advertisement
Table of Contents

Related Manuals for Idea-fly apollo A1


Summary of Contents for Idea-fly apollo A1
- Page 1 Ready to take amateur video and images? The Apollo A1 includes a 2-axis, auto-stabilization camera mount ready for any GoPro, Boscam or similar-sized action video camera (not included). The Apollo A1 puts you in control too. While flying in auto-hover mode, you’ll not only have stabilization of the camera, you’ll have tilt control directly from the transmitter.
-
Page 2: Table Of Contents
Preparing for Flight ................11 Installing the Transmitter Batteries ........ 11 Initializing the Gyros and Flight Controller ....11 Calibrating the Compass ............12 Flying the Apollo A1 Quadcopter ..........13 Propeller Safety ...............13 Arming the Motors ..............14 Flight Controls ................14 Manual Flight Mode Flying Tips ........15 Manual Flight Mode Flying Basics ......... -
Page 3: Liability And Warranty Information
Warranty repair requires proof of purchase. A copy of your original purchase receipt will be required. Once used, we do offer repair services as well as replacement parts for those customers who purchased the Apollo A1 quadcopter through Hobby People, Global Hobby Distributors or one of its affiliate authorized dealers. -
Page 4: Tips And Suggestions
APOLLO A1 QUADCOPTER OPERATOR’S MANUAL TiPS AND SUggESTiONS This section includes a number of important tips and suggestions that we recommend you familiarize yourself with before flying your new quadcopter. PLEASE READ BEFORE FLYING! THESE TIPS AND SUGGESTIONS ARE IMPORTANT! •... -
Page 5: Features And Specifications
Quick-Start Guide (Not Pictured) iTEMS REQUiRED The following items are required to fly your new Apollo A1 quadcopter. Items required can be purchased through your local Hobby People retail store or online at www.hobbypeople.net. • 8 ‘AA’ Alkaline Batteries for Transmitter (P/N 849440) •... -
Page 6: Warnings And Safety Notes
APOLLO A1 QUADCOPTER OPERATOR’S MANUAL wARNiNgS AND SAfETy NOTES These warnings and safety notes are important and must be followed closely. Please abide by this information and follow the instructions in this Operator’s Manual to ensure maximum safety. It’s important that you fully understand not only how to operate your quadcopter, but also to fully understand the responsibility you have for its proper use - both for your safety and the safety of others. -
Page 7: Lipo Battery Safety
APOLLO A1 QUADCOPTER OPERATOR’S MANUAL wARNiNgS AND SAfETy NOTES LiPO bATTERy SAfETy To ensure your safety, please read and carefully follow the guidelines in this section. It’s important that you follow these warnings closely. LiPo batteries are significantly more volatile than Alkaline or NiCd and NiMH batteries. -
Page 8: Radio Control System Warnings
APOLLO A1 QUADCOPTER OPERATOR’S MANUAL wARNiNgS AND SAfETy NOTES RADiO CONTROL SySTEM wARNiNgS • The radio system operates on the 2.4GHz frequency band. The 2.4GHz connection is determined by the transmitter and receiver pair. Unlike ordinary crystal-based systems, the quadcopter can be flown without frequency control. -
Page 9: Transmitter Overview
QUADCOPTER OPERATOR’S MANUAL TRANSMiTTER OvERviEw The transmitter comes paired and programmed from the factory to work with the Apollo A1 quadcopter. Read this section to familiarize yourself with the transmitter’s functions. Before flying your quadcopter, please ensure that the transmitter is set up exactly as described in this section. -
Page 10: Audible Low Voltage Alarm
APOLLO A1 QUADCOPTER OPERATOR’S MANUAL TRANSMiTTER OvERviEw AUDibLE LOw vOLTAgE ALARM The transmitter features a Low Voltage Alarm that will sound continuously when the transmitter battery voltage drops below a safe value. When this occurs, land as soon as is safely possible and replace the transmitter batteries. -
Page 11: Preparing For Flight
Follow the information in this section to install the transmitter batteries, install the LiPo battery, initialize the gyros and flight controller, calibrate the compass to prepare the Apollo A1 quadcopter for flight. It’s important that you follow the steps in this section very carefully. Failure to follow these steps correctly and in the order written may result in your quadcopter not flying as designed or not flying at all. -
Page 12: Calibrating The Compass
APOLLO A1 QUADCOPTER OPERATOR’S MANUAL PREPARiNg fOR fLigHT CALibRATiNg THE COMPASS Please follow the tips below when calibrating the compass. Completing the compass calibration process correctly is important to ensure the quadcopter will fly properly. CALIBRATING THE COMPASS IS REQUIRED FOR FLIGHT! DO NOT SKIP THIS PROCEDURE! •... -
Page 13: Flying The Apollo A1 Quadcopter
LiPo battery, turn off the transmitter, then repeat the calibration steps from the beginning. fLyiNg THE APOLLO A1 QUADCOPTER After calibrating the compass, your quadcopter is now ready for flight. Follow the steps in this section to arm the motors and fly your quadcopter using Manual Mode. -
Page 14: Arming The Motors
APOLLO A1 QUADCOPTER OPERATOR’S MANUAL fLyiNg THE APOLLO A1 QUADCOPTER ARMiNg THE MOTORS Before the throttle will operate, the motors must be armed. Before arming the motors and flying your quadcopter, make sure you’ve completed the following steps: • Install the LiPo battery, turn the transmitter ON and make sure the Flight Mode Switch is in the Manual Mode (1) position. -
Page 15: Manual Flight Mode Flying Tips
MANUAL fLigHT MODE fLyiNg TiPS The Apollo A1 quadcopter is a powerful, high-performance quad-rotor heli and you must use caution at all times when flying it. In this section we’ve provided some basic flying tips to help you get started. -
Page 16: Flight Trimming The Quadcopter
APOLLO A1 QUADCOPTER OPERATOR’S MANUAL fLyiNg THE APOLLO A1 QUADCOPTER MANUAL fLigHT MODE fLyiNg bASiCS, CONTiNUED..Practice Patterns: Once you become comfortable with the basics, start practicing the different patterns described below to help you increase your skills and confidence flying the quadcopter. -
Page 17: Using The Gps Flight Mode
USiNg THE gPS fLigHT MODE The Apollo A1 quadcopter features a GPS Flight Mode that provides Auto-Hover, Auto-Hover with Head Lock Position Hold and Auto-Hover with Head Free Position Hold. Using the GPS Flight Mode allows you manually fly the quadcopter to the desired altitude and position, then have the GPS hold that altitude and position, allowing you to control the camera gimbal to shoot amazing, stable aerial video. -
Page 18: Gps Flight Modes
APOLLO A1 QUADCOPTER OPERATOR’S MANUAL USiNg THE gPS fLigHT MODE gPS fLigHT MODES Manual Set Altitude: Provides Altitude Hold, but not Position Hold. With the throttle control stick at 50% (half throttle), the quadcopter will hover at the current altitude, but won’t hold its current position. For example, you can use the control sticks to place the quadcopter in the desired position and at the desired altitude, then reduce the throttle to half throttle and the quadcopter will hold the current altitude;... -
Page 19: Gps Flight Mode Flying Tips
APOLLO A1 QUADCOPTER OPERATOR’S MANUAL USiNg THE gPS fLigHT MODE gPS fLigHT MODE fLyiNg TiPS • Before switching to the GPS Flight Mode, you must manually fly the quadcopter (using the Manual Flight Mode) to the desired altitude and position and place it in a stable hover. Only after the quadcopter is stable should you switch to the GPS Flight Mode. -
Page 20: Using The Return To Home Function
QUADCOPTER OPERATOR’S MANUAL USiNg THE RETURN TO HOME fUNCTiON The Apollo A1 quadcopter features a Return to Home function, that when activated, commands the quadcopter to automatically return to its Home Point and land, all automatically. RETURN TO HOME fUNCTiON wARNiNgS Please read and understand the warnings in this section prior to using the Return to Home function. -
Page 21: Failsafe Function
QUADCOPTER OPERATOR’S MANUAL fAiLSAfE fUNCTiON The Apollo A1 quadcopter features a Failsafe function, that when activated, commands the quadcopter to return to its Home Point and land (Return to Home function). The Failsafe function will activate automatically if the quadcopter should exceed the altitude and/or distance limits or if the RF signal between the transmitter and receiver fails. -
Page 22: Autopilot Configuration Program
The Autopilot Configuration program is used for several different types of quadcopters. If you press the Default button, the programming values will default to general values that are not used for the Apollo A1 quadcopter. Failure to ensure the programming values match the recommended values in this section can result in your quadcopter not flying properly or not flying at all. -
Page 23: Saving Programming Values
APOLLO A1 QUADCOPTER OPERATOR’S MANUAL AUTOPiLOT CONfigURATiON PROgRAMMiNg SAviNg PROgRAMMiNg vALUES 1) After changing the desired programming values, press the Save button to write those values to the flight controller. For detailed explanations of each programming value, see below and on the next page. - Page 24 APOLLO A1 QUADCOPTER OPERATOR’S MANUAL AUTOPiLOT CONfigURATiON PROgRAMMiNg PROgRAMMiNg vALUE DEfiNiTiONS, CONTiNUED..Parameter Settings: MAX LIFT SPEED (Default Value: 2M/S) - This option allows you to choose the maximum lift speed of the quad- copter in Meters Per Second. Using a higher value increases the lift speed of the quadcopter, which can make the quadcopter more difficult to control.
-
Page 25: Updating Firmware
DOwNLOADiNg THE CURRENT fiRMwARE Download the current firmware version to your desktop from the Files section of the Apollo A1 quadcopter product page here: http://www.hobbypeople.net/index.php/quads-helis/quadcopter/idea-fly-apollo-a1-gen-2-rtf-quad-copter- w-carbon-props-drone.html... -
Page 26: Using The Camera Gimbal
APOLLO A1 QUADCOPTER OPERATOR’S MANUAL UPDATiNg fiRMwARE UPDATiNg THE fiRMwARE, CONTiNUED..3) Press the Select Firmware button, then navigate to the location that you saved the firmware download. 4) Click to highlight the firmware file, then press the Open button. The firmware update process will proceed as follows: ERASE >... -
Page 27: Adjusting The Center Of Gravity
MAiNTENANCE In general, the Apollo A1 quadcopter doesn’t require much in the way of maintenance or adjustments, however, there may come a time when you need to replace the rotor blades, bind the transmitter to the receiver, calibrate the transmitter control sticks and more.
Need help?
Do you have a question about the apollo A1 and is the answer not in the manual?
Questions and answers