
Related Manuals for Janome HT2008


Summary of Contents for Janome HT2008
-
Page 1: Instruction Manual
Janome HT2008 Instruction Manual Janome 2008 Sewing Machine Janome HT2008 Instruction Manual Manual de instrucciones Manuel d’instructions HT2008LE www.toews.com HT2008 Owners Manual/ User Guide... -
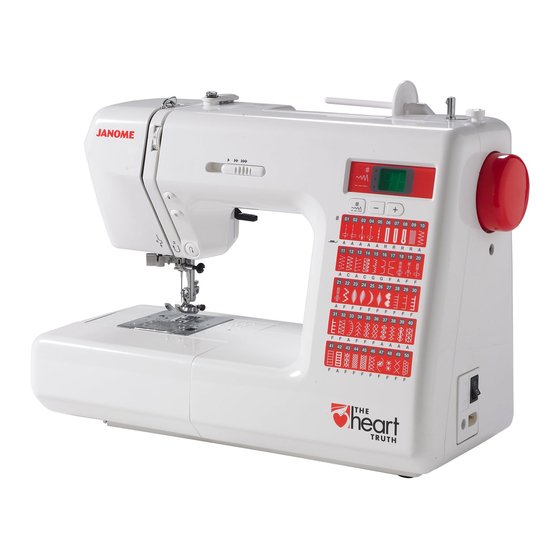
Page 2: Section 1. Names Of Parts
#1 Power switch #2 Machine socket #3 Drop feed lever #4 Free arm #5 Buttonhole lever #6 Presser foot lifter #7 Hole for additional spool pin NOTE: The specifications are subject to change without prior notice. www.toews.com HT2008 Owners Manual/ User Guide... -
Page 3: Seccion 1. Nombre De Las Partes
#6 Releveur du pied presseur #7 Agujero para poste de carrete adicional #7 Orifice pour broche à bobines supplémentaire NOTA: REMARQUE: Las especificaciones están sujetas a cambio sin previo aviso. Les spécifications pourront être modifiées sans avis préalable. www.toews.com HT2008 Owners Manual/ User Guide... -
Page 4: Standard Accessories
Blind hem foot G Seam ripper / Buttonhole opener Screwdriver Lint brush Quilter bar Foot control Additional spool pin Spool pin felt Spool stand Spool holder (large) Spool holder (small) Instruction book Power supply cord www.toews.com HT2008 Owners Manual/ User Guide... - Page 5 Feutre de porte-bobbine Base de carrete Dispsitif de retenue de la bobine Tapa-carretes grande Grande rondelle de porte-bobine Tapa-carretes pequeñol Petite rondelle de porte-bobine Manual de instrucciones Manuel d’instructions Cable de alimentación Cordon d’alimentation www.toews.com HT2008 Owners Manual/ User Guide...
-
Page 6: Extension Table And Free Arm Sewing
Pin e Hole • Free arm sewing: The free arm sewing is useful for stitching sleeves, waistbands, pant legs or any tubular garment, also for darning socks or mending knees, elbows and children’s wear. www.toews.com HT2008 Owners Manual/ User Guide... - Page 7 On pourra également repriser les chaussettes ou réparer les genoux et les coudes ainsi que les vêtements pour enfants. www.toews.com HT2008 Owners Manual/ User Guide...
-
Page 8: Section 2. Getting Ready To Sew
If the plug does not fit in the outlet, reverse the plug. If it still does not fit, contact a qualified electrician to install the proper outlet. Do not modify the plug in any way. www.toews.com HT2008 Owners Manual/ User Guide... -
Page 9: Sección 2. Preparativos Para Coser
électricien qualifié qui installera une prise appropriée. contacto con un electricista cualificado para que le instale N’essayez pas de modifier la prise. una toma de corriente apropiada. No intente modificar la www.toews.com HT2008 Owners Manual/ User Guide clavija de ninguna forma. -
Page 10: Function Keys And Buttons
If you start sewing with the needle up, it will be up when you stop the machine. If you start sewing with the needle down, it will be down when you stop the machine. www.toews.com HT2008 Owners Manual/ User Guide... - Page 11 La máquina se detendrá con la aguja arriba o abajo, La machine s’arrêtera avec l’aiguille en position haute ou dependiendo de la posición que tenía antes de comenzar. basse, suivant la position dans laquelle elle se trouvait avant de commencer. www.toews.com HT2008 Owners Manual/ User Guide...
-
Page 12: Mode Selection Key
You can adjust the stitch width while the machine is running. c Stitch length adjusting mode: Press the Up key to increase the stitch length or Down key to decrease. NOTE: You can adjust the stitch length while the machine is running. www.toews.com HT2008 Owners Manual/ User Guide... - Page 13 NOTA: REMARQUE: Puede ajustar la longitud de puntada mientras la máquina Il est possible d’ajuster la longueur du point pendant que está funcionando. la machine tourne. www.toews.com HT2008 Owners Manual/ User Guide...
- Page 14 You can raise it about 0.6 cm (1/4") higher than the normal up position for easy removal of the presser foot, or to help you to place thick fabric under the foot. q Lowered position w Normal up position e Highest position www.toews.com HT2008 Owners Manual/ User Guide...
- Page 15 Posición inferior également utile pour placer des tissus particulièrement w Posición superior normal épais sous le pied. e Posición más alta q Position basse w Position d’élévation normale. e Position la plus haute www.toews.com HT2008 Owners Manual/ User Guide...
- Page 16 Place the flat side of the needle onto something flat (needle plate, glass etc). The clearance between the needle and the flat surface should be consistent. t Clearance WARNING: Never use a bent or blunt needle, which can cause it to break. www.toews.com HT2008 Owners Manual/ User Guide...
- Page 17 être partout la même. t Separación t Distance ATENCIÓN: ATTENTION: Nunca utilice agujas dobladas o romas, pues pueden Ne jamais utiliser une aiguille tordue ou émoussée car elle romperse. risquerait de se casser. www.toews.com HT2008 Owners Manual/ User Guide...
- Page 18 * When sewing stretch, very fine fabrics and synthetics, use a stretch needle. The stretch needle effectively prevents skipped stitches. * When sewing very fine fabrics, sew over a piece of paper to prevent distortion. www.toews.com HT2008 Owners Manual/ User Guide...
-
Page 19: Cuadro Comparativo De Aguja E Hilos
élastique. Cette aiguille évite effectivement les deformaciones de este. sauts de points. * En cousant les tissus très légers, utilisez un morceau de papier placé au-dessous pour prévenir la déformation du tissu. www.toews.com HT2008 Owners Manual/ User Guide... - Page 20 Depress the foot control again. When the bobbin is fully wound, it will stop automatically. Return the bobbin to its original position by moving the spindle to the left, and cut the thread as shown. www.toews.com HT2008 Owners Manual/ User Guide...
- Page 21 Mueva el volante de nuevo a su posición original. Remettre le volant à sa position d’origine. www.toews.com HT2008 Owners Manual/ User Guide...
- Page 22 The bobbin should turn counterclockwise when pulling the thread. b Pull out about 10 cm (4") of thread and attach the hook cover. y Bobbin thread u Align left edge of the hook cover. www.toews.com HT2008 Owners Manual/ User Guide...
- Page 23 (4 pouces) de fil puis remettre en place le couvercle du y Hilo de la bobina boîtier. u Alinee el borde izquierdo de la tapa del gancho. y Fil de la canette u Aligner le bord gauche du couvercle du boîtier. www.toews.com HT2008 Owners Manual/ User Guide...
-
Page 24: Thread Take-Up Lever
Pass the thread in the lower thread guide from the right. o Lower thread guide b Slip the thread in the needle bar thread guide on the left. !0 Needle bar thread guide NOTE: Refer to page 26 for the automatic needle threader. www.toews.com HT2008 Owners Manual/ User Guide... - Page 25 !0 Guide-fil de la barre à aiguille NOTA: REMARQUE: Consulte la página 27 para conocer la forma de uso del Se référer à la page 27 pour utiliser l’enfilage automatique. enhebrador automático de la aguja. www.toews.com HT2008 Owners Manual/ User Guide...
-
Page 26: Needle Thread
Needle thread w Bobbin thread e Up/down needle position button c Draw 10 cm (4") of both threads to the back under the presser foot. www.toews.com HT2008 Owners Manual/ User Guide... - Page 27 Pase 10 cm (4") de ambos hilos hacia la parte trasera, c Tirer les deux fils sur une longueur de 10 cm (4 pouces) por debajo del prensatelas. vers l’arrière, sous le pied presseur. www.toews.com HT2008 Owners Manual/ User Guide...
- Page 28 Tension is too loose q Right side (Top side) of fabric w Wrong side (Bottom side) of fabric The corner of each zigzag point pulls together on the wrong side of the fabric. www.toews.com HT2008 Owners Manual/ User Guide...
- Page 29 El hilo de la aguja pasará por la parte de abajo de la tela y Le fil de l’aiguille à tendance à faire des boucles sur l’envers se jalará quedando casí junto. du tissu et les points sont déformés. www.toews.com HT2008 Owners Manual/ User Guide...
-
Page 30: Section 3. Basic Sewing
Raise the presser foot and pull the fabric to the rear. c Draw the threads up and into the thread cutter. The threads are cut at the proper length for starting the next seam. e Thread cutter www.toews.com HT2008 Owners Manual/ User Guide... -
Page 31: Partie 3. Couture De Base
Tirer les fils vers le haut et les amener dans le coupe-fil. cortarán a la longitud apropiada para iniciar la siguiente Les fils sont à la bonne longueur pour commencer la costura. e Cortahilos prochaine couture. e Coupe-fil www.toews.com HT2008 Owners Manual/ User Guide... - Page 32 Press the Down (–) key to move the needle to the left. Press the Up (+) key to move the needle to the right q Left needle position w Center needle position e Right needle position www.toews.com HT2008 Owners Manual/ User Guide...
- Page 33 Pour déplacer l’aiguille vers la droite, appuyer sur la w Posición central de la aguja touche (+). e Posición derecha de la aguja q Aiguille positionnée à gauche w Aiguille positionnée au centre e Aiguille positionnée à droite www.toews.com HT2008 Owners Manual/ User Guide...
-
Page 34: Black Button
Lower the needle into the fabric at the point to start sewing. x Lower the foot while pushing the black button in. The foot is locked in the horizontal position. c The foot will be unlocked automatically after sewing several stitches. q Black button www.toews.com HT2008 Owners Manual/ User Guide... -
Page 35: Girando Esquinas Cuadradas
Le pied est maintenu en position horizontale. c Le pied sera dégagé automatiquement une fois que horizontal. c El prensatelas se liberará automáticamente después de quelques points auront été cousus. q Bouton noir coser varias puntadas. q Botón negro www.toews.com HT2008 Owners Manual/ User Guide... - Page 36 Sew slowly at the corners. q Pattern: Stretch stitch w Foot F: Satin stitch foot For top stitching and quilting q Pattern: Saddle stitch w Foot A: Zigzag foot Long straight stretch stitch, similar to hand stitches www.toews.com HT2008 Owners Manual/ User Guide...
- Page 37 Point sellier w Prensatelas w Pied A: Prensatelas de zigzag A: Pied zigzag Puntada elástica larga y recta, similar a las puntadas Point droit extensible long, similaire aux points faits à la manuales. main www.toews.com HT2008 Owners Manual/ User Guide...
-
Page 38: Stitch Width
The LED display shows the default setting of the selected pattern. Press the Down (–) key to decrease stitch length. Press the Up (+) key to increase stitch length. w Stitch length www.toews.com HT2008 Owners Manual/ User Guide... - Page 39 Oprima la tecla Menos (–) para reducir la longitud de touche (–). puntada. Pour accroître la longueur du point, appuyer sur la Oprima la tecla Más (+) para aumentar la longitud de touche (+). w Longueur du point puntada. w Longitud de puntada www.toews.com HT2008 Owners Manual/ User Guide...
-
Page 40: Section 4. Utility Stitches
This stitch overcasts and seams the raw edge at the same time, it prevents the fabric from fraying. q Guide www.toews.com HT2008 Owners Manual/ User Guide... - Page 41 Ce point permet de surfiler et de coudre les bords non-finis. la costura del borde no terminado, evitando que la tela se En même temps, le point empêche le tissu de s’effilocher. q Guied deshilache. q Guía www.toews.com HT2008 Owners Manual/ User Guide...
- Page 42 Do not set the stitch width less than 5 when using the overedge foot to prevent the needle from hitting the wires on the foot. This stitch is used for finishing the raw edges of stretch fabrics that tend to unravel. www.toews.com HT2008 Owners Manual/ User Guide...
- Page 43 Esta puntada se utiliza para terminar los bordes de las telas On utilise ce point pour finir les bords non-finis des tissus elásticas que tienden a deshilacharse. extensibles ayant tendance à se défaire. www.toews.com HT2008 Owners Manual/ User Guide...
- Page 44 • The button holder of the foot takes a button size up to 2.5 cm (1") in diameter. • Make a test buttonhole on a scrap fabric of the actual garment. • Use interfacing on stretch fabrics. www.toews.com HT2008 Owners Manual/ User Guide...
- Page 45 2,5 cm (1 pouce). prenda. Effectuer une boutonnière d’essai sur une chute du tissu • Utilice la entretela de las telas elásticas. sur lequel vous allez travailler. Utiliser de l’entoilage sur les tissus extensibles. www.toews.com HT2008 Owners Manual/ User Guide...
-
Page 46: Buttonhole Lever
No gap !0 Spring holder !1 Sewing gap NOTE: Make sure there is no gap between the slider and spring holder, otherwise the left and right length of the buttonhole will be different. www.toews.com HT2008 Owners Manual/ User Guide... - Page 47 S’assurer qu’il n’y ait aucun écart entre le glisseur et le diferencias entre la longitud del lado izquierdo y del lado support du ressort, sinon la longueur de droite et la derecho del ojal. longueur de gauche de la boutonnière serait inégales. www.toews.com HT2008 Owners Manual/ User Guide...
- Page 48 Cut the opening with the seam ripper. Use an awl to open the keyhole buttonhole. !5 Pin !6 Seam ripper !7 Awl m After the buttonhole sewing is finished, push the buttonhole lever upward as far as it will go. !8 Buttonhole lever www.toews.com HT2008 Owners Manual/ User Guide...
- Page 49 Al terminar de coser el ojal, levante la palanca de ojales m Une fois la boutonnière terminée, pousser le levier à hasta el límite. boutonnières aussi haut que possible. !8 Palanca de ojales !8 Levier à boutonnières www.toews.com HT2008 Owners Manual/ User Guide...
- Page 50 Straight stitching in reverse to go back to the starting point. c Front bartack and left row v Right row b Back bartack and locking stitches at the end www.toews.com HT2008 Owners Manual/ User Guide...
- Page 51 Barrette de renfort avant et longueur de gauche. b Remate trasero y puntadas de sujeción en el extremo. v Longueur de droite. b Barrette de renfort arrière et points de renforcement à la fin. www.toews.com HT2008 Owners Manual/ User Guide...
- Page 52 Wide buttonhole (5.5mm wide) The width of keyhole buttonhole can be varied from 5.0 to 7.0. q Narrow buttonhole (5.0mm wide) w Wide buttonhole (7.0mm wide) Refer to page 50 for stitch density adjustment. www.toews.com HT2008 Owners Manual/ User Guide...
- Page 53 Boutonnière étroite (5.0, soit 5,0 mm de largeur) Consulte la página 51 para ajustar la densidad de puntada. w Boutonnière large (7.0, soit 7,0 mm de largeur) Voir la page 51 pour le réglage de la densité du point. www.toews.com HT2008 Owners Manual/ User Guide...
- Page 54 The sewing sequence is the same as the automatic buttonhole. c Remove the fabric and pull the left end of the cord to tighten it. Cut the excess cord. Refer to page 48 for opening the buttonhole. www.toews.com HT2008 Owners Manual/ User Guide...
- Page 55 Corte el excedente del cordón. gauche du cordon pour serrer. Couper le restant du Consulte la página 49 par abrir el ojal. cordon. Voir la page 49 pour ouvrir la boutonnière. www.toews.com HT2008 Owners Manual/ User Guide...
- Page 56 Pull the bobbin thread to pick the needle thread out to the wrong side of the fabric and tie the threads together. After finish sewing, raise the feed dog by shifting the drop feed lever to the original position. www.toews.com HT2008 Owners Manual/ User Guide...
- Page 57 Lorsque la couture du bouton est terminée, relever les griffes d’entraînement en ramenant le levier Al terminar de coser, levante las garras transportadoras d’entraînement à sa position d’origine. moviendo la palanca de las garras transportadoras a la posición original. www.toews.com HT2008 Owners Manual/ User Guide...
- Page 58 (A) If the left corner is lower than the right side, press the Up (+) key to correct it. (B) If the right corner is lower than the right side, press the Down (–) key to correct it. NOTE: Allowable adjustment range is d1-d9. www.toews.com HT2008 Owners Manual/ User Guide...
- Page 59 (B) Si le coin gauche se trouve plus bas que le côté droit, appuyer sur la touche (–) pour rectifier. NOTA: El intervalo de ajuste permitido es d1 a d9. REMARQUE: La fourchette de réglage possible est de d1-d9. www.toews.com HT2008 Owners Manual/ User Guide...
- Page 60 Sew from the bottom stop to the entire length of the zipper tape, removing pins as you go. q Upper layer w Lower layer e 1/8” (2 cm) margin r Margin edge t Bottom stop y Zipper length www.toews.com HT2008 Owners Manual/ User Guide...
- Page 61 Borde de la sobresalga e Pli de 0.3 cm (1/8") t Final de la abertura r Côté du pli y Tamaño de la abertura t Extrémité de l’ouverture y Longueur du ruban de la fermeture www.toews.com HT2008 Owners Manual/ User Guide...
- Page 62 At the end of the seam, sew in reverse a few stitches to lock. Once both sides of zipper are sewn, use seam ripper to open the basting stitch. www.toews.com HT2008 Owners Manual/ User Guide...
- Page 63 Una vez cosidos los dos lados de la cremellera, utilice point de point de faufilage. un abrecosturas para abrir las puntadas de hilvanar. www.toews.com HT2008 Owners Manual/ User Guide...
- Page 64 Folded edge v Open the fabric after sewing is finished. y Right side of the fabric NOTE: If the needle pierces too far left, the stitches will show on the right side of fabric. www.toews.com HT2008 Owners Manual/ User Guide...
- Page 65 Si la aguja perfora la tela demasiado a la izquierda, las Si l’aiguille pique le tissu trop à gauche, les points puntadas aparecerán en el derecho de la tela. apparaîtront sur l’endroit du tissu. www.toews.com HT2008 Owners Manual/ User Guide...
-
Page 66: Section 5. Decorative Stitches
NOTE: Press the auto lock button while sewing the last unit of the pattern so the machine will stop automatically after finishing the last unit. www.toews.com HT2008 Owners Manual/ User Guide... -
Page 67: Seccion 5. Puntadas Decorativas
Appuyer sur le bouton d’arrêt automatique lorsqu’on coud automáticamente al terminar la última unidad. le dernier point de la couture pour que la machine s’arrête automatiquement à la fin de la couture. www.toews.com HT2008 Owners Manual/ User Guide... - Page 68 Foot F: Satin stitch foot Seam two layers of the fabric with right side together. Open the fabric flat and sew the pattern over the seam line on the right side of the fabric. www.toews.com HT2008 Owners Manual/ User Guide...
- Page 69 Coudre deux couches de tissu en joignant les deux endroits. la tela y cosa el patrón sobre la línea de costura del derecho Ouvrir et aplatir le tissu. Coudre le point par-dessus la de la tela. couture sur l’endroit du tissu. www.toews.com HT2008 Owners Manual/ User Guide...
- Page 70 Adjust the stitch width as you desire to match the pattern. Sew outward from the center of the design. Use the placement arrow “∆” on the foot F to insure straight, even rows. www.toews.com HT2008 Owners Manual/ User Guide...
- Page 71 Cousez à l'extérieur du centre du mtif. Utilice la flecha de la colocación “∆” en el pie F para Employez la flèche de placement “∆” sur le pied F pour asegurar recto, incluso filas. assurer droit, même rangées. www.toews.com HT2008 Owners Manual/ User Guide...
- Page 72 Turn the guide screw and move the guide next to the folded edge. Sew guiding the folded edge along the guide. Open the fabric and press the tucks to one side. q Guide screw w Guide e Folded edge www.toews.com HT2008 Owners Manual/ User Guide...
- Page 73 Tornillo de la guía Ouvrir le tissu et repousser les nervures sur un côté au w Guía moyen d’un fer à repasser. e Borde doblado q Vis de guidage w Guide e Bord plié www.toews.com HT2008 Owners Manual/ User Guide...
- Page 74 Depress the foot control, and the machine will sew one unit of the pattern and stop automatically. Repeat the above steps to sew a line of the pattern combination. q Auto lock button www.toews.com HT2008 Owners Manual/ User Guide...
- Page 75 Repita los pasos anteriores para coser una línea de la Répéter cette procédure pour coudre une ligne de points combinación de patrones. combinés. www.toews.com HT2008 Owners Manual/ User Guide...
-
Page 76: Section 6. Care Of Your Machine
Close face plate cover. NOTE: Replace the bulb with the same type rated 12V, 5W. Always refer to the part number #000026002 when ordering a replacement bulb. www.toews.com HT2008 Owners Manual/ User Guide... -
Page 77: Partie 6. Entretien De Votre Machine
Reemplace la bombilla con otra del mismo tipo de 12 V, 12 V, 5 W. Toujours se référer au numéro de pièce 5 W. Siempre mencione el número de catálogo N. 000026002 lorsqu’on commande une ampoule de 000026002 al ordenar bombillas de repuesto. rechange. www.toews.com HT2008 Owners Manual/ User Guide... -
Page 78: Cleaning Hook Race And Feed Dog
. Insert the bobbin and attach the needle plate . ⁄0 aligning the holes with the guide pins. i Holes ⁄0 Tighten the setscrew firmly. o Setscrew NOTE: After cleaning the machine, attach the needle and presser foot. www.toews.com HT2008 Owners Manual/ User Guide... - Page 79 ⁄0 Bien serrer les vis de serrage. o Tornillos o Vis de serrage NOTA: REMARQUE: Después de limpiar la máquina, monte la aguja y el Une fois le nettoyage de la machine terminé, fixer l’aiguille prensatelas. et le pied presseur. www.toews.com HT2008 Owners Manual/ User Guide...
-
Page 80: Problems And Warning Signals
Do not use the automatic buttonhole foot to sew any other pattern than buttonhole or darning. The machine is out of order. Audible signal BEEP Beep sounds when: Normal operation pip-pip-pip Invalid operation pip-pip-peep Buttonhole is finished. peep The machine is out of order. www.toews.com HT2008 Owners Manual/ User Guide... - Page 81 No utilice el prensatelas para ojales automática para coser patrones que no sean ojales o zurcido. La máquina está averiada. Señal sonora Sonido El sonido se emite en los siguientes casos: Funcionamiento normal. Operación no permitida. pip-pip-pip Ojal terminado. pip-pip-peep La máquina está averiada. peep www.toews.com HT2008 Owners Manual/ User Guide...
- Page 82 La machine est hors service. Signal sonore: Bip sonore On entend un bip sonore lorsque : Fonctionnement normal. Opération non-valide. pip-pip-pip La boutonnière est terminée. pip-pip-peep La machine est hors service. peep www.toews.com HT2008 Owners Manual/ User Guide...
-
Page 83: Troubleshooting
The machine does not 1. Thread has been caught in the hook race. See page 78 run smoothly and is 2. Lint has built up in the hook race or bobbin holder. See page 78 noisy. www.toews.com HT2008 Owners Manual/ User Guide... - Page 84 La máquina no funciona 1. Hay hilos atrados en el mecanismo del gancho. Página 79 correctamente y es muy 2. Se han acumulado las pelusas en el portacanillas o en el garfio. Página 79 ruidosa www.toews.com HT2008 Owners Manual/ User Guide...
- Page 85 Page 19 correctement Le fronctionnement est 1. Du fil est bloqué dans la piste coursière. Page 79 bruyant. 2. Des peluches se sont accumulées dans la coursière ou dans le porte-canettes. Page 79 www.toews.com HT2008 Owners Manual/ User Guide...
- Page 86 Janome HT2008 Instruction Manual Janome 2008 Sewing Machine 843-800-050 (E/S/F) www.toews.com HT2008 Owners Manual/ User Guide Printed in Taiwan...
Need help?
Do you have a question about the HT2008 and is the answer not in the manual?
Questions and answers