Table of Contents

Related Manuals for Digital Watchdog DWC-MPA20M


Summary of Contents for Digital Watchdog DWC-MPA20M
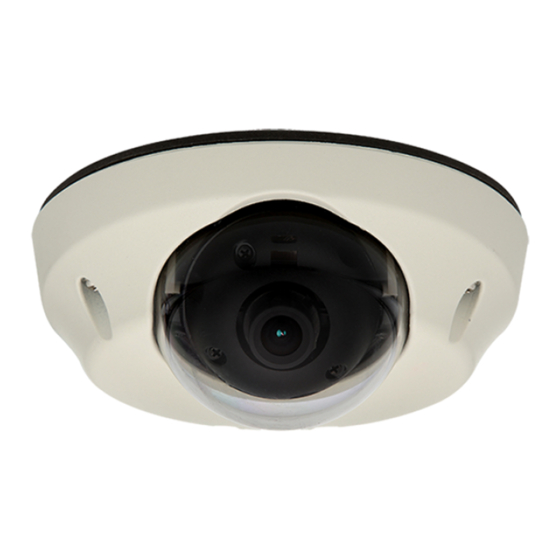
- Page 1 DWC-MPA20M IP 2.1MP Armored Vandal Dome Camera Before installing or operating the camera, please read and follow this manual carefully. re installing or operating the camera please read and follow this manual carefully 04132012...
- Page 2 PRECAUTIONS Do not open or modify. Do not open the case except during maintenance and installation, for it may be dangerous and can cause damages. Do not put objects into the unit. Keep metal objects and flammable substances from entering the camera. It can cause fire, short-circuits, or ...
-
Page 3: Table Of Contents
TABLE OF CONTENTS* FEATURES............4 PARTS &... -
Page 4: Features
FEATURES* ONVIF Conformant 1/2.7” CMOS Sensor (12% Larger than 1/3” CMOS Sensor) Highest Resolution 2.1 Megapixels 1080P (1920X1080) at 30fps 4.3mm Fixed Lens 8X Digital Zoom Power over Ethernet [PoE] & DC12V Web Server Built-in ... -
Page 5: Parts & Descriptions
PARTS & DESCRIPTIONS* Lens RJ45 Cable DC Cable IP Module Bottom Bottom Pad Gimbal Tilt Stopper Mounting Screws Dome Cover Support Dome Cover Gasket Rubber Upper Case Rubber Upper Case Assembly Screws M3.0 X 15.0 FA Buttons... -
Page 6: Dimensions
DIMENSIONS*... -
Page 7: Inside The Box
INSIDE THE BOX* The following items are included with the MEGAPIX camera. User Manual Quick Start Guide CD (Manual & Software) L-Wrench (T10-M3X15.0) 4 Screws & 4 Dry Wall Anchors Mounting Template Camera Input Sensor Power Supply DC12V Max 5.16W, 430mA RJ45 Connector... -
Page 8: Network Connection
NETWORK CONNECTION * T h e r e a r e t w o o p t i o n s . U s e a P o E - e n a b l e d s w i t c h t o c o n n e c t d a t a a n d p o w e r t h r o u g h a s i n g l e c a b l e a n d b e g i n v i e w i n g a n d r e c o r d i n g i m a g e s i n s t a n t l y . -
Page 9: Installation
INSTALLATION* Using the supplied L-Wrench (T10-M3X15.0), loosen the four security screws. Carefully remove the dome cover. The MEGAPIX camera comes with a safety wire attached. The Safety Wire will secure the dome cover to the camera module during the installation process. To remove the safety wire, remove the screw that is keeping the wire in place. - Page 10 INSTALLATION* Pull wires through and make connections. Connect the RJ45 to a CAT5 cable or power adaptor. Refer to “NETWORK CONNECTIONS” for further explanation. Mount the camera to the wall or ceiling, using the screws provided with the camera. Adjust the camera pan and tilt. See page11 for details. Check the LED light. Green light flickers when the camera is booting, and Red light turns on when booting is complete.
- Page 11 INSTALLATION* A d j u s t i n g t h e 2 - A x i s G i m b a l T h e G i m b a l m e c h a n i s m y i e l d s m a x i m u m r o t a t i o n a n d p l a c e m e n t a s s h o w n b e l o w .
-
Page 12: Ip Finder Software
I n s t a l l i n g I P F i n d e r S o f t w a r e IP Finder searches for all the available Digital Watchdog devices currently connected to your network. - Page 13 IP FINDER SOFTWARE* U s i n g I P F i n d e r S o f t w a r e Use IP Finder to change the basic settings of your MEGAPIX camera or to connect to your MEGAPIX camera. Configuration: Change the device’s connection type and/or IP address information.
- Page 14 IP FINDER SOFTWARE* U s i n g I P F i n d e r S o f t w a r e Use IP Finder to set the connection type and the IP address information for your MEGAPIX camera. DHCP: Select DHCP to access the camera within the same internal network.
- Page 15 IP FINDER SOFTWARE* D H C P The Dynamic Host Configuration Protocol (DHCP) is a network configuration protocol that allows a device to configure automatically according to the network it is connected to. If your network supports DHCP and your MEGAPIX camera is set to DHCP, IP Finder will automatically find and set your MEGAPIX camera to correspond with your network requirements.
-
Page 16: Camera Reboot
CAMERA REBOOT* R e s e t t i n g t h e C a m e r a H o l d d o w n S W 4 a n d p r e s s S W 4 t o i n i t i a l i z e a l l e n v i r o n m e n t a l v a r i a b l e s t o f a c t o r y d e f a u l t . -
Page 17: Webviewer
WEBVIEWER* R e m o t e V i d e o M o n i t o r i n g V i a I n t e r n e t E x p l o r e r Monitor and configure the MEGAPIX camera through a built-in webviewer. - Page 18 WEBVIEWER* R e m o t e V i d e o M o n i t o r i n g V i a C h r o m e , F i r e f o x , o r S a f a r i You can view your MEGAPIX camera using web browsers other than Internet Explorer.
- Page 19 WEBVIEWER* F i r s t S t r e a m & S e c o n d S t r e a m Configure two stream settings for monitoring and recording. On the main monitoring page, user can view the camera with the First Stream settings or the Second Stream settings. Below the display screen, click on the First Stream and Second Stream buttons to view the different camera settings.
- Page 20 WEBVIEWER* E x p o r t I m a g e E x p o r t a s c r e e n s h o t o f t h e c u r r e n t l i v e v i d e o t o y o u r c o m p u t e r . Click Export Image button located on the left.
- Page 21 WEBVIEWER* P r i n t I m a g e P r i n t a s c r e e n s h o t o f t h e c u r r e n t l i v e v i d e o . Click Print button, and the Print Preview window will appear.
- Page 22 WEBVIEWER* I n s t a n t R e c o r d i n g R e c o r d l i v e v i d e o t o y o u r l o c a l d r i v e . To Setup Instant Recording Click on the Record button located to the left of the Webviewer.
- Page 23 WEBVIEWER* I n s t a n t R e c o r d i n g R e c o r d l i v e v i d e o t o y o u r l o c a l d r i v e . To Start and Stop Instant Recording To Start, right-click anywhere on the display screen.
- Page 24 WEBVIEWER* S e t u p > V i d e o > S t r e a m S e t t i n g s User can setup two different streams for the MEGAPIX camera. • Name: Set a distinguish name to each stream to identify each one of them. •...
- Page 25 WEBVIEWER* S e t u p > V i d e o > C o l o r S e t t i n g s The Recommended Stream Settings are indicated on the image to the left. This is also the factory default settings. Adjust the Color Settings for your MEGAPIX camera.
- Page 26 WEBVIEWER* S e t u p > V i d e o > C o l o r S e t t i n g s The Recommended Stream Settings are indicated on the image to the left. This is also the factory default settings. Adjust the Color Settings for your MEGAPIX camera.
- Page 27 WEBVIEWER* S e t u p > V i d e o > P r i v a c y Z o n e The MPA20M camera offers up to 30 privacy zone settings. To set Privacy Zones: Change Mode to On. Click Apply. By default, all 30 privacy zones will be displayed. Select the zones you want to view and/or modify.
- Page 28 WEBVIEWER* S e t u p V i d e o > M o t i o n D e t e c t i o n The Motion detection feature allows the MEGAPIX camera to detect motion and trigger an alarm. To set the camera to send e-mail notifications for every motion triggered alarms, see PAGE 34.
- Page 29 WEBVIEWER* S e t u p V i d e o > M o t i o n A r e a The motion detection feature allows the MEGAPIX camera to detect motion and trigger an alarm. To set the camera to send e-mail notifications for every motion triggered alarms, see PAGE 34.
- Page 30 WEBVIEWER* S e t u p > E v e n t > E m e r g e n c y A l a r m Send alarm triggered information to predefined destination (i.e. remote client software). Enter the Site Name, Transmission Settings, and Video Duration for the video that will be sent when motion is detected.
- Page 31 WEBVIEWER* S e t u p > N e t w o r k > N e t w o r k S e t t i n g s Select the type of IP address for the camera. DHCP: IP is assigned automatically. PPPoE: Select this otpion, when you use WAN service.
- Page 32 WEBVIEWER* S e t u p > N e t w o r k > D y n a m i c D N S If you do not use a public IP address, DDNS provides you to connect on WAN. DDNS allows you to connect to the MEGAPIX camera with a URL address instead of an IP address.
- Page 33 WEBVIEWER* S e t u p > N e t w o r k > C o m m u n i c a t i o n P r o t o c o l Current Protocol displays the current selected protocol. To change the Protocol, select one of the three options—TCP, UDP, Multicast.
- Page 34 WEBVIEWER* S e t u p > N e t w o r k > A c c e s s P e r m i s s i o n Use the Access Permission page to allow or block specific IP addresses to connect to the camera. Select All Allow to allow anyone to connect to this camera.
- Page 35 WEBVIEWER* S e t u p > N e t w o r k > O N V I F ONVIF is the Open Network Video Interface Forum. To use ONVIF, check Enable. Set the Service Port to “8032.” Select On or Off for WS-Security. Select desired Options from the list.
- Page 36 WEBVIEWER* S e t u p > S y s t e m > U p g r a d e Upgrade the MEGAPIX camera with an upgrade file. System Version: Shows the current version of the camera. Upgrade: To upgrade system firmware, you have to contact manufacturer and get the upgrade file first. Browse file and select the file.
- Page 37 WEBVIEWER* S e t u p > S y s t e m > D a t e & T i m e Set date and time information. Insert the Date and Time. Select the type of Format for your time. Select your Timezone.
- Page 38 WEBVIEWER* S e t u p > S y s t e m > E - m a i l N o t i f i c a t i o n Send an e-mail notification when an event is triggered. Select Use Event Mail option.
- Page 39 WEBVIEWER* S e t u p > S y s t e m > U s e r A c c e s s C o n t r o l To add a new user, enter Username and Password and select a Permission type. Then, click Add. Super: Administrator Operator: View and Edit Video and Event Settings Only Viewer: View Only...
- Page 40 WEBVIEWER* S e t u p > S y s t e m > L o g s V i e w User can view detailed logs for system and/or events triggered and recorded in the camera. To view, select the type of report you want to view (System / Event / System & Event) and click on the View button.
- Page 41 WEBVIEWER* S e t u p > S y s t e m > S y s t e m I n f o r m a t i o n & F a c t o r y D e f a u l t System Information will display all the current camera settings: System Version, Time Inforamtion, Network Information, Codec Information, Color Information, and Motion Detection.
-
Page 42: Troubleshooting
TROUBLESHOOTING Before sending your camera for repair, check the following or contact your technical specialist. I c a n ’ t f i n d m y M E G A P I X c a m e r a o n t h e I P F i n d e r s o f t w a r e . Is the PoE cable connected properly? ... - Page 43 TROUBLESHOOTING Before sending your camera for repair, check the following or contact your technical specialist. I c a n ’ t c o n n e c t t o m y M E G A P I X c a m e r a t h r o u g h t h e W e b B r o w s e r Are the camera’s LEDs on and blinking? ...
- Page 44 TROUBLESHOOTING Before sending your camera for repair, check the following or contact your technical specialist. I c a n ’ t s e e t h e l i v e v i d e o o f m y M E G A P I X c a m e r a . Are you trying to view the camera’s video from an Internet Explorer browser? ...
- Page 45 TROUBLESHOOTING Before sending your camera for repair, check the following or contact your technical specialist. S e t t i n g t h e I P A d d r e s s f o r y o u r P C Dynamic Host Configuration Protocol (DHCP) is the default setting for the camera.
-
Page 46: Specifications
SPECIFICATIONS* IMAGE Image Sensor 1/2.7” CMOS Sensor (12% Larger Than 1/3” CCD) Total Pixels 2016 (H) X 1108 (V) Minimum Scene Illumination F1.6 (30IRE): 0.8 Lux [Color] | F1.6 (30IRE): 0.01 Lux [B/W] LENS Focal Length 4.3mm Lens Type Fixed NETWORK 802.3 Compliance 10/100 Lan Video Compression Type... - Page 47 SPECIFICATIONS* ENVIRONMENTAL Operating Temperature -10oC ~ 55oC (14oF ~ 131oF) Operating Humidity Less than 90% (Non-Condensing) Storage Temperature -20oC ~ 70oC (-4oF ~ 158oF) IP Rating IP66 (Protects against Dust and High Pressure Water) Other Certifications CE, FCC, RoHS ELECTRICAL Power Consumption DC12V, PoE (IEEE802.3af Class 2) Power Requirement...
-
Page 48: Warranty Information
WARRANTY INFORMATION* Digital Watchdog (referred to as “the Warrantor”) warrants the Camera against defects in materials or workmanships as follows: Labor: For the initial two (2) years, one (1) year for IR LED, from the date of original purchase if the camera is determined to be defective, the Warrantor will repair or replace the unit with new or refurbished product at its option, at no charge. -
Page 49: Limits & Exclusions
If the problem is not handled to your satisfaction, then write to the following address: Digital Watchdog, Inc. ATTN: RMA Department 5436 W Crenshaw St... - Page 50 5436 W Crenshaw St, Tampa, FL 33634 PH: 866-446-3595 | FAX: 813-888-9262 www.Digital-Watchdog.com technicalsupport@dwcc.tv Technical Support Hours: Monday-Friday 8:30am to 8:00pm Eastern Standard Time...
Need help?
Do you have a question about the DWC-MPA20M and is the answer not in the manual?
Questions and answers