Table of Contents
Advertisement
Available languages
Available languages
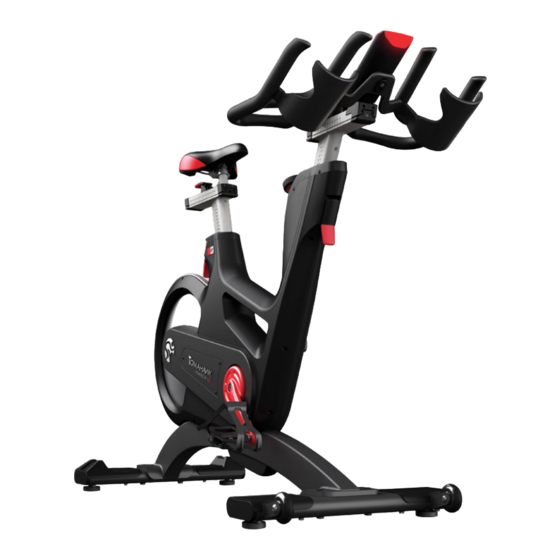
IC7
MODEL NO:IC-TKIC7B
CAUTION!
READ ALL PRECAUTIONS AND INSTRUCTIONS IN THIS MANUAL BEFORE YOU START
USING THIS EQUIPMENT. PLEASE KEEP THIS MANUAL FOR FUTURE REFERENCE.
IMPROPER ASSEMBLY, USE OR MAINTENANCE CAN VOID THE WARRANTY TERMS.
ADDITIONAL LANGUAGES AVAILABLE FOR DOWNLOAD AT WWW.INDOORCYCLING.COM
Version 3.0 2015 IC-TKIC7B-03 Copyright by Indoor Cycling Group GmbH 2015 | www.indoorcycling.com
MANUFACTURED BY:
Indoor Cycling Group GmbH
Happurger Str. 86
90482 NUERNBERG | Germany
info@indoorcycling.com
www.indoorcycling.com
Phone: +49(0)911 / 54 44 50
Advertisement
Chapters
Table of Contents

Subscribe to Our Youtube Channel
Related Manuals for Tomahawk IC-TKIC7B


Summary of Contents for Tomahawk IC-TKIC7B
- Page 1 USING THIS EQUIPMENT. PLEASE KEEP THIS MANUAL FOR FUTURE REFERENCE. IMPROPER ASSEMBLY, USE OR MAINTENANCE CAN VOID THE WARRANTY TERMS. ADDITIONAL LANGUAGES AVAILABLE FOR DOWNLOAD AT WWW.INDOORCYCLING.COM Version 3.0 2015 IC-TKIC7B-03 Copyright by Indoor Cycling Group GmbH 2015 | www.indoorcycling.com...
- Page 2 ATTENTION Warning labels on the bikes must be replaced by warning labels in your language during the assembly process. Version 3.0 2015 IC-TKIC7B-03 Copyright by Indoor Cycling Group GmbH 2015 | www.indoorcycling.com...
- Page 3 ATTENTION To download the owners manual in Lataa omistajan käsikirja omalla your language, visit the IC7 support kielelläsi IC7-ohjeosiosta sivustolta: section at: www.teamicg.com www.teamicg.com Um das Handbuch in Ihrer Sprache Du kan laste ned bruksanvisningen herunterzuladen, besuchen Sie bitte på ditt eget språk ved å gå til IC7 den IC7 Support Bereich auf unserer støttesiden på: www.teamicg.com Webseite unter www.teamicg.com...
-
Page 4: Table Of Contents
WARRANTY P.31 TECHNICAL SPECIFICATIONS: The TOMAHAWK IC7 Bike is, according to EN ISO 20957 (1 & 10), a Class S product for use in a controlled environment such as sports or fitness facilities under the supervision of a trainer. WEIGHT OF BIKE:... -
Page 5: Important Precautions
IMPORTANT PRECAUTIONS 8. Children under the age of 14 shall only be allowed WARNING! to use the indoor cycle with parental approval and To reduce the risk of serious injury due to improper supervision of a qualified Trainer or Instructor. Use of use of the equipment, carefully read and adhere the bike by persons over the age of 14 only after they to the following important precautions and... -
Page 6: Getting Started
WARNING! You will find the production code for the Tomahawk IC7 Bike on the tag plate which is located on the lower left side of the frame tube of the Indoor Bike. Please enter this production code into care and maintenance lists. -
Page 7: How To Assemble The Indoor Cycle
HOW TO ASSEMBLE THE INDOOR CYCLE TORQUE WRENCH 17MM PEOPLE WARNING! Avoid high fluctuations in temperature whilst transporting the bike from the store to the installation site. If there are nevertheless large fluctuations in temperature, please allow the bike to acclimatise to the surrounding temperature before proceeding with assembly. - Page 8 THE HANDLEBARS ARE LOCATED UNDERNEATH THE WITH ASSEMBLY. MOUNTING BRACKET FOR THE COMPUTER. DO NOT REMOVE WARNING TAPE FROM THE SLIDERS PRIOR TO THE HANDLEBAR BEING ASSEMBLED. Version 3.0 2015 IC-TKIC7B-03 Copyright by Indoor Cycling Group GmbH 2015 | www.indoorcycling.com...
- Page 9 HOW TO ASSEMBLE THE INDOOR CYCLE TORQUE WRENCH PEOPLE 30 NM IN ORDER TO AVOID DAMAGING THE INTERIOR AFTER ASSEMBLY, REMOVE THE WARNING TAPE. CABLING, THE HANDLEBARS MUST NOT BE ADJUSTED DO NOT MOVE HORIZONTAL SLIDER BACKWARDS. HORIZONTALLY BEFORE THIS STEP. ENSURE THAT BOLTS ARE TIGHTENED WITH SUFFICIENT FORCE (30 NM) WHEN MOUNTING THE HANDLEBARS.
- Page 10 CHECK THE CLAMPING FORCE OF THE VERTICAL ADJUSTMENT WITH THE FLIP LEVER CLOSED. MAKE SURE THE VERTICAL ADJUSTMENT PERFORMS SUFFICIENTLY. ADJUST IF REQUIRED REFERING TO SERVICE GUIDELINES ON AVAILABLE ON MANUFACTURER‘S SERVICE WEBSITE OR CONTACT YOUR LOCAL DISTRIBUTOR. Version 3.0 2015 IC-TKIC7B-03 Copyright by Indoor Cycling Group GmbH 2015 | www.indoorcycling.com...
- Page 11 HOW TO ASSEMBLE THE INDOOR CYCLE 15 MM HAND TIGHT PEDAL WRENCH PEOPLE INSERT THE BIKE COMPUTER FASTEN THE BIKE COMPUTER INTO PLACE FROM INTO THE COMPUTER BRACKET. THE UNDERSIDE OF THE HANDLEBARS WITH THE BOLT AND PLASTIC SLEEVE PROVIDED. PLASTIC SLEEVE MUST BE LOCATED BETWEEN HANDLEBAR BRACKET AND COMPUTER.
-
Page 12: Installation And Disposing Of Batteries
Instructions stated in this manual must be performed during initial installation of the TOMAHAWK Indoor Cycle in order to ensure optimal performance and a long lifespan. Please read and follow the following instructions carefully. If the Indoor Cycles are not installed and configured as described, the components may be subjected to excessive wear and tear and the bike may become damaged. - Page 13 INSTALLATION AND DISPOSING OF BATTERIES CUSTOMER SERVICE 1. Provide the customer with basic maintenance instructions, and direct them to detailed maintenance instructions. 2. Have the sign-off sheet for the manual, explanation of maintenance procedures and verification of impeccable condition of the bikes confirmed by the customer when handing over the goods.
-
Page 14: How To Adjust The Indoor Cycle
HOW TO ADJUST THE INDOOR CYCLE The Tomahawk Indoor Cycle can be very easily adjusted, depending on the requirements of various user groups. This enables maximum riding comfort to be ensured whilst achieving optimal training results. The configurations described in the following paragraphs demonstrate just a few of the most often used adjustment variations of which the Indoor Cycle is capable. - Page 15 HOW TO ADJUST THE INDOOR CYCLE ADJUSTING THE SADDLE HORIZONTALLY: Properly positioning the saddle horizontally is very important in order to avoid injury to the knees. Sit on the saddle and move the pedals until the crank arms are in the horizontal position. The knee of your forward-facing leg should be positioned directly above the centre of the pedal.
- Page 16 It is recommended to change hand positions frequently during extended workouts in order to minimise one-sided and monotonous exertions on your muscles, ligaments and joints. Version 3.0 2015 IC-TKIC7B-03 Copyright by Indoor Cycling Group GmbH 2015 | www.indoorcycling.com...
-
Page 17: How To Operate The Indoor Cycle
HOW TO OPERATE THE INDOOR CYCLE RESISTANCE ADJUSTMENT: The resistance adjustment can be set precisely and regulated in fine increments according to the requirements of the cyclist using the resistance adjustment knob with a range of motion of 300°. The resistance in % (where 0% is no resistance and 100% is maximum resistance) is also displayed on the Indoor Cycle computer display. - Page 18 Allow a minimum safety distance away from the nearest equipment, objects or walls as illustrated below. 3.9“ (10cm) 23.6“ 23.6“ (60cm) (60cm) 3.9“ (10cm) 23.6“ (60cm) 23.6“ (60cm) Version 3.0 2015 IC-TKIC7B-03 Copyright by Indoor Cycling Group GmbH 2015 | www.indoorcycling.com...
- Page 19 HOW TO OPERATE THE INDOOR CYCLE Check the stability of the Indoor Cycle where it is to be operated and if necessary adjust the levelling feet underneath the front or rear stabilizers to ensure the desired stability. IMPORTANT! Please do not unscrew the levelling feet more than 1 cm! The free standing Indoor cycle shall only be installed and operated on a stable and leveled floor.
-
Page 20: Preventive Maintenance
Never spray the maintenance spray directly onto the flywheel, as this could cause the drive belt to slip through (belt slip) and could have negative impact on E-brake functionality. Version 3.0 2015 IC-TKIC7B-03 Copyright by Indoor Cycling Group GmbH 2015 | www.indoorcycling.com... - Page 21 PREVENTIVE MAINTENANCE BI-WEEKLY MAINTENANCE: 1. Emergency brake: To ensure operating safety, the emergency brake must be regularly checked to make sure it is functioning properly. To do this, press down the red emergency brake handle whilst pedalling. When functioning optimally, it should produce an immediate braking effect and bring the flywheel to a complete standstill.
- Page 22 Indoor Cycle must be checked for firm seating and function, and parts showing wear or damage (saddle, pedal teeth, pedals, SPD system) replaced. Version 3.0 2015 IC-TKIC7B-03 Copyright by Indoor Cycling Group GmbH 2015 | www.indoorcycling.com...
- Page 23 PREVENTIVE MAINTENANCE USER-DEFINED MAINTENANCE: 1. Vertically adjusting the handlebars and saddle: To ensure the easy adjustment of the vertical handlebar and saddle posts, it is recommended that you check the clamping mechanism and if necessary apply a small amount of lithium/silicone grease to the vertical clamping mechanism of the handlebar posts (1) and saddle posts (2/3).
-
Page 24: Maintenance Activity And Required Schedule
THE HANDLEBARS AND SADDLE MONTHLY P 23 EXAMPLES OF MAINTENANCE PLAN CHARTS FOR IN-HOUSE SERVICE TECHNICIANS: WEEKLY MAINTENANCE CHECKLIST BIKE NO. PRODUCTION CODE OBSERVATIONS ACTION TAKEN RESULT NAME / DATE Version 3.0 2015 IC-TKIC7B-03 Copyright by Indoor Cycling Group GmbH 2015 | www.indoorcycling.com... - Page 25 MAINTENANCE ACTIVITY AND REQUIRED SCHEDULE BI-WEEKLY MAINTENANCE CHECKLIST BIKE NO. PRODUCTION CODE OBSERVATIONS ACTION TAKEN RESULT NAME / DATE MONTHLY MAINTENANCE CHECKLIST BIKE NO. PRODUCTION CODE OBSERVATIONS ACTION TAKEN RESULT NAME / DATE...
-
Page 26: Spare Parts
SPORT SADDLE BLACK & RED INCL. SADDLE CLAMP 320-00-00009-01 CONSOLE KIT 900-10-00003-01 LEVELING FEET, RUBBER 75° SHORE 150-01-00005-02 COMBI PEDAL SET, SPD COMPATIBLE 150-03-00048-01 TOE STRAP SET Version 3.0 2015 IC-TKIC7B-03 Copyright by Indoor Cycling Group GmbH 2015 | www.indoorcycling.com... -
Page 27: Warranty
WARRANTY ICG warrants that all new equipment will be free of manufacturing defects in workmanship and materials, effective on the date of original assembly at its production facility. Parts repaired or replaced under the terms of this warranty will be warranted for the remainder of the original warranty period only. ICG is obligated to uphold its manufacturer warranty obligation so long as the product is used in the closed environment it was designed for, Temperature range between 15ºC~40°C Celsius (59ºF~104°F) and max. - Page 28 CAUTION. READ ALL PRECAUTIONS AND INSTRUCTIONS IN THIS MANUAL BEFORE YOU BEGIN USING THIS EQUIPMENT. PLEASE KEEP THIS MANUAL FOR FUTURE REFERENCE. IMPROPER ASSEMBLY, SET UP, USE OR MAINTENANCE MAY VOID THE WARRANTY. EMAIL: INFO@INDOORCYCLING.COM WEBSITE: WWW.INDOORCYCLING.COM © 2015 Indoor Cycling Group Manufactured by: Indoor Cycling Group®...
-
Page 29: Wichtiger Hinweis
UND BEFOLGEN SIE ALLE DARIN BESCHRIEBENEN ANLEITUNGEN ZU MONTAGE, WARTUNG UND BETRIEB DES GERÄTES NICHT ORDNUNGSGEMÄSSE HANDHABUNG ODER UNZUREICHENDE WARTUNG FÜHRT ZUM ERLÖSCHEN DER GARANTIE! DIESES HANDBUCH IST IN WEITEREN SPRACHEN DIGITAL VERFÜGBAR UNTER WWW.INDOORCYCLING.COM Version 3.0 2015 IC-TKIC7B-03 Copyright by Indoor Cycling Group GmbH 2015 | www.indoorcycling.com... - Page 30 WICHTIG! Die Aufkleber mit den Warnhinweisen müssen während des Aufbaus des Bikes gegen die Aufkleber in Landessprache getauscht werden. Version 3.0 2015 IC-TKIC7B-03 Copyright by Indoor Cycling Group GmbH 2015 | www.indoorcycling.com...
- Page 31 WICHTIG! To download the owners manual in Lataa omistajan käsikirja omalla your language, visit the IC7 support kielelläsi IC7-ohjeosiosta sivustolta: section at: www.teamicg.com www.teamicg.com Um das Handbuch in Ihrer Sprache Du kan laste ned bruksanvisningen herunterzuladen, besuchen Sie bitte på ditt eget språk ved å gå til IC7 den IC7 Support Bereich auf unserer støttesiden på: www.teamicg.com Webseite unter www.teamicg.com...
- Page 32 GARANTIE S.31 TECHNISCHE DATEN: Das Tomahawk IC7 Bike entspricht nach EN ISO 20957 (Teil 1 & 10) der Benutzerklasse S und ist für die Verwendung in kontrollierter Umgebung wie z.B. Sportstätten und Fitnesseinrichtungen unter Beaufsichtigung eines Trainers klassifiziert. GEWICHT DES BIKES:...
-
Page 33: Wichtige Sicherheitshinweise
WICHTIGE SICHERHEITSHINWEISE 8. Kindern unter 14 Jahren ist es nicht erlaubt das Bike WARNUNG! ohne Aufsicht durch einen dazu qualifizierten Trainer zu Um einem Sicherheitsrisiko durch unsachgemäße verwenden. Verwendung des Gerätes für Personen über Handhabung des Gerätes vorzubeugen ist es 14 Jahren nur nach vorheriger Einweisung durch erforderlich, die nachfolgenden Sicherheitshinweise einen qualifizierten Trainer. -
Page 34: Einführung
STANDFUSS WICHTIG! Den individuellen Produktionscode des Tomahawk IC7 Bikes finden Sie auf dem Typenschild, dass sich im unteren Bereich des Rahmenrohrs in Fahrtrichtung links des Indoor Bikes befindet. Bitte tragen Sie diesen Produktionscode in die Pflege- und Wartungslisten ein. Die Angabe des Produktionscodes ist bei allen Garantieanfragen zwingend erforderlich. -
Page 35: Montage Und Zusammenbau
MONTAGE UND ZUSAMMENBAU DREHMOMENTSCHLÜSSEL 17MM PERSONEN WICHTIG! Vermeiden Sie hohe Temperaturschwankungen zwischen dem Transport des Bikes und dem Ort der Installation. Sollten dennoch unterschiedliche Temperaturen herrschen, muss mit der Inbetriebnahme gewartet werden, bis sich das Bike an die Umgebungstemperatur angeglichen hat. 50 NM 50 NM WICHTIG! - Page 36 LENKERS IN DIE MAXIMALPOSITION BEVOR VERBINDUNGSBRÜCKE DES LENKERS UNTERHALB SIE MIT DER MONTAGE BEGINNEN. DER HALTERUNG FÜR DEN COMPUTER BEFINDET. ACHTUNG! DEN AUFKLEBER ERST ENTFERNEN NACHDEM DER LENKER MONTIERT WURDE. Version 3.0 2015 IC-TKIC7B-03 Copyright by Indoor Cycling Group GmbH 2015 | www.indoorcycling.com...
- Page 37 MONTAGE UND ZUSAMMENBAU DREHMOMENTSCHLÜSSEL PERSONEN 30 NM UM EINE BESCHÄDIGUNG DER INNENLIEGENDEN ENTFERNEN SIE NACH DER MONTAGE KABELFÜHRUNG ZU VERMEIDEN, DARF DER DEN AUFKLEBER ZUR FIXIERUNG LENKER VOR DIESEM ARBEITSCHRITT NICHT IN DER HORIZONTALVERSTELLUNG. DER HORIZONTALEN VERSTELLT WERDEN. STELLEN SIE SICHER, DASS DIE SCHRAUBVERBINDUNGEN BEI DER MONTAGE DES LENKERS AUSREICHEND FEST (30 NM) ANGEZOGEN WERDEN.
- Page 38 ÜBERPRÜFEN SIE BEI GESCHLOSSENEM ARRETIERHEBEL DIE KLEMMKRAFT DER VERTIKALVERSTELLUNG. BEI GESCHLOSSENEM ARRETIERHEBEL MUSS DIE VERTIKALE LENKER- UND SATTELPOSITION FEST FIXIERT SEIN! STELLEN SIE BEI BEDARF DIE KLEMMKRAFT GEMÄSS DEN SERVICEVORGABEN DES HERSTELLERS EIN. Version 3.0 2015 IC-TKIC7B-03 Copyright by Indoor Cycling Group GmbH 2015 | www.indoorcycling.com...
- Page 39 MONTAGE UND ZUSAMMENBAU 15MM HANDFEST PEDALSCHLÜSSEL PERSONEN STECKEN SIE DEN RADCOMPUTER BEFESTIGEN SIE DEN RADCOMPUTER VON AUF DIE HALTERUNG. DER LENKERUNTERSEITE AUS MIT DER BEILIEGENDEN SCHRAUBE UND HALTERUNG. DIE HALTERUNG MUSS ZWISCHEN LENKER UND COMPUTER PLATZIERT WERDEN. WARNUNG! Das Benutzerhandbuch für den IC7 Coach By Color® Computer ist separat beigepackt und enthält alle notwendigen Informationen zur Inbetriebnahme und Bedienung des Computers.
-
Page 40: Installation, Aufbau
5. Einige Teile des Bikes können sich während des Transportes lösen. Überprüfen Sie die Kurbeln und alle sichtbaren Schrauben, Bolzen und Muttern. Stellen Sie sicher, dass diese festsitzen und korrekt angezogen sind. Version 3.0 2015 IC-TKIC7B-03 Copyright by Indoor Cycling Group GmbH 2015 | www.indoorcycling.com... - Page 41 INSTALLATION, AUFBAU TOMAHAWK BIKES KUNDENDIENST 1. Geben Sie dem Kunden die Anleitungen für die Grundwartung und verweisen Sie ihn auf die ausführlichen Wartungsanleitungen. 2. Lassen Sie sich die Übergabe des Handbuches, die Erklärung der Wartungsarbeiten und den einwandfreien Zustand der Bikes bei der Übergabe durch den Kunden bestätigen. Ein von Ihnen gegengezeichnetes Exemplar verbleibt beim Kunden.
-
Page 42: Richtige Radeinstellung
Becken auf eine Seite kippt. Faustregel: Wenn Sie neben dem Bike stehen sollte sich die Satteloberkante eine Handbreit /4 Finger unterhalb des Beckenkamms befinden. Bitte vermeiden Sie, mit durchgestreckten Knien oder kippendem Becken zu fahren. Version 3.0 2015 IC-TKIC7B-03 Copyright by Indoor Cycling Group GmbH 2015 | www.indoorcycling.com... - Page 43 RICHTIGE RADEINSTELLUNG HORIZONTALE SATTELEINSTELLUNG: Die horizontale Positionierung des Sattels ist sehr wichtig um Verletzungen an den Kniegelenken vorzubeugen. Setzen Sie sich auf den Sattel und bringen Sie die Kurbelarme in die horizontale Position. Das Kniegelenk am nach vorne gerichteten Bein sollte sich direkt über der Achse des Pedals befinden.
- Page 44 Fahrer alle Möglichkeiten bieten seine ideale Sitz- und Handpositionierung zu finden. Es wird empfohlen während längerer Trainingseinheiten die Handposition regelmäßig zu wechseln um einseitige und monotone Belastungen der Muskeln, Bänder und Gelenke zu vermeiden. Version 3.0 2015 IC-TKIC7B-03 Copyright by Indoor Cycling Group GmbH 2015 | www.indoorcycling.com...
-
Page 45: Richtige Handhabung Des Bikes
RICHTIGE HANDHABUNG DES BIKES EINSTELLUNG DES WIDERSTANDES: Der individuell angestrebte Bremswiderstand kann mit Hilfe des Bremsverstellknopfes fein und exakt auf die Bedürfnisse des Fahrers über einen Aktionsradius von 330° eingestellt werden. Der Widerstand in % (0% kein Bremswiderstand - 100% maximaler Widerstand) wird zusätzlich auf dem Display des Radcomputers angezeigt. - Page 46 Boden bewegen. Hier empfiehlt sich eine 2. Person, die das eventuelle Kippen zur Seite verhindert. Weiterhin ist darauf zu achten, den unten beschriebenen Sicherheitsabstand zu anderen Geräten, Gegenständen und Wänden einzuhalten. 10cm 60cm 10cm 60cm 60cm Version 3.0 2015 IC-TKIC7B-03 Copyright by Indoor Cycling Group GmbH 2015 | www.indoorcycling.com...
- Page 47 RICHTIGE HANDHABUNG DES BIKES Überprüfen Sie die Standsicherheit des Indoor Cycles am Einsatzort und justieren Sie ggf. die niveauregulierbaren Standfüße auf der Unterseite der Stabilisatoren um die gewünschte Standsicherheit zu gewährleisten. WICHTIG! Die Standfüße sollten immer möglichst weit hinein gedreht und nicht mehr als 1cm herausgedreht werden! Das Indoorcycle darf nur auf einem standsicheren und ebenen Untergrund aufgestellt und betrieben werden.
-
Page 48: Regelmässige Pflege Und Wartung
Sprühen Sie das Wartungsspray nie direkt auf die Schwungscheibe, da dies dazu führen könnte, dass es zum Durchrutschen (Schlupf) des Antriebsriemen kommt und die Funktionalität der Notbremse beeinträchtigt werden kann. Version 3.0 2015 IC-TKIC7B-03 Copyright by Indoor Cycling Group GmbH 2015 | www.indoorcycling.com... - Page 49 REGELMÄSSIGE PFLEGE UND WARTUNG 14-TÄGIGE MASSNAHMEN: 1. Notbremse: Aus Gründen der Betriebssicherheit muss die Notbremse regelmäßig auf ihre Funktion überprüft werden. Hierzu drücken Sie während des Fahrens den roten Notbremsgriff nach unten. Bei optimaler Funktion sollte es zu einer sofortigen Bremswirkung bis hin zum vollständigen Stillstand der Schwungscheibe kommen.
- Page 50 Muttern u.s.w. am Indoor Cycle auf festen Sitz und Funktion überprüft werden und Teile die Verschleiß, Abnutzung oder Beschädigung zeigen (Sattel, Pedalriemen, Pedale, SPD System) ersetzt werden. Version 3.0 2015 IC-TKIC7B-03 Copyright by Indoor Cycling Group GmbH 2015 | www.indoorcycling.com...
- Page 51 REGELMÄSSIGE PFLEGE UND WARTUNG NUTZUNGSABHÄNGIGE MASSNAHMEN: 1. Vertikalverstellung Lenker und Sattel: Um die Leichtgängigkeit der vertikalen Lenker- und Sattelverstellung sicherzustellen wird empfohlen den Klemmmechanismus zu prüfen und bei Bedarf eine geringe Menge Lithium/Silikon Fett auf den vertikalen Klemmmechanismus der Lenkerstütze (1.) und der Sattelstütze (2./3.) aufzutragen.
-
Page 52: Wartungs - Und Pflegeplan
VERTIKALVERSTELLUNG VON LENKER UND SATTELSTÜTZE EINFETTEN MONATLICH SEITE 23 BEISPIEL FÜR EINEN WARTUNGSPLAN BEI DURCHFÜHRUNG DER ARBEITEN DURCH DRITTE. WÖCHENTLICHE CHECKLISTE BIKE NO. PRODUKTIONSCODE ANMERKUNGEN HANDLUNG RESULTAT NAME/DATUM Version 3.0 2015 IC-TKIC7B-03 Copyright by Indoor Cycling Group GmbH 2015 | www.indoorcycling.com... - Page 53 WARTUNGS - UND PFLEGEPLAN 14-TÄGIGE CHECKLISTE BIKE NO. PRODUKTIONSCODE ANMERKUNGEN HANDLUNG RESULTAT NAME/DATUM MONATLICHE CHECKLISTE BIKE NO. PRODUKTIONSCODE ANMERKUNGEN HANDLUNG RESULTAT NAME/DATUM...
-
Page 54: Ersatzteile
Webseite www.indoorcycling.com zu besuchen. 120-01-00015-02 SPORT SATTEL SCHWARZ & ROT INKL. SATTELKLOBEN 320-00-00009-01 COMPUTER SET INKL. ANBAUTEILE 900-10-00003-01 GUMMISTANDFUSS, 75° SHORE 150-01-00005-02 KOMBIPEDAL SET, SPD KOMPATIBEL 150-03-00048-01 PEDALRIEMEN SET Version 3.0 2015 IC-TKIC7B-03 Copyright by Indoor Cycling Group GmbH 2015 | www.indoorcycling.com... -
Page 55: Garantie
GARANTIE Die Indoorcycling Group GmbH garantiert, dass alle neuen Produkte am Tag der Lieferung zum Kunden frei von Fertigungs- und Materialfehlern sind. Verwendung des Produktes nur bei Umgebungstemperaturen zwischen 15°C 40°C Celsius bei max. Luftfeuchtigkeit von 65%. Keine Verwendung im Freien. Unsachgemäßer Gebrauch, Fehlbedienung, mechanische Beschädigung und Veränderungen am Produkt führen zum Erlöschen jeglicher Garantieansprüche. - Page 56 ACHTUNG. MACHEN SIE SICH MIT ALLEN SICHERHEITSMASSNAHMEN UND -ANWEISUNGEN, DIE IN DIESER BEDIENUNGSANLEITUNG BESCHRIEBEN SIND, VERTRAUT, BEVOR SIE DAS GERÄT IN BETRIEB NEHMEN. BEWAHREN SIE DIESE ANLEITUNG SORGFÄLTIG AUF. UNSACHGEMÄSSEM ZUSAMMEN- AUFBAU, UNSACHGEMÄSSER WARTUNG PFLEGE, SOWIE UNSACHGEMÄSSEM GEBRAUCH, KÖNNEN GARANTIEBESTIMMUNGEN ERLÖSCHEN.
- Page 57 ¡EL USO Y MANEJO INAPROPIADO, MONTAJE INCORRECTO Y LA DE LA BICICLETA. FALTA DE MANTENIMIENTO PUEDEN DERIVAR EN LA CANCELACIÓN DE LA GARANTÍA! MANUAL DE USUARIO EN OTROS IDIOMAS DISPONIBLE PARA SU DESCARGA EN WWW.INDOORCYCLING.COM Version 3.0 2015 IC-TKIC7B-03 Copyright by Indoor Cycling Group GmbH 2015 | www.indoorcycling.com...
- Page 58 ¡ADVERTENCIA! Warning labels on the bikes must be replaced by warning labels in your language during the assembly process. Version 3.0 2015 IC-TKIC7B-03 Copyright by Indoor Cycling Group GmbH 2015 | www.indoorcycling.com...
- Page 59 ¡ADVERTENCIA! To download the owners manual in Lataa omistajan käsikirja omalla your language, visit the IC7 support kielelläsi IC7-ohjeosiosta sivustolta: section at: www.teamicg.com www.teamicg.com Um das Handbuch in Ihrer Sprache Du kan laste ned bruksanvisningen herunterzuladen, besuchen Sie bitte på ditt eget språk ved å gå til IC7 den IC7 Support Bereich auf unserer støttesiden på: www.teamicg.com Webseite unter www.teamicg.com...
- Page 60 P.31 ESPECIFICACIONES TÉCNICAS: La bici indoor TOMAHAWK IC7 corresponde, conforme a la norma EN ISO 20957 (1 y 10), al producto de Clase S para poder ser usada en un entorno controlado como por ejemplo en centros deportivos y gimnasios bajo la dirección de un entrenador o instructor.
-
Page 61: Advertencias Importantes
ADVERTENCIAS IMPORTANTES 8. Los jóvenes menores de 14 años sólo deben ¡ADVERTENCIA! utilizar la bici indoor previo consentimiento paterno ¡Para poder reducir el riesgo de lesiones graves además de ser supervisados por un instructor o debido a un uso inapropiado del equipo, por favor entrenador cualificado. -
Page 62: Introducción
¡ADVERTENCIA! Encontrará el código de producción de la bici Tomahawk IC7 en la placa identificativa que se encuentra en la parte inferior izquierda del cuadro de la bici indoor. Por favor incluya este código de producción el los listados de cuidado y mantenimiento. -
Page 63: Cómo Montar La Bici Indoor
CÓMO MONTAR LA BICI INDOOR LLAVE DINANOMÉTRICA 17MM PERSONAS ¡ADVERTENCIA! Evite diferencias notables de temperatura durante el transporte de la bici desde el almacen hasta el lugar de instalación. Si se producen inevitablemente notables diferencias de temperatura, por favor deje que la bici se aclimate a la temperatura ambiente del lugar antes de proceder con el montaje. - Page 64 A SU ALTURA MÁXIMA ANTES DE COMENZAR CON EL POSICIONADO POR DEBAJO DEL SOPORTE DE LA MONTAJE. COMPUTADORA. NO RETÍRE EL PRECINTO DE ADVERTENCIA DE LAS GUÍAS ANTES DE COMENZAR EL MONTAJE DEL MANILLAR. Version 3.0 2015 IC-TKIC7B-03 Copyright by Indoor Cycling Group GmbH 2015 | www.indoorcycling.com...
- Page 65 CÓMO MONTAR LA BICI INDOOR LLAVE DINANOMÉTRICA PERSONAS 30 NM CON MOTIVO DE EVITAR DAÑAR EL CABLEADO RETÍRE EL PRECINTO DE ADVERTENCIA. INTERIOR, EL MANILLAR NO DEBE DE SER AJUSTADO NO DESLICE LA GUÍA HORIZONTAL HACIA ATRÁS. HORIZONTALMENTE ANTES DE ESTE PASO. ASEGÚRESE DE QUE LOS TORNILLOS ESTÁN APRETADOS CON SUFICIENTE FUERZA (30 NM) CUANDO MONTE EL MANILLAR.
- Page 66 POR FAVOR, REFIÉRASE A LAS RECOMENDACIONES DE SERVICIO DISPONIBLES EN LA PÁGINA WEB DEL FABRICANTE O CONTACTE CON SU DISTRIBUIDOR MÁS CERCANO SI SE REQUIERE OPTIMIZAR EL AJUSTE VERTICAL. Version 3.0 2015 IC-TKIC7B-03 Copyright by Indoor Cycling Group GmbH 2015 | www.indoorcycling.com...
- Page 67 CÓMO MONTAR LA BICI INDOOR LLAVE PARA PEDAL APRETADO A 15MM PERSONAS MANO INSERTE LA COMPUTADORA DE ACCEDA DESDE LA PARTE INFERIOR DEL PUENTE LA BICI EN SU SOPORTE. DEL MANILLAR PARA SUJETAR LA COMPUTADORA DE LA BICI EN SU LUGAR CORRESPONDIENTE CON AYUDA DEL SOPORTE DE PLÁSTICO Y TORNILLO SUMINISTRADO.
- Page 68 Las instrucciones descritas en este manual, deben de ser llevadas a cabo durante el montaje inicial de la bici indoor TOMAHAWK para así poder garantizar un nivel de rendimiento óptimo y una vida útil de larga duración. Por favor, léa y siga cuidadosamente las siguientes instrucciones.
- Page 69 INSTALACIÓN Y RECICLA- DO DE LAS BATERÍAS SERVICIO AL CLIENTE 1. Proporcione a su cliente las instrucciones básicas de mantenimiento y orientelo detalladamente sobre las instrucciones de mantenimiento a seguir. 2. Asegúrese de que tanto las hojas de servicio situadas al final de este manual, como las informaciones sobre el proceso para el correcto mantenimiento y verificación del estado de las bicis, es correctamente cumplimentado y firmado por el cliente una vez se hayan recibido las bicis.
-
Page 70: Cómo Ajustar La Bici Indoor
CÓMO AJUSTAR LA BICI INDOOR La bici indoor Tomahawk puede ser ajustada fácilmente y de forma muy variable dependiendo de las exigencias de varios grupos de usuarios. Esto permite un máximo confort durante el pedaleo, para garantizar al mismo tiempo la obtención de unos resultados óptimos de entrenamiento. - Page 71 CÓMO AJUSTAR LA BICI INDOOR AJUSTE HORIZONTAL DEL SILLÍN: El ajuste horizontal del sillín es muy importante para evitar lesiones en las articulaciones de las rodilla. Móntese en el sillín y pedalee hasta que las bielas queden en posición horizontal. La rodilla de su pierna que está...
- Page 72 Es recomendable cambiar la posición de las manos frecuentemente para minimizar posibles sobrecargas musculares durante entrenamientos prolongados. Version 3.0 2015 IC-TKIC7B-03 Copyright by Indoor Cycling Group GmbH 2015 | www.indoorcycling.com...
-
Page 73: Cómo Manejar La Bici Indoor
CÓMO MANEJAR LA BICI INDOOR AJUSTE DE LA RESISTENCIA: La resistencia del freno, puede ser ajustada con precisión y también poder ser regulada de acuerdo a las exigencias del ciclista en pequeños incrementos repartidos en un rango giratorio de 300° del dial de resistencia. La resistencia se indica en % (donde 0% no presenta resistencia y donde 100% presenta la máxima resistencia) la cual es mostrada en la pantalla de la computadora de la bici indoor. - Page 74 Deje una distancia de seguridad mínima con respecto al equipo más próximo, objetos o paredes tal y como se ilustra a continuación: 3.9“ (10cm) 23.6“ 23.6“ (60cm) (60cm) 3.9“ (10cm) 23.6“ (60cm) 23.6“ (60cm) Version 3.0 2015 IC-TKIC7B-03 Copyright by Indoor Cycling Group GmbH 2015 | www.indoorcycling.com...
- Page 75 CÓMO MANEJAR LA BICI INDOOR Compruebe la estabilidad de la bici indoor allí donde vaya a ser utilizada y ajuste si fuera necesario, los pies de nivelación situados debajo de los estabilizadores delantero y trasero para asegurar la estabilidad deseada. ¡IMPORTANTE! Por favor no desenrosque los pies de nivelación más de 1 cm.
-
Page 76: Mantenimiento Preventivo
Nunca aplíque el spray de mantenimiento recomendado directamente sobre el volante de inercia ya que esto podría provocar que la correa patine, además de repercutir negativamente en la correcta funcionalidad del freno de emergencia. Version 3.0 2015 IC-TKIC7B-03 Copyright by Indoor Cycling Group GmbH 2015 | www.indoorcycling.com... - Page 77 MANTENIMIENTO PREVENTIVO MANTENIMIENTO CADA 2 SEMANAS: 1. Freno de emergencia: Para garantizar la seguridad de funcionamiento, el freno de emergencia debe ser revisado regularmente. Para ello, presione hacia abajo el pomo rojo del freno de emergencia mientras pedalea. Cuando funcione de manera óptima, debe producir un efecto de frenado inmediato pero no instantáneo, deteniéndose antes de completar un giro completo de las bielas.
- Page 78 De no ser así, las piezas/ partes gastadas o dañadas, deberán de ser reemplazadas (incluidos el sillín, pedales, sistemas SPD, correas de los pedales). Version 3.0 2015 IC-TKIC7B-03 Copyright by Indoor Cycling Group GmbH 2015 | www.indoorcycling.com...
- Page 79 MANTENIMIENTO PREVENTIVO MANTENIMIENTO DEFINIDO POR EL USUARIO: 1. Ajustando verticalmente el manillar y sillín: Para garantizar un fácil ajuste vertical de la tija del manillar y del sillín, es recomendable que compruebe el mecanismo de la palanca de bloqueo y aplique una pequeña cantidad de grasa de litio/silicona en ambos mecanismos de la tija del manillar (1) y tija del sillín (2/3).
- Page 80 EJEMPLO DE UN PLAN DE MANTENIMIENTO PARA LOS TÉCNICOS DE SERVICIO: COMPROBACIÓN DE MANTENIMIENTO SEMANAL BICI Nº. Nº. DE SERIE OBSERVACIONES ACCIÓN TOMADA RESULTADO NOM. / FECHA Version 3.0 2015 IC-TKIC7B-03 Copyright by Indoor Cycling Group GmbH 2015 | www.indoorcycling.com...
- Page 81 PLAN DE MANTENIMIENTO PROGRAMADO REQUERIDO COMPROBACIÓN DE MANTENIMIENTO CADA 2 SEMANAS BICI Nº. Nº. DE SERIE OBSERVACIONES ACCIÓN TOMADA RESULTADO NOM. / FECHA COMPROBACIÓN DE MANTENIMIENTO MENSUAL BICI Nº. Nº. DE SERIE OBSERVACIONES ACCIÓN TOMADA RESULTADO NOM. / FECHA...
-
Page 82: Piezas De Recambio
NEGRO/ROJO INCL. ABRAZADERA 320-00-00009-01 COMPUTADORA 900-10-00003-01 PIES DE NIVELACIÓN DE GOMA A (75º) 150-01-00005-02 JUEGO DE PEDALES COMBI, COMPATIBLE CON SISTEMA SPD 150-03-00048-01 JUEGO CORREAS DE RASTRALES Version 3.0 2015 IC-TKIC7B-03 Copyright by Indoor Cycling Group GmbH 2015 | www.indoorcycling.com... -
Page 83: Garantía
GARANTÍA ICG garantiza que todos los productos nuevos en el día de entrega al cliente no contienen defectos de material ni de fabricación, entrando en vigor desde la fecha original de instalación. Las piezas reparadas o reemplazadas bajo los términos de esta garantía, estarán garantizadas hasta el final de la garantía original. ICG tiene la obligación de mantener su garantía como fabricante, siempre y cuando el producto haya sido usado en el entorno para el que fue diseñado, con una temperatura de entre 15ºC~40°C Centigrados y un máximo de 65% de humedad ambiental (no cercano a piscinas o el exterior). - Page 84 ¡PRECAUCIÓN! LEA TODAS LAS ADVERTENCIAS E INSTRUCCIONES INCLUIDAS EN ESTE MANUAL ANTES DE COMENZAR A UTILIZAR ESTE PRODUCTO. POR FAVOR, GUARDE ESTE MANUAL EN LUGAR SEGURO PARA POSIBLES CONSULTAS FUTURAS. EL MONTAJE, AJUSTE, USO O MANTENIMIENTO INCORRECTO PUEDEN DERIVAR EN LA CANCELACIÓN DE LA GARANTÍA. EMAIL: INFO@INDOORCYCLING.COM PÁGINA WEB: WWW.INDOORCYCLING.COM ©...
Need help?
Do you have a question about the IC-TKIC7B and is the answer not in the manual?
Questions and answers