Sony RSX-GS9 Operating Instructions Manual
Hide thumbs
Also See for RSX-GS9:
- Operating instructions manual (196 pages) ,
- User manual (32 pages) ,
- Operating instructions manual (84 pages)
Table of Contents
Advertisement
Quick Links
Digital Media
Player
To switch the FM/AM tuning step, see page 9.
For the connection/installation, see page 27.
Para cambiar el paso de sintonización de FM/AM, consulte la
página 9.
Para la conexión/instalación, consulte la página 30.
RSX-GS9
4-577-101-42(1)
Operating Instructions
Manual de instrucciones
GB
ES
Advertisement
Chapters
Table of Contents

Related Manuals for Sony RSX-GS9


Summary of Contents for Sony RSX-GS9
- Page 1 Operating Instructions Player Manual de instrucciones To switch the FM/AM tuning step, see page 9. For the connection/installation, see page 27. Para cambiar el paso de sintonización de FM/AM, consulte la página 9. Para la conexión/instalación, consulte la página 30. RSX-GS9...
- Page 2 Do not expose the battery to excessive heat such as direct sunlight, fire or the like. Disclaimer regarding services offered by third parties Services offered by third parties may be changed, suspended, or terminated without prior notice. Sony does not bear any responsibility in these sorts of situations.
-
Page 3: Important Notice
Important notice Caution IN NO EVENT SHALL SONY BE LIABLE FOR ANY INCIDENTAL, INDIRECT OR CONSEQUENTIAL DAMAGES OR OTHER DAMAGES INCLUDING, WITHOUT LIMITATION, LOSS OF PROFITS, LOSS OF REVENUE, LOSS OF DATA, LOSS OF USE OF THE PRODUCT OR ANY ASSOCIATED EQUIPMENT, DOWNTIME, AND PURCHASER’S TIME RELATED TO... -
Page 4: Table Of Contents
Connection/Installation Table of Contents Cautions ....... . . 27 Guide to Parts and Controls ....5 Parts List for Installation . -
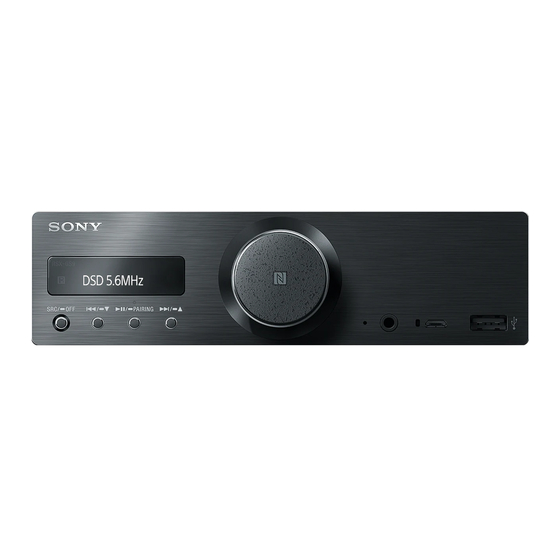
Page 5: Guide To Parts And Controls
Guide to Parts and Controls Main unit / (prev/next) In this manual, procedures are explained USB1/USB2: Skip tracks. mainly for the remote commander unless Tuner: Receive stored radio stations. otherwise specified. / (album –/+) Available buttons light up depending on the USB1/USB2: Press and hold to skip albums. - Page 6 /// RM-X261 Remote commander Select a setup item, etc. ENTER Enter the selected item. / (prev/next) USB1/USB2: Skip tracks. Tuner: Tune in the radio station automatically. Press and hold to tune manually. +/– (album +/–) USB1/USB2: Skip albums. Tuner: Receive stored radio stations. ...
-
Page 7: Guide To Audio Device Connection
Guide to Audio Device Connection *1 Audio device with a stereo mini jack. When Audio device* (e.g., connecting, a stereo mini plug (not supplied) is WALKMAN®, digital media required. Do not use any type of plug that interferes player, smartphone) with the instrument panel of the car. - Page 8 Playable High-Resolution Audio file formats Playable file formats, sampling frequencies and bit depths differ depending on whether the USB type-A port or the USB micro-B port is used. USB-DAC (USB micro-B port) USB1 (USB type-A port, Front) USB2 (USB type-A port, Rear) ASIO Native: 2.8 MHz/1 bit, 5.6 MHz/1 bit –...
-
Page 9: Getting Started
To display the clock Press DSPL. Getting Started Preparing a BLUETOOTH Device Resetting the Unit You can enjoy music, or perform handsfree calling Before operating the unit for the first time, after depending on the BLUETOOTH compatible device replacing the car battery, or changing the such as a smartphone, cellular phone and audio connections, you must reset the unit. - Page 10 To use a paired device, connection with this unit is device so it detects this unit. required. Some paired devices will connect automatically. Select [RSX-GS9] shown in the display of the BLUETOOTH device. If your model name does not appear, repeat from step 2.
-
Page 11: Connecting A Usb Device
To connect the last-connected device from Connecting a High-Resolution this unit Activate the BLUETOOTH function on the USB Audio Supported Device BLUETOOTH device. Press SOURCE (SRC), then select [BT Phone]* or [BT Turn down the volume on the unit. Audio]. Press ENTER to connect with the cellular phone, or Connect a High-Resolution USB Audio PAUSE to connect with the audio device. -
Page 12: Listening To The Radio
Listening to the Radio Playback Listening to the Radio Playing a USB Device Tuning step setting is required (page 9). In these Operating Instructions, “iPod” is used as a To listen to the radio, press SOURCE (SRC) to select general reference for the iPod functions on an iPod [Tuner]. -
Page 13: Playing A Bluetooth Device
Connect a USB device to the USB type-A To remove the device Stop playback, then remove the device. port (page 11). Playback starts. (Depending on the file To display the sampling frequency and bit organization, playback may take time to start.) depth of the audio file being played Press DSPL during playback. -
Page 14: Searching And Playing Tracks
To match the volume level of the BLUETOOTH device to other sources Start playback of the BLUETOOTH audio device at a Handsfree Calling (via BLUETOOTH moderate volume, and set your usual listening only) volume on the unit. Press and hold MENU, then select [BT Setting] [BTA Level] (page 18). -
Page 15: Useful Functions
“SongPal” is an app for controlling Sony audio devices which are compatible with “SongPal”, by your iPhone/ Android smartphone. What you can control with “SongPal” varies depending on the connected device. -
Page 16: Settings
To display the source list Tap the source list icon on the “SongPal” application. Settings Basic Setting Operation You can set items in the following setup categories: General setup (General), Sound setup (Sound), BLUETOOTH setup (BT Setting) Setting by “SongPal” is also available (page 15). (While the BT phone is selected, only the BLUETOOTH setup is available.) Use the remote commander to perform the... -
Page 17: Sound Setup (Sound)
Firmware Pos Custom (position custom) (Available only while the source is off and the Sets [Custom] of [Pos Preset]. clock is displayed.) (Available when any source except for BT phone Checks/updates the firmware version. For is selected.) (Automatically set to [OFF] when details, visit the support site on the back cover. -
Page 18: Bluetooth Setup (Bt Setting)
Fader BT Initialize Adjusts the relative level: [F-15] – [Center] – Initializes all the BLUETOOTH related settings [R-15]. (pairing information, device information, etc.): (Available when any source except for BT phone [NO], [YES]. is selected.) (Automatically set to [OFF] when When disposing the unit, initialize all the [Optical Out] is set to [48kHz] or [96kHz].) settings. - Page 19 Optical output setting and available sound settings Available sound settings differ depending on the optical output setting and the selected source. Optical USB1 (front), USB-DAC USB-DAC AUX1 AUX2 (High Tuner BT Audio USB2 (rear) (PCM) (DSD) (front) level input) Phone ...
-
Page 20: Additional Information
(“Music”, “music” and “MUSIC” are wireless performance. valid.) If you have any questions or problems concerning your unit that are not covered in this manual, consult your nearest Sony dealer. -
Page 21: Maintenance
Maintenance Tuning range: 531 – 1,602 kHz (at 9 kHz step) 530 – 1,710 kHz (at 10 kHz step) Replacing the lithium battery of the remote AM tuning step: commander 9 kHz/10 kHz switchable Under normal conditions, the battery will last Antenna (aerial) terminal: approximately 1 year. - Page 22 The Bluetooth® word mark and logos are registered Output: trademarks owned by Bluetooth SIG, Inc. and any BLUETOOTH Standard Power Class 2 use of such marks by Sony Corporation is under (Max. +4 dBm) license. Other trademarks and trade names are Maximum communication range: those of their respective owners.
-
Page 23: Troubleshooting
Neither the name of the Xiph.org Foundation nor Troubleshooting the names of its contributors may be used to endorse or promote products derived from this The following checklist will help you remedy software without specific prior written problems you may encounter with your unit. permission. - Page 24 A USB device takes longer to play. USB device. The USB device contains many files or a Restart your computer. Install the driver software “Sony USB Device complicated file structure. Driver” on your Windows computer if not The sound is intermittent.
- Page 25 NFC function A call partner says that the volume is too low or high. One touch connection (NFC) is not possible. Adjust the volume accordingly using mic gain The BLUETOOTH signal of this unit is not turned adjustment (page 14). ...
- Page 26 Connect a USB device containing playable files If these solutions do not help improve the situation, (page 21). consult your nearest Sony dealer. Check that the “Music” folder is located directly under the root directory of the USB device and that playable files are stored in the folder.
-
Page 27: Connection/Installation
Parts List for Installation Connection/Installation Cautions Run all ground (earth) leads to a common ground (earth) point. × 2 Do not get the leads trapped under a screw, or caught in moving parts (e.g., seat railing). ... -
Page 28: Connection
Connection Subwoofer* * Power amplifier* Smartphone* , iPod/ iPhone* , WALKMAN®, USB storage device from a wired remote control (not supplied)* Power amplifier with an optical input * Front panel Smartphone* , iPod/ iPhone* , WALKMAN®, USB storage device High-Resolution USB Audio supported computer, smartphone or digital... -
Page 29: Making Connections
(e.g. XM-GS4) (e.g. XS-GS1) lead to a common ground (earth) point. To the +12 V power terminal which is energized when the ignition switch is set to RSX-GS9 Full-range speaker (this unit) (e.g. XS-GS1621) the accessory position If there is no accessory position, connect to the +12 V power (battery) terminal which is energized at all times. - Page 30 High level input connection Installing the microphone For details on the connection, refer to the manual supplied with your audio device. To capture your voice during handsfree calling, you need to install the microphone . Left speaker White White output White/black striped...
-
Page 31: Installation
Insert both release keys until they You may not be able to install this unit in some click, and pull down the bracket , then makes of Japanese cars. In such a case, consult your Sony dealer. pull up the unit to separate. TOYOTA ... - Page 32 If the fuse blows, check the power connection and replace the fuse. If the fuse blows again after replacement, there may be an internal malfunction. In such a case, consult your nearest Sony dealer. Fuse (15 A) Note Use an appropriate tool to replace a fuse.
- Page 34 Exención de responsabilidad sobre los servicios prestados por otros proveedores Los servicios prestados por otros proveedores están sujetos a cambios, anulaciones o interrupciones sin previo aviso. Sony no asume responsabilidad alguna en estas situaciones.
- Page 35 Aviso importante Precaución SONY NO SERÁ RESPONSABLE DE NINGÚN DAÑO INCIDENTAL, INDIRECTO O DERIVADO NI DE OTROS DAÑOS QUE INCLUYEN, ENTRE OTROS, PÉRDIDA DE GANANCIAS, PÉRDIDA DE INGRESOS, PÉRDIDA DE DATOS, PÉRDIDA DE LA UTILIDAD DEL PRODUCTO O DE CUALQUIER EQUIPO RELACIONADO, TIEMPO DE INACTIVIDAD Y TIEMPO DEL COMPRADOR RELACIONADO CON LA UTILIZACIÓN DE ESTE...
- Page 36 Conexión/Instalación Tabla de Contenidos Advertencias ......30 Guía para las piezas y los controles... . . 5 Lista de piezas para la instalación .
-
Page 37: Guía Para Las Piezas Y Los Controles
Guía para las piezas y los controles Unidad principal / (anterior/siguiente) En este manual, los procedimientos se explican USB1/USB2: Saltar pistas. principalmente para usar un control remoto a Tuner: Para recibir a las emisoras almacenadas. menos que se especifique lo contrario. / ... - Page 38 /// Control remoto RM-X261 Seleccione un elemento de configuración, etc. ENTER Ingrese el elemento seleccionado. / (anterior/siguiente) USB1/USB2: Saltar pistas. Tuner: Para sintonizar emisoras de radio en forma automática. Manténgalo presionado para sintonizarlas en forma manual. +/– (álbum +/–) USB1/USB2: Saltar álbumes.
-
Page 39: Guía Para La Conexión De Un Dispositivo De
Guía para la conexión de un dispositivo de audio *1 Dispositivo de audio con entrada estéreo minitoma. Dispositivo de audio* (por ejemplo, Cuando se conecte, utilice un conector estéreo WALKMAN®, reproductor digital minitoma (no suministrado). No utilice ningún tipo multimedia, smartphone) de enchufe que interfiera con el panel de instrumentos del automóvil. - Page 40 Formatos ejecutables de archivos de audio con alta resolución Los formatos de archivo ejecutables, las frecuencias de muestra y la profundidad de bits difieren si se utiliza un puerto USB tipo-A o USB micro-B. USB1 (puerto USB tipo-A, USB2 (puerto USB tipo-A USB-DAC (puerto USB micro-B) Frontal) Posterior)
-
Page 41: Procedimientos Iniciales
Una vez ajustados los minutos, presione ENTER. Procedimientos iniciales El ajuste se completa y el reloj se pone en funcionamiento. Reinicio de la unidad Para visualizar el reloj Presione DSPL. Antes de operar la unidad por primera vez, luego de remplazar la batería del automóvil o cambiar las conexiones, debe reiniciar la unidad. - Page 42 Toque la parte marca N de la unidad con Seleccione [RSX-GS9] que se muestra en la parte marca N del smartphone. la pantalla del dispositivo de BLUETOOTH. Si el nombre de su modelo no aparece, repita desde el paso 2.
-
Page 43: Conexión De Un Dispositivo Usb
Conexión con un dispositivo Conexión de un dispositivo USB BLUETOOTH emparejado Baje el volumen de la unidad. Para utilizar un dispositivo emparejado, es necesaria la conexión con esta unidad. Algunos Conecte el dispositivo USB a un puerto dispositivos emparejados se conectarán USB tipo-A. -
Page 44: Conexión De Otro Dispositivo De Audio
Conexión de otro dispositivo de Escuchar la radio audio portátil Escuchar la radio Baje el volumen de la unidad. Se requiere la configuración de paso de Conecte el dispositivo de audio portátil a sintonización (página 9). la toma de entrada AUX (minitoma Para escuchar una emisora de radio, presione estéreo) en la unidad con un cable de SOURCE (SRC) para seleccionar [Tuner]. -
Page 45: Reproducción
Recepción de las emisoras almacenadas Reproducción Seleccione la banda y, a continuación, presione un botón numérico (de 1 a 6). Reproducción de un dispositivo También puede presionar o en la unidad. En este Manual de instrucciones, “iPod” se utiliza como referencia general para las funciones del iPod en un iPod y un iPhone, a menos que se especifique lo contrario en el texto o en las... -
Page 46: Reproducción De Un Dispositivo Compatible Con Audio Usb De Alta Resolución
Antes de conectar el dispositivo USB, asegúrese de Antes de conducir su vehículo, asegúrese de que seleccionar USB1 o USB2. Si un dispositivo USB con el dispositivo compatible con audio USB de alta estructura de archivo actualizado se encuentra resolución no se reproducirá... -
Page 47: Reproducción De Un Dispositivo Bluetooth
Reproducción de un dispositivo Búsqueda y reproducción de BLUETOOTH pistas Puede reproducir contenido en un dispositivo Utilice el control remoto para realizar la siguiente conectado que sea compatible con BLUETOOTH operación. A2DP (Perfil de distribución de audio avanzado). Se Para iPod, las opciones de repetición y shuffle no se recomienda la utilización de un dispositivo encuentran disponibles. -
Page 48: Llamada Con Manos Libres (Solo A Través De Bluetooth)
Para ajustar el volumen para otra persona (Ajuste de ganancia de micrófono) Presione durante una llamada. Llamada con manos libres (solo a Niveles ajustables de volumen: [MIC High] (alto), través de BLUETOOTH) [MIC Low] (bajo), [MIC Middle] (medio). Para reducir el eco y el ruido (Cancelador de Para usar un teléfono celular, conéctelo a esta ecos/Modo cancelador de ruidos) unidad. -
Page 49: Funciones Útiles
“SongPal” es una aplicación para controlar dispositivos de audio Anuncio de varios tipos de información Sony que son compatibles, mediante su smartphone iPhone/Android. por guía de voz (sólo para smartphone Lo que pueda controlar con “SongPal” varía de Android) acuerdo al dispositivo conectado. -
Page 50: Ajustes
Ajuste de sonido y pantalla Puede ajustar la configuración relacionada con el Ajustes sonido y la pantalla a través del smartphone iPhone/Android. Operación básica de ajustes Puede seleccionar elementos de las siguientes categorías de configuración: Configuración general (General), Configuración de sonido (Sound), Configuración de BLUETOOTH (BT Setting) La configuración por “SongPal”... -
Page 51: Configuración Del Sonido (Sound)
HPF Slope (pendiente del filtro de paso alto) Tuner Step (página 9) Selecciona la pendiente HPF (solo funciona (Disponible solamente mientras la fuente esté cuando [HPF Freq] está configurada en una apagada y se muestre el reloj). opción diferente de [OFF]): [SLP1] (-12dB/oct), [SLP2] (-24dB/oct), [SLP3] (-36dB/oct), [SLP4] Firmware (-48dB/oct). -
Page 52: Configuración Bluetooth (Bt Setting)
EQ10 Preset Configuración BLUETOOTH (BT Selecciona una curva del ecualizador entre 10 Setting) curvas de ecualizador o apagado: [OFF], [R & B], [Rock], [Pop], [Dance], [Hip-Hop], [Electronica], [Jazz], [Regueton], [Salsa], [Custom] (curva del BT Signal (señal BLUETOOTH) (página 11) ecualizador definida por “SongPal”). Activa/desactiva la función BLUETOOTH. - Page 53 Configuración de salida óptica y de sonidos disponibles Las configuraciones disponibles de sonidos difieren según la configuración de salida óptica y la fuente seleccionada. USB1 AUX2 (nivel Optical (frontal), USB-DAC USB-DAC AUX1 Tuner de entrada BT Audio USB2 (PCM) (DSD) (frontal) Phone alto)
-
Page 54: Información Complementaria
Acerca de iPod Información complementaria Puede conectarse a los siguientes modelos de iPod. Actualice sus dispositivos iPod a la última Actualizar el firmware versión de software antes de utilizarlos. Modelos compatibles de iPhone/iPod Para actualizar el firmware, visite el sitio de soporte técnico que figura en la contratapa, luego siga las Modelo compatible Bluetooth®... -
Page 55: Mantenimiento
Si desea realizar alguna consulta o solucionar algún Especificaciones problema relativo a la unidad que no se traten en este manual, póngase en contacto con el distribuidor Sony más cercano. Sección del sintonizador Rango de sintonización: Mantenimiento 87,5 – 108,0 MHz (a pasos de 50 kHz) 87,5 –... - Page 56 Método de modulación: FHSS marcas comerciales registradas y son propiedad de Perfiles de BLUETOOTH compatible* Bluetooth SIG, Inc., y Sony Corporation posee A2DP (Perfil de distribución de audio avanzado) licencia para utilizar cualquiera de dichas marcas. Otras marcas registradas y nombres comerciales AVRCP (Perfil de control remoto de audio y pertenecen a sus respectivos propietarios.
-
Page 57: Solución De Problemas
WALKMAN® y el logotipo WALKMAN® son marcas Antes de consultarla, revise los procedimientos de comerciales registradas de Sony Corporation. conexión y de funcionamiento. Para más detalles sobre el uso del fusible y sobre LDAC™ y el logotipo LDAC son marcas comerciales cómo quitar la unidad del tablero, ver “Conexión/... - Page 58 USB. Reinicie la computadora. derechos digitales) en algunos casos. Instale el controlador de dispositivo “Sony USB Un archivo de audio no puede reproducirse. Device Driver” en su Windows en caso de no Los dispositivos USB formateados con sistemas encontrarse.
- Page 59 La computadora está conectada a la unidad Una vez realizado el emparejamiento del mientras el software de reproducción de audio dispositivo, active la salida de señal de está en uso. BLUETOOTH (página 11). Reinicie el software de reproducción de audio No es posible realizar la conexión.
- Page 60 Operación SongPal El volumen del dispositivo de audio conectado es bajo (alto). El nombre de la aplicación no coincide con la El nivel de volumen cambiará dependiendo del aplicación real en “SongPal”. dispositivo de audio. Inicie la aplicación nuevamente desde la ...
- Page 61 BLUETOOTH. Salga de la pantalla de configuración de la aplicación para permitir la operación del botón. Si estas soluciones no ayudan con el problema, póngase en contacto con el distribuidor Sony más cercano.
-
Page 62: Conexión/Instalación
Lista de piezas para la Conexión/Instalación instalación Advertencias Conecte todos los cables hacia un punto a tierra en común. No deje que los cables queden atrapados debajo de un tornillo o que se enganchen en piezas ×... -
Page 63: Conexión
Conexión Subwoofer* * Amplificador de potencia* Smartphone* , iPod/iPhone* WALKMAN®, dispositivo de almacenamiento USB Desde un control remoto conectado (no suministrado)* Amplificador de potencia con entrada óptica * Panel frontal Smartphone* , iPod/iPhone* WALKMAN®, dispositivo de almacenamiento USB Computadora compatible con audio USB de alta resolución, smartphone o reproductor... - Page 64 Si no existe la posición accesorio, conecte la terminal de potencia +12 V (batería) la cual se Parlante de rango RSX-GS9 encuentra energizada en todo momento. completo (por ejemplo, (esta unidad) Asegúrese de conectar primero el cable a tierra XS-GS1621) negro a un punto de puesta a tierra.
- Page 65 Conexión de entrada de alto nivel Instalación del micrófono Para obtener más información sobre la conexión, consulte el manual incluido con su equipo de Para capturar su voz durante una llamada con manos libres, necesita instalar el micrófono . audio. ...
-
Page 66: Instalación
Montar la unidad en un auto japonés clic y empuje el soporte , luego retire Tal vez no pueda instalar esta unidad en algunas la unidad para separar. marcas de autos japoneses. En dicho caso, consulte con su distribuidor Sony. TOYOTA ... - Page 67 Si el fusible se quema nuevamente después de reemplazarlo, puede haber un mal funcionamiento interno. En ese caso, consulte con su distribuidor Sony más cercano. Fusible (15 A) Nota Utilice una herramienta adecuada para reemplazar el...
- Page 68 Please note that Sony cannot answer or respond to any inquiries regarding the content of this source code. 2. You may modify your copy or copies of the Program or any portion of...
- Page 69 not excuse you from the conditions of this License. If you cannot These requirements apply to the modified work as a whole. If identifiable sections of that work are not derived from the Program, distribute so as to satisfy simultaneously your obligations under this License and any other pertinent obligations, then as a consequence and can be reasonably considered independent and separate works in themselves, then this License, and its terms, do not apply to those...
- Page 70 software which everyone can redistribute and change under these To protect your rights, we need to make restrictions that forbid anyone terms. to deny you these rights or to ask you to surrender the rights. These restrictions translate to certain responsibilities for you if you distribute To do so, attach the following notices to the program.
- Page 71 4. You may copy and distribute the Library (or a portion or derivative of straightforwardly into another language. (Hereinafter, translation is included without limitation in the term “modification”.) it, under Section 2) in object code or executable form under the terms of Sections 1 and 2 above provided that you accompany it with the “Source code”...
- Page 72 Each version is given a distinguishing version number. If the Library It may happen that this requirement contradicts the license restrictions of other proprietary libraries that do not normally specifies a version number of this License which applies to it and “any later version”, you have the option of following the terms and accompany the operating system.
- Page 73 GNU LESSER GENERAL PUBLIC LICENSE little to gain by limiting the free library to free software only, so we use the Lesser General Public License. Version 2.1, February 1999 In other cases, permission to use a particular library in non-free programs enables a greater number of people to use a large body of Copyright (C) 1991, 1999 Free Software Foundation, Inc.
- Page 74 You must give prominent notice with each copy of the work that the Therefore, Subsection 2d requires that any application-supplied function or table used by this function must be optional: if the Library is used in it and that the Library and its use are covered by this License.
- Page 75 END OF TERMS AND CONDITIONS herein. You are not responsible for enforcing compliance by third parties with this License. How to Apply These Terms to Your New Libraries 11. If, as a consequence of a court judgment or allegation of patent infringement or for any other reason (not limited to patent issues), If you develop a new library, and you want it to be of the greatest conditions are imposed on you (whether by court order, agreement...
- Page 76 This program is licensed under the BSD license (the one with DISCLAIMED. IN NO EVENT SHALL THE COPYRIGHT OWNER OR advertisement clause removed). CONTRIBUTORS BE LIABLE FOR ANY DIRECT, INDIRECT, INCIDENTAL, SPECIAL, EXEMPLARY, OR CONSEQUENTIAL DAMAGES (INCLUDING, BUT If you are submitting changes to the project, please see CONTRIBUTIONS NOT LIMITED TO, PROCUREMENT OF SUBSTITUTE GOODS OR SERVICES;...
-
Page 77: Legal Terms
ntpdate o You can use this software for whatever you want, in parts or full form, without having to pay us. (‘royalty-free’ usage) o You may not pretend that you wrote this software. If you use it, or only Copyright (c) University of Delaware 1992-2011 parts of it, in a program, you must acknowledge somewhere in your documentation that you have used the FreeType code. - Page 78 As you have not signed this license, you are not required to accept it. according to the same disclaimer and license as libpng-0.96, with the However, as the FreeType Project is copyrighted material, only this following individuals added to the list of Contributing Authors: license, or another one contracted with the authors, grants you the right Tom Lane to use, distribute, and modify it.
- Page 79 1. Redistributions of source code must retain the above copyright THIS SOFTWARE IS PROVIDED BY ERIC YOUNG “AS IS” AND ANY EXPRESS notice, this list of conditions and the following disclaimer. OR IMPLIED WARRANTIES, INCLUDING, BUT NOT LIMITED TO, THE IMPLIED WARRANTIES OF MERCHANTABILITY AND FITNESS FOR A 2.
- Page 80 8. Limitation of Liability. Subject to the terms and conditions of this License, each Contributor hereby grants to You a perpetual, worldwide, non-exclusive, no- In no event and under no legal theory, whether in tort (including charge, royalty-free, irrevocable copyright license to reproduce, negligence), contract, or otherwise, unless required by applicable law prepare Derivative Works of, publicly display, publicly perform, (such as deliberate and grossly negligent acts) or agreed to in writing,...
- Page 81 derivative works are solely in the form of machine-executable object NONINFRINGEMENT. IN NO EVENT SHALL THE AUTHORS OR COPYRIGHT code generated by a source language processor. HOLDERS BE LIABLE FOR ANY CLAIM, DAMAGES OR OTHER LIABILITY, WHETHER IN AN ACTION OF CONTRACT, TORT OR OTHERWISE, ARISING THE SOFTWARE IS PROVIDED “AS IS”, WITHOUT WARRANTY OF ANY KIND, FROM, OUT OF OR IN CONNECTION WITH THE SOFTWARE OR THE USE OR EXPRESS OR IMPLIED, INCLUDING BUT NOT LIMITED TO THE WARRANTIES...
- Page 82 Copyright (C) 2002, 2004, 2006, 2007 Apple Inc. All rights reserved. HOWEVER CAUSED AND ON ANY THEORY OF LIABILITY, WHETHER IN Copyright (C) 2002, 2004, 2006, 2007, 2008 Apple Inc. All rights reserved. CONTRACT, STRICT LIABILITY, OR TORT (INCLUDING NEGLIGENCE OR Copyright (C) 2007 Eric Seidel <eric@webkit.org>...
- Page 83 flex The basic library functions are written in C and are freestanding. Also included in the distribution is a set of C++ wrapper functions, and a just- in-time compiler that can be used to optimize pattern matching. These Flex carries the copyright used for BSD software, slightly modified are both optional features that can be omitted when the library is built.
- Page 84 Web: the web site below: Customers in Latin America/Clientes en Latinoamérica: http://esupport.sony.com/ES/LA/ Customers in Asia Pacific/Clientes en Asia-Pacífico: http://www.sony-asia.com/section/support http://www.sony-asia.com/caraudio/ http://www.sony.net/ ©2015 Sony Corporation Printed in Thailand...
Need help?
Do you have a question about the RSX-GS9 and is the answer not in the manual?
Questions and answers