Epson GT-S50 User Manual
Printer & scanner
Hide thumbs
Also See for GT-S50:
- Cleaning (6 pages) ,
- Brochure & specs (4 pages) ,
- User manual (2 pages)
Table of Contents
Advertisement
U s e r ' s G u i d e
Overview of Your Scanner Features
These features help you create the best possible scans, no matter what shape your original is in.
Guide to the Scanner Parts
Check this section to identify the parts of your scanner.
Placing Originals in the Scanner
Follow the steps here to place your original documents or photos on the scanner.
Scanning Your Originals
Follow the step- by- step instructions here to scan your original documents or photos using any of the available scanning methods.
Scanning Special Projects
Follow the instructions here for specific scanning projects you may need to create.
Maintenance
Follow the guidelines here to maintain and transport your scanner.
Solving Problems
If you have a problem using your scanner or its software, check here for solutions.
Technical Specifications
Check here for technical details about your scanner and its accessories.
Safety
Copyright and Trademarks
Advertisement
Table of Contents

Related Manuals for Epson GT-S50


Summary of Contents for Epson GT-S50
- Page 1 U s e r ’ s G u i d e Overview of Your Scanner Features These features help you create the best possible scans, no matter what shape your original is in. Guide to the Scanner Parts Check this section to identify the parts of your scanner. Placing Originals in the Scanner Follow the steps here to place your original documents or photos on the scanner.
- Page 2 Home > Overview of Your Scanner Features Overview of Your Scanner Features These features help you create the best possible scans, no matter what shape your original is in. Scanning Documents With the Carrier Sheet Text Enhancement...
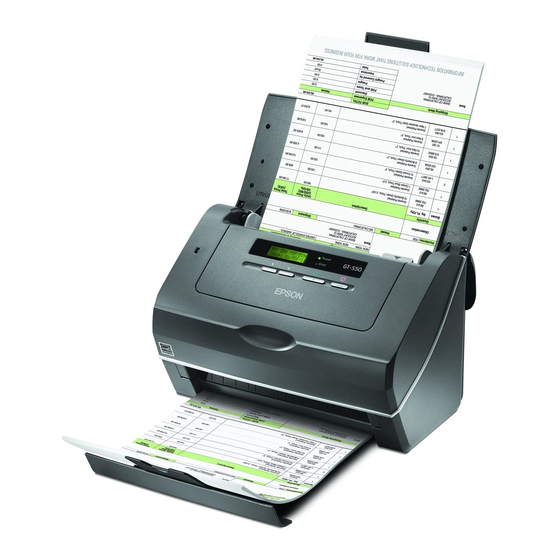
- Page 3 Home > Guide to the Scanner Parts Guide to the Scanner Parts Check these sections to identify the parts of your scanner. Scanner Parts Control Panel...
- Page 4 Home > Placing Originals in the Scanner Placing Originals in the Scanner Follow the steps here to place your original documents or photos on the scanner. Loading Documents...
-
Page 5: Scanning Your Originals
Follow the step-by-step instructions here to scan your original documents or photos using any of the available scanning methods. Starting a Scan Using the Control Panel Starting a Scan Using Epson Scan Scanning Documents Using Document Capture Pro (Windows only) Scanning Documents Using Epson Scan Selecting File Save Settings Using Epson Scan Detailed Setting Instructions Finishing the Scan... -
Page 6: Scanning Special Projects
Home > Scanning Special Projects Scanning Special Projects Follow these instructions for specific scanning projects you may need to create. Scanning Documents With the Carrier Sheet Text Enhancement Scanning to a PDF File Using the Scanner as a Copier Scanning Directly to an E-mail Converting Scanned Documents into Editable Text Scanning Business Cards Setting Up the LCD Screen Menu List... -
Page 7: Maintenance
Home > Maintenance Maintenance Follow the guidelines here to maintain and transport your scanner. Cleaning the Scanner Cleaning Inside the Scanner Transporting the Scanner Replacing the Roller Assembly Kit Using the Security Slot... -
Page 8: Solving Problems
If you have a problem using your scanner or its software, check here for solutions. Scanner Problems Paper Feeding Problems Scanning Problems Scan Quality Problems Updating Your Scanning Software (Mac OS X only) Uninstalling Your Scanning Software Where To Get Help Epson Technical Support Other Software Technical Support... -
Page 9: Technical Specifications
Home > Technical Specifications Technical Specifications Check here for technical details about your scanner and its accessories. System Requirements Scanner Specifications... -
Page 10: Important Safety Instructions
Home > Safety Important Safety Instructions Restrictions on Copying In this document, warnings, cautions, and notes indicate the following: Warnings must be followed carefully to avoid bodily injury. Cautions must be observed to avoid damage to your equipment. Notes contain important information and useful tips on the operation of this product. Read all these instructions, and follow all warnings and instructions marked on the scanner. -
Page 11: Restrictions On Copying
A note concerning responsible use of copyrighted materials Epson encourages each user to be responsible and respectful of the copyright laws when using any Epson product. While some countries’ laws permit limited copying or reuse of copyrighted material in certain circumstances, those circumstances may not be as broad as some people assume. -
Page 12: Copyright And Trademarks
Seiko Epson Corporation and its affiliates shall not be liable against any damages or problems arising from the use of any options or any consumable products other than those designated as Original Epson Products or Epson Approved Products by Seiko Epson Corporation. - Page 13 Home > Overview of Your Scanner Features Scanning Documents With the Carrier Sheet The carrier sheet enables you to scan documents larger than letter- or A4-size, documents having irregular shape, documents with folds or wrinkles, and photos or valuable originals. For instructions on using this feature, see Scanning Documents With the Carrier Sheet.
-
Page 14: Text Enhancement
Home > Overview of Your Scanner Features Text Enhancement When you scan documents, you can sharpen the text and increase accuracy by using the Text Enhancement feature in Epson Scan. For instructions on using this feature, see Text Enhancement. -
Page 15: Scanner Parts
Home > Guide to the Scanner Parts Scanner Parts User Replacable Parts a. input tray extension b. input tray c. edge guides d. cover lever e. scanner cover f. output tray g. output tray extension a. Power switch b. DC inlet c. - Page 16 a. paper feed roller b. separation pad...
-
Page 17: Control Panel
Home > Guide to the Scanner Parts Control Panel Lights Buttons LCD Screen The scanner has one LCD screen, two indicator lights, and four buttons. Lights The status lights are on the right side of the LCD screen. a. LCD screen b. -
Page 18: Lcd Screen
Note for Mac OS X users: Only the job number is displayed on the LCD screen. To confirm the job settings, check the Button Settings tab in the Epson Event Manager main window. See Adding and Assigning Scan Jobs (Mac OS X) -
Page 19: Loading Documents
Home > Placing Originals in the Scanner Loading Documents Document Specifications Loading Documents Directly Loading Documents With the Carrier Sheet Loading Cards You can load your original documents into the input tray to scan multiple pages quickly. Before loading documents into the input tray, see Document Specifications to make sure your original documents can be loaded. - Page 20 The document has rear carbon coating. * A document with one of these conditions can be loaded if you use the carrier sheet. See Loading Documents With the Carrier Sheet detailed information. Loading Documents Directly for instructions on loading your documents. Loading Documents Directly Caution: Do not feed photographs or valuable originals into the scanner directly.
-
Page 21: Loading Documents With The Carrier Sheet
Slide the paper into the feeder until it meets resistance. Then slide the edge guides over to fit the edge of the paper. To start scanning, see Starting a Scan Using Epson Scan for instructions. Loading Documents With the Carrier Sheet Note: Remove the protective film on both sides of the carrier sheet. -
Page 22: Loading Cards
Slide the carrier sheet into the feeder until it meets resistance. Then slide the edge guides over to fit the edges of the carrier sheet. To start scanning, see Starting a Scan Using Epson Scan for instructions. Note: The carrier sheet should be replaced after every 500 scans* or if scratched or stained. (*Replacement timeline may vary depending on usage.) - Page 23 Slide the edge guides on the input tray all the way outward. Load the card into the input tray with the printed side facing down and the left edge facing into the feeder. Slide the card into the feeder until it meets resistance. Then slide the edge guides over to fit the edges of the card. When you scan plastic cards (such as ID cards), you can load only one card at a time.
- Page 24 Caution: Do not load business cards or plastic cards in landscape orientation. To start scanning using the Epson Scan, see Starting a Scan Using Epson Scan for instructions. To start scanning using Presto! BizCard, see Scanning Business Cards for instructions.
-
Page 25: Starting Scan Using Control Panel
Note for Mac OS X users: Only the job number is displayed on the LCD screen. To confirm the job settings, check the Button Settings tab in the Epson Event Manager main window. See Adding and Assigning Scan Jobs (Mac OS X) - Page 26 Using Another Scanning Program You can use any TWAIN-compliant scanning program to scan with your scanner. You open the program, select Epson Scan and scan. When you are finished scanning, the scanned image opens in your scanning program so you can modify, print, and save it.
- Page 27 Do not select a WIA option for your scanner from the Import or Acquire list; you will not be able to use all the features of your scanner. The Epson Scan window automatically opens. See Scanning Documents Using Epson Scan...
- Page 28 Do one of the following to start Document Capture Pro: Windows 8.x: Navigate to the Apps screen and select Document Capture Pro. Windows (other versions): Click the start button icon or Start > All Programs or Programs > EPSON Software > Document Capture Pro. Note: If you do not already have Document Capture Pro, you can obtain it online.
- Page 29 Click the Scan icon. You see a window like this:...
- Page 30 If you want to select detailed scan settings, click Detailed Settings. Select any scan settings you want to use and click OK. Note: When you select this option, Epson Scan starts. See Scanning Documents Using Epson Scan for details on selecting settings in the Epson Scan window.
- Page 31 You may need to click the arrow next to the icons in order to see all of them. The available icons may vary, depending on the software version you are using. Select settings as necessary, then click OK, Send, or Print to save the scanned file.
- Page 32 Scanning Documents Using Epson Scan When you start Epson Scan, the following window appears. To scan documents, follow the steps below. Load your documents (up to 75 pages) into the input tray with the printed side facing down and the top edge facing into the feeder.
- Page 33 You can save all of the selected settings as a group of custom settings with a Name, and later apply these custom settings to scanning. The custom settings are also available for Epson Event Manager. See Epson Scan Help for details.
- Page 34 The File Save Settings window appears. Note: If you start Epson Scan from a TWAIN-compliant program, the File Save Settings icon does not appear. In the File Save Settings window, specify the file folder in which you want to save your scanned image.
- Page 35 Multi-TIFF (*.tif) A TIFF format where multiple pages are saved to the same file. You can also edit the scanned images before saving them. See Epson Scan Help for details. To open Multi-TIFF files, you need a program that supports it.
- Page 36 Open image folder after scanning Select this option if you want Windows Explorer or the Macintosh Finder to automatically open the folder where your scanned image file is saved when Epson Scan finishes scanning. Show Add Page dialog after scanning Select this option if you want the Add Page Confirmation window to appear automatically after each scan to PDF or multi-Tiff.
-
Page 37: Selecting The Scan Resolution
For example, if the resolution is 300 dpi, but you will increase the image size to 200%, change the resolution setting to 600 dpi. Selecting the Resolution Using Epson Scan You can select the resolution you want at any time. -
Page 38: Adjusting The Color And Other Image Settings
Adjusting the Color and Other Image Settings Once you have selected your source settings, you can modify the image quality, if necessary. Epson Scan offers a variety of settings for improving color, sharpness, contrast, and other aspects affecting image quality. - Page 39 The table below describes the settings available. For details on adjusting these settings, see Epson Scan Help. Setting Description Brightness Adjusts the overall image lightness and darkness. This setting is available when the Image Type is set to Auto, Color, or Grayscale, or when the Image Type is set to Black &...
-
Page 40: Finishing The Scan
What happens after you scan depends on how you started your scan. If you started your scan by running Epson Scan from the EPSON Scan icon, you see the File Save Settings window. This lets you select the name and location of your saved scan files. See Selecting File Save Settings Using Epson Scan for details. - Page 41 If your document is larger than letter- or A4-size, has an irregular shape, has folds or wrinkles, or is a photo or valuable original you can scan it using the carrier sheet. You can purchase additional carrier sheets from an Epson authorized reseller. To find the nearest reseller, call 800-GO-EPSON (800-463- 7766). Or you can purchase online at http://www.epsonstore.com...
- Page 42 Click OK. Epson Scan scans your document. Note: The carrier sheet should be replaced after every 500 scans* or if scratched or stained. (*Replacement timeline may vary depending on usage.)
- Page 43 Load your documents (up to 75 pages) into the input tray with the printed side facing down and the top edge facing into the feeder. Loading Documents for instructions. Start Epson Scan. See Starting a Scan Using Epson Scan for instructions. Note for Windows users: You can also scan with text enhancement using Document Capture Pro. See...
- Page 44 Click OK. Epson Scan scans your document.
-
Page 45: Scanning To A Pdf File
Start Here sheet, it has already been installed. Note for Mac OS X users: If you do not already have ABBYY FineReader, you can obtain it using Epson Software Updater. See Updating Your Scanning Software (Mac OS X only) for instructions. - Page 46 Click Options. You see the EPSON PDF Plug-in Settings window. To create a searchable PDF file, click the Text tab, select the Create searchable PDF check box, then select your language from the Text Language list.
- Page 47 Note: The searchable PDF function is available for Windows only. The Text Language setting is available only when ABBYY FineReader Sprint is installed. To assign password settings to the PDF file, click the Security tab and select the password settings.
- Page 48 To specify the maximum number of pages that can be included in one PDF file, click the General tab and adjust the Select number to make file setting.
- Page 49 For other settings in the EPSON PDF Plug-in Settings window, see Epson Scan Help for details. Select the settings that match your document and click OK. You return to the File Save Settings window. Make any other file save settings, and click OK. Epson Scan scans your document and displays the window below. Note: If you deselect the Show Add Page dialog after scanning check box in the File Save Settings window, this window does not appear and Epson Scan automatically saves your document.
- Page 50 For further details on the tools in the Editing Page window, see Epson Scan Help. When you have finished editing your pages, click OK. The pages are saved in one PDF file in Pictures, My Pictures, or the location you selected in the File Save Settings window, and you return to the Epson Scan window.
-
Page 51: Using The Scanner As A Copier
Load your documents (up to 75 pages) into the input tray with the printed side facing down and the top edge facing into the feeder. See Loading Documents for instructions. Select Applications > Epson Software > Copy Utility, and double-click the Copy Utility icon. You see a window like this:... - Page 52 Select your scanner from the Scanner list at the top of the window. Select your printer from the Printer list. Click the Source Type box, select an Input Source, select the type of original(s) you are copying, and click OK. See the table below for guidance.
- Page 53 If you want to enlarge or reduce your image(s) as you copy it, click the Copy Size box, select the enlargement/reduction, and click OK. If you are copying a color or black-and-white document, you can improve the definition of text and line art by leaving the Text Enhancement check box checked.
- Page 54 Select the Color Jpeg to E-mail function on the LCD screen. Press the Start button. Epson Scan scans your document and displays the Send File Via E-mail window. Select the e-mail program you use in the Select E-mail Application list.
- Page 55 If you scanned photos and want to resize them, choose an option under Select Photo Size. Note: The box at the bottom of the window displays information about the image file(s) you are attaching to the e-mail message. Click OK. Your e-mail program is opened and any scanned images you selected are attached to a new e-mail message. See your e- mail program Help if you need instructions on sending your e-mail message.
- Page 56 Home > Scanning Special Projects Converting Scanned Documents into Editable Text Windows Mac OS X You can scan a document and convert it into editable text using an Optical Character Recognition (OCR) program, such as ABBYY FineReader. OCR software cannot recognize or has difficulty recognizing the following types of documents or text: Handwritten characters Pages that have been copied from other copies Faxes...
- Page 57 Select the language used in the document you are going to scan as the Document Language setting. Click either the Scan to Other Formats icon or the icon that corresponds with the program you want to scan to. If you see the Select Scanner window, select your product and click OK. Note: Do not select a WIA option for your product;...
- Page 58 Select the type of document you are going to scan. Epson Scan starts in the last scan mode you used. Select your scan settings and click Scan. Your document is scanned and you see the Epson Scan window while your document is converted to editable text.
- Page 59 Click the Save button. The file is saved and then opened in an application associated with the file type you selected, if available on your system.
-
Page 60: Scanning Business Cards
If you are using Presto! BizCard for the first time, you may be prompted to create a new card file before the window appears. If you do not already have Presto! BizCard, you can obtain it using Epson Software Updater. See Updating Your Scanning Software (Mac OS X only) for instructions. - Page 61 Note: If the characters in your text are not recognized very well, you can improve recognition by selecting the Text Enhancement check box or adjusting the Threshold setting. See Adjusting the Color and Other Image Settings instructions. Follow the instructions in Presto! BizCard Help to edit and save your document.
- Page 62 Windows 8.x: Navigate to the Apps screen and select Document Capture Pro. Windows (other versions): Click the start button icon or Start > Programs or All Programs > EPSON Software > Document Capture Pro. You see a window like this:...
- Page 63 Click the Manage Job icon from the toolbar at the top of the window. You see a window showing the current scan job list.. If you want to add a scan job, click Add, enter a name for the new job, select settings as necessary, and click OK. You can now use the new scan job when you scan with Document Capture Pro.
- Page 64 Start button to start the scan. Adding and Assigning Scan Jobs (Mac OS X) You can configure any of the LCD screen menu items to open a job in the Epson Event Manager to make scanning your projects even quicker.
- Page 65 Click the arrow next to a job description, then select a preset job or go to step 4 to create a new job. The preset jobs are listed below. Scan and Save: Epson Scan starts. See Scanning Documents Using Epson Scan for instructions.
- Page 66 Now you can scroll through the LCD screen menu list, select the job you assigned, and press the Start button to start the scan. Note: If you need help using Epson Event Manager, click Help, then Epson Event Manager Help. Assigning a Program With Windows 8, Windows 7, and Windows Vista Do one of the following:...
- Page 67 Click OK. Now whenever you press the Start button, the program you assigned opens. Note: To run a job from the LCD screen menu when the Start button is pressed, Epson Event Manager must be assigned in...
- Page 68 Now whenever you press the Start button, the program you assigned opens. Note: To run a job from the LCD screen menu when the Start button is pressed, Epson Event Manager must be assigned in the Start this program list.
- Page 69 Windows 8.x: Navigate to the Apps screen and select Document Capture Pro. Windows (other versions): Click the start button icon or Start > All Programs or Programs > Epson Software > Document Capture Pro. You see a window like this: Click the Scan icon.
- Page 70 If you want to select detailed scan settings, click Detailed Settings. Select any scan settings you want to use and click OK. Note: When you select this option, Epson Scan starts. See Scanning Documents Using Epson Scan for details on selecting settings in the Epson Scan window.
- Page 71 Note: The settings may vary, depending on the software version you are using. See the Help information in Document Capture Pro for details. Select any other scan settings as necessary, and click Send. Your originals are scanned and uploaded to the indicated server. Note: You can also create a scan job for uploading scanned images to a SharePoint server or a cloud service.
- Page 72 Windows 8.x: Navigate to the Apps screen and select Document Capture Pro. Windows (other versions): Click the start button icon or Start > All Programs or Programs > Epson Software > Document Capture Pro. You see a window like this: Click the Scan icon.
- Page 73 If you want to select detailed scan settings, click Detailed Settings. Select any scan settings you want to use and click OK. Note: When you select this option, Epson Scan starts. See Scanning Documents Using Epson Scan for details on selecting settings in the Epson Scan window.
-
Page 74: Cleaning The Scanner
Home > Maintenance Cleaning the Scanner To keep your scanner operating at its best, clean it periodically using the following procedure. Caution: Do not press the glass surface inside the scanner with any force. Be careful not to scratch or damage the glass surface inside the scanner, and do not use a hard or abrasive brush to clean it. -
Page 75: Opening The Scanner Cover
Home > Maintenance Cleaning Inside the Scanner Opening the Scanner Cover Cleaning the Glass Surface Cleaning the Paper Path Rollers Cleaning the Separation Pad Cleaning the Paper Feed Roller If scanned images have streaks or if scanned documents become dirty, clean inside the scanner. Caution: Do not press the glass surface inside the scanner with any force. -
Page 76: Cleaning The Glass Surface
After opening the scanner cover, see the following sections: Cleaning the Glass Surface Cleaning the Paper Path Rollers Cleaning the Separation Pad Cleaning the Paper Feed Roller When finished cleaning, close the input tray and output tray. Cleaning the Glass Surface Open the scanner cover. -
Page 77: Cleaning The Paper Path Rollers
If the glass surface inside the scanner gets dirty, clean it with a soft, dry, lint-free cloth. If the glass surface is stained with grease or some other hard-to-remove material, use a small amount of glass cleaner with a soft cloth to remove it. Wipe off all remaining liquid. -
Page 78: Cleaning The Separation Pad
Wipe off all remaining liquid with a soft, dry, lint-free cloth. Make sure that the rollers are completely dry before using the scanner. Cleaning the Separation Pad Open the scanner cover. See Opening the Scanner Cover for instructions. Wipe the separation pad downward with a lint-free cloth dampened with water and thoroughly wrung out. Caution: Be careful not to get the cloth caught on the pick spring. - Page 79 Caution: Be careful not to scratch or damage the roller. Wipe off all remaining liquid with a soft, dry, lint-free cloth. Make sure that the roller is completely dry before using the scanner.
-
Page 80: Transporting The Scanner
Home > Maintenance Transporting the Scanner If you need to transport your scanner some distance, carefully prepare and repack it as described below. Turn off the scanner, then unplug the AC adapter cord. Disconnect all the cables from the scanner. Remove all paper from the input tray. -
Page 81: Replacing The Roller Assembly Kit
Replacing the Roller Assembly Kit It is recommended that you replace the parts on the roller assembly kit after every 100,000 scans. Note: You can check the number of scans by starting EPSON Scan Settings and clicking Maintenance. Removal part Part number... - Page 82 Caution: Do not touch the pick spring. Hold the new separation pad holder as shown below. Insert the bottom side of the new separation pad first, then press the hook on the separation pad to attach to the correct position. Press the hook on both sides of the paper feed roller cover, then open the cover.
- Page 83 Slide and remove the installed paper feed roller. Caution: Do not touch the surface of the paper feed roller. Hold the new paper feed roller as shown below. Slide the new paper feed roller onto the spool.
- Page 84 Do not install the paper feed roller in reverse direction. Close the paper feed roller cover, then close the scanner cover. Turn on the scanner. Start EPSON Scan Settings. Then, click Maintenance. Click Reset on the right of the Number of Scans. Click OK.
-
Page 85: Using The Security Slot
Home > Maintenance Using the Security Slot You can use an optional standard security lock with the security slot. To lock the scanner, insert the lock into the back of the scanner and turn the key to lock the scanner. Then, secure the cable and the scanner to a stationary place. See the User’s Guide that came with the security lock for detailed information. -
Page 86: Scanner Problems
If you are using any TWAIN-compliant program, make sure that the correct scanner is selected as the Scanner or Source setting. If you upgraded your computer’s operating system, you need to reinstall Epson Scan. Uninstall Epson Scan as described in Uninstalling Your Scanning Software, then reinstall it as described on the Start Here sheet. - Page 87 Program With Windows 8, Windows 7, and Windows Vista Assigning a Program With Windows Mac OS X: Make sure you are logged on as the user who installed the scanner software. Other users must first start Epson Scanner Monitor in the Applications folder and then press the...
-
Page 88: Paper Feeding Problems
Home > Solving Problems Paper Feeding Problems Paper Jams in the Scanner Double Feed Error (GT-S80 only) Paper Jams in the Scanner If paper jams inside the scanner, follow the steps below to remove jammed paper. Turn off the scanner. Remove all paper from the input tray. - Page 89 Note: Remove any pages remaining inside the scanner. If paper is jammed in the output tray, gently pull the paper out in the direction shown. Close the scanner cover.
- Page 90 Double Feed Error (GT-S80 only) When the double feed error is detected even when the error does not occur, try the following solution: Click Configuration in the Epson Scan window, select the Detect Double Feed check box, then select Standard as the Paper Thickness.
-
Page 91: Scanning Problems
Only Part of the Document is Scanned If your scanned image is not the correct size or only part of your document scanned, open Epson Scan or Document Capture Pro and make sure the Size or Document Size setting is correct. - Page 92 Windows (Other Versions) Click the start button icon or Start > Control Panel > Security or Security Center > Windows Firewall. Click the Exceptions tab, and then click the Add Program button. Note for Windows 7 and Windows Vista: Click Change settings if you cannot find the Exception tab. Select Event Manager from the Programs list, and then click OK.
-
Page 93: Scan Quality Problems
Scanner. If you still have the problem, the glass surface inside the scanner may be scratched. Contact Epson for assistance. Make sure the plastic card that you are scanning does not have shiny surfaces. If you scan plastic cards with shiny surfaces, a line may appear. - Page 94 If you are using Epson Scan, make sure to enable the Embed ICC Profile setting. In the File Save Settings window, select JPEG or TIFF as the Type setting. Click Options, then select the Embed ICC Profile check box. To access the File Save Settings...
- Page 95 Blank Pages Appear in Your Scanned Image If you are using Epson Scan, select the Skip Blank Pages check box in the Configuration window. See Epson Scan Help for details. If you are using Document Capture Pro, select the Skip Blank Page check box.
- Page 96 Solving Problems Updating Your Scanning Software (Mac OS X only) You can use Epson Software Updater to download updates and additional software (if available) for your scanner. Make sure your scanner is connected to your computer before you start the program.
-
Page 97: Uninstalling Your Scanning Software
You may need to uninstall and then reinstall your scanner software to solve certain problems or if you upgrade your operating system. Uninstalling Epson Scan Follow the instructions in the section for your operating system to uninstall Epson Scan. Uninstalling Epson Scan for Windows 8, Windows 7, and Windows Vista Note: You must log on to a Computer Administrator account. - Page 98 Epson support website to uninstall your scanner software as described here. Note: If you find that re-installing your scanner software does not solve a problem, contact Epson for assistance. To download the Uninstaller utility, visit Epson’s support website (U.S.
-
Page 99: Uninstalling Other Epson Applications
Follow the on-screen instructions to uninstall the User’s Guide. Uninstalling the Online User’s Guide for Mac OS X Drag the gts50-s80_el folder and the GT-S50_S80 User’s Guide icon in the Applications/Epson Software/Guide folder into the Trash. Uninstalling Other Epson Applications Follow these steps to uninstall applications you do not need. - Page 100 Epson support website to uninstall your scanner software as described here. Note: If you find that re-installing your scanner software does not solve a problem, contact Epson for assistance. To download the Uninstaller utility, visit Epson’s support website (U.S.
-
Page 101: Epson Technical Support
Days and hours of support are subject to change without notice. Toll or long distance charges may apply. Purchase Accessories You can purchase genuine Epson accessories from an Epson authorized reseller. To find the nearest reseller, call 800-GO-EPSON (800-463- 7766). Or you can purchase online at epsonstore.com... -
Page 102: Other Software Technical Support
Home > Solving Problems Other Software Technical Support ABBYY FineReader (866) 463-7689, abbyy.com, support@abbyyusa.com EMC Captiva ISIS (800) 782-4362 (U.S.), (800) 543-4782 (Canada), emc.com NewSoft Presto! BizCard www.newsoftinc.com, contactus@newsoftinc.com Nuance ScanSoft PaperPort (770) 702-6014, support.nuance.com... -
Page 103: Windows System Requirements
See your system documentation for details.) Note: Epson Scan does not support the UNIX File System (UFS) for Mac OS X. You must install Epson Scan on a disk or in a partition that does not use UFS or Mac OS Extended (Case-sensitive/Journaled.) -
Page 104: Scanner Specifications
Home > Technical Specifications Scanner Specifications General Mechanical Electrical Environmental Interfaces Standards and Approvals Note: Specifications are subject to change without notice. General Scanner type Sheet Feed, one pass duplex A4 color scanner Photoelectric device Color CCD line sensor Effective pixels 5,100 ×... - Page 105 Approx. 10.1 lb (4.6 kg) Electrical Note: Check the label on the AC adapter or on the back of the scanner for voltage information. Scanner GT-S80 GT-S50 Rated voltage DC 24.0 V Rated input current 2.0 A Power consumption Operating mode...
-
Page 106: Standards And Approvals
Interfaces USB Interface Interface type Universal Serial Bus Specification Revision 2.0 Electrical standard Full Speed mode (12 Mbits per second) and Hi-Speed mode (480 Mbits per second) of Universal Serial Bus Specification Revision 2.0. Connector type One Type B port Standards and Approvals Scanner FCC Part 15 Subpart B Class B...
Need help?
Do you have a question about the GT-S50 and is the answer not in the manual?
Questions and answers