Advertisement
Quick Links
P P
i i
v v
P P
i i
v v
H H
e e
d d
H H
e e
d d
INSTRUCTION MANUAL
DATE CODE
BEFORE RETURNING THIS PRODUCT
FOR ANY REASON PLEASE CALL
1-800-54-HOW-TO (544-6986)
IF YOU SHOULD EXPERIENCE A PROBLEM
WITH YOUR BLACK & DECKER PRODUCT,
CALL 1-800-54-HOW-TO (544-6986)
BEFORE YOU CALL, HAVE THE FOLLOWING INFORMATION AVAILABLE, CATALOG No., TYPE No.,
AND DATE CODE. IN MOST CASES, A BLACK & DECKER REPRESENTATIVE CAN RESOLVE YOUR
PROBLEM OVER THE PHONE. IF YOU HAVE A SUGGESTION OR
COMMENT, GIVE US A CALL. YOUR FEEDBACK IS VITAL TO BLACK & DECKER.
KEY INFORMATION YOU SHOULD KNOW:
• To insure extension cord does not come loose secure as shown for proper attachment.
• In order to operate the trimmer, the lock button must first be pushed forward
(see figure 5) then squeeze trigger.
SAVE THIS MANUAL FOR FUTURE REFERENCE.
VEA EL ESPAÑOL EN LA CONTRAPORTADA.
INSTRUCTIVO DE OPERACIÓN, CENTROS DE SERVICIO Y
PÓLIZA DE GARANTÍA. ADVERTENCIA: LÉASE ESTE
INSTRUCTIVO ANTES DE USAR EL PRODUCTO.
CAT. No. HH2210, HH2410
FORM NO. 589122-00
Copyright © 2004 Black & Decker
WARNING: IMPORTANT SAFETY WARNINGS AND INSTRUCTIONS
TO REDUCE RISK OF INJURY:
• Before any use, be sure everyone using this tool reads and understands all safety instructions
and other information contained in this manual.
• Save these instructions and review frequently prior to use and in instructing others.
WARNING: This product contains chemicals, including lead, known to the State of California
to cause cancer, and birth defects or other reproductive harm. Wash hands after
handling.
CAUTION: Wear appropriate personal hearing protection during use. Under some conditions
and duration of use, noise from this product may contribute to hearing loss.
WARNING: When using electric gardening appliances, basic safety precautions should
always be followed to reduce risk of fire, electric shock, and personal injury,
including the following:
READ AND UNDERSTAND ALL INSTRUCTIONS.
GENERAL SAFETY WARNINGS AND INSTRUCTIONS FOR ALL TOOLS
• AVOID DANGEROUS ENVIRONMENT - Don't use hedge trimmers in damp or wet locations.
• DON'T USE IN RAIN.
• KEEP CHILDREN AWAY - All visitors should be kept at a safe distance from the work area.
• DRESS PROPERLY - Don't wear loose clothing or jewelry. They can be caught in moving parts. Use of
rubber gloves and substantial footwear is recommended when working outdoors. Wear protective hair
covering to contain long hair.
• ALWAYS WEAR EYE AND RESPIRATORY PROTECTION.
• GROUND FAULT CIRCUIT INTERRUPTER (GFCI) protection should be provided on the circuit(s) or outlet(s) to
be used for the hedge trimmer. Receptacles are available having built-in GFCI protection and may be used
for this measure of safety.
• USE RIGHT APPLIANCE - Do not use appliance for any job except that for which it is intended.
WARNING:
To reduce the risk of electric shock use only with an extension cord intended for outdoor use,
such as SW-A, S0W-A, STW-A, STOW-A, SJW-A, SJOW-A, SJTW-A or SJTOW-A.
• EXTENSION CORD. Make sure your extension cord is in good condition. When using an extension cord be
sure it is heavy enough to carry the current your product will draw. An undersized extension cord will cause
a drop in line voltage resulting in loss of power and overheating. The following table shows the correct size
to use depending on cord length and nameplate ampere rating. If in doubt, use the next heavier gage. The
smaller the gage number, the heavier the cord.
Volts
120V
240V
Ampere Rating
More Not more
Than Than
0
-
6
6
-
10
10
-
12
12
-
16
• AVOID UNINTENTIONAL STARTING - Don't carry plugged in hedge trimmer with finger on switch. Be sure
switch is off when plugging in.
• DON'T ABUSE CORD - Never carry hedge trimmer by cord or yank it to disconnect from receptacle. Keep
cord from heat, oil, and sharp edges.
DANGER: Risk of cut. Keep hands away from blades. Keep both hands on handles when power is on.
• DO NOT ATTEMPT to remove cut material or hold material to be cut when blades are moving. Make sure
trimmer switch is off when clearing jammed material from blades. Do not grasp the exposed cutting blades
or cutting edges when picking up or holding the hedge trimmer.
CAUTION: Blades coast after turn off.
• DON'T FORCE HEDGE TRIMMER - It will do the job better and with less likelihood of a risk of injury at the
rate for which it was designed.
• DON'T OVERREACH - Keep proper footing and balance at all times.
• STAY ALERT - Watch what you are doing. Use common sense. Do not operate hedge trimmer when you are tired.
• DISCONNECT HEDGE TRIMMER from the power supply when not in use or when servicing or cleaning.
• STORE IDLE HEDGE TRIMMER INDOORS - When not in use, hedge trimmer should be stored indoors in a
dry and high or locked-up place- out of reach of children.
o o
t t
H H
a a
n n
d d
l l
e e
o o
t t
H H
a a
n n
d d
l l
e e
g g
e e
T T
r r
i i
m m
m m
e e
r r
g g
e e
T T
r r
i i
m m
m m
e e
r r
Catalog No. HH2210,
HH2410
Printed In Mexico
Minimum Gage for Cord Sets
Total Length of Cord in Feet
0-25
26-50
51-100 101-150
0-50
51-100 101-200 201-300
American Wire Gage
18
16
16
14
18
16
14
12
16
16
14
12
14
12
Not Recommended
• MAINTAIN HEDGE TRIMMER WITH CARE - Keep cutting blades sharp and clean for best performance and
to reduce the risk of injury. Inspect extension cord periodically and replace if damaged. Keep handles dry,
clean and free from oil and grease.
• CHECK DAMAGED PARTS - before further use of the hedge trimmer, a guard or other part that is damaged
should be carefully checked to determine that it will operate properly and perform its intended function.
Check for alignment of moving parts, binding of moving parts, breakage of parts, mounting and any other
condition that may affect its operation. A guard or other part that is damaged should be properly repaired
or replaced by an authorized service center unless otherwise indicated elsewhere in this manual.
Double insulated tools are constructed throughout with two separate layers of electrical insulation or one
double thickness of insulation between you and the tool's electrical system. Tools built with this insulation
system are not intended to be grounded. As a result, your tool is equipped with a two prong plug which
permits you to use extension cords without concern for maintaining a ground connection.
NOTE: Double insulation does not take the place of normal safety precautions when operating this tool. The
insulation system is for added protection against injury resulting from a possible electrical insulation failure
within the tool.
Replacement parts: When servicing all tools, USE IDENTICAL REPLACEMENT PARTS. Repair or replace
damaged cords.
SAFETY WARNINGS AND INSTRUCTIONS: POLARIZED PLUGS
To reduce the risk of electric shock, this equipment has a polarized plug (one blade is wider than the other).
This equipment must be used with a suitable polarized outdoor 3 wire extension cord. Polarized connections
will fit together only one way. Make sure that the receptacle end of the extension cord has large and small
blade slot widths. If the plug does not fit fully into the extension cord, reverse the plug. If it still does not fit,
obtain a suitable extension cord. If the extension cord does not fit fully into the outlet, contact a qualified
electrician to install the proper outlet. Do not change the tool plug or extension cord in any way.
SECURING POWER SUPPLY CORD
Secure the power supply cord and a suitable extension cord as shown.
WARNING: Some dust created by this product contains chemicals known to the State of California to
cause cancer, birth defects or other reproductive harm. Some examples of these chemicals
are:
To reduce your exposure to these chemicals, wear approved safety equipment such as
dust masks that are specially designed to filter out microscopic particles.
1
3
(SEPT. '04)
5
7
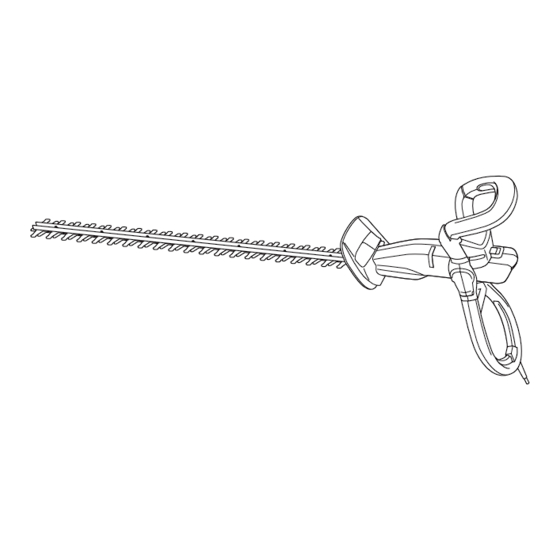
Features (Fig. 1)
This tool includes some or all of the following features.
1. On/off switch
4. Handle release button
This hedgetrimmer has the following features for your benefit:
• Rotating handle for comfortable cutting.
• Pre hardened steel blades for improved cutting.
• Dual action blades for reduced vibration.
Handle Rotation
Changing the position of the rotating handle
WARNING: Before changing the position of the rotating handle, make sure that the tool is switched off
and unplugged.
Rotating the handle into the right-angle position. Your hedgetrimmer will arrive with the handle in the
forward position. To rotate the handle, proceed as follows:
1. Support the underside of the unit with one hand keeping hand and fingers behind the guard. (Fig. 2)
2. Press the release button (A) with your thumb and rotate the handle (B) backward with your other hand.
3. Move the handle fully into the right-angle position. Make sure the handle clicks and locks into place. (Fig. 3)
Rotating the handle into the forward position. To move the handle from the right-angle into the forward
position, proceed as follows:
1. Support the underside of the unit with one hand.
2. Press the release button (A) with your thumb and rotate the handle (B) forward with your other hand.
(Fig. 4)
3. Move the handle fully into the forward position. Make sure the handle clicks and locks into place.
4. Insert the plug into an extension cord.
WARNING: The extension cord must be suitable for outdoor use. When using a cable reel, always
unwind the cable completely.
WARNING: Let the tool work at its own pace. Do not overload.
• Carefully guide the cord in order to avoid accidentally cutting it.
SAFETY WARNINGS: DOUBLE INSULATION
SPECIFIC SAFETY WARNING
• compounds in fertilizers
• compounds in insecticides, herbicides and pesticides
• arsenic and chromium from chemically treated lumber
SAVE THESE INSTRUCTIONS FOR FUTURE USE
B
A
CLICK
DÉCLIC
CLIC
6
8
7A
OPERATING INSTRUCTIONS
2. Lock off buttons
5. Blade
2
A B
4
B
A
6A
6B
3. Secondary handle
Advertisement

Related Manuals for Black & Decker HH2210


Summary of Contents for Black & Decker HH2210
- Page 1 VEA EL ESPAÑOL EN LA CONTRAPORTADA. INSTRUCTIVO DE OPERACIÓN, CENTROS DE SERVICIO Y PÓLIZA DE GARANTÍA. ADVERTENCIA: LÉASE ESTE INSTRUCTIVO ANTES DE USAR EL PRODUCTO. CAT. No. HH2210, HH2410 FORM NO. 589122-00 (SEPT. ‘04) Copyright © 2004 Black & Decker...
- Page 2 être raccordée qu’à une prise polarisée trifilaire et ce, HH2210, HH2410 dans un seul sens; on doit l’inverser si on est incapable de l’enfoncer complètement. Si la fiche ne s’adapte toujours pas, on doit faire appel à...
- Page 3 AVERTISSEMENT : Avant de changer la position de la poignée rotative, on doit s’assurer que l’outil est mis hors tension et qu’il est débranché de la source d’alimentation électrique. HH2210, HH2410 Position à angle droit : Lors de la réception de l’outil, la poignée est placée en position avant. Pour la faire tourner, on doit procéder comme suit :...
- Page 4 60 Hz Lo más efectivo es un movimiento de barrido amplio, haciendo penetrar los dientes de la cuchilla en las HH2210, HH2410 ramitas. Una leve inclinación de la cuchilla hacia abajo, en la dirección del movimiento, da el mejor Potencia nominal: 300W resultado al cortar.
Need help?
Do you have a question about the HH2210 and is the answer not in the manual?
Questions and answers