Table of Contents

Related Manuals for Sea-doo ISLANDIA


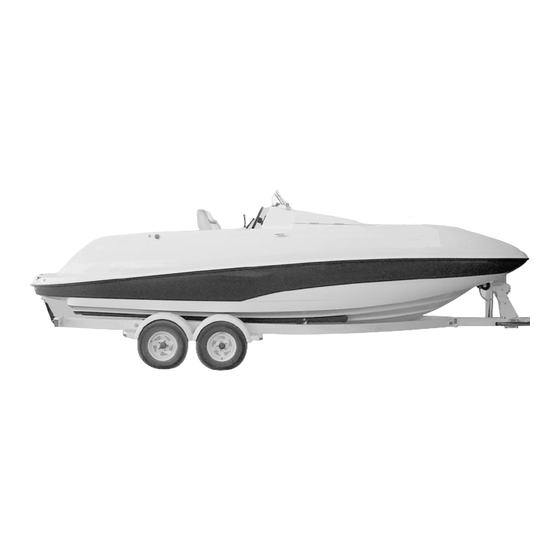
Summary of Contents for Sea-doo ISLANDIA
- Page 2 The following trademarks are the property of Bombardier Inc. and/or its subsidiaries: ® SEA-DOO BOMBARDIER-ROTAX ® ® BOMBARDIER LUBE Sea-Doo Synthetic Grease Printed in Canada (lmo2001-003a.fm PS) ® *Trademarks of Bombardier Inc. and/or its subsidiaries. © 2002 Bombardier Inc. All rights reserved.
- Page 3 Doin’it on your new Sea-Doo Sport Boat Congratulations, you are now the proud owner of a Sea-Doo sport boat. Whether you are an experienced boater or are new to the sport of boating, we ask you to take the time to view the Videocassette provided with the craft, to read this Op- erator’s Guide, the Safety Handbook and on-product warning/caution labels and...
-
Page 4: Table Of Contents
SAFETY MEASURES ............... General ....................Operation ....................Maintenance .................... LIST OF DISTRIBUTORS ............. BOMBARDIER LIMITED WARRANTY NORTH AMERICA: ® SEA-DOO SPORT BOAT ............10 BOMBARDIER INTERNATIONAL LIMITED WARRANTY: SEA-DOO ® SPORT BOAT ............12 REGISTRATION NUMBER LOCATION ......... 14 LOCATION OF THE IMPORTANT LABELS ........15 IDENTIFICATION NUMBERS ............ - Page 5 20) Tachometer..................21) Speedometer ..................22) Windscreen..................23) Grab Handle(s) .................. 24) Rear Grab Handle(s) ................25) Front/Rear Swim Platform ..............26) Sun Deck/Rear Seat/Engine Cover............ 27) Front Seat(s)..................28) Bow Seat(s)..................29) Cup Holders ..................30) Deck Storage Compartment ............. 31) Rear Storage Compartment ..............
- Page 6 65) Radio ....................66) Speaker(s) ..................67) Transom Doors ................. 68) Fire Port .................... 69) Shower....................70) Water Bypass System ..............71) Main Battery Cut-Off Switch............. 72) Bimini Top (not shown) ..............FUEL, WATER AND LUBRICATION ..........56 Fueling Procedure..................Recommended Fuel ................
- Page 7 POST-OPERATION CARE ............67 General Care.................... Additional Care for Foul Water or Salt Water .......... SPECIAL PROCEDURE ..............68 Engine Overheating ................. Potable Water System Disinfection ............Jet Pump Water Intake and Impeller Cleaning ........Capsized Boat..................Submerged Boat ..................Low-Charge Battery Condition ..............
-
Page 8: Foreword
CAUTION: Denotes an instruction which, if not followed, may damage A Sea-Doo Sport Boat Shop Manual the craft and/or components. can be obtained for complete service, maintenance and more repair informa- NOTE: Indicates supplementary infor- tion. -
Page 9: Safety Measures
SAFETY MEASURES General Operation To fully appreciate the pleasures, Always perform the pre-operation enjoyment and excitement of boat- checks as specified in this guide. ing there are some basic rules that Always keep in mind that directional should be observed and followed by control is reduced with decreasing any boater. -
Page 10: Maintenance
Bombar- spare fuel or inflammable liquids in dier. If required, contact your autho- any of the storage or engine com- rized Sea-Doo dealer for further ser- partments. vicing information. Operate your craft prudently and have fun. Don’t forget that all per- sons must assist other boaters in a case of emergency. -
Page 11: List Of Distributors
Nunavut Newfoundland If your SEA-DOO Sport Boat requires warranty service, you should take it to any authorized SEA-DOO Sport Boat dealer. Be sure to bring your warranty registra- tion card or other valid proof of the original date of purchase. If a question or problem arises regarding warranty, first contact the service manager or owner of the SEA-DOO Sport Boat dealership. -
Page 12: Bombardier Limited Warranty North America: Sea-Doo Sport Boat
SEA-DOO SPORT BOAT dealer the SEA-DOO Warranty Registration Card or a proof of purchase of the NEW and UNUSED SEA-DOO SPORT BOAT and must sign the repair/work order prior to the start of the repair in order to validate a warranty repair. - Page 13 SPORT BOAT sold while this warranty is in effect. 6. TRANSFER If the customer sells the SEA-DOO SPORT BOAT guaranteed under the present, he shall assign and transfer this warranty, which shall be valid for the rest of the relevant PERIOD as defined in section 1 hereinabove, to the new customer.
-
Page 14: Bombardier International Limited Warranty: Sea-Doo Sport Boat
SEA-DOO SPORT BOAT dealer the SEA-DOO Warranty Registration Card or a proof of purchase of the NEW and UNUSED SEA-DOO SPORT BOAT and must sign the repair/work order prior to the start of the repair in order to validate a warranty repair. - Page 15 BOMBARDIER or any other person. Every SEA-DOO SPORT BOAT is sold with the English version of this warranty. Some authorized SEA-DOO International Distributor may elect to translate this warranty into local language, it is then understood and agreed that in the event of any discrepancies or incon- sistencies between the two versions, the English version shall prevail.
-
Page 16: Registration Number Location
REGISTRATION NUMBER LOCATION All craft are required by federal law to be registered and legally numbered. Due to space availability for proper display of registration number, refer to the following illustration for location. The registration number should appear on each side of the craft. -
Page 17: Location Of The Important Labels
LOCATION OF THE IMPORTANT LABELS Please read the following labels carefully before operating this craft. F14L02N... - Page 18 Label 1 F00L30L Label 2 Label 5 F04LADY F13L0GY Label 6 Label 3 F04LAEY Label 7 F13L0EY TYPICAL — REFER TO ACTUAL LABEL ON CRAFT Label 4 F04LAPY F04LALY...
- Page 19 Label 8 Label 12 F14L2AY F04LAVY Label 9 Label 13 F14L2BY Label 14 F00L2IY Label 10 F14L2DY Label 15 F14L28Y F14L2EY Label 11 F14L29Y...
-
Page 20: Identification Numbers
IDENTIFICATION NUMBERS The main components of the craft (engine and hull) are identified by different serial numbers. It may sometimes become necessary to locate these numbers for warranty purposes or to trace the craft in the event of theft. Hull The Hull Identification Number (H.I.N.) is located on the right side of the transom. -
Page 21: Controls, Components And Instruments Location
CONTROLS, COMPONENTS AND INSTRUMENTS LOCATION Cockpit 16 15 13 19 10 8 9 14 F14L2FL... -
Page 22: Overview
Overview 25 43 44 45 F14L3CL... -
Page 23: Front View
Front View 23 35 23 36 F14L06L... -
Page 24: Rear View
Rear View 54-55 53 56 F14L03M REAR VIEW... - Page 25 1. Safety Lanyard 36. Boarding Lights 2. Steering Wheel 37. Engine Compartment Light 3. Throttle Lever 38. Navigation Lights 4. Shift Lever 39. Removable Stern Light (not shown) 5. Ignition Switch 40. Deck Lights 6. 12-Volts Accessory Jack 41. Changing Room Ceiling Light 7.
-
Page 26: Controls, Components And Instrument Functions
CONTROLS, COMPONENTS AND INSTRUMENT FUNCTIONS 1) Safety Lanyard WARNING (engine cut-out switch) Do not lubricate the safety lanyard The safety lanyard cap should be se- switch. curely snapped onto its switch to be fully operational. WARNING Pulling the safety lanyard cap from the switch stops the engine operation. -
Page 27: Shift Lever
NOTE: To ease shifter use, line up the shifter arrow with the appropriate dot (Forward/Neutral/Reverse). F09L3TY TYPICAL F10L0BY 1. Increase speed TYPICAL 2. Decrease speed 1. Dots besides shifting position 2. Arrow on shifter 4) Shift Lever A 3-position lever: WARNING –... -
Page 28: Ignition Switch
5) Ignition Switch Lift protection cap to expose jack. CAUTION: Using the accessory jack for a prolonged time without engine running may discharge the battery. CAUTION: Close protection cap when jack is not in use to protect against weather inclemency. 7) Navigation Light Switch F14H04Y TYPICAL... -
Page 29: Docking Light Switch
8) Docking Light Switch 10) Engine Compartment Light Switch F00H1EY F00H1GY A 2-position ON/OFF push type switch. A 2-position ON/OFF push type switch. Lights may be operated without the safety lanyard on its switch. CAUTION: Using the engine com- partment light for a prolonged time CAUTION: Using the docking lights when the engine is not running will for a prolonged time when the en-... -
Page 30: Bilge Air Blower Switch
NOTE: The bilge pump may be operat- CAUTION: Using the bilge blower ed without the safety lanyard on its for a prolonged time when the en- switch. gine is not running will discharge the battery. CAUTION: Ensure to always turn pump OFF when bilge is dry or be- Blower should be turned off during fore operating the engine above... -
Page 31: Low-Fuel Warning System Switch (If So Equipped)
15) Low-Fuel Warning 16) Low-Battery Warning System Switch System Switch (if so equipped) F00H1OY F00H1LY A 2-position ON/OFF push type switch. A 2-position push type switch. This system is activated whenever the main battery cut-off switch is ON, and When the fuel tank level is low, a beep- will monitor the charge level of the bat- er will sound and the pilot lamp on the tery currently being used (see main... - Page 32 BATTERY SWITCH NOT PRESSED PRESSED Engine • LED will continue to flash for 5 • LED will stay on for 5 minutes minutes. with buzzer off. • Buzzer will continue to sound for • Every 30 seconds buzzer will 5 minutes. come on and the LED will go off for 1 second as a reminder.
-
Page 33: Fuel Gauge/Low Oil Level Pilot Lamp And Beeper
17) Fuel Gauge/Low Oil 18) Fountain Pump Switch Level Pilot Lamp and Beeper Fuel Gauge Located in dashboard, the analog gauge continuously indicates the amount of fuel in fuel tank when engine is running. The gauge is illuminated whenever the navigation lights are used. -
Page 34: Main Water Pump Switch
19) Main Water Pump Switch F10L21Y TYPICAL 1. Tachometer 21) Speedometer F00H1NY Analog speedometer indicates the speed of the craft in miles per hour A 2-position ON/OFF push type switch. (MPH) and kilometers per hour (km/h). Activate main water pump to supply The gauge is illuminated whenever the potable water to sink faucet, shower navigation lights are used. -
Page 35: Grab Handle(S)
23) Grab Handle(s) 26) Sun Deck/Rear Seat/ Engine Cover Provide a handhold for the passen- gers. Sun Deck CAUTION: Never use the grab han- dles to pull anything or to lift the craft. Refer to components location illustra- tions at the beginning of this section for grab handles location. -
Page 36: Front Seat(S)
Engine Cover Engine cover opening procedure is covered hereinafter. Refer to Rear Storage Compartment (item 31). 27) Front Seat(s) Each passenger should be seated while underway. WARNING Allow no one to sit on edge of craft or stand up while in opera- tion. -
Page 37: Bow Seat(S)
Driver Seat Forward and Backward Adjustment Swivel Driver seat is adjustable forward and backward. Driver seat can swivel backward. With this feature, the driver seat can be Push lever to unlock seat. Move seat used as a complement to the rear seat, at the desired position. -
Page 38: Cup Holders
Bow Seat Storage To reinstall seat, ensure to position L- Compartment bracket first then push seat down to snap it. F14L0MY PORT SIDE — LIFT THE PULL SEAT TO GAIN ACCESS TO THIS STORAGE F14L0OY COMPARTMENT 1. Position L-bracket first 29) Cup Holders Convenient locations for non-alcoholic beverages. -
Page 39: Deck Storage Compartment
30) Deck Storage WARNING Compartment Never operate the craft with the The deck storage compartment is a storage compartment cover open. convenient location for water-skis, paddles, anchor and rope, etc. 31) Rear Storage Compartment Convenient rear storage location to be used to carry large personal articles. -
Page 40: Rear Side Storage Compartment
32) Rear Side Storage 33) Glovebox Compartment Convenient lockable storage location to be used to carry small personal arti- Convenient lockable storage location cles. to be used to carry fire extinguisher, fishing rods, ski post (if so equipped), stern light, etc. WARNING Never leave any heavy or loose breakable objects in the storage... -
Page 41: Docking Lights
36) Boarding Lights Stern Eyelets Allow a rope with a hook, a close end Convenient lights that can be used be- or an open end to be attached. tween sunset and sunrise to assist passengers when boarding. See Boarding Light Switch (item 9). F14L03Y TYPICAL F14L0TZ... -
Page 42: Removable Stern Light
Installation – Lift connector cap. – Insert post in connector hole. En- sure to align hole keyway with post screw head. – Firmly push downward to engage terminals. – Push lock ring downward. Turn until locked. It may be necessary to F14L0VY slightly turn it to allow its insertion 1. -
Page 43: Deck Lights
CAUTION: Ensure dielectric grease CAUTION: Using the changing room is present in connector area of light light for a prolonged time when the to prevent corrosion. engine is not running will discharge the battery. 40) Deck Lights 42) Deck Convenient lights to use between sun- set and sunrise. -
Page 44: Fountain Jet
44) Fountain Jet Convenient water fountain for passen- gers relaxation. F14L07Z ADD WATER 1. Maximum specified water level NOTE: The fountain will not operate properly if the water level in the sump is too high. F14L0ZY FOUNTAIN To Activate Fountain Add water into fountain sump. -
Page 45: Wash Down Valve
45) Wash Down Valve This valve supplies water to fountain sump and footwell. The valve can also be used to attach a garden hose which may be used to rinse the craft’s deck. WARNING Splashed water will make the deck slippier than usual. -
Page 46: Table
F14L17Y TURN VALVE TO THIS POSITION F14L19Y TABLE PROPERLY INSTALLED WARNING Do not operate craft with table in- stalled. Reinstall black plastic cap in the table socket and properly store table and its post back in rear side storage compart- ment when table is not being used. -
Page 47: Fuel Tank Vent
WARNING Never use a lit match or open flame to check fuel level. 48) Fuel Tank Vent It allows fuel vapors and pressure to escape from fuel tank. WARNING Never use a lit match or open flame close to vent. Follow the Fu- F14L13Y eling Procedure instructions in the USE FUEL TANK CAP KEY... -
Page 48: Main Oil Reservoir Cap
49) Main Oil Reservoir Cap 50) Potable Water Tank Open the engine cover to expose the oil cap. The cap is located under the engine cover. F14L1AY PUSH F10L23Y MAIN OIL RESERVOIR CAP To add injection oil in the reservoir, un- screw the cap counterclockwise. -
Page 49: Flushing Connector
51) Flushing Connector 54) Jet Pump Water Intake Use this connector to plug a garden The water is drawn up by the impeller hose when engine cooling system through this opening. It minimizes en- flushing is required. try of foreign objects into the propul- sion system. -
Page 50: Retractable Ladder(S)
58) Retractable Ladder(s) WARNING Engine should be OFF when using ladder. Keep limbs away from jet or intake grate. Stay on center of the ladder. Only one person at the time on the ladder. Never use the ladder for pulling, towing, diving or jumping, boarding a craft that is out of water or any other purpose other than a ladder. -
Page 51: Convenience Center
60) Convenience Center CAUTION: In order to avoid damage, maximum load on lower storage tray must not exceed 27 kg (60 lb). To Use Sink Faucet F14L1KY F14L1MY CONVENIENCE CENTER INSTALL FAUCET TUBE 1. Food preparation area 2. Sink 3. Faucet 4. -
Page 52: Changing Room With Toilet
F14L1NY OPEN FAUCET VALVE The pump consumes power only F14L1PY when water is being discharged. OPEN ZIPPER TO GAIN ACCESS TO CAUTION: Always remove faucet tube CHANGING ROOM AND TOILET before installing mooring cover. 1. Zipper 61) Changing Room with WARNING Toilet Changing room should never be... -
Page 53: Fuses
Toilet Paper Holder F14L2IY PULL SNAP-BUTTONS F14L1RY LIFT COVER THEN INSERT PAPER ROLL Fuses in Engine Compartment These fuses are located on starboard 63) Fuses side of engine compartment. Fuse Block at Helm Location Refer to MAINTENANCE section for Open changing room as described in more details. -
Page 54: Radio
CAUTION: Ski post will not float if WARNING dropped in the water. Riding when pulling a tub, skier or wakeboarder makes the craft han- dle differently and require greater skill. Unless absolutely necessary, do not make tight, sharp turns. Keep a safe distance from the docks, other swimmers, craft or objects. -
Page 55: Speaker(S)
66) Speaker(s) 68) Fire Port F14L21Y F14L1ZY IN CASE OF ENGINE COMPARTMENT FIRE, TYPICAL — REFER TO SUPPLIER UNSCREW CAP THEN INSERT FIRE INSTRUCTIONS EXTINGUISHER 1. Port front speaker 69) Shower 67) Transom Doors Convenient telephone shower con- Convenient lockable door to prevent nected to craft potable water system. -
Page 56: Water Bypass System
70) Water Bypass System At idle speed, there will not be a water flow through this outlet. When engine is running above idle speed, water must flow through this hole. This allows air in engine water jacket to escape. F14L2JY REMOVE PROTECTIVE CAP F14L25Y 1. -
Page 57: Main Battery Cut-Off Switch
71) Main Battery Cut-Off Switch The switch is located near driver seat on the starboard side. It is provided to allow a complete cut-out of the electri- cal system. F14L2MY When in OFF position, ALL electrical equipments and electronics will not be powered and not working. -
Page 58: Fuel, Water And Lubrication
FUEL, WATER AND LUBRICATION Recommended Fuel CAUTION: Scrupulously follow the instructions of this section. Failure Use regular unleaded gasoline with 87 to do so may reduce the engine’s life octane (Ron + Mon/2) specification. and/or performance. NOTE: This craft features an oil injec- Fueling Procedure tion system which does not require manual fuel/oil mixing. -
Page 59: Engine Mounted Oil Reservoir Level
CAUTION: Always maintain a suffi- cient amount of oil in the oil reser- voir. Check and refill every time you refuel. Do not overfill. If the engine runs out of oil, severe engine dam- age will occur. If the oil reservoir is found almost empty, refer to an au- thorized dealer to have the oil injec- tion system inspected. -
Page 60: Break-In Period
10-Hour Inspection It is highly recommended that after the first 10 hours of operation, the craft be checked by an authorized Sea-Doo dealer. This inspection will also provide the opportunity to discuss any unanswered questions you may have encountered during the first hours of operation. -
Page 61: Pre-Operation Checks
PRE-OPERATION CHECKS WARNING The pre-operation check is very important prior to operating the vehicle. Always check the proper operation of critical controls, safety features and mechanical components before starting. If not done as specified here, se- vere injury or death might occur. Bring all safety equipment required by local laws. -
Page 62: Safety Lanyard And Ignition Switch
Should any leak or gasoline odor be present, do not start the engine. Refer to M Jet Drive Operator’s Guide. Consult an authorized Sea-Doo dealer before use. Bilge Should water be present in the bilge, Steering System... -
Page 63: Throttle System
Throttle System Check throttle lever once for free and smooth operation. NOTE: To activate throttle lever, shift lever must be in forward or reverse po- sition. WARNING Check throttle lever operation be- fore starting the engine. Shifter System Check reverse gate operation for free movement. -
Page 64: Operating Instructions
– Remove sink faucet tube. refer to an authorized Sea-Doo – Close bimini top. dealer. – A SEA-DOO cover can protect the craft, particularly before driving on Launching/Loading dirt roads, to prevent dirt entry through the air intake opening(s). - Page 65 Shift Lever FORWARD The shift lever should be in the forward position in order for the craft to ad- vance. F10L26Y TYPICAL 1. Reverse gate in middle position REVERSE F10L24Y To obtain reverse, pull shift lever com- TYPICAL pletely. The reverse gate will be in 1.
-
Page 66: Boarding From A Dock
NOTE: To obtain maximum efficiency A craft needs some throttle to turn. and control from the reverse, increase Practice in a safe area applying the engine speed to slightly above idle. throttle and turning away from an Too much RPM will create water tur- imaginary object. -
Page 67: Boarding From The Water
Boarding from the Water WARNING WARNING Bilge blower must be turned off above idle speed. Inexperienced riders should practice how to get aboard close to shore WARNING first before venturing into deep water. Do not touch electrical parts or jet pump area when engine is run- WARNING ning. -
Page 68: Stopping/Docking
Stopping/Docking The craft is slowed by water drag. The stopping distance will vary depending on the craft size, weight, speed, water surface condition, presence and direc- tion of wind and current. The operator should become familiar- ized with the stopping distance under different conditions. -
Page 69: Post-Operation Care
POST-OPERATION CARE Cooling System Flushing WARNING General Allow engine to cool before per- Flushing the cooling system with fresh forming any maintenance. water is essential to neutralize corrod- ing effects of salt or other chemical products present in water. It will help to General Care remove sand, salt, shells or other parti- Should water be present in the bilge... -
Page 70: Special Procedure
Jet Drive Operator‘s Guide. Reconnect both hoses on pump by If engine still overheats, refer to an au- pushing both fittings back in place. thorized Sea-Doo dealer for servicing. Disinfection Potable Water System Fill potable water tank with approxi- Disinfection mately 15 L (4 U.S. -
Page 71: Jet Pump Water Intake And Impeller Cleaning
Reconnect both fittings on pump. more at steady and slow speeds. In- spect water intake grate for damage. Refill Refer to an authorized Sea-Doo dealer Fill system with fresh potable water. for repair as necessary. Jet Pump Water Intake and... -
Page 72: Maintenance
MAINTENANCE Ski Post (if so equipped) WARNING Only perform procedure as de- tailed in this guide. It is recom- mended that the assistance of an authorized dealer be periodically obtained on other components/ systems not covered in this guide and/or M Jet Drive Operator‘s Guide. -
Page 73: Periodic Inspection
Refer to the PERIODIC INSPECTION CHART at the end of this guide. Refer to an authorized Sea-Doo dealer if an adjustment is necessary. Throttle Cable WARNING Activate the throttle lever throughout its full range of motion. -
Page 74: Bilge Air Blower
It is located inside engine com- and connected before restarting. partment beneath ventilation duct. See an authorized Sea-Doo sport boat dealer for servicing. Clean both openings. Ensure that both openings are not obstructed. Squeeze cover locking tabs and pull WARNING cover out to access fuses. - Page 75 Stern Light Unscrew lens counterclockwise and pull it out. F04H2SY TYPICAL 1. Pull lens out F04H2UY TYPICAL 1. Unscrew then pull Pull bulb to remove it. F04H2TY TYPICAL F04H2VY 1. Lift and remove bulb TYPICAL The assembly is essentially the re- 1.
-
Page 76: General Inspection And Cleaning
WARNING If any gasoline leak and/or odors are present, do not start the en- gine. Have the craft serviced by an authorized Sea-Doo dealer. Inspect muffler, battery, fuel tank and oil reservoir fastening devices. Visually check electrical connections for corro- sion and tightness. - Page 77 Cleaning The bilge should be cleaned by the deal- er to remove any possible fuel/oil/ electrolyte deposits and mildew. Occasionally, wash the body with hot water and soap (only use mild deter- gent). Remove any marine organisms from engine and/or hull. Apply non- abrasive wax.
-
Page 78: Storage And Pre-Season Preparation
Storage potable water tank. It is recommended that the craft be Start main water pump. taken to an authorized Sea-Doo dealer Open sink faucet. As soon as anti- for proper storage but the following freeze solution starts flowing, close operations can be performed by you faucet. -
Page 79: Pre-Season Preparation
Only perform procedure as de- tailed in this guide. It is recom- Battery mended that the assistance of an authorized dealer be periodically Contact your authorized Sea-Doo dealer. obtained on other components/ systems not covered in this guide Anticorrosion Treatment and/or M Jet Drive Operator‘s... -
Page 80: Periodic Inspection Chart
PERIODIC INSPECTION CHART FREQUENCY DESCRIPTION ✔ ✔➁ Fire extinguisher condition/mounting GENERAL ➀ ✔ ✔ Lubrication/corrosion protection ✔ ✔ ✔ ENGINE Exhaust system fasteners/hoses ✔➂ Flushing COOLING SYSTEM ✔ ✔ ✔ Hose condition and fasteners ✔ Throttle cable adjustments Throttle/choke cables, ➀... - Page 81 FREQUENCY DESCRIPTION LOW-SPEED Inspection and throttle cable ✔ ✔ ✔ STEERING adjustment SYSTEM PROPULSION ✔ ✔ Shifter system/cable adjustment SYSTEM Convenience center storage trays ✔ ✔ adjustment/lubrication ✔ ✔➁ Hull condition HULL AND ✔ ✔ ✔ Windscreen and fasteners condition BODY Storage compartment cover locks ➀...
-
Page 82: Specifications
SPECIFICATIONS ENGINE ISLANDIA Number of engines Engine type V-6 Mercury engine, 2 stroke Induction type Reed valve Exhaust system Mercury type Type See Mercury specifications Lubrication Oil type See Mercury specifications Number of cylinders Displacement 2500 cm³ (152.53 in COOLING... - Page 83 PROPULSION ISLANDIA Propulsion system Mercury Sport Jet Number of jet pumps Jet pump type Mixed flow, single stage Pivoting angle of direction (nozzle) ~ 26° Minimum required water level See Mercury specifications for jet pumps DIMENSIONS Overall length 6.7 m (22 ft) Beam 2.6 m (8 ft 6 in)
-
Page 84: Si Metric Information Guide
SI* METRIC INFORMATION SI* METRIC INFORMATION GUIDE BASE UNITS DESCRIPTION UNIT SYMBOL length ..........meter........mass............ kilogram ......force ............ newton ....... liquid ............ liter ........temperature......... Celsius........ °C pressure ..........kilopascal ......torque ..........newton-meter..... N•m land velocity......... kilometer per hour ....km/h navigation velocity ....... -
Page 85: Declaration Ce Of Conformity
I, the undersigned, hereby declare that the equipment specified above conforms to the above Directives and Standards. Name of signatory: Fernando Garcia Title of signatory on behalf of Bombardier Motor Corporation of America: Director - Public and Regulatory Affairs — Sea-Doo sport boats... -
Page 86: Homologation And Certification
Homologation and Certification These boats comply with the following standards: STANDARD TYPE OF CERTIFICATION United States Coast Guard Self certification Canadian Coast Guard Self certification Russian Maritime Register of Shipping Certify by Russian Maritime Register of Shipping 8, Dvortsovaya Nab., 191186 St. -
Page 87: Operator's Guide Confirmation Of Receipt
I understand and agree to be bound with. I am also satisfied with the predelivery set-up and inspection of my Sea-Doo sport boat. I have also received a copy of the Operator’s Guide, Safety Handbook and Safety Videocassette for my Sea-Doo sport boat. -
Page 89: Change Of Address
Please provide your name, address, phone number, Hull Identification Number and date it was stolen. Bombardier will provide a list of stolen units to all authorized Sea-Doo dealers on a monthly basis to aid in recovery of such units to their owners. - Page 90 CHANGE OF ADDRESS If your address has changed, be sure to fill out and mail the card provided on this page. Such notification is likewise necessary for your own safety even after expiration of the original warranty, since Bombardier will be in a position to contact you if correction to your watercraft becomes necessary.
- Page 91 Purchase Date YEAR MONTH Warranty Expiry Date YEAR MONTH To be completed by the dealer at the time of the sale. DEALER IMPRINT AREA Please verify with your selling dealer to ensure your SEA-DOO craft has been registered with Bombardier.
Need help?
Do you have a question about the ISLANDIA and is the answer not in the manual?
Questions and answers