Advertisement
Available languages
Available languages
Table of Contents
- 1 Before You Start
- 2 Product Dimensions
- 3 Check Operation
- 4 Moving the Range
- 5 Table of Contents
- 6 Avant de Commencer
- 7 Dimensions des Placards Et Dégagements
- 8 Dimensions du Produit
- 9 Contrôle du Fonctionnement
- 10 Si la Cuisinière Ne Fonctionne Pas
- 11 Si Une Assistance Est Nécessaire
- Download this manual
Installation Instructions
30" (76.2 cm) Electric
Freestanding Range
WARNING
Tip Over Hazard
A child or adult can tip the range
and be killed.
Connect anti-tip bracket to rear
range foot.
Reconnect the anti-tip bracket, if
the range is moved.
Failure to follow these instructions
can result in death or serious
burns to children and adults.
Quick Reference
Table of Contents:
Pages
2
Before you start
3
Product dimensions
Cabinet dimensions/requirements
3
4
Installation steps
5
Check operation
6
If range does not operate
6
If you need assistance/service
6
Moving the range
If you need assistance:
Check your Use and Care Guide for a toll-free number to
call or call the dealer from whom you purchased this
appliance. The dealer is listed in the Yellow Pages of your
phone directory under "Appliances — Household —
Major — Service and Repair. "
Call when you:
Have questions about range installation or operation.
Need to obtain the name and number of an authorized
service company.
When you call, you will need:
The range model number.
The range serial number.
Both numbers are listed on the model/serial rating plate
located on the oven frame behind the storage drawer
panel.
IMPORTANT:
Read and save these instructions.
IMPORTANT:
Installer: Leave Installation Instructions with the homeowner.
Homeowner: Keep Installation Instructions for future reference.
Save Installation Instructions for local electrical inspector's use.
Part No. 9756848
Advertisement
Table of Contents

Related Manuals for Whirlpool werp4120pq0


Summary of Contents for Whirlpool werp4120pq0
- Page 1 Installation Instructions 30" (76.2 cm) Electric Quick Reference Freestanding Range Table of Contents: Pages Before you start Product dimensions Cabinet dimensions/requirements Installation steps Check operation If range does not operate If you need assistance/service Moving the range If you need assistance: Check your Use and Care Guide for a toll-free number to call or call the dealer from whom you purchased this appliance.
-
Page 2: Before You Start
Before you start... Cabinet opening dimensions that are Tools needed: shown must be used. Given dimensions are minimum clearances. Your safety and the safety of Grounded electrical outlet is required. others are very important. • level • flat-blade screwdriver We have provided many important •... -
Page 3: Product Dimensions
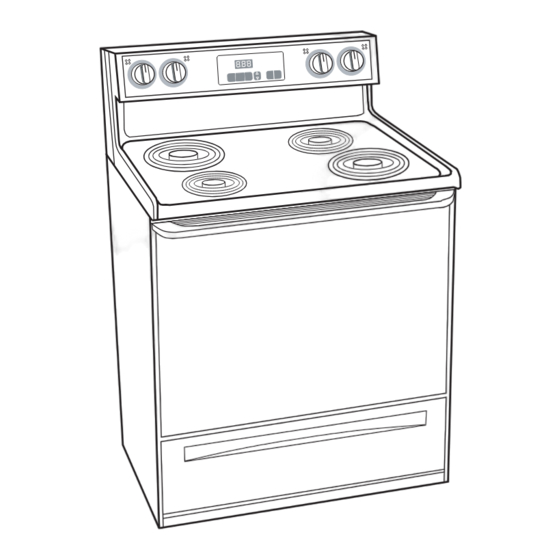
Product dimensions 27-1/8" (68.9 cm) depth with handle 46-7/8" (119.1 cm) overall height 36" (91.4 cm) cooktop height 24-13/16" (63.0 cm) 29-7/8" (75.9 cm) width Cabinet dimensions/requirements Cabinet opening dimensions 25" (63.5 cm) countertop depth, 13" (33 cm) max. 24" (61.0 cm) base cabinet depth, upper cabinet depth 36"... - Page 4 Now start... Operating position WARNING Before moving range across floor, check that range is still on cardboard shipping WARNING base to protect floor covering. Excessive Weight Hazard Move range close to cabinet Use two or more people to move and opening.
-
Page 5: Check Operation
If your oven has an electronic Check operation console: 1. Press the “BAKE” pad. • The “BAKE” indicator will light. FRONT • “350” will appear in the display. • The “START ?” indicator will begin to flash after 5 seconds. 2. -
Page 6: Moving The Range
• Slide range back so rear range foot is under anti-tip bracket. 4. Check that range is level. 5. Plug in range or reconnect power. Part No. 9756848 © 2003 Whirlpool Corporation Benton Harbor, Michigan 49022 Printed in U.S.A. -
Page 7: Table Of Contents
Instructions d’installation Cuisinière autoportante Sommaire électrique 76,2 cm (30 po) Table des matières : Page Avant de commencer Dimensions du produit Dimensions des placards et dégagements Processus d’installation Contrôle du fonctionnement Si la cuisinière ne fonctionne pas Besoin d’assistance ou de service après-vente Déplacement de la cuisinière Si une assistance est nécessaire : Contacter le revendeur qui a fourni l’appareil ou chercher... -
Page 8: Avant De Commencer
Avant de cuisson et les placards, installer une Outillage hotte d’extraction au-dessus de la table commencer... de cuisson pour éviter les risques de nécessaire : brûlure et autres accidents. On doit parfaitement obturer/sceller Votre sécurité et celle des autres est •... -
Page 9: Dimensions Du Produit
Dimensions du produit 68,9 cm (27-1/8 po) Profondeur (poignée de porte incluse) hauteur hors-tout 119,1 cm (46-7/8 po) hauteur de la table de cuisson 91,4 cm (36 po) 63.0 cm (24-13/16 po) largeur 75,9 cm (29-7/8 po) Dimensions des placards et dégagements Dimensions de l’ouverture entre les placards 33 cm (13 po) maximum... - Page 10 Commencer Position d’utilisation AVERTISSEMENT maintenant… Avant de déplacer l’appareil sur le plancher, pour ne pas risquer d’endommager le revêtement de sol, AVERTISSEMENT vérifier que la cuisinière reste posée sur la base de l’emballage de carton. Risque du poids excessif Approcher la cuisinière près de Utiliser deux ou plus de personnes l’espace d’insertion entre les placards.
-
Page 11: Contrôle Du Fonctionnement
2. Placer le sélecteur de fonction à la Réinstaller le tiroir de position “BROIL ” (gril) et le sélecteur rangement ou le panneau inférieur. de température à la position “BROIL ” (gril). Contrôle du fonctionnement • L’élément supérieur devrait rougeoyer et le témoin de fonctionnement devrait être allumé. -
Page 12: Si La Cuisinière Ne Fonctionne Pas
1. Débrancher la cuisinière ou déconnecter la source de courant électrique. 2. Faire glisser l’appareil vers l’avant pour pouvoir exécuter les opérations de nettoyage ou entretien. Pièce n° 9756848 © 2003 Whirlpool Corporation Benton Harbor, Michigan 49022 Imprimé aux É.-U.
Need help?
Do you have a question about the werp4120pq0 and is the answer not in the manual?
Questions and answers