Table of Contents
Advertisement
Quick Links
Advertisement
Table of Contents

Related Manuals for PARKZONE Super Decathlon


Summary of Contents for PARKZONE Super Decathlon
- Page 1 7587...
-
Page 2: Instruction Manual
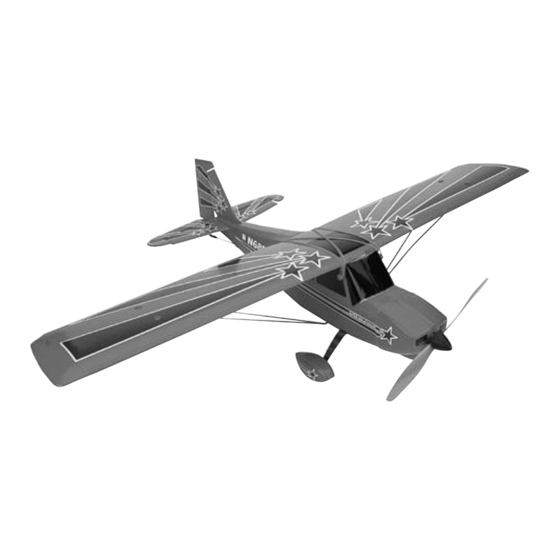
Super Decathlon Instruction Manual Mode d’emploi Bedienungsanleitung Manuale d’istruzioni Manual de instrucciones Envergure: 900mm Longueur: 640mm Poids: 450 g Moteur: 370 avec réducteur Radio: 3 voies FM proportionnelles Batterie: 8.4V 600mAh Ni-MH Chargeur: DC Peak Spannweite 900mm Länge 640mm Gewicht 450 g... - Page 3 Congratulations on your purchase of the ParkZone™ Super Decathlon. other radio controlled aircraft, we recommend that you seek the help of Your Super Decathlon has come with everything to get you in the air – all an experienced radio control pilot during your beginning flights. Crash...
- Page 4 Schritt 1. Charging the Aircraft Battery (NEEN IN GERMAN) Ihr ParkZone-Ladegerät verfügt über eine besondere Spitzenerkennungsfunktion (Peak Detect), wodurch ein stets korrektes Laden gewährleistet wird und die Ni-Cd- und Ni-MH-Akkus gegen Überladung geschützt werden. Während des Ladezyklus überwacht es kontinuierlich die Ladekurve und schaltet automatisch auf Erhaltungsladen um, sobald die Spitze identifiziert wird.
- Page 5 continued Step 1 DC Peak Detection Charger Features: 4. Charging is finished when the LED indicator glows steadily. You should also notice at this time that the battery is warm to the touch. • Variable charge rate from 0.3–1.2 amps •...
- Page 6 Italiano Passo 1. continuazione Caratteristiche del caricabatteria con rilevamento del picco a CC 4. La carica è terminata quando l’indicatore LED rimane acceso con luce stabile. A questo punto si dovrebbe anche notare che la batteria • Velocità di carica variabile da 0,3–1,2 A •...
- Page 7 Step 2 Transmitter 1. Insert 8 new “AA” batteries (supplied) into the transmitter, observing proper polarity. 2. Turn switch on to ensure the batteries have been installed correctly. Once this is confirmed, turn radio off. Français Stade 2. Emetteur 1. Insérer 8 piles neuves AA (fournies) dans l’émetteur en respectant la polarité. 2.
- Page 8 Step 3 Don’t connect until Ni-MH Battery just before flight. Installation of Landing Gear 1. Locate the landing gear within packaging. 2. Slide one half of landing gear into allotted slot in fuse until it “locks” into place. Slide the other half of the landing gear into fuse as you have done with the previous one.
- Page 9 Step 4 Fix wing securely to fuselage. Loss of wing will result in lack of control and crash. Use 4 rubber bands Attaching the Wing to secure wing as 1. Locate wing. shown. 2. Locate wing strut screws. 3. Place the wing on the top of the fuselage, making certain it is centered properly.
- Page 10 Italiano Passo 4. Montaggio dell’ala. 1. Individua l’ala. 2. Individua I montanti dell’ala e le viti. 3. Appoggia l’ala sulla fusoliera, assicurandoti che sia sia ben centrata. Fissa l’ala con i quattro elastici in dotazione. Metti due elastici tra lo spinotto anteriore e quello posteriore ai lati dell’ala ed incrocia gli altri due.
- Page 11 5. Placer la batterie dans son logement et refermer le couvercle. 6. Votre Super Decathlon est équipé d’une sécurité qui permet d’activer le moteur seulement si la commande des gaz est sur Off à la mise sous tension. (ATTENTION: Vérifier que la zone de rotation de l’hélice est libre de tout obstacle et prendre garde à vos vêtements et vos cheveux.) Avancer la commande des gaz, l’hélice doit commencer à...
- Page 12 Step 6 Tail Control Test 5. Pull the stick back and the elevator control surface should move upward (as shown). Warning: Keep everything clear of the propeller before starting 6. Move the stick full forward. When this is done, the elevator the control test in the event that you accidentally turn on the motor.
- Page 13 Deutsch Stade 6. Test der Steuerflächen 6. Drücken Sie den Steuerknüppel ganz nach vorn. Das Höhenruder Warnung: Halten Sie alles aus dem Luftschraubendrehkreis heraus bevor Sie mit dem Test beginnen. Es besteht Verletzungsgefahr, muss sich nach unten bewegen. Falls Ihr Modell nicht korrekt auf die Steuereingaben reagiert, falls der Motor unerwartet anläuft.
- Page 14 Español Paso 6. Prueba de control de la cola 6. Mueva la palanca completamente adelante. Cuando lo haga, la Advertencia: Mantenga todo alejado de la hélice antes de iniciar la prueba de control por si se conecta el motor accidentalmente. superficie de control del elevador debe moverse hacia abajo (como se muestra).
- Page 15 Step 7 Choose a Large, Open Grassy Field • A large, open grassy field is required to fly your Super Decathlon. WIND VENTO The Super Decathlon flies about 15–20 mph, so it covers ground VENT VIENTO fast. The bigger the field, the better.
- Page 16 Step 8 Choose a Calm Day You want to fly! However, you need to make sure that you fly in the conditions that will allow you to have the best success. This is when there is little to no wind (less than 7 mph). To check wind conditions: 1.
- Page 17 Step 9 Range Test You will need two people to perform the range test: one to hold the plane and the other to give the transmitter input. Warning: The person holding the plane should hold it in such a way that the propeller does not come into contact with any part of their clothing or body.
- Page 18 Sie mit der ParkZone™ Super Decathlon auch keine Probleme haben. vertraut, können Sie in Modus B wechseln. Wenn Sie allerdings mit der Super Decathlon zum ersten Mal fliegen, sollten Sie sich von einem erfahrenen Modellflugzeugpiloten helfen Hinweis: Die können den Modus im Flug wechseln. Es wird lassen.
- Page 19 Modo B (Alta manovrabilità): Modo B non limita più l’escursione delle parti mobili e permette un pilotaggio più aggressivo. D’altra parte sarà più facile rompere il Super Decathlon per un eccesso di comando se non si sta attenti. . In questo modo l’interruttore sul dorso della fusoliera è...
- Page 20 7. Wenn es diese sichere Höhe erreicht hat, kann es gefahrlos in die gewünschte Richtung gesteuert werden und die Gasstärke zurück genommen werden, um Flughöhe und Geschwindigkeit zu regulieren. Italiano Passo 12. Lancio a mano del Super Decathlon 1. Assicurati che la batteria sia completmente carica 2. Accendi la tramittente.
- Page 21 * Flight-Trak™ gives some up elevator when directional input (rudder) is given. This helps hold the nose up during turns for those pilots that are transitioning to using a 3-channel radio system. Note: Default positions of jumpers of Super Decathlon are shown above in bold italics. Français Stade 13. Variateur/Récepteur Votre Super Decathlon est équipé...
- Page 22 Jumper 3 - Auto Cutt Off wird der Kurvenflug erheblich erleichtert, weil die Nase des Auto Cutt Off: Die Super Decathlon ist mit einem Jumper in Port 3 Flugzeuges oben gehalten wird. Diese Funktion ist besonders für die Konfiguriert. Diese Konfiguration ist für den Auto Cutt Off bei 6-8 zelligen Piloten von Vorteil, die Zone 2 Erfahrung haben und sich zum Zone 3 NiMH Flugakkus konfiguriert.
- Page 23 3 canales. Nota: Las posiciones por defecto de los puentes de Super Decathlon se muestran anteriormente en negritas y cursiva.
- Page 24 Runway Take-off 4. Plug in aircraft battery. 5. Stand behind the Super Decathlon and take note of the wind so Runway (ROG) takeoffs are recommended only for advanced pilots. that you can take off directly into it. Make certain you are All initial flight should be done by hand-launch.
- Page 25 Step 15 Flying 1. After launching, your Super Decathlon will climb at full throttle. Keep the throttle full on until you have reached an altitude of about 50 feet. At this same time, make sure that you continue to keep the airplane directed into the wind.
- Page 26 Italiano Passo15. Il volo 1. Dopo il decollo il Super Decathlon cabrerà a tutto motore. Dai tutto gas fino a che il modello ha raggiunto circa 15 metri. Contemporaneamente cerca di mantenere il modello con il muso puntato contro vento.
- Page 27 Step 16 Throttle Adjustment 1. Climb to an altitude of 100 feet or more with full throttle. 2. To achieve and maintain a level “cruising” altitude, reduce the power by moving the throttle slider down to approximately 50% of full-on. The throttle slider is proportional, so you can add or reduce throttle in small increments as needed to maintain the altitude that you desire.
- Page 28 Italiano Passo 17. Uso dell’elevatore Il Super Decathlon è dotato del terzo canale per il piano di Quando si verifica lo stallo il muso del modello si abbassa ed il profondità (assetto longitudinale). Tirando indietro la leva si solleva modello inizia una picchiata.
- Page 29 Landing Your Super Decathlon Expert Tip: As you get better and more experienced at flying, try When you begin to notice that your Super Decathlon no longer adding a bit of “up” elevator just prior to landing to “flare” the climbs well under full power (normally after approximately 12–15...
- Page 30 Italiano Passo 18. Atterraggio del Super Decathlon Quando si inizia a notare che il Super Decathlon non sale più Suggerimento dell’esperto: Man mano che si migliora e si diventa bene a tutta potenza (normalmente dopo circa 12–15 minuti), più esperti nel volo, prova a dare un po’ di elevatore in più appena significa che la batteria si sta scaricando e che è...
- Page 31 Passo 19. Volo acrobatico Al momento di estrarlo dalla scatola, il Super Decathlon ha i comandi impostati per risposte più dolci ed ha i rinvii fissati ai fori esterni delle superfici di controllo. Tuttavia, una volta che ti sei abituato alle caratteristiche di volo e desideri eseguire manovre più acrobatiche, puoi modificare l’escursione permessa spostando ai fori interni delle squadrette di comando.
- Page 32 è possibile ripararlo con del nastro adesivo. Se invece il danno è più serio e l’ala o la coda si è piegata, sostituisci immediatamente la parte. In questo manuale c’è la lista completa delle parti di ricambio del Super Decathlon. Español Paso 20.
-
Page 33: Warnings And Safety
8. Never fly on the same frequency as another RC vehicle in your allow anyone to attempt to catch the airplane while it’s in flight or area. The frequency of the Super Decathlon is shown on stickers serious injury can result. -
Page 34: Sicurezza E Precauzioni
Cuando acabe de volar el Super Decathlon, desenchufe siempre la 3. No vuele con viento demasiado fuerte ya que puede perder el batería antes de apagar el transmisor. -
Page 35: Success Tips
2. Choose your flying field carefully—grass and soft ground with 5. If you’re gliding with the motor off, allow the Super Decathlon a 600-foot diameter of open space is optimal for flying and will more area for turns. -
Page 36: Consejos Útiles
Usa gli occhiali da sole se c’è molto sole. bene che non ci siano ostacoli, come edifici od alberi. Mai volare 7. Tieni il Super Decathlon sopra vento specialmente se il vento è sopra le persone che potrebbero venire colpite dal modello. -
Page 37: Troubleshooting
Troubleshooting PROBLEM POSSIBLE CAUSE SOLUTION Unit does not operate 1. Transmitter “AA” batteries are depleted or installed incorrectly, indi 1. Check polarity installation or replace with fresh cated by a dim or unlit LED on transmitter or the low battery alarm. “AA”... - Page 38 Italiano - Ricerca dei guasti PROBLEMA CAUSA POSSIBiLE SOLUZIONE Il modello non funziona 1. Le pile “AA” della trasmittente sono scariche o non installate 1. Controlla l’installazione delle pile oppure cambia bene. Ciò è indicato dal LED che non si accende o dal cicalino della le pile “AA”.
- Page 39 24969 Sillerup Wenn Sie von unserem Produkt-Support gebeten werden, das Flugzeug zu retournieren, beachten Sie bitte Folgendes: 1. Akku vom Flugzeug ausstecken. 2. Packen Sie die Super Decathlon komplett (alle Bauteile) in die Originalverpackung und zum Schutz in eine feste Transportschachtel.
-
Page 40: Garanzia Ed Assistenza
Se il nostro personale di Supporto Prodotto invita a restituire il Super Decathlon, seguire queste istruzioni: 1. Staccare la batteria dall’aeroplano. 2. Imballare il ParkZone™ Super Decathlon (completo (tutti i componenti nella scatola originale) e metterlo in una robusta scatola di spedizione per proteggerlo. -
Page 41: Pièces Détachées
Replacement Parts Make sure that you keep your Super Decathlon in the air. Replacement parts are available at your local hobby shop or from Horizon Hobby (www.horizonhobby.com). Please try your local retailer first. By supporting your local hobby shop, they will be there when you need them! -
Page 42: Parti Di Ricambio
Italiano Mantenete in efficienza il vostro Super Decathlon! Le parti di ricambio si possono acuistare presso il vostro negozio di fiducia o direttamente da www.scorpio.it Vi consigliamo di consultare sempre per primo il vostro rivenditore che è anche in grado di darvi preziosi consigli. Per la lista dei rivenditori consultate la sezione relativa sul sito della Scorpio. - Page 44 Parkzone Produkte warden vetrieben von: JSB Marketing & Vertriebs GmbH Otto Hahn Str. 9a 25337 Elmshorn ©2005 Horizon Hobby, Inc. www.parkzone.com I prodotti ParkZone™ della Horizon Hobby, Inc. Sono distribuiti in esclusiva per l’Italia da: Scorpio.s.r.l. CP 750 38100 Trento ©2005 Horizon Hobby, Inc.
Need help?
Do you have a question about the Super Decathlon and is the answer not in the manual?
Questions and answers