Makita HM0860C Technical Information
Hide thumbs
Also See for HM0860C:
- Instruction manual (45 pages) ,
- Instruction manual (17 pages) ,
- Instruction manual (25 pages)
Advertisement
Quick Links
Download this manual
See also:
Instruction Manual
T
ECHNICAL INFORMATION
Model No.
Description
C
ONCEPT AND MAIN APPLICATIONS
Now the 5 kg class SDS-max demolition hammer has been released.
Its features and benefits are as follows.
* SDS-max bit can be used.
* Lightest weight 4.7kg (10.4lbs) in this class, but high performance
* Electronic features for soft start and speed control
* Indication lamp informs operator of the machine's condition.
* 12 angle settings of hammer bit
S
pecification
Voltage (V)
110
120
220
230
240
Blows per min: bpm=min
Shank
Single blow energy : J
Protection from electric shock
Cord length : m (ft)
Net weight :Kg (lbs)
S
tandard equipment
* Bar style side handle ............................ 1 pc.
* Bit grease .............................................. 1 pc.
* Plastic carrying case ............................. 1 pc.
< Note > The standard equipment for the tool shown may differ from country to country.
O
ptional accessories
* Various bull points
* Various cold chisels
* Various scaling chisels
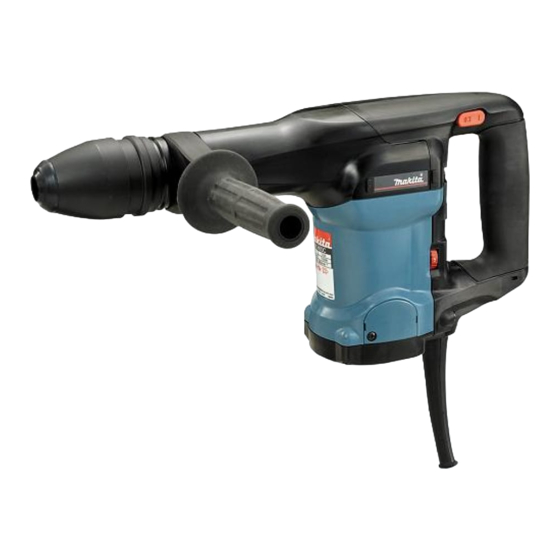
HM0860C
Demolition Hammer
Current (A)
Cycle (Hz)
11
50 / 60
10
50 / 60
5.6
50 / 60
5.3
50 / 60
5.1
50 / 60
-1
1,100 - 2,650
SDS-max
by Double insulation
5.0 (16.4)
* Clay spade
* Bushing tool
* Rammer
Continuous Rating (W)
Input
1,100
1,100
1,100
1,100
1,100
Diameter :18mm (11/16")
1.8 - 12
For Europe : 4.0 (13.1)
4.7 (10.4)
* Shank for rammer
* Shank for bushing tool
* D formed side handle
PRODUCT
W
L
Dimensions : mm ( " )
454 (17-7/8)
Length ( L )
Height ( H )
223 (8-3/4)
Width ( W )
99 (3-7/8)
Max. Output(W)
Output
540
1,200
540
1,200
1,200
540
1,200
540
1,200
540
* Hammer service kit
(a set of repairing parts)
P 1 /14
H
Advertisement

Related Manuals for Makita HM0860C


Summary of Contents for Makita HM0860C
- Page 1 ECHNICAL INFORMATION PRODUCT P 1 /14 Model No. HM0860C Description Demolition Hammer ONCEPT AND MAIN APPLICATIONS Now the 5 kg class SDS-max demolition hammer has been released. Its features and benefits are as follows. * SDS-max bit can be used.
- Page 2 <2> Lubrication Apply a tube (30g) of Makita grease R No. 00 in total to the portions designated by arrows as shown below. Also apply a little bit of Makita grease N No.2 to the portions by designated by circles.
- Page 3 P 3 /14 <4> Disassembling/Reassembling Chuck Portion Fig. 1 <4>-1. Disassembling Chuck Section Tool holder cap (1) Slide Chuck cover in the direction of Gear housing, and remove Tool holder cap from the machine. (Fig. 1) (2) Remove Chuck cover from Tool holder. Chuck cover (3) Remove Ring spring 25 from tool holder using Retaining ring pliers ST-2N (1R003).
- Page 4 P 4 /14 (2) Install Chuck ring, Urethane ring 28 and Flat washer 28 on Tool holder as in Fig. 4, and then set Ring spring 25 with Retaining ring pliers ST-2N (1R003). Fig. 4 Urethane ring 28 (reversible when assembled to Tool holder) Flat washer 28 Ring spring 25 Chuck ring...
- Page 5 Holding Fan by hand, turn M6 Hex. nut located under Fan 76 counterclockwise with an M10 hex socket attached 4x18 tapping screw to Makita impact driver. (4 pcs.) Caution: Be sure to wear gloves when you hold Fan 76 Rear cover on removing M6 Hex.
- Page 6 P 6 /14 <7> Disassembling/reassembling Tool Holder <7>-1. Disassembling Tool Holder (1) Remove Retaining ring R-42 from Barrel using Retaining R pliers RT-2N (1R005). (2) Take Flat washer 29 and Urethane ring 28 out of Barrel. (3) Take Tool holder out of Barrel. (4) Remove Impact bolt from Tool holder by striking Impact bolt with a proper round bar as illustrated in Fig.
- Page 7 P 7 /14 <8> Removing/Installing Fluoride Ring 28 Fluoride ring 28 can be removed from Impact bolt using slotted driver. When installing Fluoride ring 28 on Impact bolt, use a Taper sleeve (1R214). (Fig. 13) Fluoride Ring and Taper Sleeve Use Taper sleeve for fitting fluoride ring to impact bolt of Rotary Hammers.
- Page 8 P 8 /14 <10> Disassembling/reassembling Cylinder Section <10>-1. Disassembling Cylinder Section (1) Separate Barrel from Crank housing comp. by removing M6x30 Hex. socket head bolts (4 pcs.) as in Fig. 15. (2) Cylinder section can be removed from Barrel by hitting the end of Barrel with wooden or plastic hammer as illustrated in Fig.
- Page 9 P 9 /14 <10>-2. Reassembling Cylinder Section Do the reverse of the disassembling procedure described in <10>-1. Note: When reassembling Cylinder section, be sure to follow the instructions below; 1) Rubber ring is not reversible when installed on Cup washer 23 in Guide ring. The metal portion of Rubber ring 20 must face the direction of Bit side.
- Page 10 P 10 /14 <11> Disassembling/reassembling Piston <11>-1. Disassembling Piston (1) Separate crank cap from crank housing complete by removing M5x20 pan head screws (4 pcs.) with screwdriver. (Fig. 24) Fig. 24 M5x20 pan head screws (4 pcs.) Bit side Crank cap Crank housing complete (2) Set the Crank shaft complete to the position of the nearest to cylinder, then Piston and Connecting rod can be removed.
- Page 11 P 11 /14 <12> Disassembling/reassembling Switch Portion <12>-1. Disassembling Switch Portion (1) Separate Handle from machine by removing two M5x20 pan head screws on the upper side and two 5x25 tapping screws on the lower side. (Fig. 20) And then disconnect the terminal from the Controller as illustrated in Fig.
- Page 12 P 12 /14 Wiring Put the lead wires to three lead holders of Handle as Fig. 31. Fig. 31 Lead holders Handle Pass the lead wire (red) for connecting with Brush holder between bosses and wall of Motor housing as Fig. 32. Fig.
- Page 13 P 13 /14 Circuit Diagram Switch Lead wire (blue) of Controller (for 220-240V) white black (white: for 115-127V) Lead wire (black) of controller Terminal for carbon brush detection Controller Clamping lead wires of Field black Connector black Terminal block black white black Pick-up coil...
- Page 14 P 14 /14 Maintenance program The service life of Makita genuine Carbon brushes is approximate 120 hours. When replacing the Carbon brushes, we recommend you of replacement of the following parts at the same time. Description Part No. Grease 30cc (See note below.)
Need help?
Do you have a question about the HM0860C and is the answer not in the manual?
Questions and answers