
Subscribe to Our Youtube Channel
Related Manuals for Cookworks MG18CHV


Summary of Contents for Cookworks MG18CHV
- Page 1 Instruction Manual Please keep for future reference Cookworks Table Top Mini Oven MG18CHV...
- Page 3 IMPORTANT SAFETY INSTRUCTIONS Read all instructions before use and keep for future reference. WARNING • Misuse or modification of this appliance may result in breakdown or injury. • To reduce the risk of fire or electric shock, do not expose this appliance to rain or moisture.
- Page 4 IMPORTANT SAFETY INSTRUCTIONS Read all instructions before use and keep for future reference. • Check that the voltage on the rating plate of your product corresponds with your local electricity supply which must be A.C. (Alternating Current). • If the mains sockets in your home are not suitable for the plug supplied with this product, check with a qualified electrician for replacement.
- Page 5 IMPORTANT SAFETY INSTRUCTIONS Read all instructions before use and keep for future reference. FOR SAFETY DO NOT: • Attempt to disassemble this unit or carry out repairs. • Attempt to modify the unit in any way. • Make sure that foreign objects do not get inside the unit.
- Page 6 IMPORTANT SAFETY INSTRUCTIONS Read all instructions before use and keep for future reference. CHILDREN • Children do not always understand the dangers associated with operating electrical appliances. Never allow children to use this appliance. • Children should be supervised to ensure that they do not play with the appliance.
- Page 7 IMPORTANT SAFETY INSTRUCTIONS Read all instructions before use and keep for future reference. CAUTION: TO REDUCE THE RISK OF ELECTRIC SHOCK DO NOT REMOVE COVER (OR BACK), THERE ARE NO USER SERVICEABLE PARTS INSIDE, REFER SERVICING TO QUALIFIED SERVICE PERSONNEL. ATTENTION : Your oven should be cleaned regularly to prevent grease and food particles from building up on the inside surface.
- Page 8 IMPORTANT SAFETY INSTRUCTIONS Read all instructions before use and keep for future reference. • The use of accessory or attachments other than supplied may cause damages and injuries. • When operating the oven, keep at least 10cm of space on all sides of the oven to allow for adequate air circulation.
-
Page 9: For Future Reference
IMPORTANT SAFETY INSTRUCTIONS Read all instructions before use and keep for future reference. • Do not place any of the following materials in the oven: cardboard, plastic, paper or any other flammable materials. • Do not store any materials, other than manufacturer’s recommended accessories in this oven. - Page 10 IMPORTANT SAFETY INSTRUCTIONS Read all instructions before use and keep for future reference. • A fire may occur if the appliance is covered or touching flammable material, including curtains, draperies, walls, and the like, when in operation. Do not put any items on top of the appliance when in operation.
- Page 11 IMPORTANT SAFETY INSTRUCTIONS Read all instructions before use and keep for future reference. • This appliance is not intended for use by persons (including children) with reduced physical, sensory or mental capabilities. Or lack of experience and knowledge unless they have been given supervision or instruction concerning use of the appliance by a person responsible for their safety.
- Page 12 IMPORTANT SAFETY INSTRUCTIONS Read all instructions before use and keep for future reference. • The appliances are not intended to be operated by means of an external timer or separate remote-control system. • The temperature of accessible surfaces may be high when the appliance is operating •...
-
Page 13: Table Of Contents
CONTENTS Know Your Machine ..................12 Operation ......................13 Before Using Your Oven................. 13 About Control Settings..................15 How To Use The Oven................... 17 Toasting ........................................Broiling Grilling Baking ......................Care and Cleaning .................... 2 3 Cleaning removable crumb tray ............... 2 3 Specifications ..................... -
Page 14: Know Your Machine
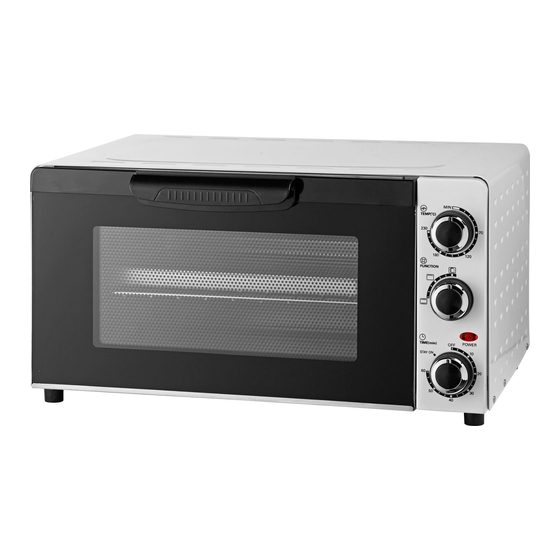
KNOW YOUR MACHINE Mini Oven 1 x Crumb Tray 1 x Grill Rack 1 x Food Tray (packed inside oven) Temperature Knob Function Knob Indicator Light Timer Knob Door Handle Oven Door Grill Rack Food Tray Crumb Tray... -
Page 15: Operation
OPERATION IMPORTANT: Please read the important safety instructions before use. fig. 1 BEFORE USING YOUR OVEN - Before using your oven for the first time, be sure to: 1. Make sure oven is unplugged and Timer Knob D is in the OFF position. - Page 16 OPERATION 6. After re-assembling your oven, turn the Temperature Knob A fig. 2 to 230°C and turn the Timer Knob D to 15 minutes to eliminate any oil coatings on parts after production. See fig. 2. NOTE: The oven may smoke during this process.
-
Page 17: About Control Settings
OPERATION ABOUT CONTROL SETTINGS Time Setting Timer Range 0-60 Minutes: The fig. 3 Timer can be set up to 60 minutes. The oven will not turn "on" without the timer being set. When the Timer Knob D is in the "off" position, the oven will not operate. - Page 18 OPERATION Indicator Light fig. 4 The Indicator Light C will light up when the oven is operating. When the Timer Knob D is in the "OFF" position, the Indicator Light C will not be lit. See fig. 4.
-
Page 19: How To Use The Oven
OPERATION HOW TO USE THE OVEN CAUTION: The oven surfaces will be hot during and after use. General Instructions 1. Place the Grill Rack G in position that will accommodate the height of the food to be cooked. See fig. 5. 2. -
Page 20: Toasting
OPERATION fig. 7 HOW TO USE Toasting 1. Set the function knob to" ". Rotate the temperature knob to desired temperature. See fig. 7. 2. Open the Oven Door E and place sliced bread on the Grill Rack Place one slice of bread in the center of Grill Rack G, or 4 slices side by side. - Page 21 OPERATION 4. When toasting is finished the bell will ring and the electrical power is automatically turned off. To stop fig. 9 the cycle at any time, turn the Timer Knob D anti-clockwise to "off" position and the bell will ring. See fig.
-
Page 22: Broiling / Grilling
OPERATION Broiling Grilling 1. S de grill rack G into the oven. Always put the food on the grill tray G. When the broiling food like chicken wings or drumsticks which contain fat/oil, put the food on the grill tray and put it on the See fig. -
Page 23: Baking
OPERATION Baking Place food on the Food Tray H . See fig. 12. 2. Slide the grill rack G into the oven, then put the grill tray H on the rack. 3. When setting in Bake, both top and bottom heating elements will work. fig. - Page 24 OPERATION ABOUT RACK LEVELS There are 3 rack levels. The Food Tray or Grill Rack can be inserted on either level, depending on your cooking requirements. See fig. 14. fig. 14...
-
Page 25: Care And Cleaning
CARE AND CLEANING NOTE: Always Unplug and allow to cool before cleaning CARE AND CLEANING 1. Before cleaning unplug the toaster oven and allow it to cool completely. 2. Wash all the attachments with mild, soapy water including the rack and the baking tray. -
Page 26: Specifications
SPECIFICATIONS Technical Data Model: MG18CHV Power Supply: 220-240V ~50Hz Power Consumption: 1300W Connecting to Power Check that the voltage marked on the product corresponds with your supply voltage. This product is fitted with a 13A plug complying with BS1363. If this plug is unsuitable... - Page 27 Guarantee PRODUCT GUARANTEE This product is guaranteed against manufacturing defects for a period of Year This product is guaranteed for twelve months from the date of original purchase. Any defect that arises due to faulty materials or workmanship will either be replaced, refunded or repaired free of charge where possible during this period by the dealer from whom you purchased the unit.
- Page 28 PN.:261800317292...
Need help?
Do you have a question about the MG18CHV and is the answer not in the manual?
Questions and answers
How to stop muffins from burning on top
Is it a fan-assisted oven?