Advertisement
Quick Links
※組立てる前にこの説明書を良くお読みになり十分に理解してください。
Before commencing assembly, please read these instructions thoroughly.
THE FINEST RADIO CONTROL MODELS
For Intermediate
&
Advanced flyers.
中・上級者向
RADIO CONTROLLED ENGINE POWERED SCALE AIRCRAFT
KYOSHO SUPER QUALITY WARBIRDS SERIES
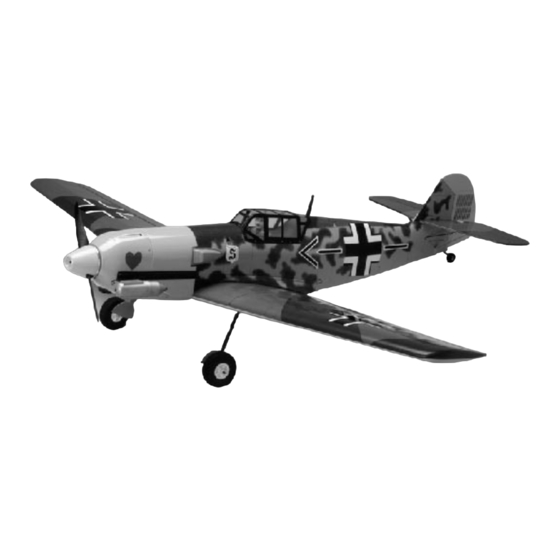
Messerschmitt Bf109E 40
ラジオコントロール エンジン スケール プレーン
目 次 INDEX
●キットの他にそろえる物
REQUIRED FOR OPERATION
●組立て前の注意
BEFORE YOU BEGIN
●本体の組立て
ASSEMBLY
●オプションパーツ
OPTIONAL PARTS
●取扱いの注意
OPERATING YOUR MODEL SAFELY
安全のための注意事項
この無線操縦模型は玩具ではありません!
●この商品は高い性能を発揮するように設計されています。
組立てに不慣れな方は、模型を良く知っている人にアド
バイスを受け確実に組立ててください。
●小さい部品があるので、組立て作業は、幼児の手がとど
かない所で必ず行ってください。
●動かして楽しむ場所は万一の事故を考えて、安全を確認
してから責任をもってお楽しみください。
●組立てた後も、説明書がいつでも見られるように大切に
保管してください。
※製品改良のため、予告なく仕様を変更する場合があります。
© 1999 KYOSHO/禁無断転載複製
R
●First-time builders should seek the advice of experienced modellers
before commencing assembly and if they do not fully understand
any part of the construction.
●Assemble this kit only in places out of children's reach!
●Take care before operating this model.
You are responsible for this model's assembly and safe operation!
●Always keep this instruction manual ready at hand for quick
reference, even after completing the assembly.
SPECIFICATIONS ARE SUBJECT TO CHANGE WITHOUT NOTICE.
WINGSPAN: 1420mm
INSTRUCTION MANUAL
メッサーシュミット Bf109E 40
SAFETY PRECAUTIONS
This radio control model is not a toy!
組立/取扱説明書
2
3
3~14
15
15~16
No.11807
Advertisement

Related Manuals for Kyosho Messerschmitt Bf109E 40


Summary of Contents for Kyosho Messerschmitt Bf109E 40
-
Page 1: Instruction Manual
THE FINEST RADIO CONTROL MODELS For Intermediate & Advanced flyers. 組立/取扱説明書 中・上級者向 INSTRUCTION MANUAL RADIO CONTROLLED ENGINE POWERED SCALE AIRCRAFT KYOSHO SUPER QUALITY WARBIRDS SERIES Messerschmitt Bf109E 40 メッサーシュミット Bf109E 40 ラジオコントロール エンジン スケール プレーン 目 次 INDEX ●キットの他にそろえる物 REQUIRED FOR OPERATION ●組立て前の注意... - Page 2 REQUIRED FOR OPERATION (Purchase separately!) キットの他にそろえる物(別購入品) 燃料、始動用具 下記商品のメーカー、サイズ等は、販売店とご相談ください。 Required for engine starting: CAUTION: For details concerning the equipment listed below 注意 (size, maker, etc.), check with your hobby shop. ■グロー燃料 Model Glow Fuel. 4チャンネル以上の飛行機用無線操縦機 (プロポ) セ ット(5サーボ:標準サーボ x5 ) と電池。 ガソリンや灯油は使用禁止...
- Page 3 Read through the manual before you begin, so you will have an overall idea of what to do. キットの内容をお確かめください。万一不良、不足がありましたら、お買い求めの販売店にご相談いただくか、当社 「ユーザー相談室」までご連絡ください。 Check all parts. If you find any defective or missing parts, contact your local dealer or our Kyosho Distributor. 説明書に使われているマーク Symbols used throughout this instruction manual comprise the following: ●重要な注意事項があ...
- Page 4 主翼 Main Wing 2 x 6mm TPビス TP Screw 1.5mm プロポに付属のビス Included with the radio set. 2 x 6mm 2 x 6mm エルロンサーボ Aileron Servo 主翼 2 x 22mm ビス 2 x 6mm ビス 3mm セットビス Main Wing Screw Screw Set Screw 90°...
- Page 5 主翼 引き込み脚にする場合は、P.13 ∼P.14 も参考にする。 Main Wing Note, P13 , if you are using retracting landing gear. ∼P.14 確実に接着する。 飛行中にはずれると操縦不可能になり事故につ Warning! ながります。 Ensure that the two wing halves are securely glued together. フィルムのみ。 Cut away covering film only. 引き込み脚にする場合は、P.13 ∼P.14 も参考にする。 主翼...
- Page 6 主翼 4 x 30mm キャップビス マウントナット ワッシャー Blind Nut Main Wing Cap Screw Washer フィルムのみ。 Cut away only covering film. 主翼の穴に合わせる。 4.1mm Align with main wing holes. M4×30mm AÕ A = AÕ エンジンマウント 4 x 20mm キャップビス マウントナット Engine Mount Blind Nut Cap Screw エンジンシャフトライン...
- Page 7 エンジンマウント 3 x 25mm ワッシャー ビス ナット Engine Mount Washer Screw 3.1mm 3mm ナット ワッシャー Washer エンジンマウント Engine Mount エンジン Engine 3 x 25 mm 117mm エンコンロッド Throttle Rod キャブレターの位置に合わせる。 Depends on the position of the throttle arm. 燃料タンク Fuel tank 3x18mm 3 x 18mm ビス...
- Page 8 カウリング Cowling 2 x 10mm TPビス TP Screw エンジンに合わせ 3 x 16mm TPビス てカウリングを TP Screw カットする。 Relieve the cowl to clear the engine head. 1.5mm カウルとスピンナーの隙間は、 1.5mm 1.5mm以上開ける。 Apporx.1.5mm 3 x 16mm 2 x 10mm 水平尾翼 / 垂直尾翼 Horizontal / Vertical Tail B’...
- Page 9 ラダーロッド 折り曲げる。 Rudder Rod Bend at end of rod. ラダーホーン側。 To rudder horn. サーボ側。 To servo. チューブを燃やさないように 注意して暖めて収縮させる。 Be careful not to scorch the 収縮チューブ heat-shrink tube! Heat-shrink Tube 火気に注意。 火気に注意。 Slide heat shrink tubes over linkage rods and use Beware of the flame! a hair dryer or similar to secure (shrink) them in place.
- Page 10 水平尾翼 Horizontal Stabiliser 2 x 14mm ビス Screw 2 x 14mm フィルムのみ Cut away only film. 垂直尾翼 Vertical Fin / Rudder 2 x 14mm ビス Screw フィルムのみ Cut away only film. 2 x 14mm 30mm フィルムとバルサ(下地)をカット Cut away film and balsa. 水平尾翼...
-
Page 11: Radio Equipment
プロポ Radio Equipment 3mm セットビス Set Screw ラダーサーボ Rudder Servo リンケージストッパー (B) Linkage Stopper (B) 2mm ワッシャー 受信機/バッテリー, Washer Battery / Receiver 2mm Eリング E ring エンコンサーボ エレベーターサーボ Throttle Servo Elevator Servo Eリング E ring 重心位置 87mm キャノピー 2 x 6mm TPビス Canopy TP Screw 黒で塗装する。... - Page 12 メインギヤ Main gear クリア グレー Clear. Gray. カバーはディスプレー用です。 飛行時ははずしてください。 Remove landing gear cover before flight. 図の様に各舵が動くように調整する。この調整幅は普通の飛行に適した舵角ですので楽しみ方によって再調整して下さい。 Adjust the travel of each control surface to the values in the diagrams. These values fit general flight capabilities. Readjust according to your requirements and flight experience. ラダー RUDDER 30 mm 30 mm...
- Page 13 引き込み脚の組立(別売) RETRACTABLE GEAR (PURCHASE SEPARATELY) 引き込み脚を使用する場合は、5チャネル以上のプロポと引き込み脚用サーボが必要です。 引き込み脚の組立 A retractable landing gear system is not included in this kit and must be purchased separately. Retractable Gear To install retractable undercarriage, a minimum 5 channel radio with 1 additional retractable gear servo and 1 extension cord is required. 主翼下面...
- Page 14 主翼下面 引き込み脚の組立 View from Underside of Main Wing Retractable Gear 引き込み脚に合わせて カットする。 Remove shaded area. メインギヤが、確実にロックするようにリンケージする。 引き込み脚の組立 Make sure linkages for landing gear are properly locked. Retractable Gear 余分をカットする。 ロッドがあたる場合は、曲げる。 Cut off excess. If linkage rods foul, bend accordingly to ensure free movement.
-
Page 15: Optional Parts
●この機体は、経験者を対象にしていますので、無線操縦飛行機が初めてという方は、調整等を経験者のアドバイスを受け ながら確実に組立ててください。中途半端な組上がりの機体を飛ばすのは大変危険です。 ●無線操縦飛行機が初めてという方には、単独飛行はできませんので、必ず経験者の指導を受けてください。 ●この機体は、2サイクルの40~46エンジン、4サイクル48~53エンジン用に設計されていますのでこれ以上のエンジンを使 用し、過激な飛行をおこなうと破損するだけでなく、大変危険ですので絶対におやめください。 ●This model aircraft is designed for Intermediate to Experienced fliers. Beginners should seek advice for pre-flight adjustments and assembly from more experienced fliers. Be aware that flying a badly assembled or badly adjusted aircraft is very dangerous! ●At the start, first-time fliers should always be assisted by an experienced flier and NEVER fly alone! ●This model aircraft is designed to be powered by either a 2 stroke .40 ~ .46 size engine or a 4 stroke .48 ~ .53 size engine. -
Page 16: Safety Precautions
離陸させる。 and firmly affixed. injury. Launch the aeroplane into the wind. 〇 × 風 オプションパーツは純正パーツ以 WIND 外使用しない。 Only use genuine KYOSHO parts. 京商株式会社 〒243-0034 神奈川県厚木市船子153 メーカー指定の純正部品を使用して パーツに関するお問い合わせは、右記 ●ユ−ザ−相談室直通 TEL.046-229-4115 安全にR/Cを楽しみましょう。 ユーザー相談室までお問い合わせください。 THE FINEST RADIO CONTROL MODELS お問い合わせは:月曜∼金曜(祝祭日を除く) 10:00~18:00 PRINTED IN CHINA ...
Need help?
Do you have a question about the Messerschmitt Bf109E 40 and is the answer not in the manual?
Questions and answers