Table of Contents
Advertisement
Quick Links
Advertisement
Table of Contents

Subscribe to Our Youtube Channel
Summary of Contents for Boss MR1420S
-
Page 2: Buttons Location And Functions
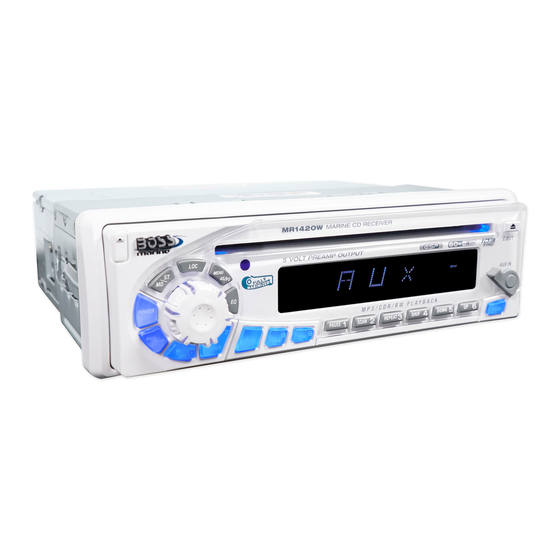
1. BUTTONS LOCATION AND FUNCTIONS 1. Panel Release Button 1. Tecla para remover o painel frontal 2. Mute Button 2. Tecla Mute 3. CD Eject Button 3. Tecla para ejetar o disco 4. Audio Button 4. Tecla de ajuste de audio 5. -
Page 3: Handling Compact Discs
2. HANDLING COMPACT DISCS MOISTURE CONDENSATION On a rainy day or in a very damp area, moisture may condense on the lenses inside the unit. Should this occur, the unit will not operate properly. In such a case, remove the disc and wait for about an hour until the moisture has evaporated. -
Page 4: Installation
3. INSTALLATION Before finally installing the unit, connect the wiring temporarily and make sure it is all connected up properly and the unit and system work properly. Use only the parts included with the unit to ensure proper installation. The use of unauthorized parts can cause malfunctions. - Page 5 Removing the unit a. Frame b. Insert fingers into the groove in the front of frame and pull out to remove the frame. (When re-attaching the frame, point the side with a groove down wards and attach it.) c. Insert the levers supplied with the unit into the grooves at both sides of the unit as shown in figure until they click.
-
Page 6: Detachable Control Panel (D.c.p .)
4. DETACHABLE CONTROL PANEL (D.C.P .) Removing The Detachable Control Panel (D.C.P .). 1. Turn the power off 2. Press the D.C.P . release button 3. Remove the D.C.P . PANEL RELEASE BUTTON Attaching the DCP 1. Attach the panel at the right side first, with point B on the main unit touching point A on the D.C.P . - Page 7 5. WIRING DIAGRAM (20 PIN HARNESS PLUG) FUSE SICHERUNG FUSIBLE ANTENNA CABLE INPUT FUSíVEL FUSIBLE ANTENNENVERLÄ NGERUNGS KABEL FUSIBILE CÂBLE D'EXTENSION D' ANTENNE ENTRADA PARA CABO DE ANTENA CABLE DE ANTENA CAVO ANTENNA ESTENDIBILE 20-PIN AUDIO/POWER HARNESS (See Figure 1) 20-PIN AUDIO/STROM- KABELGESCHIRR PLAQUE 20 FICHES AUDIO/ALIMENTATION CONECTOR DE 20 PINOS PARA AUDIO E ALIMENTACAO...
-
Page 8: Basic Operations
6. BASIC OPERATIONS 1) PANEL RELEASE BUTTON (REL) Press this button to remove the control panel. 12) POWER ON/OFF BUTTON Press this button to turn on or off the power. 5) DISPLAY BUTTON (DISP) Press this button briefly, the LCD will display the clock for about 2 seconds, then return to previous display mode. -
Page 9: Audio Operations
7. AUDIO OPERATIONS 10) VOLUME KNOB Turn this knob to adjust desired volume level. 4) AUDIO BUTTON Press this button to select desired audio function. ORDER OF FUNCTION: VOLUME(VOL) -> BASS(BAS) -> TREBLE(TRE) ->BALANCE(BAL) ->FADER(FAD) While the selected function is displayed, turn Volume Knob to adjust the level within 5 seconds, otherwise the unit will return to volume adjustment mode. -
Page 10: Radio Operations
8. RADIO OPERATIONS 11) AUTO MEMORY STORE/PRESET SCAN BUTTON (AS/PS) 1. PRESET SCAN: Press AS/PS button briefly to enter Preset Scan mode, it will scan all the preset stations in the memories, you can hear that it will stay on each station for about 5 seconds. 2. - Page 11 9. CD OPERATIONS M1) PAUSE BUTTON (PAUSE) Press this button to pause CD play, press again to release pause. M2) SCAN BUTTON (SCAN) Press this button, the first 10 seconds of each track will be played sequentially until this button is pressed again, then normal play will resume at the current track.
-
Page 12: Mp3 Operations
10.MP3 OPERATIONS Notes : - An MP3 directory is shown in this manual as “D irectory ”, and an MP3 file is shown as “Track”. - Maximum length of file name : 28 characters. - Maximum length of directory : 16 characters. - Maximum number of tracks per disc : 254. - Page 13 DIRECTORY (2) SEARCH / TRACK NAME BY USING VOLUME KNOB Under MP3 Play Mode, press MP3 MENU BUTTON twice, the display shows “ * “. Rotate the VOLUME KNOB for selecting the character. In this Encoder Search mode, SELECT button use as move cursor. Press BAND/LOUDNESS button use as MP3 CONFIRM BUTTON.
-
Page 14: Specifications
11. SPECIFICATIONS CD PLAYER CD Player Compact disc audio system System Sistema: Sistema áudio CD Compact disc Tipo de disco: Usable disc 44.1KHz Frequência de Amostragem: 44.1KHz Sampling frequency 1bit No of quantization bits Conversor D/A: 1bit 5-20,000Hz Resposta de frequencia Frequency 5-20,000Hz 2 stereo... -
Page 15: Troubleshooting
If at any time in the future you should need to dispose of this product please note that Waste electrical products should not be disposed of with household waste. Please recycle where facilities exist. Check with your Local Authority or retailer for recycling advice.(Waste Electrical and Electronic Equipment Directive) BOSS AUDIO CAR STEREOS CAR AUDIO SYSTEMS...


Need help?
Do you have a question about the MR1420S and is the answer not in the manual?
Questions and answers