Table of Contents
Advertisement
※ご使用前にこの説明書を良くお読みになり十分に理解してください。
Before beginning assembly, please read these instructions thoroughly!
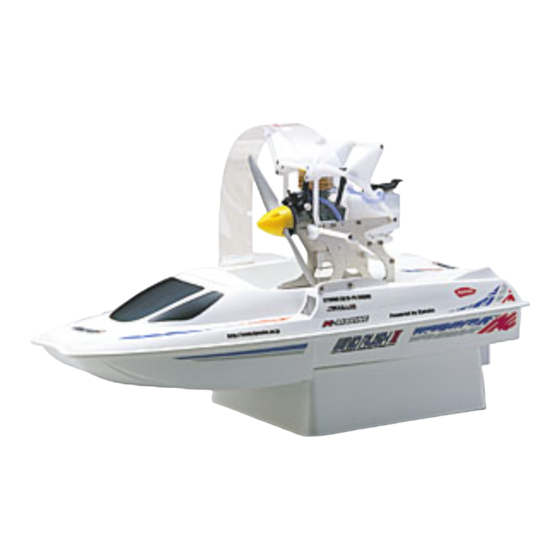
1:12 SCALE RADIO CONTROLLED
.10~.15 ENGINE POWERED AIR BOAT
目 次
INDEX
●キットの他にそろえる物/
RADIO PREPARATION
●プロポの準備/
BEFORE YOU BEGIN
●組立て前の注意/
ASSEMBLY
●本体の組立て/
OPERATING YOUR MODEL SAFELY
●取扱いの注意/
CHECKLIST BEFORE RUNNING
●走航前のチェック/
●エンジン各部名称と働き/
●エンジンの始動・ブレークイン/
MAINTENANCE
●走航後の手入れ/
IN CASE THE ENGINE DOES NOT START
●故障?と思う前に/
EXPLODED VIEW
●分解図/
●スペアパーツ・オプションパーツリスト/
●スペアパーツ・オプションパーツ購入方法
安全のための注意事項
この無線操縦模型は玩具ではありません!
●この商品は高い性能を発揮するように設計されています
ので組立てに不慣れな方は、模型を良く知っている人に
アドバイスを受け確実に組立ててください。
●組立て作業は、幼児の手のとどかない所で行ってください。
●動かして楽しむ場所は万一の事故を考えて、安全を確認
してから責任をもってお楽しみください。
●組立てた後も説明書がいつでも見られるように大切に保
管してください。
※製品改良のため、予告なく仕様を変更する場合があります。
*SPECIFICATIONS ARE SUBJECT TO BE CHANGED WITHOUT NOTICE.
© 2004 KYOSHO CORPORATION
/禁無断転載複製
REQUIRED FOR OPERATION
ENGINE DESCRIPTION
ENGINE STARTING & BREAK IN
SPARE PARTS & OPTIONAL PARTS
LENGTH: 620mm (24.4")
INSTRUCTION MANUAL
SAFETY PRECAUTIONS
This radio control model is not a toy.
First-time builders should seek the advice of experienced
●
modellers before beginning assembly and if they do not fully
understand any part of the construction.
Assemble this kit only in places out of children's reach!
●
Take enough safety precautions prior to operating this model.
●
You are responsible for this model's assembly and safe
operation!
Always keep this instruction manual ready at hand for quick
●
reference, even after completing the assembly.
No. 41424 (GS15PR付)
組立/取扱説明書
4~16
17
18
18
18~22
23
23
24~25
26
27~28
No. 41425 (GS15PRタッチスターター付)
No. 41426 (OS10FP-B(K)付)
2
3
3
Advertisement
Table of Contents

Related Manuals for Kyosho wind rush ii


Summary of Contents for Kyosho wind rush ii
-
Page 1: Instruction Manual
Always keep this instruction manual ready at hand for quick ● 管してください。 reference, even after completing the assembly. No. 41424 (GS15PR付) No. 41425 (GS15PRタッチスターター付) ※製品改良のため、予告なく仕様を変更する場合があります。 *SPECIFICATIONS ARE SUBJECT TO BE CHANGED WITHOUT NOTICE. No. 41426 (OS10FP-B(K)付) © 2004 KYOSHO CORPORATION /禁無断転載複製... -
Page 2: キットの他にそろえる物/ Required For Operation
Spark Booster cannot be used. 耐燃料塗料 No.76301 ∼ 76403 スプレーカラーを使用する場合、 Fuel-proof paint 京商スプレーカラー 缶の説明を良く読んでください。 KYOSHO SPRAY COLOR CAUTION: Before using Kyosho Spray Colors, 注意 より強力な耐燃料性を必要とする場合はウレタン系塗料を使用する。 always read the instructions. If greater fuel resistance is required, use a urethane paint. 組立工程の中で塗料が必要です。... -
Page 3: Before You Begin
●キットの内容を確かめる。 ※万一不良、不足がありましたら、お買い求めの販売店か、当社 「ユーザー相談室」 までご連絡ください。 Check the contents of this kit. Should parts be missing, immediately contact the retail shop or your nearest Kyosho distributor. ●TPビス締をめるときは・・・ 締めこみが固くても部品が固定されるまで締めてください。ただし、部品が変形するまで締めるとビスがきかなくなります。 When tightening a self-tapping (TP) screw: continue tightening until fastened correctly, even if screw is hard to turn. - Page 4 メカボックス Radio Box 向きに注意。 メカボックス Note the direction. Radio Box 防水のためすき間を なくす。 Leave not gaps so it will be waterproof. カウリング Cowling 瞬間接着剤で接着する。 をカットする。 Apply instant glue Cut off shaded portion. (CA glue, super glue). 注意して組立てる所。 Pay close attention here!
- Page 5 塗装 ABS樹脂製品はグロー燃料に侵されると変質やひび割れするので、船体の Painting 内側、外側を必ず耐グロー燃料塗料を厚めに塗装する。 Coat the hull's interior and exterior surfaces with glow fuel-resistant coating as the shape of the ABS resin material may change if soaked in glow fuel. 塗装前に、中性洗剤で油やよごれを洗う。 Before painting, remove any dirt or oil by washing with mild detergent. 水分を完全に乾かす。...
- Page 6 フレーム 3 x 10mm Frame 3 x 10mm TPビス TP Screw 3 x 10mm 燃料タンク Fuel Tank 3 x 10mm TPビス TP Screw シリコンチューブ(160mm) Silicone Tube(160mm) シリコンチューブ Silicone Tube シリコンチューブ(120mm) カットする。 Silicone Tube(120mm) Cut off. 160mm 120mm 燃料タンク Fuel Tank 3 x 10mm TPビス...
- Page 7 3 x 10mm 船体 3 x 10mm Hull 3 x 10mm ビス Screw エンジン GS15PR OS10FP Engine 約1mm Approx. 1mm フランジナット Flanged Nut 2.6 x 10mm TPビス TP Screw この穴を使用。 Use this hole. 2.6 x 10mm 5mmフランジナットをエンジン から一度外して、プロペラを おさえながらしめる。 Remove 5mm Flanged Nut from engine and hold the propeller in シムがエンジンのシャフトにひっかから...
- Page 8 3 x 10mm 船体 3 x 10mm Hull スロットルロッド(D) OS10FP Throttle Rod (D) 3 x 10mm ビス Screw GS15PR 向きに注意。 OS10FPの場合、 を図の Note the 寸法に曲げる。 前 direction. If using OS10FP, bend Front as shown. 14mm 13mm エンジン Engine 3 x 10mm ビス...
- Page 9 フレーム Frame 3 x 10mm 3 x 10mm TPビス TP Screw 3 x 10mm と の 向きに注意。 Note direction & 向きに注意。 Note the direction. 3 x 10mm フレーム Frame 3 x 10mm ビス Screw で仮組したビス。 3 x 10mm Screw from Step 7. マフラーヘ...
- Page 10 3 x 10mm 船体 Hull 3 x 10mm 3 x 10mm TPビス TP Screw 前 Front 向きに注意。 Note the direction. ラダー Rudder 3 x 10mm 3 x 10mm TPビス TP Screw Oリング O-ring ラダー Rudder 3 x 10mm TPビス TP Screw 3 x 16mm TPビス...
- Page 11 メカボックス スロットルサーボ Radio Box Throttle Servo ラダーサーボ Rudder Servo 3 x 10mm TPビス TP Screw プロポの説明書を参考にしてコネクター メカボックス を接続する。 Radio Box Connect as per radio instruction manual. 受信機 Receiver 防水テープ アンテナ Tape Anntena 電池ボックス Battery Box アンテナ Anntena メカボックス Radio Box スイッチ...
- Page 12 メカボックス Radio Box 六角レンチ(1.5mm) スロットルロッド(A) Hex Wrench Throttle Rod (A) 3 x 3mm セットビス Set Screw 3 x 3mm サーボ付属 Supplied with the servo. 51 51 50 50 この穴を使用。 Use this hole. 16mm ニュートラル スロットルハイ エンジンストップ Neutral Full Throttle Stopping Engine 3×3mmセットビスで...
- Page 13 メカボックス Radio Box この穴を使用。 Use this hole. ラダーロッド Rudder Rod 13mm 3 x 3mm セットビス Set Screw サーボ付属 Supplied with the servo. 六角レンチ(1.5mm) Hex Wrench 角度を合わせセットビスを締め込む。 Adjust the angle as shown, and then tighten the set screws. 90° 90° メカボックス Radio Box 3 x 10mm TPビス...
- Page 14 メカボックス Radio Box 防水テープ Waterproofing Tape すき間のないように貼る。 Attach tape without gaps. 部分に 防水 テープを貼る。 Attach tape to area. 船体 Hull 3 x 10mm TPビス TP Screw 80mm 3 x 10mm 2.5mm カウリング Cowling キリで穴をあける (例1.5㎜) Make hole with Awl. 1.5mm (example: 1.5mm).
- Page 15 デカール Decal 図の位置にデカールをはる。 Apply the decals to the spots indicated. ナンバーのついていないデカールは好きな位置に貼る。 Decals with no number apply any place. カッコの中は反対側用のデカールナンバーです。 The decal numbers between brackets are only for the opposite side. 15 16 13 14 11 12...
- Page 16 スターター 3 x 10mm 一度外して取り付ける。 No.41425 Starter Remove screws to attach. タッチスターター付キット Kit with Touch Starter 3 x 16mm 3 x 16mm TPビス TP Screw 同じ色のコードを接続する。 Connect to the same color. コネクターユニット No.41425 Connector Unit タッチスターター付キット Kit with Touch Starter 7.2V バッテリー...
-
Page 17: 取扱いの注意/ Operating Your Model Safely
取扱いの注意 OPERATING YOUR MODEL SAFELY 事故やケガ等の危険防止のため、次のことを必ずお守りください。 In order to avoid accidents and personal injury, be sure to observe the following: ●燃料は、引火性があります。 ●R/Cボートは、湖や河川などの水辺で楽しむものです。 Fuel is highly inflammable and highly explosive! 操縦する方や同行の方が思わぬ事故に合わないように 注意し、必ず安全な場所で走航させてください。 火気のあるところや室内では絶対に使用しない。 Discover a new world of pleasure with R/C boats. NEVER use fuel indoors or in places with open fires and Wheth- e r you run your boat on lakes, rivers or else- sources of heat! -
Page 18: Engine Description
走航前のチェック CHECKLIST BEFORE RUNNING □ Are all screws securely tightened? □ビスなどのゆるみはありませんか? □ Do moving/rotating parts move smoothly? Are they greased □可動部分はスムーズに動きますか?また、グリス等適切に塗 to ensure non-binding movement? ってありますか? □ Is fuel line clear and free of cracks? Is it connected properly. □燃料パイプの詰まりやひび割れ、接続の不良はありませんか? □... - Page 19 プラグヒート。 チョーク。 ここに燃料が来たら、 さらに1回 Heat the glow plug. Choke the チョークボタンを押す。 engine. When fuel reaches this point, push the choke button one more time. リコイルスターター付エンジンの始動(2) STARTING AN ENGINE WITH RECOIL STARTER (2) エンジン始動。 暖気運転。 スロットルトリム Start the engine. Run up the engine. Throttle Trim エンジンの回転が安定したら、スロットルトリムを通常の位置に...
-
Page 20: Engine Adjustment
エンジン調整 ENGINE ADJUSTMENT ●ブレークインが終了してから の順で調整してください。 Adjust in the order once the break-in is completed. ニードル調整(最高回転数の調整) ニードル Needle Valve Adjustment (Maximum Rpm Adjustment) Needle Valve 「エンジンの始動」の手順でエンジンを始動し、船を走航させます。 Start the engine as explained in the chapter <ENGINE STARTING> and run your boat. 直進でスロットルスティックをハイにしたときの船のスピードを見ます。 ニードルを10°(1コマ)ずつしめこむと、スピードが上がってきます。... - Page 21 スターターが回転しない場合 IN CASE THE STARTER DOES NOT WORK No.41425 タッチスターター付キット スターターが回転しない場合には、すぐにスタートをやめて下さい。 If the starter does not rotate, stop the starting process promptly. Kit with Touch Starter 警告 WARNING スターター配線ユニット、コネクターユニットが正常に接続されているにもかかわらず、スターターが回転しない場合には、 エンジンに燃料が入りすぎていることが考えられます。 If the starter wiring unit and connector units are properly hooked up and the starter still doesn't start the engine properly, it is possible the engine may be flooded with too much fuel.
- Page 22 エンジンが始動しない場合 IN CASE THE ENGINE DOES NOT START スターターはいきおいよく回転しますか? スターター用のバッテリーは充電されていますか? バッテリーを充電します。 Is the starter running powerfully? Is the battery for the starter fully charged? Charge the battery. スターターユニットの配線は正しいですか? 正しく配線してください。 Is the wiring for the starter unit properly hooked up? Wire the system correctly. 燃料がエンジンに入りすぎています。プラグを外し、スタートさせ、余分な燃料を...
-
Page 23: 走航後の手入れ/ Maintenance
走航後の手入れ MAINTENANCE After use, draw out fuel from the tank. □一日の走航が終わったらタンクから燃料を抜いてください。 □ □ Next, restart the engine to combust remaining fuel. □燃料を抜きとった後エンジンを始動し残りの燃料を使いきる。 Leaving fuel inside the engine makes engine starting difficult. 燃料が残っていると次回エンジンが始動しにくくなります。 □ Wipe off dirt and oil. □船体やエンジンの汚れを、きれいにとる。 □ Disconnect the receiver batteries. -
Page 24: 分解図/ Exploded View
3 x 10mmTP 94881 WR106 WR108 3 x 3mm ORG18BK 94881 WR108 ORG05R WR106 96202 94881 3 x 10mmTP 94881 94881 WR108 94881 ORG02R WR106 2mm Nut WR108 WR108 WR108 WR107 3 x 16mmTP 94752 © 2004 KYOSHO CORPORATION /禁無断転載複製... - Page 25 96425 96202 2.6 x 25mm 3 x 10mmTP 96202 3 x 10mmTP WR104 6591 WR104 96202 3 x 10mmTP 96425 WR103 96202 3 x 10mmTP FD33 WR105 96202 3 x 10mmTP 1790 96202 3 x 10mmTP 92301 1790 WR105 WR104 96202 3 x 10mmTP 96202...
-
Page 26: Optional Parts
Waterproofing silicone sealant. Replaces .Includes 18 pcs. 穴加工用テーパーリーマー ナイフエッジリーマー KYOSHO スペシャルグルー(14g) 瞬間接着剤(14g) 695101 96154 2100 Knife Edge Reamer KYOSHO Special Glue(14g) Super adhesive glue(14g) Taper reamer for hole processing. スーパースターターパック 走行姿勢調整用ウエイト60g入り セッティングウエイト(60g) エンジン始動用具のセット 73201 96161 3780 SUPER STARTER PACK Setting Weight(60g)
Need help?
Do you have a question about the wind rush ii and is the answer not in the manual?
Questions and answers