Table of Contents
Advertisement
Available languages
Available languages
Quick Links
Advertisement
Chapters
Table of Contents

Related Manuals for Pioneer VSX-520-K


Summary of Contents for Pioneer VSX-520-K
- Page 1 VSX-520...
- Page 2 IMPORTANT CAUTION RISK OF ELECTRIC SHOCK DO NOT OPEN CAUTION: The lightning flash with arrowhead symbol, The exclamation point within an equilateral within an equilateral triangle, is intended to TO PREVENT THE RISK OF ELECTRIC triangle is intended to alert the user to the alert the user to the presence of uninsulated SHOCK, DO NOT REMOVE COVER (OR presence of important operating and...
-
Page 3: Operating Environment
Operating Environment If the AC plug of this unit does not match the AC Operating environment temperature and humidity: outlet you want to use, the plug must be removed +5 °C to +35 °C (+41 °F to +95 °F); less than 85 %RH and appropriate one fitted. -
Page 4: Table Of Contents
Thank you for buying this Pioneer product. Please read through these operating instructions so you will know how to operate your model properly. After you have finished reading the instructions, put them away in a safe place for future reference. - Page 5 08 Other connections Bluetooth® ADAPTER for Wireless Enjoyment of Music....43 Wireless music play ....43 Connecting Optional Bluetooth ADAPTER .
-
Page 6: Flow Of Settings On The Receiver
Flow of settings on the receiver The unit is a full-fledged AV receiver equipped The colors of the steps indicate the following: with an abundance of functions and terminals. Required setting item It can be used easily after following the procedure below to make the connections and settings. -
Page 7: Before You Start
Before you start Chapter 1: Before you start CAUTION Checking what’s in the box Incorrect use of batteries may result in such Please check that you’ve received the following hazards as leakage and bursting. Observe the supplied accessories: following precautions: •... -
Page 8: Installing The Receiver
Before you start Installing the receiver • When installing this unit, make sure to put it on a level and stable surface. Don’t install it on the following places: – on a color TV (the screen may distort) – near a cassette deck (or close to a device that gives off a magnetic field). -
Page 9: Controls And Displays
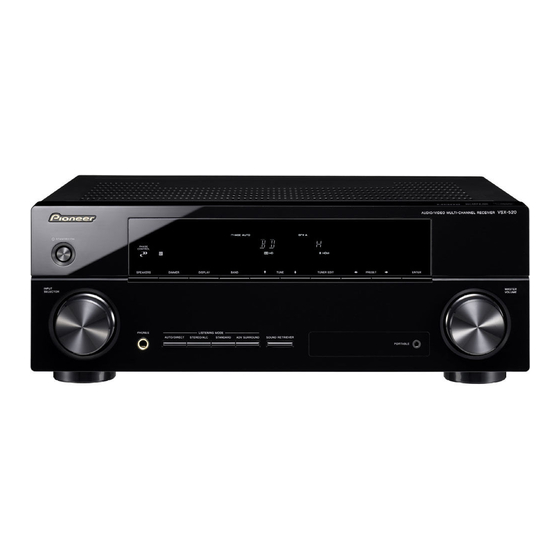
Controls and displays Chapter 2: Controls and displays Front panel VSX-520 AUDIO/ VIDEO MULTI- CHANNEL RECEIVER STANDBY/ON PHASE CONTROL SPEAKERS DIMMER DISPLAY BAND TUNE TUNER EDIT PRESET ENTER INPUT MASTER SELECTOR VOLUME PHONES LISTENING MODE PORTABLE AUTO/DIRECT STEREO/ALC STANDARD ADV SURROUND SOUND RETRIEVER ... -
Page 10: Operating Range Of Remote Control
Controls and displays PRESET / Operating range of remote control Use to select preset radio stations The remote control may not work properly if: (page 40). • There are obstacles between the remote MASTER VOLUME dial control and the receiver’s remote sensor. •... -
Page 11: Display
Controls and displays Display PHASE Character display Lights when the Phase Control is switched on Displays various system information. (page 31). 10 DTS indicators AUTO Lights when the Auto Surround feature is Lights when a source with DTS encoded switched on (see Auto playback on page 28). audio signals is detected. - Page 12 Controls and displays Lights when a source with Dolby TrueHD encoded audio signals is detected. Lights to indicate Dolby Digital EX decoding. 2PLll(x) Lights to indicate 2 Pro Logic II / 2 Pro Logic IIx decoding. Light will go off during 2 Pro Logic IIz decoding (see Listening in surround sound on page 28 for more on this).
-
Page 13: Remote Control
As for operating other devices, the remote min – 60 min – 90 min – Off). You can check control codes for the Pioneer products are the remaining sleep time at any time by preset. The settings cannot be changed. - Page 14 Controls and displays STEREO/A.L.C. Press TUNER first to access: Switches between stereo playback, Auto TUNER EDIT level control stereo mode (page 30) and Memorizes/names stations for recall Front Stage Surround Advance modes (page 40, 41). (page 30). BAND STANDARD Switches between AM, FM ST (stereo) and Press for Standard decoding and to switch FM MONO radio bands (page 40).
- Page 15 Dims or brightens the display. The brightness can be controlled in four steps. 12 SOURCE Turns on or off the power of the Pioneer DVD/ DVR units when BD, DVD, DVR or CD is selected using the input function buttons.
-
Page 16: Connecting Your Equipment
Connecting your equipment Chapter 3: Connecting your equipment Placing the speakers By connecting the left and right front speakers (L/R), the center speaker (C), the left and right surround speakers (SL/SR), and the subwoofer (SW), a 5.1 ch surround system can be enjoyed. Further, by using an external amplifier, you can connect the left and right surround back speakers (SBL/SBR) and the left and right front height speaker (FHL/FHR) to boost your system up to a 7.1 ch surround system. -
Page 17: Hints On The Speaker Placement
Connecting your equipment Hints on the speaker placement • Try not to place the surround speakers farther away from the listening position Where you put your speakers in the room has a than the front and center speakers. Doing big effect on the quality of the sound. The so can weaken the surround sound effect. -
Page 18: Connecting The Speakers
Connecting your equipment Bare wire connections Connecting the speakers Front speaker terminals: The receiver will work with just two stereo Twist exposed wire strands together. speakers (the front speakers in the diagram) Loosen terminal and insert exposed wire. but using at least three speakers is recommended, and a complete setup is best Tighten terminal. -
Page 19: Connect The Surround Back Or Front Height Speakers
Connecting your equipment CAUTION Making cable connections • These speaker terminals carry Make sure not to bend the cables over the top HAZARDOUS LIVE voltage. To prevent of this unit (as shown in the illustration). If this the risk of electric shock when connecting happens, the magnetic field produced by the or disconnecting the speaker cables, transformers in this unit may cause a... -
Page 20: Hdmi Cables
Connecting your equipment HDMI cables • Input of multi-channel linear PCM digital audio signals (192 kHz or less) for up to 8 Both video and sound signals can be transmitted channels simultaneously with one cable. If connecting the player and the TV via this receiver, for both •... -
Page 21: Digital Audio Cables
Connecting your equipment Digital audio cables About video outputs Commercially available coaxial digital audio cables or optical cables should be used to connection connect digital components to this receiver. This receiver is not loaded with a video converter. When you use component video cables or HDMI cables for connecting to the input device, the same cables should be used for connecting to the TV. -
Page 22: Connecting A Tv And Playback Components
Connecting your equipment Connecting a TV and playback components Connecting using HDMI Connecting your component with no HDMI terminal If you have an HDMI or DVI (with HDCP) equipped component (Blu-ray disc player, This diagram shows connections of a TV and etc.), you can connect it to this receiver using a DVD player (or other playback component) commercially available HDMI cable. -
Page 23: Connecting A Satellite Receiver Or Other Digital Set-Top Box
Connecting your equipment Connecting a satellite receiver Connecting an HDD/DVD recorder, or other digital set-top box VCR and other video sources Satellite and cable receivers, and terrestrial This receiver has audio/video inputs and outputs suitable for connecting analog or digital TV tuners are all examples of so-called digital video recorders, including HDD/DVD ‘set-top boxes’. -
Page 24: Using The Component Video Jacks
Connecting your equipment Important Using the component video jacks • If you connect any source component to the Component video should deliver superior receiver using a component video input, you picture quality when compared to composite must also have your TV connected to this video. -
Page 25: Connecting Antennas
Connecting your equipment Using external antennas Connecting antennas To improve FM reception Connect the AM loop antenna and the FM wire Connect an external FM antenna as shown antenna as shown below. To improve reception below. and sound quality, connect external antennas (see Using external antennas below). -
Page 26: Connecting To The Front Panel Audio
Check the power cord once in a player, etc. while. If you find it damaged, ask your nearest Pioneer authorized independent service company for a replacement. • Do not use any power cord other than the one supplied with this unit. -
Page 27: Listening To Your System
Listening to your system Chapter 4: Listening to your system Press AUTO/DIRECT to select ‘AUTO Important SURROUND’ and start playback of the source. • If you selected the proper input source • The listening modes and many features and there is still no sound, press SIGNAL described in this section may not be SEL button to select the audio input signal available depending on the current source,... -
Page 28: Selecting The Audio Input Signal
Listening to your system Selecting the audio input signal Auto playback The audio input signal can be selected for each input source. Once it is set, the audio input that The simplest, most direct listening option is the was selected will be applied whenever you Auto Surround feature. - Page 29 Listening to your system • While listening to a source, press • Straight Decode – Plays back without the STANDARD. DOLBY PLII, DOLBY PLIIz HEIGHT and If the source is Dolby Digital, DTS, or Dolby NEO:6 effects. Surround encoded, the proper decoding With multichannel sources, you can select format will automatically be selected and from:...
-
Page 30: Using The Advanced Surround Effects
Listening to your system • EXT.STEREO – Gives multichannel sound With multichannel sources, if you have connected surround back speaker(s) and have to a stereo source, using all of your selected SB ON, you can select (according to speakers. format): •... -
Page 31: Using Stream Direct
Listening to your system • While listening to a source, press STEREO/ A.L.C. to select Front Stage Surround Advance Using the Sound Retriever modes. When audio data is removed during the • STEREO – See Listening in stereo above for compression process, sound quality often more on this. -
Page 32: Using Surround Back Channel Processing
Listening to your system Front speaker Listening Using surround back channel position processing You can have the receiver automatically use 6.1 or 7.1 decoding for 6.1 encoded sources (for Sound example, Dolby Digital EX or DTS-ES), or you Subwoofer source can choose to always use 6.1 or 7.1 decoding (for example, with 5.1 encoded material). -
Page 33: Setting The Up Mix Function
Listening to your system While holding down the PRESET on • SB AUTO – Matrix decoding processing for the front panel, and hold the STANDBY/ generating the surround back component from the surround component is switched ON for about two seconds. automatically. - Page 34 Listening to your system Setting What it does Option(s) S.DELAY Some monitors have a slight delay when showing video, so 0.0 to 9.0 (frames) (Sound Delay) the soundtrack will be slightly out of sync with the picture. 1 second = 25 frames By adding a bit of delay, you can adjust the sound to match (PAL)/30 frames (NTSC) the presentation of the video.
- Page 35 Listening to your system Setting What it does Option(s) A.DLY This feature automatically corrects the audio-to-video delay between components connected with an HDMI cable. The (Auto Delay) audio delay time is set depending on the operational status of the display connected with an HDMI cable. The video delay time is automatically adjusted according to the audio delay time.
-
Page 36: The System Setup Menu
The System Setup menu Chapter 5: The System Setup menu Using the System Setup menu Manual speaker setup The following section shows you how to make These setting optimize surround sound detailed settings to specify how you’re using performance. You only need to make these the receiver. -
Page 37: Speaker Setting
The System Setup menu Speaker setting • Surround (S) – Select LARGE if your surround speakers reproduce bass Use this setting to specify your speaker frequencies effectively. Select SMALL to configuration (size, number of speakers). send bass frequencies to the other Select ‘SP SET’... -
Page 38: Crossover Network
The System Setup menu Crossover network When the surround back speakers are connected: • Default setting: 100Hz L C R SR SBR SBL SL SW This setting decides the cutoff between bass sounds playing back from the speakers When the front height speakers are connected: selected as LARGE, or the subwoofer, and bass L... -
Page 39: The Input Assign Menu
The System Setup menu • For the assignment of the digital signal inputs, see Selecting the audio input signal The Input Assign menu on page 28. You only need to make settings in the Input Assign menu if you didn’t hook up your equipment according to the default settings for The Pre Out Setting the component video inputs. -
Page 40: Using The Tuner
Using the tuner Chapter 6: Using the tuner High speed tuning Press and hold TUNE / for high speed Listening to the radio tuning. Release the button at the frequency The following steps show you how to tune in to you want. -
Page 41: Listening To Station Presets
Using the tuner Tune to a station you want to memorize. See Listening to the radio on page 40 for more on this. • To erase a station name, follow steps 1 and 2, and press ENTER while the display Press TUNER EDIT. -
Page 42: Making Recordings
Making recordings Chapter 7: Making recordings Select the audio input signal (if necessary). Press SIGNAL SEL button and select the Making an audio or a video analog inputs (A) for the source component of recording which you want to record (see page 28 for more You can make an audio or a video recording on this). -
Page 43: Other Connections
Note 1 • It must be necessary that the Bluetooth wireless technology enabled device supports A2DP profiles. • Pioneer does not guarantee proper connection and operation of this unit with all Bluetooth wireless technology enabled devices. 2 • It must be necessary that the Bluetooth wireless technology enabled device supports AVRCP profiles. -
Page 44: Connecting Optional Bluetooth
Other connections Connecting Optional Bluetooth Press TOP MENU. ADAPTER Press ENTER to enter PAIRING. • Before making or changing connections, Select the PIN code to be used from 0000/ switch off the power. 1234/8888 using /, then press ENTER. PAIRING blinks. SUBWOOFER PRE OUT CD-R/TAPE... -
Page 45: Listening To Music Contents Of Bluetooth Wireless Technology Device With Your System
® The Bluetooth word mark and logos are registered trademarks owned by Bluetooth SIG, Inc. and any use of such marks by Pioneer Corporation is under license. Other trademarks and trade names are those of their respective owners. Note 1 •... -
Page 46: Additional Information
Sometimes the trouble may lie in another component. Investigate the other components and electrical appliances being used. If the trouble cannot be rectified even after exercising the checks listed below, ask your nearest Pioneer authorized service center or your dealer to carry out repair work. - Page 47 Additional information Problem Remedy Considerable noise in radio • Connect the antenna (page 25) and adjust the position for best broadcasts. reception. • Route any loose cables away from the antenna terminals and wires. • Fully extend the FM wire antenna, position for best reception, and secure to a wall (or connect an outdoor FM antenna).
- Page 48 Additional information Problem Remedy The Bluetooth wireless • Check that no object that emits electromagnetic waves in the 2.4 GHz technology device cannot band (microwave oven, wireless LAN device or Bluetooth wireless be connected or operated. technology apparatus) is near the unit. If such an object is near the unit, Sound from the Bluetooth set the unit far from it.
-
Page 49: Hdmi
Additional information HDMI Symptom Remedy No picture or sound. • If the problem still persists when connecting your HDMI component directly to your monitor, please consult the component or monitor manual or contact the manufacturer for support. No picture. • Video signals that are input from the analog video terminal will not output from the HDMI terminal. -
Page 50: Important Information Regarding The Hdmi Connection
Additional information Important information regarding Resetting the main unit the HDMI connection There are cases where you may not be able to Use this procedure to reset all the receiver’s route HDMI signals through this receiver (this settings to the factory default. Use the front depends on the HDMI equipped component panel controls to do this. -
Page 51: Specifications
HDMI output type ....5 V, 100 mA sprays or other chemicals on or near this unit, since these will corrode the surface. Published by Pioneer Corporation. Copyright © 2010 Pioneer Corporation. All rights reserved. - Page 52 D3-4-2-1-1_A1_Zhtw D3-4-2-1-7a_A1_Zhtw D3-4-2-1-3_A1_Zhtw D3-4-2-1-4*_A1_Zhtw D3-4-2-1-7b*_A1_Zhtw D3-4-2-1-7c*_A1_Zhtw D3-4-2-1-5*_A1_Zhtw...
- Page 53 D3-4-2-2-1a_A1_Zhtw STANDBY/ON D3-4-2-2-2a*_A1_Zhtw K056_A1_Zhtw K041_A1_Zhtw...
- Page 54 感謝您購買本先鋒產品。 請徹底閱讀此份操作手冊,以便知道如何正確操作您的機器。 手冊閱讀完後,請妥善保管以供未來參考之用。 目錄 接收器的設定流程 ....6 04 聆聽您的系統 基本播放功能 ....27 選擇音訊輸入訊號...
- Page 55 08 其他連接 Bluetooth® 享受無線音樂的 ADAPTER ..... . . 43 無線音樂播放 ....43 Bluetooth ADAPTER 連接選用的...
-
Page 56: 接收器的設定流程
接收器的設定流程 步驟的顏色指示下列事項: 本機是配備多種功能和端子的全方位影音接 收器。 依下列程序連接和設定後,就可以輕 需設定項目 易使用。 視需要設定 使用前 清點包裝內容物 (第 頁) • 開啟電源 裝入電池 (第 頁) • 確定已設定好電視機的視訊輸入。 若不知如 何設定,請參閱電視機隨附手冊。 連接揚聲器 揚聲器的位置對音效產生極大的影響。 請 前置輸出設定 (第 39 頁) 依下圖位置擺設揚聲器,以便產生最佳環 (連接前側高音揚聲器時。) 繞音效。 輸入指定選單 (第 39 頁) 揚聲器之擺設 (第 頁)... -
Page 57: 使用前
使用前 第 1 章: 使用前 注意 清點包裝內容物 電池使用不當會導致滲漏及爆炸等危險。 請清點是否收到以下隨附配件: 請遵守下列安全注意事項: • 遙控器 • 新舊電池切勿混合使用。 AAA/IEC R03 乾電池 • • 裝入電池時,請正確對照電池匣內的正 (以確保系統運作) 負極標示。 環型天線 • • 電池形狀雖然相同,電壓卻不盡相同。 線型天線 • 不同電壓的電池切勿混合使用。 • 電源線 (確實使用所在國家/地區適 • 處理廢舊電池時,請遵守政府條例或適 用的正確電源線) : 圓頭 針式、平頭 用於貴國或地區的環境公共指令規則。 針式及英規 針式... -
Page 58: 安裝接收器
使用前 安裝接收器 • 在安裝本機時,請確實將其安放在水平 且平穩的表面上。 切勿安裝在以下地方: - 彩色電視機上 (畫面可能失真) - 卡式錄音座附近 (或靠近會產生磁場的 設備) 。 這會對聲音造成干擾。 - 陽光直射的地方 - 濕氣重或潮濕的地方 - 極熱或極冷的場所 - 有振動或其他動作的場所 - 灰塵多的場所 - 有熱霧或油氣的場所 (如廚房) 通風 安裝本機時,請確實在本機四周保留空間通 40 cm 風,以有效散熱 (上方至少要有 ) 。 若本機與牆壁或其他設備之間所留空間不 足,內部便會積熱,進而影響效能及/或造 成故障。 40 cm 接收器... -
Page 59: 控制與顯示
控制與顯示 第 2 章: 控制與顯示 前面板 VSX-520 AUDIO/ VIDEO MULTI- CHANNEL RECEIVER STANDBY/ON PHASE CONTROL SPEAKERS DIMMER DISPLAY BAND TUNE TUNER EDIT PRESET ENTER INPUT MASTER SELECTOR VOLUME PHONES LISTENING MODE PORTABLE AUTO/DIRECT STEREO/ALC STANDARD ADV SURROUND SOUND RETRIEVER 1 STANDBY/ON DISPLAY 切換本機的顯示幕。... -
Page 60: 遙控器的操作範圍
控制與顯示 PRESET / 遙控器的操作範圍 用於選取預設電台 (第 頁) 。 在以下狀況下,遙控器可能無法正常運作: • 遙控器與接收器的遙控感應器之間有障 7 MASTER VOLUME 旋鈕 礙物。 • 日光或螢光燈直射遙控感應器。 8 PHONES 插孔 • 接收器距離會發射紅外線的設備太近。 用於連接耳機。 耳機接上時,不會有聲音從 • 接收器與其他紅外線遙控器設備同時操 揚聲器輸出。 只有在從耳機聽到聲音時,才 作。 能使用 STEREO 或 ALC 選擇聆聽模式。 9 聆聽模式按鍵 AUTO/DIRECT 在自動環繞聲模式 ( 自動播放... - Page 61 控制與顯示 顯示 9 字元顯示幕 1 PHASE 相位控制開啟時會亮起 (第 頁) 。 顯示各種系統資訊。 10 DTS 指示燈 2 AUTO 自動環繞聲功能開啟時會亮起 (請參閱第 自動播放 頁的 乙節) 。 偵測到含 解碼音訊訊號時會亮起。 3 ST DTS-EXPRESS DTS-HD 偵測到含 或 解 在自動立體聲道模式中接收到立體聲 廣 碼音訊訊號時會亮起。 播時會亮起。 4 TUNE DTS-ES 亮起表示 解碼中。 接收到廣播時會亮起。...
- Page 62 控制與顯示 Dolby TrueHD 偵測到含 解碼音訊訊號 時會亮起。 Dolby Digital EX 亮起表示 解碼中。 2PLll(x) Pro Logic II / Pro Logic 亮起表示 2 Pro Logic IIz 編碼 。 在 2 解碼期間指 示燈會熄滅(有關詳細資料請參閱第 頁的 使用環繞音效聆聽 乙節) 。 12 ADV.S. 已選取其中一種先進環繞聲模式時會亮起 使用先進環繞聲效果 (詳情請參閱第 頁的 乙節) 。 13 SIGNAL SELECT 指示燈...
-
Page 63: 遙控器
控制與顯示 1 SLEEP 遙控器 按下可切換接收器進入待機前的時間 (30 min - 60 min - 90 min - Off) 。 只 關於操作其他裝置,則預設先鋒產品的遙控 要按下SLEEP按鍵一次便可查看剩餘的休眠 代碼。 無法變更設定。 時間。 2 RECEIVER RECEIVER SLEEP SOURCE CONTROL 此按鍵可用以切換接收器的待機與開機。 RECEIVER DTV/TV INPUT SELECT RECEIVER INPUT 可將遙控器切換以控制接收器 (用以選擇 數字鍵上方的白色指令 (如 TEST TONE CD-R 等)... - Page 64 控制與顯示 首先按下 TUNER 以選取: STEREO/A.L.C. 在立體聲播放模式、自動音量控制立體 TUNER EDIT 聲模式(第 頁)與前場前環繞聲模式 按下可記憶/命名便於喚回的電台 (第 頁)之間切換。 (第 , 頁) 。 STANDARD BAND 按下可進行標準解碼及切換各種的 FM ST 切換 、 (立體聲)和 Pro Logic II 選項 (第 頁) 。 MONO 廣播頻段 (第 頁) 。 ADV SURR 9 (TUNE /、PRESET 可於各種環繞模式中進行切換...
- Page 65 控制與顯示 TEST TONE VOL +/– 輸出每個聲道的測試音。 可用以調整電視機音量。 使用 / 按鍵選擇聲道,然後使用 DTV/TV* /按鍵調整每個聲道的位準 。 再按一 在先鋒電視的數位電視與類比電視輸入 次 TEST TONE 以退出測試音模式。 模式之間切換。 SB CH 14 MASTER VOLUME +/– 按下 ON、AUTO、OFF 選取後環繞聲道。 用以設定聆聽的音量大小。 CH SELECT 15 MUTE 連續按可選擇想要的聲道,再用 可進行靜音/取消靜音。 LEV +/– 按鍵調整位準 (第 頁)...
-
Page 66: 連接您的設備
連接您的設備 第 3 章: 連接您的設備 揚聲器之擺設 連接左右前置揚聲器 (L R) 、中置揚聲器 (C) 、左右環繞揚聲器 (SL SR) ,以及重低音 (SW)後,就能享受 聲道的環繞系統。 此外,使用外接擴大機後,您即可連接左右後環繞揚聲器 (SBL SBR) ,以及左右前側高音 揚聲器 (FHL FHR) ,將系統提升至多達 聲道的環繞系統。 • 您也可連接一部後環繞揚聲器 (SB)並享受 聲道的環繞系統。 為了能獲得最佳的環繞音效,請按照下圖方式安裝所有揚聲器。 5.1 聲道環繞系統: 6.1 聲道環繞 (後環繞)系統: 7.1 聲道環繞 (後環繞) 7.1 聲道環繞 (前側高音) 系統:... -
Page 67: 揚聲器擺設的提示
連接您的設備 揚聲器擺設的提示 • 將左右前側高音揚聲器筆直放置在左右 前置揚聲器上至少一公尺。 對於音效的品質來說,您所擺放揚聲器的地 方會有極大的影響。 以下的指南將會協助您 自系統中得到最佳的音效。 注意 • 重低音可以擺放在地上。 在理想的方式 • 請確定所有揚聲器均已牢牢安裝。 這不 上,最好是將其他揚聲器擺放在您聆聽 僅有助於改善音質,更可減少因地震等 當時接近耳朵的高度。 不建議將揚聲器 外力導致揚聲器翻倒或掉落而造成損壞 置於地板上 (重低音除外) ,或將它們 或使人受傷的危險。 安裝在牆上很高的位置。 • 要想得到最好的立體聲效果,請將前置 重要 揚聲器擺在 至 遠、與電視機同 • 若要連接後環繞或前側高音揚聲器,您 等距離的位置上。 需要另外的擴大機。 將另外的擴大機連 • 若您要將揚聲器放在 電視附近 , 請使 接至... -
Page 68: 連接揚聲器
連接您的設備 裸露金屬線之連接方式 前置揚聲器端子: 連接揚聲器 本接收器僅需兩只立體聲揚聲器就可運作 1 將裸露的導線捲繞在一起。 (如圖中的前置揚聲器) , 但建議請至少使用 2 鬆開端子,插入裸露的導線。 三只揚聲器,再加上完整的設定方式為環繞 音效最好的組合。 3 旋緊端子。 請確實將右置(R)的揚聲器接至右側端子, 左置 (L)的揚聲器接至左側端子。 另請將 本接收器的正、負 (+ –)端對應至揚聲器 上相符的端子。 10 mm 若不使用重低音,可將前置揚聲器設定 (請 揚聲器設定 參閱第 頁的 乙節)變更為 中置及環繞揚聲器端子: LARGE。 將裝置接上 AC 電源前,請務必完成所有的 1 將裸露的導線捲繞在一起。 接線工作。 2 推開端子,插入裸露的導線。... -
Page 69: 連接後環繞或前側高音揚聲器
連接您的設備 注意 連接線 • 這些揚聲器端子均帶有危險電壓。 為避 請勿將連接線折彎繞過本機上方 (如圖所 免在連接或脫離揚聲器線時發生電擊危 示) 。 否則本機內部變壓器所產生的磁場可 險,在觸摸任何未絕緣部分之前,請先 能會使揚聲器產生嗡鳴的雜音。 將電源線插頭拔離。 • 請確定所有裸露的揚聲器導線都已纏繞 在一起,並完全插入揚聲器端子中。 若 有任何裸露的揚聲器金屬線接觸到背面 面板,則可能導致電源切斷以策安全。 連接後環繞或前側高音揚聲器 連接本機的PRE OUT輸出和另外的擴大機以 增加後環繞或前側高音揚聲器。 • 若已連接後環繞或前側高音揚聲器,請 重要 Pre Out 進行 設定 (請參閱第 頁的 • 在接線或更動接線前,請關閉電源並將 前置輸出設定 乙節) 。 電源線插頭從 電源插座上拔掉。... -
Page 70: Hdmi 連接線
連接您的設備 HDMI 連接線 • 輸入下列數位音訊格式: Dolby Digital Dolby Digital Plus 使用一條連接線可同時傳輸視訊及聲音訊 - 、 、 Dolby TrueHD 號。 若透過此接收器連接播放機與電視,則 、高位元率音訊 ( 、 HDMI 兩部設備的連接可使用 連接線。 DTS-HD Master Audio DVD-Audio ) 、 、 SACD 、 ( 訊號) 、 、超級 HDMI 、 HDMI 標誌及 High-Definition Multimedia Interface 均為... -
Page 71: 數位音訊線
連接您的設備 數位音訊線 關於連接視訊輸出 請使用一般市面上的同軸數位音訊線或光纖 線,將數位設備連接至本接收器上。 本接收器未搭載視訊轉換器 。 當您使用色差 HDMI 視訊連接線或 連接線來連接至輸入裝 置時,應使用相同的連接線連接至電視機。 來自本機類比 (複合及色差)視訊輸入的 訊號將不會從 HDMI OUT 輸出。 播放設備 視訊線 標準 RCA 視訊線 用於連接來源裝置的端子 此種連接線為最常用類型的視訊接線,主要 是用來連接複合視訊端子。 黃色插頭則是用 來區別視訊線與音訊線。 HDMI IN COMPONENT VIDEO IN VIDEO IN COMPONENT VIDEO MONITOR OUT MONITOR OUT HDMI OUT 用於連接電視機的端子... -
Page 72: 連接電視機及播放設備
連接您的設備 連接電視機及播放設備 使用 HDMI 連接 連接沒有 HDMI 端子的設備 HDMI HDCP HDMI 端子的電視與 如果您有 或 (附 )型設備 本圖顯示沒有 播 Blu-ray Disc ( 播放機等) ,您便可使用市售 放器 (或其他播放設備)和接收器的連接方 HDMI 的 連接線,將其連接至接收器。 式。 播放器 HDMI/DVI 相容 選擇一台 Blu-ray disc DIGITAL AUDIO OUT ANALOG AUDIO OUT 播放機... -
Page 73: 連接衛星接收器或其他數位機上盒
連接您的設備 連接衛星接收器或其他數位機 連接硬碟 (HDD) /DVD 錄影 上盒 機、VCR 及其他視訊來源 衛星、有線接收器及地面數位電視調諧器, 本接收器有音訊/視訊輸入及輸出,可適合 均稱為 「機上盒」設備。 /DVD 連接類比或數位錄影機,包括硬碟式 錄影機及 等。 VIDEO IN SUBWOOFER • 只有輸入至 端子的訊號可從 PRE OUT CD-R/TAPE DVR/VCR VIDEO OUT 端子輸出。 ADAPTER PORT SURR BACK / FRONT ( OUTPUT 5 V 100 mA MAX ) HEIGHT •... -
Page 74: 使用色差視訊插孔
連接您的設備 重要 使用色差視訊插孔 • 使用色差視訊輸入將任何一種來源設備 色差視訊相較於複合視訊,應可帶來更為優 連接至本接收器時,需將電視機一併接 異的畫質。 另一項優勢(若來源及電視機均 至本接收器的 COMPONENT VIDEO 相容)則是循序掃描視訊,它可帶來極為穩 OUT 插孔上。 定、毫無跳動的畫面。 請參閱電視機及來源 設備隨附手冊,進一步了解它們是否與循序 掃描相容。 連接其他音訊設備 • 必要時,請配合所連接的輸入來源指定 接線的數量及種類需視連接的設備類型而 色差視訊輸入。 CD-R 定 。 請按照以下步驟連接 、 、 、 只有在未依以下預設值連接時 , 才需如此做 : 卡式錄音機或其他音訊設備。 • COMPONENT VIDEO IN 1 - BD •... -
Page 75: 連接天線
連接您的設備 使用外部天線 連接天線 改善 FM 接收效果 請依下圖方式連接 環型天線及 線型 天線。 要改善接收效果及聲音品質,可連接 請依照下圖的方式將外部 天線接上。 使用外部天線 外部天線 (請參閱以下的 乙 節) 。 Ω 同軸連接線 型插頭 (非隨附) LOOP ANTENNA 改善 AM 接收效果 可連接一條 至 長的乙烯塗裝金屬 LOOP 線連接至 天線端子 , 無須將隨附的 環型天線拆離。 為了能獲得最佳的接收效果 , 請水平懸掛於 室外。... -
Page 76: 連接至前面板音訊迷你插孔
連接您的設備 連接至前面板音訊迷你插孔 插上接收器電源 連接前面板音訊可經由前面板利用遙控器上 只有在將所有設備連接至本接收器(包括揚 的 INPUT SELECTOR 或 PORTABLE 按鍵進 聲器)時,才能插入接收器。 行。 使用立體聲迷你插孔連接線來連接數位 音訊播放器等。 注意 MASTER VOLUME • 手拿電源線時請握住插頭部分。 切勿拖 著線將插頭拔出,並不可在您手濕的時 候觸摸電線,因為這樣會造成短路或受 PORTABLE 到電擊。 請勿將本機、傢俱或其他物體 放在電源線上或有任何擠壓到電線的情 形發生。 絕不可將線打結或與其他連接 線纏繞在一起。 電源線在佈置上不可會 有腳踩到的情形。 破損的電源線會引起 火災或讓您遭受電擊。 請每隔一段時間 AUDIO OUT 檢查一次電源線。 若您發現到有破損,請 數位音訊 播放器等... -
Page 77: 聆聽您的系統
聆聽您的系統 第 4 章: 聆聽您的系統 4 按下 AUTO/DIRECT 選擇 重要 「AUTO SURROUND」並開始播放來源。 • 本章節中所說明的聆聽模式及許多功能 • 若您已選擇適當的輸入來源且仍無聲 會視目前來源、設定值及接收器的狀態 音,請按下 SIGNAL SEL 按鍵選擇音訊 而可能無法適用。 輸入訊號進行播放 (第 頁) 。 Dolby 若您正在播放使用數位音訊連接的 Digital 基本播放功能 或 環繞音效的 碟片,那 麼您應可聽到環繞音效。 若您是正在播放 在此提供一些利用您的家庭劇院系統在播放 立體聲來源,或者以類比音訊連接,那麼您 來源 (如 碟片)時的基本操作方式。 只能在預設的聆聽模式下聽到來自左/右... -
Page 78: 選擇音訊輸入訊號
聆聽您的系統 選擇音訊輸入訊號 自動播放 可選擇各輸入來源使用的音訊輸入訊號。 完 成設定後,每當您使用輸入功能按鍵選擇輸 最簡單、直接的聆聽選擇就是使用自動環繞 入來源時,就會套用已選擇的音訊輸入。 聲功能。 藉由此項功能,接收器便可自動偵 測播放來源的種類,並依需要選擇多聲道或 ADAPTER TUNER PORTABLE 立體聲播放。 PHASE S.RETRIEVER SIGNAL SEL BD MENU AUTO/ STEREO/ DIRECT A.L.C. STANDARD ADV SURR • 按下SIGNAL SEL按鍵選取相對於來源設 • 聆聽來源時,按下 AUTO/DIRECT 進行 備的音訊輸入訊號。 來源的自動播放。 當選擇 DIGITAL 或 HDMI 且... - Page 79 聆聽您的系統 若為多聲道來源 • 在聆聽來源時,按下 STANDARD 按鍵。 ,可選取的模式如下: Dolby Digital Dolby Surround 若為 、 或 • DOLBY PLIIz HEIGHT -多達 聲道音 編碼來源,接收器會自動偵測正確的解碼格 效 式並顯示在顯示幕中。 • 直接解碼-不使用 DOLBY PLIIz HEIGHT 音效的播放。 未連接後環繞及前側高音揚聲器時。 若為雙聲道來源 ,可選取的模式如下: 尚未連接後環繞揚聲器時。 • DOLBY PLII MOVIE -多達 聲道音 若是您有連接後環繞揚聲器,請一併參閱第 使用後環繞聲道處理模式...
-
Page 80: 使用先進環繞聲效果
聆聽您的系統 多聲道來源在連接後環繞揚聲器並已選取 SB ON 時,可選取 (根據格式) : 以立體聲聆聽 • DOLBY PLIIx MOVIE -請參閱上述說明 選取 STEREO 時,只要透過左、右前置揚聲 (僅在使用兩個後環繞揚聲器時可用) 器 (以及重低音揚聲器,不過需視揚聲器設 • DOLBY PLIIx MUSIC -請參閱上文 Dolby Digital 定而定) 便能聆聽來源 。 、 聲道來源 • DOLBY DIGITAL EX-可為 多聲道來源均會縮混成立體聲。 製造出後環繞聲道音效,並為 聲道 在自動音量控制立體聲模式 ( )... -
Page 81: 使用直流
聆聽您的系統 • 聆聽來源時,按下 STEREO/A.L.C. 選取 前場前環繞聲模式。 使用聲音修正器功能 以立體聲 • STEREO -詳情請參閱上文的 壓縮處理期間將音訊資料移除時,聲音品質 聆聽 乙節。 通常會出現不均勻的音像 。 聲音修正器功能 以立體聲聆聽 • ALC -詳情請參閱上文的 便是採用最新 技術,藉由恢復聲壓及 乙節。 修整壓縮後留下的人工缺陷 , 將 品質的 • F.S.S.ADVANCE -用於提供豐富的環繞 聲音恢復成壓縮的雙聲道音訊。 音效,該音效指向左、右前置揚聲器音 效投射區域匯集的中央部分。 ADAPTER TUNER PORTABLE F.S.S.ADVANCE PHASE S.RETRIEVER SIGNAL SEL •... -
Page 82: 使用後環繞聲道處理模式
聆聽您的系統 使用後環繞聲道處理模式 您可以使接收器自動運用 或 解碼功 Dolby Digital 能用於 編碼來源 (例如, DTS-ES 或 ) ,或者您可以選擇保持運用 或 解碼功能 (例如,對於 編碼 媒體內容) 。 對於 編碼來源,雖可產生 後環繞聲道,但該媒體內容如以原始編碼的 格式來播放,音效則會更佳 (在該種情 形下,您只須將後環繞聲道處理功能關閉即 可) 。 • 使用 聲道環繞系統時 , 透過後環繞聲 Up Mix 道處理至新增 功能時,從後環繞 揚聲器輸入經過矩陣編碼處理的音訊。 相位控制技術透過使用相位匹配 提供一致 DISP TEST TONE SB CH... -
Page 83: 設定 Up Mix 功能
聆聽您的系統 設定 Up Mix 功能 設定音訊選項 在此有許多額外的聲音設定值,讓您可以利 在環繞揚聲器直接放在聆聽位置旁邊的 用 AUDIO PARAMETER 選單來完成。 如未 聲道環繞系統中,從側面聽到 聲道來源 Up Mix 說明,預設值均以粗黑體字。 的環繞聲。 功能混合環繞揚聲器與 後環繞揚聲器的聲音,因此應從對角到後面 聽到環繞聲。 重要 • 如第 頁範例中的建議設定 聲道環 • 注意,若是有一設定值沒有在 AUDIO Up Mix 繞系統中的揚聲器時,使用 功能 PARAMETER 選單中出現,則表示其不 仍然有效。 適用於目前的來源、設定值以及接收器 • 視揚聲器和音源的位置而定,有時可能 的狀態。... - Page 84 聆聽您的系統 設定值 功能 選項 某些顯示器在顯示影像時會有一些延遲,因此音效會稍微 至 (訊框) S.DELAY 無法與影像同步。 但藉由增加一個位元的延遲,您便能將 1 秒 = 25 格 ( PAL ) / (聲音延遲) 30 格 ( NTSC ) 音效調整至與影像同步呈現。 預設值: 0.0 M/L OFF 可讓您在低音量下聽到強而有力的電影環繞音效。 MIDNIGHT MIDNIGHT 用於在低音量下自音樂來源取得良好的低音和高音。 LOUDNESS LOUDNESS 壓縮處理期間將音訊資料移除時,聲音品質通常會出現不 S.RTV 均勻的音像。 而聲音修正器功能便是採用創新的 技...
- Page 85 聆聽您的系統 設定值 功能 選項 HDMI 此功能將自動修正以 連接線連接之設備間的音訊至 A.DLY HDMI 視訊延遲。 將視用 連接線連接之顯示幕的操作狀態 (自動延遲) 而定,設定音訊延遲時間。 而視訊延遲時間則根據音訊延 遲時間自動調整。 可將中置聲道在右、左前置揚聲器之間展開,使其聽起來 至 C.WIDTH 更寬廣 (高設定值)或更集中 (低設定值) 。 預設值: 3 (中置寬度) (僅適用於有使用 中置揚聲器時) 可調整由前到後的環繞音效平衡,使其聽起來更深遠 (負 至 – DIMEN. 設定值)或更靠近 (正設定值) 。 預設值: 0 (范圍) 可將前置立體聲像無限延伸而使環繞揚聲器一併容納進 PNRM.
-
Page 86: 系統設定選單
系統設定選單 第 5 章: 系統設定選單 使用系統設定選單 手動揚聲器設定 下節將詳細說明如何設定指定本接收器的使 這些設定使環繞聲達到最佳化效果。 所有設 用方式。 同時也會說明如何細部調整各項揚 定只需進行一次(除非目前揚聲器系統的擺 聲器系統的設定值。 設有變動或加入新的揚聲器) 。 AUDIO TUNER EDIT MASTER PARAMETER TOOLS VOLUME MENU 重要 MENU RECEIVER SLEEP SOURCE CONTROL • 視 PRE OUT 設定而定,可調整的揚聲器 RECEIVER DTV/TV INPUT SELECT ENTER INPUT 項目會有不同。... - Page 87 系統設定選單 揚聲器設定 - 若所有環繞揚聲器能 • Surround 使用此項設定可指定揚聲器的配置方式(揚 有效產生低音頻率,選取 LARGE。 或可 聲器的大小、數量) 。 選取 SMALL 將低音頻率傳送至其他揚 聲器或重低音上。 若未連接環繞揚聲 1 從 SP SETUP 選單選取 「SP SET」 。 器,請選擇 NO (環繞聲道的音效會傳 2 使用 / 選擇要設定的揚聲器,然後選 送至其他揚聲器) 。 取揚聲器大小。 - 選取您有的後 • Surround Back 使用...
-
Page 88: 分頻器
系統設定選單 尚未連接後環繞揚聲器時: 分頻器 L C R SR SBR SBL SL SW • 預設值: 100Hz 此項設定值可決定 LARGE 揚聲器,或重低 尚未連接前側高音揚聲器時: L FHL C FHR R SR SL SW 音所輸出低音音效與 SMALL 揚聲器所輸出 低音音效之間的分頻點。... -
Page 89: 輸入指定選單
系統設定選單 輸入指定選單 前置輸出設定 若未根據色差視訊輸入的預設值接上設備, 指定使用後環繞揚聲器或前側高音揚聲器 便只需進行輸入指定選單中的設定。 連接 PRE OUT 輸出。 揚聲器連接需另外的 • 預設值: 擴大機。 COMP 1 - BD • 預設值: SURR.BACK (後環繞) COMP 2 - DVD 1 從 System Setup 選單中選取 「PRE 若未根據上述預設值連接色差視訊,則必需 OUT」 。 指定編號輸入至連接的裝置上(否則您可能 2 選擇使用 / 連接至 PRE OUT 輸出 會看到不同裝置的視訊訊號)... -
Page 90: 使用調諧器
使用調諧器 第 6 章: 使用調諧器 改善 FM 音質 收聽收音機 若在調到 電台時因訊號微弱而導致TUNE 或 ST 指示燈未亮,請按下 BAND 按鍵選取 以下步驟為說明如何利用自動 (搜索)及手 動(步驟)調諧功能調選 及 廣播節 FM MONO,並將接收器設定為單聲道接收 目的方法。 在完成選台後,可記憶頻率便於 模式。 如此應可有效改善音質,進而享受廣 叫出收聽 - 更多關於此項操作的說明,請 播的樂趣。 儲存預設電台 參閱以下的 乙節。 儲存預設電台 AUDIO TUNER EDIT MASTER PARAMETER VOLUME TOOLS MENU... -
Page 91: 收聽預設電台
使用調諧器 1 調至想要記憶的電台。 提示 收聽收音機 詳情請參閱第 頁的 乙節。 • 若要刪除電台名稱,請依照步驟 和 , 2 按下 TUNER EDIT。 然後在顯示幕空白時按下 ENTER。 在顯 顯示幕顯示 PRESET,然後閃爍 MEM 和預 示幕空白時按下 TUNER EDIT 以保留之 設電台。 前的名稱。 • 將預設電台命名後 , 請按 DISP 以顯示名 3 按下 PRESET / 選取所要的預設電 稱。... -
Page 92: 進行錄製
進行錄製 第 7 章: 進行錄製 2 選擇音訊輸入訊號 (如有必要) 。 錄音或錄影 若要錄製來源設備,請按下 SIGNAL SEL 按 鍵並選擇類比輸入 (A) (有關詳細資料請 您可經由內建調諧器或連接至本接收器的音 參閱第 頁) 。 訊或視訊來源,進行錄音或錄影 (如 播 放器或電視機) 。 3 準備好要錄製的來源。 只有透過複合視訊連接線或類比音訊輸入進 請調選電台、置入 、錄影帶、 等。 行輸入至此接收器的視訊訊號才能錄製。 透 HDMI 4 準備好錄製設備。 過 連接線、色差視訊連接線或數位 將空白的錄音帶、 、錄影帶等置入錄製... -
Page 93: 其他連接
其他連接 第 8 章: 其他連接 注意 連接或變更連接前 ,請關閉電源。 插上 • Bluetooth 設備電源應是系統最後才完成的連接工 作。 Bluetooth • 切勿讓不同端子的揚聲器導線相互碰觸 Bluetooth Bluetooth 在一起。 享受無線音樂的 Bluetooth ® ADAPTER ® 重要 Bluetooth ADAPTER Bluetooth • 下列國家及地區中可使用 ADAPTER AS-BT100 (先鋒型號 ); 新加坡、馬來西亞、泰國、澳大利亞、紐 西蘭、香港。 Bluetooth ADAPTER • 請勿移動連接 的接... -
Page 94: 連接選用的 Bluetooth Adapter
其他連接 連接選用的 Bluetooth 1 按下 TOP MENU。 ADAPTER • 連接或變更連接前,請關閉電源。 2 按下 ENTER 以進入 PAIRING。 3 使用 / 從 0000/1234/8888 中選擇 SUBWOOFER PRE OUT 要使用的 PIN 碼,然後按下 ENTER。 CD-R/TAPE DVR/VCR ADAPTER PORT SURR BACK / FRONT ( OUTPUT 5 V 100 mA MAX ) HEIGHT PAIRING 閃爍。... -
Page 95: 聆聽與您系統搭配的 Bluetooth 無線技術裝置音樂內容
其他連接 聆聽與您系統搭配的 Bluetooth 無線技 術裝置音樂內容 1 按遙控器上的ADAPTER將接收器切換至 ADAPTER 輸入。 2 從 Bluetooth 無線技術裝置端執行與 Bluetooth ADAPTER 的連接操作。 3 開始播放儲存在 無線技術裝 Bluetooth 置中的音樂內容。 Bluetooth 已可使用遙控器對 無線技術裝置 進行下列操作。 按鍵 功能 / 開始正常播放及暫停/取消暫停 播放。 按下可跳至目前檔案的開頭,再跳至前 一檔案。 按住可開始快速向後掃描。 按下可跳至下一個檔案。 按住可開始 快速向前掃描。 Bluetooth ® Bluetooth SIG, 字標和商標為... -
Page 96: 其他資訊
其他資訊 第 9 章: 其他資訊 疑難排解 錯誤的操作經常被誤以為故障及功能異常。 若認為設備出現問題,可按以下要點進行檢查。 有時候問題可能出自其他的裝置 。 請檢查使用中的其他裝置和電器用品 。 若按照以下要點檢 查後仍無法找出問題,請洽當地先鋒所授權的獨立服務公司進行維修。 • 若本機是因為靜電等外力導致無法正常操作,請拔掉插座上的電源插頭再重新插回,以 回復正常的操作狀態。 問題 解決辦法 電源無法打開。 • 將電源插頭從插座上拔掉,然後再插上。 • 確定沒有鬆脫的揚聲器線碰觸到後面板。 否則會造成接收器自動關機。 • 若電源自動關閉,請將本機帶至當地先鋒所授權的服務中心或經銷商處 進行維修。 選擇一功能時沒有聲音 • 使用 MASTER VOLUME 調高音量。 輸出。 • 按下遙控器上的 MUTE 按鍵將靜音功能關閉。 • 根據所用接線類型將SIGNAL SEL設定為HDMI 、 C1 或... - Page 97 其他資訊 問題 解決辦法 廣播節目中有明顯雜音。 • 接上天線 (第 頁)並調整至最佳接收的方位。 • 將鬆散的連接線排放在遠離天線端子及導線的地方。 • 將 線型天線完全展開,調整最佳接收的方位,並固定於牆上 (或接 上室外 天線) 。 • 連接另一條內部或外部 天線 (第 頁) 。 • 關閉造成干擾的設備或將其移離接收器(或將天線移離產生雜訊的設備 遠一些) 。 無法自動選台。 • 連接室外天線 (請參閱第 頁) 。 環繞或中置揚聲器沒有 • 正確連接揚聲器 (請參閱第 頁) 。 聲音。 揚聲器設定...
- Page 98 其他資訊 問題 解決辦法 Bluetooth 2.4 GHz 無法連接或操作 • 檢查是否有物體在本機附近於 頻帶中發射電磁波(微波爐、無 Bluetooth Bluetooth 無線技術裝置。 線 裝置或 無線技術設備) 。 若此類物體接近本機,請將 無線技術裝置的聲音未輸 本機遠離該物體。 否則,請停止使用發射電磁波的物體。 Bluetooth Bluetooth 出或聲音中斷。 • 檢查 無線技術裝置是否離本機太遠 , 且 無線技術裝 Bluetooth 置與本機間沒有阻礙物 。 讓 無線技術裝置與本機間的距離短 10 m 於約 ,且兩者之間沒有阻礙物。 Bluetooth ADAPTER •...
-
Page 99: Hdmi
其他資訊 HDMI 問題狀況 解決辦法 HDMI 無畫面或音效。 • 若直接將 設備連接至顯示器後仍然出現此問題,請查閱設備或監 視器手冊,或聯絡製造商以獲得支援。 HDMI HDMI 無畫面。 • 從類比視訊端子輸入的視訊訊號將不會從 端子輸出 。 從 端 子輸入的訊號將不會從類比視訊端子輸出。 輸入與輸出的連接線類型請 維持一致。 • 視來源設備的輸出設定而異,該設備可能是輸出無法顯示的視訊格式。 變更來源的輸出設定,或使用色差或複合插孔連接。 HDCP HDCP • 本機為 相容。 確認所連接的設備亦是 相容。 若不是,則請 利用色差或複合視訊插孔將這些設備接上。 HDCP • 視接上的來源設備而定,有可能對本接收器並不適用(即使是 相 容) 。 此時,請使用色差或複合視訊插孔將來源及接收器連接上。 Deep Color •... -
Page 100: 關於 Hdmi 連接線的重要資訊
其他資訊 關於 HDMI 連接線的重要資訊 HDMI 重新設定主機 以下為您可能無法透過本接收器傳送 HDMI 使用以下程序可將接收器的所有設定值重新 訊號的範例(此取決於您連接的 設備 HDMI 設回原廠預設值。 請使用前面板控制進行此 -關於 相容資訊,請洽詢設備製造 項操作。 商) 。 若無法透過本接收器從您的設備正確接收 1 將接收器切換成待機。 HDMI 訊號,請在連接時嘗試使用以下配置 2 按下 BAND 按鍵的同時,按住 方式。 STANDBY/ON 按鍵大約兩秒鐘。 配置 3 在見到顯示幕出現 RESET? 時,按下 HDMI HDMI 使用 連接線直接將... -
Page 101: 清潔主機
其他資訊 其他資訊 規格 電源需求 ..AC 110 V 127 V/220 V 至 至 音訊部分 240 V 50 Hz/60 Hz , ..65 W + 65 W 功率輸出... - Page 102 IMPORTANTE CAUTION RISK OF ELECTRIC SHOCK DO NOT OPEN ATENCIÓN: La luz intermitente con el símbolo de punta El punto exclamativo dentro un triángulo de flecha dentro un triángulo equilátero. PARA PREVENIR EL PELIGRO DE CHOQUE equilátero convenido para avisar el usuário Está...
- Page 103 Entorno de funcionamiento Si la clavija del cable de alimentación de CA de este Temperatura y humedad del entorno de funcionamiento aparato no se adapta a la toma de corriente de CA +5 °C a +35 °C; menos del 85 % de humedad relativa que usted desea utilizar, deberá...
- Page 104 Enhorabuena por la adquisición de este producto Pioneer. Lea completamente este manual de instrucciones para aprender a operar correctamente el aparato. Después de haber terminado la lectura de las instrucciones, guarde el manual en un lugar seguro para poderlo consultar en el futuro.
- Page 105 07 Grabación Cómo hacer una grabación de audio o vídeo ....... 42 08 Otras conexiones ADAPTADOR Bluetooth®...
-
Page 106: Organigrama De Ajustes Del Receptor
Organigrama de ajustes del receptor Este equipo es un receptor AV completo Los colores de los pasos indican lo siguiente: equipado con numerosas funciones y Elemento de ajuste necesario terminales. Se puede usar fácilmente tras seguir el procedimiento indicado a continuación para la realización de las Ajuste que debe realizarse si es necesario conexiones y ajustes. -
Page 107: Antes De Comenzar
Capítulo 1: Antes de comenzar PRECAUCIÓN Comprobación del contenido El uso incorrecto de las pilas puede provocar de la caja situaciones peligrosas tales como fugas y Compruebe que ha recibido todos los explosiones. Tenga en cuenta las siguientes accesorios siguientes: precauciones: •... -
Page 108: Instalación Del Receptor
Instalación del receptor • Cuando instale el equipo, asegúrese de colocarlo sobre una superficie nivelada y estable. No lo instale en los lugares siguientes: – sobre un televisor en color (la imagen podría distorsionarse en la pantalla) – cerca de una platina de casete (o cerca de dispositivos que generen campos magnéticos). -
Page 109: Controles E Indicadores
Capítulo 2: Controles e indicadores Panel frontal VSX-520 AUDIO/ VIDEO MULTI- CHANNEL RECEIVER STANDBY/ON PHASE CONTROL SPEAKERS DIMMER DISPLAY BAND TUNE TUNER EDIT PRESET ENTER INPUT MASTER SELECTOR VOLUME PHONES LISTENING MODE PORTABLE AUTO/DIRECT STEREO/ALC STANDARD ADV SURROUND SOUND RETRIEVER ... -
Page 110: Alcance Operativo Del Mando A Distancia
Dial MASTER VOLUME Alcance operativo del mando a distancia Conector PHONES Utilícelo para conectar un par de auriculares. El mando a distancia puede que no funcione Cuando se conecta un par de auriculares, los correctamente si: altavoces no emiten sonido. Cuando el sonido •... -
Page 111: Pantalla
Pantalla PHASE Información de presintonía o indicador Se ilumina cuando se enciende Phase Control de señal de entrada (página 31). Muestra el número de presintonía del sintonizador o el tipo de señal de entrada, etc. AUTO Se ilumina cuando la función Auto Surround Pantalla de visualización de caracteres está... - Page 112 Se ilumina cuando se detecta una fuente con señales de sonido codificadas en Dolby Digital Plus. Se ilumina cuando se detecta una fuente con señales de sonido codificadas en Dolby TrueHD. Se ilumina para indicar la descodificación Dolby Digital EX. 2PLll(x) Se ilumina para indicar la descodificación 2 Pro Logic II / 2 Pro Logic IIx.
-
Page 113: Mando A Distancia
(30 min – 60 min – 90 min – Off). dispositivos, los códigos de control del mando Puede comprobar el tiempo de desconexión a distancia para los productos Pioneer están restante en cualquier momento pulsando predefinidos. No se pueden cambiar los SLEEP una vez. - Page 114 STEREO/A.L.C. Pulse TUNER primero para acceder a: Alterna entre reproducción estéreo, el TUNER EDIT modo estéreo con control automático de Memoriza nombres o emisoras para nivel (página 30) y los modos Front Stage solicitarlos posteriormente (páginas 40, Surround Advance (página 30). 41).
- Page 115 Para reducir o incrementar la luminosidad de la pantalla. Se pueden seleccionar cuatro niveles de luminosidad. 12 SOURCE Enciende o apaga las unidades Pioneer DVD/ DVR cuando se selecciona BD, DVD, DVR o CD mediante los botones de función de entrada.
-
Page 116: Conexión Del Equipo
Capítulo 3: Conexión del equipo Disposición de los altavoces Si conecta los altavoces delanteros izquierdo y derecho (L/R), el altavoz central (C), los altavoces de sonido envolvente derecho e izquierdo (SL/SR) y el subwoofer (SW), podrá disfrutar de un sistema de sonido envolvente de 5.1 canales. Si, además, utiliza un amplificador externo, podrá... -
Page 117: Consejos Sobre La Colocación De Los Altavoces
Consejos sobre la colocación de los • Intente no colocar los altavoces de sonido envolvente muy lejos de la posición de altavoces audición con respecto a los altavoces La disposición de los altavoces en la sala frontales y central. Esta acción podría influye de manera importante en la calidad del debilitar el efecto de sonido envolvente. -
Page 118: Conexión De Los Altavoces
Conexiones de cables desnudos Conexión de los altavoces Terminales de los altavoces frontales: El receptor puede funcionar con sólo dos Trence los hilos expuestos del cable. altavoces estéreo (los altavoces frontales en el Afloje el terminal e inserte el hilo diagrama), pero se recomienda utilizar al expuesto. -
Page 119: Conexión De Los Altavoces Traseros De Sonido Envolvente O De Los Altavoces Delanteros Con Efectos De Altura
• También se puede utilizar el amplificador PRECAUCIÓN adicional para un solo altavoz conectado a • Por estos terminales de altavoz circula las salidas PRE OUT del altavoz trasero. En este caso, conecte el amplificador al tensión ACTIVA que es PELIGROSA. Para terminal izquierdo (L (Single)) evitar el peligro de descargas eléctricas al conectar o desconectar los cables de... -
Page 120: Cables Hdmi
Cables HDMI • Entrada de señales de audio digital PCM lineal multicanal (192 kHz o menos) para Tanto las señales de vídeo como las de sonido se un máximo de 8 canales pueden transmitir simultáneamente con un solo cable. Si conecta el reproductor y el televisor a •... -
Page 121: Cables De Audio Digital
Cables de audio digital Acerca de la conexión de Utilice cables de audio digital coaxiales o cables ópticos (disponibles en comercios) salidas de vídeo para conectar componentes digitales a este Este receptor no incorpora un conversor de receptor. vídeo. Si utiliza cables de vídeo de componentes o cables HDMI para conectar el equipo al dispositivo de entrada, utilice los mismos cables para conectar el equipo al... -
Page 122: Conexión Mediante Hdmi
Conexión de componentes de reproducción y de un TV Conexión mediante HDMI Conexión de un componente sin terminal HDMI Si dispone de un componente (reproductor de discos Blu-ray, etc.) equipado con HDMI o DVI Este diagrama indica las conexiones al (con HDCP), puede conectarlo a este receptor receptor de un televisor y de un reproductor de con un cable HDMI disponible en el... -
Page 123: Conexión De Un Receptor De Satélite U Otro Módulo De Conexión Digital
Conexión de un receptor de Conexión a una grabadora de satélite u otro módulo de HDD/DVD, grabadora de vídeo y conexión digital otras fuentes de vídeo Los receptores de satélite o de cable y los Este receptor tiene entradas y salidas de sintonizadores de televisión digital terrestre audio/vídeo adecuadas para conectar son ejemplos de los llamados “módulos de... -
Page 124: Uso De Conectores De Vídeo De Componentes
Importante Uso de conectores de vídeo de • Si ha conectado algún componente fuente componentes al receptor mediante una entrada de vídeo El vídeo de componentes debería ofrecerle una de componentes, también deberá conectar calidad de imagen superior que el vídeo su televisor a los conectores COMPONENT compuesto. -
Page 125: Conexión De Antenas
Uso de antenas exteriores Conexión de antenas Para mejorar la recepción en FM Conecte la antena de cuadro de AM y la antena Conecte una antena FM exterior, según se de hilo de FM como se indica a continuación. indica más abajo. Para mejorar la recepción y la calidad de sonido, conecte antenas exteriores (consulte Uso de antenas exteriores más abajo). -
Page 126: Conexión Al Miniconector De Audio Del Panel
Revise el cable de alimentación cada cierto tiempo. Si encuentra que está dañado, pida un cable de recambio al representante autorizado de Pioneer más cercano. • No utilice ningún cable de alimentación que no sea el suministrado con esta unidad. -
Page 127: Uso Del Sistema
Capítulo 4: Uso del sistema Pulse AUTO/DIRECT para seleccionar Importante ‘AUTO SURROUND’ y empezar a reproducir la fuente. • Los modos de escucha y muchas • Si pese a haber seleccionado la fuente de funciones descritas en esta sección entrada correcta no escucha ningún pueden no estar disponibles dependiendo sonido, pulse el botón de SIGNAL SEL de la fuente actual, los ajustes y el estado... -
Page 128: Selección De La Señal De Entrada De Audio
Selección de la señal de entrada de Reproducción automática audio Se puede seleccionar la señal de entrada de La opción de escucha más simple y directa es audio para cada fuente de entrada. Una vez la función Auto Surround. Con esta función, el que ha sido ajustada, la entrada de audio receptor detecta automáticamente el tipo de seleccionada se aplicará... - Page 129 • Mientras escucha una fuente, pulse • DOLBY PRO LOGIC – Consulte arriba STANDARD. • Descodificación directa – Reproducción Si la fuente es Dolby Digital, DTS o Dolby sin efectos DOLBY PLII, DOLBY PLIIz Surround codificado, el formato de HEIGHT ni NEO:6. descodificación apropiado será...
-
Page 130: Uso De Los Efectos De Sonido Envolvente Avanzados
• EXT.STEREO – Ofrece sonido multicanal Con fuentes multicanal, si ha conectado altavoces de sonido envolvente traseros y ha para una fuente estéreo, utilizando todos seleccionado SB ON, puede seleccionar (según los altavoces. el formato): • DOLBY PLIIx MOVIE – Véase más arriba Reproducción estéreo (sólo está... -
Page 131: Uso De Stream Direct
• Mientras escucha una fuente, pulse STEREO/A.L.C. para seleccionar los modos de Uso de Sound Retriever Front Stage Surround Advance. Al quitar los datos de audio durante el proceso • STEREO – Para más detalles, consulte de compresión, a menudo la calidad de sonido Reproducción estéreo más arriba. -
Page 132: Uso Del Procesamiento Del Canal Envolvente
Uso del procesamiento del canal Altavoz frontal Posición de envolvente trasero escucha Puede hacer que el receptor utilice automáticamente la descodificación de fuentes codificadas de 6.1 ó 7.1 canales (por ejemplo, Dolby Digital EX o DTS-ES), o elegir Fuente de Subwoofer sonido usar siempre descodificación 6.1 ó... -
Page 133: Ajuste De La Función Up Mix
• SB AUTO – Se activa automáticamente el Ponga el receptor en modo de espera. procesamiento de descodificación de Mantenga pulsado el botón PRESET en matriz para la generación del componente el panel frontal, y pulse el botón de sonido envolvente trasero del STANDBY/ON durante aproximadamente componente de sonido envolvente. - Page 134 Ajuste Qué hace Opciones S.DELAY Algunos monitores muestran la imagen con un leve 0,0 a 9,0 (cuadros) retardo, lo que afecta a la sincronización entre la imagen y (Retardo de sonido) 1 segundo = 25 cuadros el sonido. Si introduce un pequeño retardo, puede (PAL)/ 30 cuadros (NTSC) conseguir que el sonido coincida con la presentación del Predeterminado: 0.0...
- Page 135 Ajuste Qué hace Opciones A.DLY Esta función corrige automáticamente el retardo de sonido a vídeo entre componentes conectados con un (Retardo automático) cable HDMI. El tiempo de retardo de sonido se ajusta en función del estado operativo de la pantalla conectada con un cable HDMI.
-
Page 136: El Menú System Setup
Capítulo 5: El menú System Setup Uso del menú System Setup Configuración manual de los altavoces La sección siguiente le muestra cómo realizar ajustes detallados para especificar cómo está Este ajuste optimiza el rendimiento del sonido utilizando el receptor. Explica también cómo envolvente. -
Page 137: Ajuste De Los Altavoces
Ajuste de los altavoces • Surround (S) – Seleccione LARGE si los altavoces de sonido envolvente reproducen Seleccione esta opción para especificar la frecuencias de graves de forma eficaz. configuración de sus altavoces (tamaño, Seleccione SMALL para enviar las número de altavoces). frecuencias bajas a los otros altavoces o al Seleccione “SP SET”... -
Page 138: Red Divisora De Frecuencias
Red divisora de frecuencias Cuando los altavoces de sonido envolvente traseros están conectados: • Ajuste por defecto: 100Hz L C R SR SBR SBL SL SW Esta opción determina el corte entre los sonidos graves reproducidos desde los Cuando los altavoces delanteros con efectos de altavoces seleccionados como LARGE, o el... -
Page 139: El Menú Input Assign
• Para la asignación de las entradas de señal digital, consulte Selección de la señal de El menú Input Assign entrada de audio en la página 28. Sólo es necesario que realice ajustes en el menú Input Assign si no conectó su equipo según la configuración predeterminada para La configuración Pre Out las entradas de vídeo de componentes. -
Page 140: Uso Del Sintonizador
Capítulo 6: Uso del sintonizador Sintonización rápida Pulse y mantenga pulsado TUNE / Recepción de radio para que la operación de sintonización se El siguiente procedimiento describe cómo realice a alta velocidad. Suelte el botón en sintonizar emisiones de radio de FM o AM la frecuencia que desea sintonizar. -
Page 141: Cómo Sintonizar Emisoras Memorizadas
Pulse TUNER EDIT. Sugerencia La pantalla muestra PRESET, luego MEM parpadeante y una presintonía. • Para borrar el nombre de una estación, siga los pasos 1 y 2, y pulse ENTER Pulse PRESET / para seleccionar la mientras la pantalla está en blanco. Pulse presintonía deseada. - Page 142 Capítulo 7: Grabación Seleccione la señal de entrada de audio (de ser necesario). Cómo hacer una grabación de Pulse el botón de SIGNAL SEL y seleccione las audio o vídeo entradas analógicas (A) para el componente Puede hacer una grabación de audio o vídeo fuente desde el que desea grabar (para más desde el sintonizador incorporado o desde una detalles, consulte la página 28).
-
Page 143: Otras Conexiones
Nota 1 • Es imprescindible que el dispositivo habilitado con tecnología inalámbrica Bluetooth soporte perfiles A2DP. • Pioneer no garantiza un funcionamiento y conexión correctos de esta unidad con todos los dispositivos que dispongan de tecnología inalámbrica Bluetooth. 2 • Es imprescindible que el dispositivo habilitado con tecnología inalámbrica Bluetooth soporte perfiles AVRCP. -
Page 144: Conexión Del Adaptador Bluetooth Opcional
Conexión del ADAPTADOR Bluetooth Para más información, consulte las instrucciones de funcionamiento de su opcional dispositivo con tecnología inalámbrica • Antes de hacer o cambiar las conexiones, Bluetooth. desconecte la alimentación. Pulse TOP MENU. Pulse ENTER para introducir PAIRING. SUBWOOFER PRE OUT CD-R/TAPE DVR/VCR... -
Page 145: Escucha De Contenidos Musicales De Un Dispositivo Con Tecnología Inalámbrica Bluetooth Con Su Sistema
® La marca literal y los logotipos Bluetooth marcas registradas propiedad de Bluetooth SIG, Inc., y cualquier uso de dichas marcas por Pioneer Corporation se hace bajo licencia. Otras marcas y nombres comerciales son propiedad de sus respectivos propietarios. Nota 1 En algunos casos, puede que se haga referencia al código PIN como PASSKEY. -
Page 146: Información Adicional
Si no puede solucionar el problema después de realizar las comprobaciones que se indican a continuación, diríjase al centro de servicio técnico Pioneer autorizado más cercano o a su distribuidor para que lleve a cabo las reparaciones necesarias. - Page 147 Problema Solución Las emisiones de radio • Conecte la antena (página 25) y ajuste la posición para obtener la mejor contienen una cantidad recepción. considerable de ruido. • Aleje los cables sueltos de los hilos y terminales de la antena. •...
- Page 148 Problema Solución La pantalla se ve oscura o • Para regresar al valor por defecto, pulse repetidamente DIMMER en el está apagada. mando a distancia. El dispositivo de tecnología • Compruebe que no haya ningún objeto que emita ondas inalámbrica Bluetooth no electromagnéticas en la banda de 2,4 GHz (horno microondas, puede conectarse ni dispositivo inalámbrico LAN o un aparato de tecnología inalámbrica...
-
Page 149: Hdmi
HDMI Síntoma Solución No hay imagen ni sonido. • Si el problema todavía persiste cuando conecte su componente HDMI directamente al monitor, consulte el manual del componente o del monitor, o bien póngase en contacto con el fabricante para obtener asistencia. -
Page 150: Información Importante Relativa A La Conexión Hdmi
Información importante relativa a la Restablecimiento de los conexión HDMI Habrá casos en los que no podrá encaminar ajustes por defecto del equipo señales HDMI a través de este receptor Lleve a cabo este procedimiento para (depende del componente que está restablecer todos los ajustes realizados en el conectando;... -
Page 151: Especificaciones
Terminal HDMI... . Tipo A (19 clavijas) equipo. Tipo de salida HDMI ... . . 5 V, 100 mA Publicado por Pioneer Corporation. Copyright © 2010 Pioneer Corporation. Reservados todos los derechos. - Page 152 253 Alexandra Road, #04-01, Singapore 159936 TEL: 65-6472-7555 PIONEER ELECTRONICS AUSTRALIA PTY. LTD. 178-184 Boundary Road, Braeside, Victoria 3195, Australia, TEL: (03) 9586-6300 PIONEER ELECTRONICS DE MEXICO S.A. DE C.V. Blvd.Manuel Avila Camacho 138 10 piso Col.Lomas de Chapultepec, Mexico, D.F. 11000 TEL: 55-9178-4270 K002_B1_En Printed in China <5707-00000-313-0S>...
Need help?
Do you have a question about the VSX-520-K and is the answer not in the manual?
Questions and answers