Table of Contents
Advertisement
Quick Links
X-EM21V
Discover the benefits of registering your product online at
http://www.pioneer.co.uk
Découvrez les nombreux avantages offerts en enregistrant votre produit en ligne
http://www.pioneer.fr
maintenant sur
Bitte nutzen Sie die Möglichkeit zur Registrierung Ihres Produktes unter
http://www.pioneer.de
Registra il tuo prodotto su
http://www.pioneer.eu
(o
Ontdek nu de voordelen van online registratie! Registreer uw Pioneer product
http://www.pioneer.nl
via
http://www.pioneer.eu
(of
Registre su producto en
http://www.pioneer.eu
Operating Instructions
Mode d'emploi
Bedienungsanleitung
Istruzioni per l'uso
Handleiding
Manual de instrucciones
DVD Receiver System
Micro chaîne DVD
DVD-Receiversystem
Sistema DVD con amplificatore
DVD Receiver System
Sistema receptor de DVD
http://www.pioneer.eu
(or
(ou
http://www.pioneer.eu
(oder
http://www.pioneer.it
) e scopri subito quali vantaggi puoi ottenere!
http://www.pioneer.be
-
)
http://www.pioneer.es
) Descubra los beneficios de registrarse on-line:
).
http://www.pioneer.eu
)
(o en
).
Advertisement
Table of Contents

Related Manuals for Pioneer X-EM21V


Summary of Contents for Pioneer X-EM21V
- Page 1 (oder http://www.pioneer.it Registra il tuo prodotto su http://www.pioneer.eu ) e scopri subito quali vantaggi puoi ottenere! Ontdek nu de voordelen van online registratie! Registreer uw Pioneer product http://www.pioneer.nl http://www.pioneer.be http://www.pioneer.eu http://www.pioneer.es Registre su producto en (o en http://www.pioneer.eu...
- Page 2 IMPORTANT CAUTION RISK OF ELECTRIC SHOCK DO NOT OPEN CAUTION: The lightning flash with arrowhead symbol, The exclamation point within an equilateral within an equilateral triangle, is intended to TO PREVENT THE RISK OF ELECTRIC triangle is intended to alert the user to the alert the user to the presence of uninsulated SHOCK, DO NOT REMOVE COVER (OR presence of important operating and...
- Page 3 (the time depends on the the power cord once in a while. When you find it extent of condensation). The water droplets will damaged, ask your nearest PIONEER authorized dissipate and playback will become possible. Condensation can also occur in the summer if the service center or your dealer for a replacement.
-
Page 4: Table Of Contents
Thank you for buying this Pioneer product. Please read through these operating instructions so that you will know how to operate your model properly. After you have finished reading the instructions, put them in a safe place for future reference. -
Page 5: Before You Start
Pioneer. (http://pioneer.jp/homeav/support/ios/eu/) • Installing software versions other than the ones indicated on the website of Pioneer to your iPod/iPhone may result in incompatibility with this product. Gently press the edge of the battery (the What’s in the box dotted section on the diagram below) and remove the battery. - Page 6 Before you start Turn the battery case upside-down, set the CAUTION new battery with the side facing down, insert • Do not use any batteries other than the ones specified. it diagonally then gently press it down. • When loading the batteries into the remote control, set them in the proper direction, as indicated by the polarity marks (...
-
Page 7: Part Names And Functions
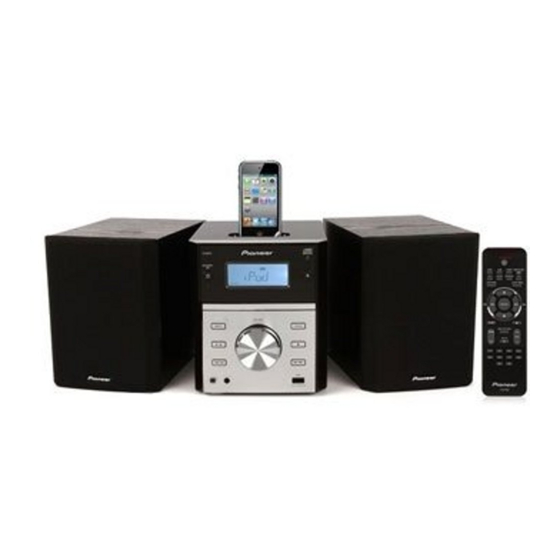
Part names and functions Chapter 2: Part names and functions Overview of the main unit Dock for iPod/iPhone • Skip to the previous track. • Connect to the iPod/iPhone. • Press and hold to play reverse quickly within a track. ... -
Page 8: Overview Of The Remote Control
Part names and functions Remote control sensor Overview of the remote control • Point the remote control to this, and then operate it within approximately 7 m. The product may have trouble capturing remote control signals if there is a fluorescent light nearby. - Page 9 Part names and functions 20 SLEEP/TIMER • Set the sleep timer in the working mode. • Use to play, pause, or resume playback. • Set alarm timer in the standby mode. 21 VOL +/– / • Use to set the listening volume. •...
-
Page 10: Connections
Connections Chapter 3: Connections Connect speakers FM Antenna Installation Note Note • For the best sound quality, use the supplied speakers only. • The antenna on the back panel is used to improve reception of FM. Extend this antenna and fix it to a position with the •... -
Page 11: Connect Tv
Connections Connect TV Connect power Connect the audio and video cables to the output sockets on the product and the corresponding input sockets on your TV. Note Select the best video connection that your TV supports. • Before you connect the AC power cord, make sure that you have completed all other connections. -
Page 12: Getting Started
Getting started Chapter 4: Getting started Turning on Finding the correct video input channel Press STANDBY/ON. The product switches to the last selected source. Turn on the product. APS mode Press DISC/USB on the remote control or • After this product is kept inactive for 15 minutes, it INPUT repeatedly on the main unit to select the automatically switches to the standby mode. -
Page 13: Playing
Playing Chapter 5: Playing CAUTION Playing recorded files • Risk of damage to the product. During playback, never move the unit. You can play DivX/MP3/WMA/JPEG files that are copied onto a CD-R/RW, or USB storage device. • Never put any object other than a disc into the disc tray. •... -
Page 14: Accessing A Category
Playing Accessing a category Playing slideshow and music simultaneously Press (or ) repeatedly until a category icon is highlighted. Note • If there is no file under a certain category, the category • Make sure that the USB storage device or the disc icon can not be highlighted. -
Page 15: Controlling Playback
Playing Controlling playback Follow the instructions to control the playback. Media Function Action Return to the disc menu Press MENU. Displays the top menu Press TOP MENU. Enable/disable the PBC (playback control) feature Press MENU repeatedly. • Enable PBC to display the PBC menu, and then use the numeric buttons to enter your choice. -
Page 16: Searching By Time Or Title/Chapter/Track Number
Playing Press to start playback. Searching by time or title/chapter/ • Only audio files within the same source can be programmed. track number • If you press REPEAT during programmed playback, the current track or all programmed tracks/files is/are During playback, press GOTO. -
Page 17: Other Features
Other features Chapter 6: Other features Charge the iPod/iPhone Playing iPod/iPhone When the product is connected to power, the docked iPod/ iPhone starts charging. You can enjoy audio from iPod/iPhone through this product. Remove the iPod/iPhone Note • The audio is only output through the supplied speakers. Unload the iPod/iPhone from the dock. -
Page 18: Displaying Rds Information
Other features Displaying RDS information Playing audio from an external device RDS (Radio Data System) is a service that allows FM stations to show additional information. If you tune to an RDS radio You can use this product to play audio from an external station, [RDS] and the station name are displayed. -
Page 19: Use The Sleep Timer
Other features Press / to select [SOURCE]. Press SLEEP/TIMER. Select the input ([DISC], [USB], [iPod] or [FM]) by pressing INPUT on the main unit or one of the input function buttons on the remote control. • For the tuner source, you still need to press / to select a programmed radio station. -
Page 20: Setup
Setup Chapter 7: Setup Interface for setup menu System setup After you press SYSTEM MENU, the interface for the setup menu is displayed as follows. [TV SYSTEM] Select a TV system that matches your TV. [TV TYPE] Select a display ratio that matches your TV screen. [VIDEO] Select a video output mode. -
Page 21: Language Setup
Setup [RATING] Audio setup Select a rating level to restrict the play of discs that are not suitable for children. To play a disc that has the rating level higher than your setting, you must enter the 4-digit password. [DOWNMIX] These discs must be recorded with rating levels. -
Page 22: Additional Information
Additional information Chapter 8: Additional information • This product can play Super VCDs, but some functions will not work. Types of playable discs • This product can play back DVD-R and DVD-RW discs The DVD player can play back discs bearing any of the recorded in the DVD VIDEO format and DVD+R and following marks: DVD+RW discs, but depending on the recording unit,... -
Page 23: Discs That Cannot Be Played
Additional information Discs that cannot be played USB playability information • DVDs without the region number on the disc. • DVDs with SECAM system Compatible USB devices: • DVD-ROM • USB flash memory (USB1.1/2.0 Full Speed) • DVD-RAM • USB flash players (USB1.1/2.0 Full Speed) •... -
Page 24: Rds Program Types
Additional information RDS program types NO TYPE No RDS programme type NEWS News services AFFAIRS Politics and current affairs INFO Special information programs SPORT Sports EDUCATE Education and advanced training DRAMA Radio plays and literature CULTURE Culture, religion and society SCIENCE Science VARIED... -
Page 25: Troubleshooting
Sometimes the trouble may lie in another component. Inspect the other components and electrical appliances being used. If the trouble cannot be rectified even after checking the points below, ask your nearest Pioneer authorized service center or your dealer to carry out repair work. -
Page 26: Ipod And Iphone
Additional information Problem Solution Disc does not play Insert a readable disc with the label side facing you. Check the disc type, color system and regional code. Check for any scratches or smudges on the disc. Press SYSTEM MENU to exit the system setup menu. Disable the password for parental control or change the rating level. -
Page 27: Cautions On Use
Then press dust or dirt, consult your nearest Pioneer authorized STANDBY/ON, wait until [GOOD BYE] disappears on service center. Although lens cleaners for players are main display to turn off, and then unplug the power cord. -
Page 28: About Specially Shaped Discs
Note • The specifications and design of this product are subject to change without notice. • Corporation and product names mentioned herein are trademarks or registered trademarks of the respective corporations. © 2012 PIONEER CORPORATION. All rights reserved. - Page 29 Additional information...
- Page 30 253 Alexandra Road, #04-01, Singapore 159936 TEL: 65-6472-7555 PIONEER ELECTRONICS AUSTRALIA PTY. LTD. 5 Arco Lane, Heatherton, Victoria, 3202, Australia, TEL: (03) 9586-6300 PIONEER ELECTRONICS DE MEXICO S.A. DE C.V. Blvd.Manuel Avila Camacho 138 10 piso Col.Lomas de Chapultepec, Mexico, D.F. 11000 TEL: 55-9178-4270 K002_B3_En Printed in China / Imprimé...
Need help?
Do you have a question about the X-EM21V and is the answer not in the manual?
Questions and answers