ZyXEL Communications WRE2205 User Manual
Hide thumbs
Also See for WRE2205:
- User manual (74 pages) ,
- Quick start manual (4 pages) ,
- Quick start manual (2 pages)
Table of Contents
Advertisement
Quick Links
Advertisement
Table of Contents

Related Manuals for ZyXEL Communications WRE2205


Summary of Contents for ZyXEL Communications WRE2205
- Page 1 WRE2206 Wireless N300 Range Extender Version 1.00 Edition 1, 12/2015 Quick Start Guide User’s Guide Default Details Web Address http://zyxelsetup http://192.168.1.2 www.zyxel.com User Name admin Password 1234 SSID ZyXEL Pre-shared Key 00000000 Copyright © 2015 ZyXEL Communications Corporation...
-
Page 2: Related Documentation
IMPORTANT! READ CAREFULLY BEFORE USE. KEEP THIS GUIDE FOR FUTURE REFERENCE. Related Documentation • Quick Start Guide The Quick Start Guide shows how to connect the WRE2206 and access the Web Configurator wizards. • More Information Go to support.zyxel.com to find other information on the WRE2206. WRE2206 User’s Guide... -
Page 3: Table Of Contents
Contents Overview Contents Overview User’s Guide ............................7 Introduction ...............................8 The Web Configurator ..........................12 Connection Wizard ..........................14 Status ..............................20 Tutorials ..............................25 Technical Reference ..........................35 Wireless LAN ............................36 LAN .................................45 System ..............................47 Tools ................................48 Troubleshooting ............................54 WRE2206 User’s Guide... -
Page 4: Table Of Contents
Table of Contents Table of Contents Contents Overview ..........................3 Table of Contents ..........................4 Part I: User’s Guide ................... 7 Chapter 1 Introduction............................8 1.1 Overview .............................8 1.2 Securing the WRE2206 ........................9 1.3 Front Panel ............................9 1.4 The WPS Button ..........................10 1.4.1 WiFi Protected Setup ....................... 11 Chapter 2 The Web Configurator ........................12 2.1 Overview ............................12... - Page 5 Table of Contents 5.2 Connecting a Wireless Client using WPS ..................25 5.2.1 Push Button Configuration (PBC) ....................25 5.2.2 PIN Configuration ........................27 5.3 Connecting the WRE2206 to an AP ....................28 5.3.1 Connecting to an AP with the WPS PBC Method ..............29 5.3.2 Connecting to an AP with the WPS PIN Method ..............30 5.3.3 Selecting an AP from an Automatically Detected List .............31 5.3.4 Selecting an AP by Manually Entering Security Information ...........33...
- Page 6 Table of Contents 9.3 Firmware Upload Screen ........................48 9.4 Configuration Screen ........................50 9.4.1 Backup Configuration ......................51 9.4.2 Restore Configuration ......................51 9.4.3 Back to Factory Defaults ......................52 9.5 Restart Screen ..........................52 9.6 LED Screen ............................52 Chapter 10 Troubleshooting..........................54 10.1 Power, Hardware Connections, and LEDs ..................54 10.2 WRE2206 Access and Login ......................55 10.3 Internet Access ..........................56 10.4 Resetting the WRE2206 to Its Factory Defaults ................58...
-
Page 7: User's Guide
User’s Guide... -
Page 8: Introduction
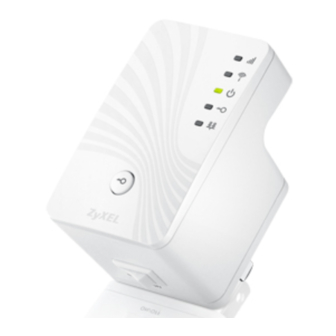
H A PT ER Introduction 1.1 Overview The WRE2206 (N) is a universal repeater that is an access point and a wireless client at the same time. The WRE2206 (N) wirelessly relays communications from its wireless clients to the access point. -
Page 9: Securing The Wre2206
Chapter 1 Introduction 1.2 Securing the WRE2206 Do the following things regularly to make the WRE2206 more secure and to manage the WRE2206 more effectively. • Change the password. Use a password that’s not easy to guess and that consists of different types of characters, such as numbers and letters. -
Page 10: The Wps Button
Chapter 1 Introduction The following table describes the LEDs and the WPS button. Table 1 Front Panel LEDs and WPS Button STATUS DESCRIPTION Signal Strength 3 LED On The signal strength is 50-100%. 2 LED On The signal strength is 25-50%. 1 LED On The signal strength is <25%. -
Page 11: Wifi Protected Setup
Chapter 1 Introduction 1.4.1 WiFi Protected Setup Your WRE2206 supports Wi-Fi Protected Setup (WPS), which is an easy way to set up a secure wireless network. WPS is an industry standard specification, defined by the WiFi Alliance. WPS allows you to quickly set up a wireless network with strong security, without having to configure security settings manually. -
Page 12: The Web Configurator
H A PT ER The Web Configurator 2.1 Overview This chapter describes how to access the WRE2206 Web Configurator and provides an overview of its screens. The Web Configurator is an HTML-based management interface that allows easy setup and management of the WRE2206 via Internet browser. Use Internet Explorer 6.0 and later versions, Mozilla Firefox 3 and later versions, or Safari 2.0 and later versions. -
Page 13: Resetting The Wre2206
Chapter 2 The Web Configurator Type admin (default) as the user name and 1234 (default) as the password and click OK. Figure 3 Login Screen 2.3 Resetting the WRE2206 If you forget your password or IP address, or you cannot access the Web Configurator, press the WPS button for more than 10 seconds to reload the factory-default configuration file. -
Page 14: Connection Wizard
H A PT ER Connection Wizard 3.1 Overview This chapter provides information on the wizard setup screens in the Web Configurator. The Web Configurator’s wizard setup helps you configure your device. The first time you access the WRE2206 Web Configurator, the wizard displays automatically. For subsequent access, click start the wizardsetup. - Page 15 Chapter 3 Connection Wizard The following table describes the labels in this screen. Table 3 Network > Wireless LAN > AP Select LABEL DESCRIPTION Select Use the radio button to select the wireless device to which you want to connect. SSID This displays the Service Set IDentity of the wireless device.
-
Page 16: Manually Configuring Ap Parameters
Chapter 3 Connection Wizard Figure 5 Wizard: Type a Key 3.2.2 Manually Configuring AP Parameters If the AP you want to connect to is not listed, then follow these steps to configure the security settings of the AP manually. Select Setup repeater manually. Type the SSID of the AP into the SSID field. -
Page 17: Completing The Connection Wizard
Chapter 3 Connection Wizard Table 5 Maximum Key Lengths ENCRYPTION KEY FORMAT KEY LENGTH 64-bit WEP ASCII 5 characters 10 characters 128-bit WEP ASCII 13 characters 26 characters WPA pre-shared key Passphrase 8-63 characters 64 characters Figure 7 Wizard: Manually Configuring Security Settings 3.3 Completing the Connection Wizard Click Next. - Page 18 Chapter 3 Connection Wizard Figure 8 Wizard: Verifying the Key The following screen appears if the key verifies successfully. Figure 9 Wizard: Key Verification Success The following screen appears if the key fails to verify. Click BACK and check the key. WRE2206 User’s Guide...
- Page 19 Chapter 3 Connection Wizard Figure 10 Wizard: Key Verification Failed Click Apply to complete the wizard setup and restart the WRE2206. Figure 11 Connection Wizard Complete WRE2206 User’s Guide...
-
Page 20: Status
H A PT ER Status 4.1 WRE2206 Status The screen below shows the status screen. Figure 12 Status Screen The following table describes the icons shown in the Status screen. Table 6 Status Screen Icon Key ICON DESCRIPTION Click this icon to open the setup wizard. Click this icon to view copyright and a link for related product information. - Page 21 Chapter 4 Status Table 6 Status Screen Icon Key (continued) ICON DESCRIPTION Select a number of seconds or None from the drop-down list box to refresh all screen statistics automatically at the end of every time interval or to not refresh the screen statistics.
-
Page 22: Summary: Packet Statistics
Chapter 4 Status Table 7 Web Configurator Status Screen (continued) LABEL DESCRIPTION Status For the LAN port, this field displays Down (line is down) or Up (line is up or connected). For the WLAN, it displays Up when the WLAN is enabled or Down when the WLAN is disabled. -
Page 23: Summary: Wlan Station Status
Chapter 4 Status Table 8 Summary: Packet Statistics (continued) LABEL DESCRIPTION System Up Time This is the total time the WRE2206 has been on. Poll Interval Enter the time interval for refreshing statistics in this field. Set Interval Click this button to apply the new poll interval you entered in the Poll Interval field. Stop Click Stop to stop refreshing statistics. - Page 24 Chapter 4 Status Figure 15 Menus The following table describes the sub-menus. Table 10 Menus LINK FUNCTION Status This screen shows the WRE2206’s general device, system and interface status information. Use this screen to access the wizard, and summary statistics tables. Network Wireless AP Select...
-
Page 25: Tutorials
H A PT ER Tutorials 5.1 Overview This chapter provides tutorials for your WRE2206 as follows: • Connecting a Wireless Client using WPS • Push Button Configuration (PBC) • PIN Configuration • Connecting the WRE2206 to an AP • Connecting to an AP with the WPS PBC Method •... - Page 26 Chapter 5 Tutorials Make sure that you have installed the wireless client (this example uses the NWD210N) driver and utility in your notebook. In the wireless client utility, find the WPS settings. Enable WPS and press the WPS button (Start or WPS button) Log into WRE2206’s Web Configurator and navigate to the Network >...
-
Page 27: Pin Configuration
Chapter 5 Tutorials 5.2.2 PIN Configuration When you use the PIN configuration method, you need to use both WRE2206’s configuration interface and the client’s utilities. Launch your wireless client’s configuration utility. Go to the WPS settings and select the PIN method to get a PIN number. -
Page 28: Connecting The Wre2206 To An Ap
Chapter 5 Tutorials Figure 17 Example WPS Process: PIN Method Wireless Client WRE2206 WITHIN 1 MINUTE Authentication by PIN SECURITY INFO COMMUNICATION 5.3 Connecting the WRE2206 to an AP This section gives you an example of how to connect the WRE2206 to an AP. There are four AP connection methods. -
Page 29: Connecting To An Ap With The Wps Pbc Method
Chapter 5 Tutorials • Connecting to an AP with the WPS PIN method - create a secure wireless network simply by entering the WRE2206's PIN (Personal Identification Number) in the AP’s interface. See Section 5.3.2 on page 30. This is the more secure method, since one device can authenticate the other. •... -
Page 30: Connecting To An Ap With The Wps Pin Method
Chapter 5 Tutorials Figure 18 Example Connection to AP using WPS: PBC Method WRE2206 WITHIN 1 MINUTE SECURITY INFO COMMUNICATION 5.3.2 Connecting to an AP with the WPS PIN Method When you use the PIN configuration method, you need to use both the configuration interface of the AP and the WRE2206’s configuration interface. -
Page 31: Selecting An Ap From An Automatically Detected List
Chapter 5 Tutorials Figure 19 Example Connection to AP using WPS: PIN Method WRE2206 51382179 WITHIN 1 MINUTE Authentication by PIN SECURITY INFO COMMUNICATION 5.3.3 Selecting an AP from an Automatically Detected List Follow the steps below to create a secure wireless network by selecting an AP from a list of detected APs. - Page 32 Chapter 5 Tutorials Figure 20 Tutorial: Selecting an automatically detected AP Type a key into the KEY field and click Next. Figure 21 Tutorial: The KEY field Wait for the WRE2206 to verify the key with the AP. Figure 22 Tutorial: Verifying the key When the key is verified, click Next.
-
Page 33: Selecting An Ap By Manually Entering Security Information
Chapter 5 Tutorials Click APPLY to save settings and restart the WRE2206. Click CONTINUE to go to the Status screen without saving the settings and restarting the WRE2206. Figure 24 Tutorial: Saving settings 5.3.4 Selecting an AP by Manually Entering Security Information This example shows you how to configure wireless security settings with the following parameters on your WRE2206. - Page 34 Chapter 5 Tutorials Select the security settings and click Next. Figure 26 Tutorial: Security Settings Click Apply to save settings and restart the WRE2206. Click CONTINUE to go to the Status screen without saving the settings and restarting the WRE2206. Figure 27 Tutorial: Saving settings WRE2206 User’s Guide...
-
Page 35: Technical Reference
Technical Reference... -
Page 36: Wireless Lan
H A PT ER Wireless LAN 6.1 Overview This chapter discusses how to configure the wireless network settings in your WRE2206. See Section 1.1 on page 8 for an overview of wireless networks. 6.2 What You Can Do • Use the General screen to enable the Wireless LAN, enter the SSID and select the wireless security mode (Section 6.4 on page 38). -
Page 37: Wireless Security Overview
Chapter 6 Wireless LAN 6.3.1 Wireless Security Overview The following sections introduce different types of wireless security you can set up in the wireless network. 6.3.1.1 MAC Address List Every wireless client has a unique identification number, called a MAC address. A MAC address is usually written using twelve hexadecimal characters ;... -
Page 38: General Wireless Lan Screen
Chapter 6 Wireless LAN Many types of encryption use a key to protect the information in the wireless network. The longer the key, the stronger the encryption. Every wireless client in the wireless network must have the same key. 6.3.1.3 WPS WiFi Protected Setup (WPS) is an industry standard specification, defined by the WiFi Alliance. -
Page 39: Mac Address List
Chapter 6 Wireless LAN Table 12 Network > Wireless LAN > General (continued) LABEL DESCRIPTION Hide SSID Select this check box to hide the SSID in the outgoing beacon frame so a station cannot obtain the SSID through scanning using a site survey tool. Operating This displays the channel the WRE2206 is currently using. -
Page 40: Wireless Lan Advanced Screen
Chapter 6 Wireless LAN The following table describes the labels in this menu. Table 13 Network > Wireless LAN > MAC Address List LABEL DESCRIPTION Active Select this to enable MAC address filtering. This is the index number of the MAC address. MAC Address Enter the MAC addresses of the wireless station that are allowed access to the WRE2206 in these address fields. -
Page 41: Quality Of Service (Qos) Screen
Chapter 6 Wireless LAN Table 14 Network > Wireless LAN > Advanced (continued) LABEL DESCRIPTION Preamble Type A preamble affects the timing in your wireless network. There are two preamble modes: long and short. If a device uses a different preamble mode than the WRE2206 does, it cannot communicate with the WRE2206. -
Page 42: Wps Station Screen
Chapter 6 Wireless LAN Figure 32 Network > Wireless LAN > WPS The following table describes the labels in this screen. Table 16 Network > Wireless LAN > WPS LABEL DESCRIPTION WPS Setup Enable WPS Select this to enable the WPS feature. PIN Number This displays a PIN number last time system generated. -
Page 43: Ap Select Screen
Chapter 6 Wireless LAN Note: WPS times out after two minutes of pressing a button. Press the button on the second device within about a minute of the first, then wait two minutes for the WPS configuration to complete. To add the second wireless station, you have to press these buttons on both device and the wireless station again after the first 2 minutes. - Page 44 Chapter 6 Wireless LAN Figure 34 Network > Wireless LAN > AP Select The following table describes the labels in this screen. Table 18 Network > Wireless LAN > AP Select LABEL DESCRIPTION Select Use the radio button to select the wireless device to which you want to connect. SSID This displays the Service Set IDentity of the wireless device.
-
Page 45: Lan
H A PT ER 7.1 Overview This screen allows you to assign the WRE2206 a fixed or dynamic IP address. The default IP address is 192.168.1.2. In initial configuration, the WRE2206 acts as a DHCP server, so it can assign your computer an IP address in the same network range as the default IP. After the WRE2206 connects to an AP, the DHCP server function is disabled and your computer gets its IP from the AP. - Page 46 Chapter 7 LAN The following table describes the labels in this screen. Table 19 Network > LAN > IP LABEL DESCRIPTION Get from DHCP Select this to have the WRE2206 get a dynamic IP address from a DHCP server. Server User Defined LAN Click this to enable the manual IP configuration.
-
Page 47: System
H A PT ER System 8.1 Overview This chapter provides information on the System screen. 8.2 What You Can Do Use the Password screen to set the password (Section 8.3 on page 47). 8.3 System Password Screen Use this screen to set the web configurator password. Click Maintenance > System. The following screen displays. -
Page 48: Tools
H A PT ER Tools 9.1 Overview This chapter shows you how to upload a new firmware, upload or save backup configuration files, restart the WRE2206 and configure LEDs. 9.2 What You Can Do • Use the Firmware screen to upload firmware to your WRE2206 (Section 9.3 on page 48). - Page 49 Chapter 9 Tools Figure 37 Maintenance > Tools > Firmware The following table describes the labels in this screen. Table 21 Maintenance > Tools > Firmware LABEL DESCRIPTION Firmware Use this section if you have already manually downloaded new firmware from the website. Upgrade Remember that you must decompress compressed (.zip) files before you can upload them.
-
Page 50: Configuration Screen
Chapter 9 Tools Figure 38 Firmware Upgrading The WRE2206 automatically restarts in this time causing a temporary network disconnect. In some operating systems, you may see the following icon on your desktop. Figure 39 Network Temporarily Disconnected After the WRE2206 restarts, the Upgrade Accomplished screen appears. Figure 40 Upgrade Accomplished Refresh the web page and log in again and check your new firmware version in the Status screen. -
Page 51: Backup Configuration
Chapter 9 Tools Figure 41 Maintenance > Tools > Configuration 9.4.1 Backup Configuration Backup configuration allows you to back up (save) the WRE2206’s current configuration to a file on your computer. Once your WRE2206 is configured and functioning properly, it is highly recommended that you back up your configuration file before making configuration changes. -
Page 52: Back To Factory Defaults
Chapter 9 Tools Figure 42 Temporarily Disconnected If you uploaded the default configuration file you may need to change the IP address of your computer to be in the same subnet as that of the default WRE2206 IP address (192.168.1.2). Refer to your operating system’s help files for details on how to set up your computer’s IP address. - Page 53 Chapter 9 Tools The following table describes the labels on the LED screen. Table 23 Maintenance > Tools > LED Screen LABEL DESCRIPTION Enable LED Type in the location of the file you want to upload in this field or click Browse... to find it. OFF mode Turn off all LED Select this to turn off all LEDs.
-
Page 54: Troubleshooting
HAPTER Troubleshooting This chapter offers some suggestions to solve problems you might encounter. The potential problems are divided into the following categories. • Power, Hardware Connections, and LEDs • WRE2206 Access and Login • Internet Access • Resetting the WRE2206 to Its Factory Defaults •... -
Page 55: Wre2206 Access And Login
Chapter 10 Troubleshooting 10.2 WRE2206 Access and Login I don’t know the IP address of my WRE2206. Click Start > Run, enter cmd, and then enter Ping zyxelsetup. You can find the MAC address on a label on the WRE2206. The default URL is http://zyxelsetup. -
Page 56: Internet Access
Chapter 10 Troubleshooting • If you changed the IP address and have forgotten it, see the troubleshooting suggestions for don’t know the IP address of my WRE2206. Check the hardware connections, and make sure the LEDs are behaving as expected. See the Quick Start Guide. - Page 57 Chapter 10 Troubleshooting Try to connect directly to the AP. If you can access the Internet, check that the WRE2206 has associated with the AP by checking the WLAN STA Information SSID field shows the SSID of the AP. See Section 6.4 on page If you are trying to access the Internet wirelessly, make sure the wireless settings in the wireless client are the same as the settings in the AP.
-
Page 58: Resetting The Wre2206 To Its Factory Defaults
Chapter 10 Troubleshooting 10.4 Resetting the WRE2206 to Its Factory Defaults If you reset the WRE2206, you lose all of the changes you have made. The WRE2206 re-loads its default settings, and the username/password resets to admin/1234. You have to make all of your changes again. -
Page 59: Appendix A Customer Support
• Brief description of the problem and the steps you took to solve it. Corporate Headquarters (Worldwide) Taiwan • ZyXEL Communications Corporation • http://www.zyxel.com Asia China • ZyXEL Communications (Shanghai) Corp. ZyXEL Communications (Beijing) Corp. ZyXEL Communications (Tianjin) Corp. • http://www.zyxel.cn India • ZyXEL Technology India Pvt Ltd • http://www.zyxel.in Kazakhstan •... - Page 60 • ZyXEL Singapore Pte Ltd. • http://www.zyxel.com.sg Taiwan • ZyXEL Communications Corporation • http://www.zyxel.com/tw/zh/ Thailand • ZyXEL Thailand Co., Ltd • http://www.zyxel.co.th Vietnam • ZyXEL Communications Corporation-Vietnam Office • http://www.zyxel.com/vn/vi Europe Austria • ZyXEL Deutschland GmbH • http://www.zyxel.de WRE2206 User’s Guide...
- Page 61 • http://www.zyxel.by Belgium • ZyXEL Communications B.V. • http://www.zyxel.com/be/nl/ • http://www.zyxel.com/be/fr/ Bulgaria • ZyXEL България • http://www.zyxel.com/bg/bg/ Czech Republic • ZyXEL Communications Czech s.r.o • http://www.zyxel.cz Denmark • ZyXEL Communications A/S • http://www.zyxel.dk Estonia • ZyXEL Estonia • http://www.zyxel.com/ee/et/ Finland •...
- Page 62 • ZyXEL Communications Poland • http://www.zyxel.pl Romania • ZyXEL Romania • http://www.zyxel.com/ro/ro Russia • ZyXEL Russia • http://www.zyxel.ru Slovakia • ZyXEL Communications Czech s.r.o. organizacna zlozka • http://www.zyxel.sk Spain • ZyXEL Communications ES Ltd • http://www.zyxel.es Sweden • ZyXEL Communications WRE2206 User’s Guide...
- Page 63 Appendix A Customer Support • http://www.zyxel.se Switzerland • Studerus AG • http://www.zyxel.ch/ Turkey • ZyXEL Turkey A.S. • http://www.zyxel.com.tr • ZyXEL Communications UK Ltd. • http://www.zyxel.co.uk Ukraine • ZyXEL Ukraine • http://www.ua.zyxel.com Latin America Argentina • ZyXEL Communication Corporation • http://www.zyxel.com/ec/es/ Brazil •...
-
Page 64: North America
Appendix A Customer Support • http://www.zyxel.com/me/en/ North America • ZyXEL Communications, Inc. - North America Headquarters • http://www.zyxel.com/us/en/ Oceania Australia • ZyXEL Communications Corporation • http://www.zyxel.com/au/en/ Africa South Africa • Nology (Pty) Ltd. • http://www.zyxel.co.za WRE2206 User’s Guide... -
Page 65: Appendix B Legal Information
The contents of this publication may not be reproduced in any part or as a whole, transcribed, stored in a retrieval system, translated into any language, or transmitted in any form or by any means, electronic, mechanical, magnetic, optical, chemical, photocopying, manual, or otherwise, without the prior written permission of ZyXEL Communications Corporation. Published by ZyXEL Communications Corporation. All rights reserved. -
Page 66: European Union
Appendix B Legal Information Industry Canada RSS-GEN & RSS-247 statement • This device complies with Industry Canada license-exempt RSS standard(s). Operation is subject to the following two conditions: (1) this device may not cause interference, and (2) this device must accept any interference, including interference that may cause undesired operation of the device. - Page 67 Appendix B Legal Information Magyar Alulírott, ZyXEL nyilatkozom, hogy a berendezés megfelel a vonatkozó alapvetõ követelményeknek és az 1999/5/EK (Hungarian) irányelv egyéb elõírásainak. Malti (Maltese) Hawnhekk, ZyXEL, jiddikjara li dan tagħmir jikkonforma mal-ħtiġijiet essenzjali u ma provvedimenti oħrajn relevanti li hemm fid-Dirrettiva 1999/5/EC.
-
Page 68: Safety Warnings
Appendix B Legal Information 2. The regulatory limits for maximum output power are specified in EIRP. The EIRP level (in dBm) of a device can be calculated by adding the gain of the antenna used(specified in dBi) to the output power available at the connector (specified in dBm). List of national codes COUNTRY ISO 3166 2 LETTER CODE... - Page 69 Appendix B Legal Information Wireless setting, please refer to "Wireless" chapter for more detail. European Union - Disposal and Recycling Information The symbol below means that according to local regulations your product and/or its battery shall be disposed of separately from domestic waste.
- Page 70 Appendix B Legal Information Environmental Product Declaration WRE2206 User’s Guide...
- Page 71 Appendix B Legal Information 台灣 以下訊息僅適用於產品具有無線功能且銷售至台灣地區 第十二條 經型式認證合格之低功率射頻電機,非經許可,公司,商號或使用者均不得擅自變更頻率、加大功率或變更原設計之特性及功能。 第十四條 低功率射頻電機之使用不得影響飛航安全及干擾合法通信;經發現有干擾現象時,應立即停用,並改善至無干擾時方得繼續使用。 前項合法通信,指依電信法規定作業之無線電通信。 低功率射頻電機須忍受合法通信或工業、科學及醫療用電波輻射性電機設備之干擾。 無線資訊傳輸設備忍受合法通信之干擾且不得干擾合法通信;如造成干擾,應立即停用, 俟無干擾之虞,始得繼續使用。 無線資訊傳設備的製造廠商應確保頻率穩定性,如依製造廠商使用手冊上所述正常操作, 發射的信號應維持於操作頻帶中 以下訊息僅適用於產品操作於 5.25-5.35 秭赫頻帶內並銷售至台灣地區 • 在 5.25-5.35 秭赫頻帶內操作之無線資訊傳輸設備,限於室內使用。 以下訊息僅適用於產品屬於專業安裝並銷售至台灣地區 • 本器材須經專業工程人員安裝及設定,始得 設置使用,且不得直接販售給一般消費者 安全警告 為了您的安全,請先閱讀以下警告及指示 : • 請勿將此產品接近水、火焰或放置在高溫的環境。 • 避免設備接觸任何液體 - 切勿讓設備接觸水、雨水、高濕度、污水腐蝕性的液體或其他水份。 • 灰塵及污物 - 切勿接觸灰塵、污物、沙土、食物或其他不合適的材料。 •...
- Page 72 Appendix B Legal Information Open Source Licenses This product contains in part some free software distributed under GPL license terms and/or GPL like licenses. Open source licenses are provided with the firmware package. You can download the latest firmware at www.zyxel.com. To obtain the source code covered under those Licenses, please contact support@zyxel.com.tw to get it.
-
Page 73: Index
Index Index firmware version Backup configuration General wireless LAN screen Guide Quick Start certifications viewing Channel Configuration backup reset the factory defaults IP Address restore contact information copyright CPU usage customer support LAN setup Link type disclaimer documentation related MAC address duplex setting MAC address filtering MAC Address List... - Page 74 Index Web Configurator how to access Overview other documentation Wireless association list overview wireless channel wireless LAN Wireless LAN wizard Wireless network basic guidelines port speed encryption security SSID Wireless security overview troubleshooting Quality of Service (QoS) type Quick Start Guide Wireless tutorial Wizard setup complete...
Need help?
Do you have a question about the WRE2205 and is the answer not in the manual?
Questions and answers