
Related Manuals for FULGOR OVFS9-10


Summary of Contents for FULGOR OVFS9-10
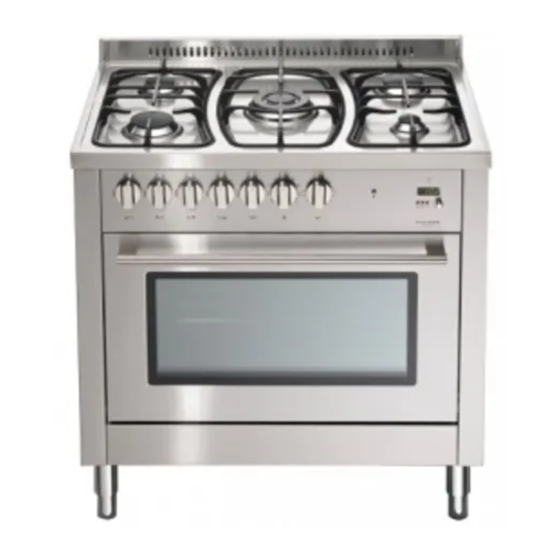
- Page 1 Customer Use & Care Manual Freestanding Oven 90 cm OVFS9-10 INSTRUCTIONS AND ADVICE FOR THE INSTALLATION, USE AND MAINTENANCE OF FREESTANDING COOKERS...
-
Page 2: Table Of Contents
INDEX WARNINGS AND RECOMMENDATIONS ....................4 1. INSTALLATION ...........................6 Where to install the cooker Discharge of fuel gases Positioning the cooker Connection to the gas supply: Current installation standards Connection to the electricity supply Stabilizing the cooker freestanding Leg fitting instructions Gas conversion of the hob burners Regulating the minimum output of the hob burners 1.10... -
Page 3: Warnings And Recommendations
WARNINGS AND RECOMMENDATIONS • This appliance has been designed for domestic household use only. DO NOT use in any other situation such as commercially or outdoors. DO NOT MODIFY THIS APPLIANCE • The adjacent cabinetry and all materials used in the installation must be able to withstand a minimum temperature rise of 75°C above ambient during periods of use. - Page 4 • Some models are fìtted with an aluminium tray, ideal for baking pastries (180-200°C), as aluminium is an ideal heat conductor, does not burn the food, does not change the flavour and does not destroy the vitamins. For better use, we recommend as follows: wash the tray with warm soapy water, grease the inside with olive oil and leave to absorb for one day (this way the tray is ready for excellent use for various types of cooking).
-
Page 5: Where To Install The Cooker
• Unattended cooking on a hob with fat or oil can be dangerous and may result in fire. NEVER try to extinguish a fire with water, but switch off the appliance and then cover flame e.g. with a lid or a fire blanket. •... - Page 6 non-combustible material for a height of 150mm for the entire length of the hob. Any combustible construction above the hotplate must be at least 650mm above the top of the burner and no construction shall be within 600mm above the top of the burner. Installed to AS5601 with zero clearance to cooker sides.
-
Page 7: Connection To The Gas Supply: Current Installation Standards
1.4.CONNECTION TO THE GAS SUPPLY: CURRENT INSTALLATION STANDARDS The gas inlet connection is 1/2'BSP and is located 40mm from the left hand side of the cooker, approximately 450mm from the base of the cooker (add the height of the adjustable leg to determine the height from the floor). - Page 8 Fitting instructions for the installation in between two cupboards: 1. Level the oven to the required height as per AS5601 in front of the cabinets. 2. Drill a 16mm hole into the cabinets at the same height as the two chains are anchored on the cooker.
- Page 9 Figure 4. To facilitate the positionning, use a finger to stop the fixing ring Figure 5. Once the leg is adjusted at the needed height, tighten the nut using a suitable spanner DO NOT tip the appliance onto its legs, always lift the appliance onto its legs.
- Page 10 Figure 3. Leg insert cut out on base of oven. To fit the legs to the appliance lie the cooker flat on its back and fit all four legs. DO NOT fit legs to the cooker by tilting the appliance, doing so may damage the leg assembly.
-
Page 11: Gas Conversion Of The Hob Burners
1.8. GAS CONVERSION OF THE HOB BURNERS This cooker is suitable for use with Natural Gas or Universal LPG. All cookers are Natural gas ready. Appliances will be converted to LPG if notified at the time of order. Otherwise a qualified gas fitter must change the jets over as stated below. -
Page 12: Before Leaving
Setting the minimum for the oven thermostat To set the minimum, proceed as follows: Open the oven door; Light the oven burner in the maximum position, close the door and wait for about 10 minutes (or the time required for the oven to heat up to about 230°C); Remove the oven knob and, through the hole in the control panel, depending on the type of thermostat (fìg. -
Page 13: Maintenance
2. MAINTENANCE WARNINGS: Before carrying out any maintenance or transformation operations, turn off the electricity supply and close the gas upstream from the appliance. If components and/or accessories need replacing, only exclusive originals must be used. Servicing should be carried out only by authorised service personnel. -
Page 14: Dismantling And Assembling The Oven Door
2.5. DISMANTLING AND ASSEMBLING THE OVEN DOOR Completely open the oven door, insert the rotation-blocking device in the hook on the hinge rods. Grasp the door on both sides and slowly close until you feel a certain resistance, at this point simultaneously push and lift the door upwards to free it from the cooker the hinge locks and then remove it. -
Page 15: Using The Cooking Hob
3.1. USING THE COOKING HOB Gas burners The burners, depending on the model can be ignited: manually or electronically with either a push button or automatic ignition incorporated in the burner tap depending on the model you have purchased. Manual ignition: rotate the burner knob to be used to the maximum position, indicated by the signal and at the same time use a match close to the burner. -
Page 16: Oven Performance
- Fish (3000W) 120+280 mm (indicated minimum measurements) Electric plates The first time the plate is turned on or if it is not used for a long time, to eliminate any humidity absorbed by the insulating cover it should be turned on and left alight for 30 minutes in position 1 on the selector switch. -
Page 17: Using The Grill
Electric ovens Static ovens; heat for the oven is produced by the electric elements fitted in the top and bottom (base) of the oven; the elements can work together or independently. This allows you to finish off recipes quickly towards the end of the cooking period. Where food may need more heat at the top or the bottom. - Page 18 d) MODELS WITH MULTIPLE FUNCTION OVEN AND RADIATING CERAMIC GRILL: (Not available on all models) The grill radiates heat for cooking, and the heat is produced by a special grill element that reaches a surface temperature of approx. 800°C in a few seconds, thus producing infrared rays which delivers rapid grilling through a transparent pyroceram or ceramic plate.
- Page 19 Cookers with this device allow uninterrupted manual working and programming the cooking time of the oven between 0 and 120 minutes. Uninterrupted manual working: set the type of cooking and the oven temperature using the "A" and "B" knobs respectively, turn the timer knob "C"...
-
Page 20: Minute Minder
LED 24hr program timer Beyond the normal functions of turning the knob in a counter-clockwise direction, it can be pressed like a push button. This simple System allows you to maximize the use of the many features of your new cooker. How to program for operation Turn the knob counter clockwise to set hour and minutes Confirm settings by pressing the knob. - Page 21 +/- keys; the "A" and symbols light up. Set the type of cooking and ideal cooking temperature for the food (knobs F and T ) and the oven immediately starts up. At the end of the set time, the oven turns off and the saucepan symbol goes out, the "A" symbol starts flashing and the buzzer sounds.
- Page 22 LIST OF FUNCTIONS Your freestanding multifunction oven gives you flexibility at your fingertips. The engineers have perfected the even distribution of hot air throughout their ovens from top to bottom and side to side with strategically placed vents at the back of the oven. This performance is the same whether you have the 72 litre oven or their giant 106 litre oven and allows you to batch cook or cook different dishes at once.
-
Page 23: Cooking Hob With Glass-Plate (Applicable Models Only)
3.7 COOKING HOB WITH GLASS-PLATE (Applicable models only) Switching on The control is switched on by pressing ( x sec.) the on/off key a beep sounds. It will not come on if the key lock function is activated (indicated by a pilot light). The heaters remain off (all the digits show 0) until a power level is selected. - Page 24 If the cook top is on, the key lock function locks all the sensors except the general on/off sensor and the key lock. When the cook top is off, the key lock function locks all the sensors, including the general on/off, except the key lock.
-
Page 25: Glass Ceramic Worktop
This makes it possible to reach the desired timer setting more quickly. From the tenth consecutive increase/decrease of the timer setting, the speed at which the value changes increases. Duration of the warning When the time set on the timer has run out, a beep sounds for 1 minute, or indefinitely (this option is also configurable), and the timer displays flash the indication <00>... - Page 26 Plate lay-out (see tables) Characteristics of the heating zones in 4 heating plate kitchen ranges. Type of Effective Knob Knob position and relevant power Position command heated zone rotation power Clockwis 2200W Energy Front left 10 % 25 % 50 % 65 % 90 % 100 %...
- Page 27 Residual heat The glass ceramic top is divided into4 (or 5) heating zones. To ensure extra safety, it has indicator lights (residual heat indicators), which light up when a zone is very hot. The indicators stay lighted for as long as the heated zone remains hot, even with the plates OFF: How to use the glass ceramic top When using the top for the first time, we advise you to turn ON the heating zones one at a time...
- Page 28 3.9 FITTING THE GAS BURNERS TO THE HOB Burners: auxiliary, semi-rapid, rapid, super rapid: for correct fitting of the burners, flame diffusers and the enamel burner caps in the cups in the hob, follow the sequence given in fig. 21. Take care that the burner guides on the cup and flame diffuser of the burner perfectly correspond.
-
Page 29: Abnormal Operation
WARNING An incorrect fitting of the gas ring could cause the flame to spread inside the gas jet itself damaging it. 3.10 ABNORMAL OPERATION Any of the following are considered to be abnormal operation and may require servicing: • Yellow tipping of the hob burner flame •... -
Page 30: Cleaning
4. CLEANING To clean the stainless steel, enamelled, glass parts and the front control panel, we recommend using a sponge or damp cloth with a non abrasive cleaner, avoid using steel wool, abrasive powders and corrosive substances that could scratch. Specific stainless steel cleaner is recommended for all stainless steel areas, after all grease and spills have been cleaned first. - Page 31 INDICATIVE COOKING TIME AND TEMPERATURES INDICATIVE TIMES AND TEMPERATURES FOR COOKING WITH A VENTILATED OR STATIC OVEN Oven Shelf position Cooking time Cooking time Temperature From the bottom with fan forced with convection Oven Cooking in °C oven oven Pastries: Sponge cake 35’...
-
Page 32: Tables
The reported data refer to laboratory tests: several factors can influence times & quality of cooking, e.g. installed location, room temperature, etc. Therefore, the above data is only indicative. TABLES Overall Dimensions 60cm Models (without Feet) 820mm (H) × 600mm(W) × 600mm(D) 70cm Models (without Feet) 820mm (H) ×... - Page 33 Series 3 burner configuration Natural Gas (Australia & New Zealand) Burner Main Injector By-pass Adjustment* Nominal Gas (mm) Consumption (MJ/h) Auxiliary (A) 0.90 Semi-Rapid (SR) 1.18 Rapid (R) 1 or 2 1.55 11.8 Fish (F) 0 or 1 1.65 Adjustable 13.0 Triple Ring Wok (W) 1.75...
- Page 34 Absorbed power by the electric oven with thermostat Table 3 BASE GRILL MAXI-GRILL CIRCUIT RESISTANCE RESISTANCE RESISTANCE RESISTANCE RESISTANCE MODEL 60x50-60x60-70x50-70x60 1400 W 600 W 1500 W Gas – Electric model : 70X60 1650 W 900 W 1500 W MIXED OVEN MODEL 600 W 1500 W 2000 W...
- Page 35 NOTES...
- Page 36 Cod. 03201482 Rev. 2.0 del 14/03/13...
Need help?
Do you have a question about the OVFS9-10 and is the answer not in the manual?
Questions and answers