
Related Manuals for Psion 7545MBW


Summary of Contents for Psion 7545MBW
- Page 1 PSION Omnii Hand-Held Computer User Manual (Windows ® Embedded CE 6.0) July 15, 2013 Part No. 8000211.F ISO 9001 Certified Quality Management System...
- Page 2 This document and the information it contains is the property of Psion Inc. This document is not to be used, reproduced or copied, in whole or in part, except for the sole purpose of assisting in proper use of Psion manufactured goods and services by their rightful owners and users.
- Page 3 Return-To-Factory Warranty Psion Inc. provides a return to factory warranty on this product for a period of twelve (12) months in accord- ance with the Statement of Limited Warranty and Limitation of Liability provided at: www.psion.com/us/warranty.htm The warranty on Psion manufactured equipment does not extend to any product that has been tampered with, altered, or repaired by any person other than an employee of an authorized Psion service organiza- tion.
- Page 5 Calibrating the Touchscreen ................27 Psion Omnii Hand-Held Computer User Manual...
-
Page 6: Table Of Contents
Certificates ......................65 Psion Omnii Hand-Held Computer User Manual... - Page 7 Control Panel Settings ..................96 Psion Omnii Hand-Held Computer User Manual...
- Page 8 Wi-Fi Config: Status ..................123 Psion Omnii Hand-Held Computer User Manual...
- Page 9 Quad Docking Station Operation............... . . 147 Psion Omnii Hand-Held Computer User Manual...
- Page 10 Viewing a Preset ................B-6 Psion Omnii Hand-Held Computer User Manual...
- Page 11 SE1224HP Decode Zones ................. D-6 Psion Omnii Hand-Held Computer User Manual...
- Page 12 Advanced Information ..................G-5 viii Psion Omnii Hand-Held Computer User Manual...
- Page 13 Omnii XT15ni Battery Information................. I-4 Psion Omnii Hand-Held Computer User Manual...
- Page 15 Regulatory Labels ............8 Psion Omnii Hand-Held Computer User Manual...
-
Page 17: About This Manual
Chapter 1: Introduction About This Manual About This Manual This user manual describes the configuration, operation, and maintenance of the Psion Omnii Hand- Held Computer. Chapter 1: Introduction provides a basic overview of the Omnii. Chapter 2: Basic Operation describes the steps required to get the Omnii ready for operation. -
Page 18: Text Conventions
Freezer Variants” on page F-1. Note: The Omnii Hand-Held Computer is a body worn device, and to maintain compliance with the FCC RF exposure guidelines, use a Psion approved carrying case. Use of non-approved acces- sories may violate FCC RF exposure guidelines. - Page 19 - Signature capture • Keyboards - Large selection of backlit keypads in both alpha and numeric formats. For a list of currently available keyboard configurations, consult your Psion representative, or go to: http://www.psion.com/us/products/handheld.htm • Voice, Audio & Feedback - High volume beeper: 95 dBA...
- Page 20 Chapter 1: Introduction Overview of the Omnii Hand-Held Computer Figure 1.1 Omnii XT15 and RT15 Alphanumeric Variants Omnii RT15 Omnii XT15 55-Key ABC Keyboard 59-Key ABC Keyboard Psion Omnii Hand-Held Computer User Manual...
- Page 21 Chapter 1: Introduction Overview of the Omnii Hand-Held Computer Figure 1.2 Omnii XT15f Freezer Variants Numeric Alphanumeric Figure 1.3 Bottom View (Docking Connector) Figure 1.4 Top View (Scanner Window) Laser Aperture Psion Omnii Hand-Held Computer User Manual...
-
Page 22: Regulatory Labels
Figure 1.6 SE955 Laser Warning Label Figure 1.7 SE965 and SE4500 Laser Warning Label Figure 1.8 LED Radiation Notice Label Figure 1.9 SE4600 Laser Warning Label This label is affixed below the scanner windo Psion Omnii Hand-Held Computer User Manual... - Page 23 2.12 Voice Communication ............17 Psion Omnii Hand-Held Computer User Manual...
-
Page 25: Omnii Features
LEDs Display Scan Key Microphone SYM Key FN Modifier Key Enter/Power Key Note: the Omnii 55- and 66-key keyboards are equipped with a Power button. See Figure 3.1 on page 22 for keyboard layouts. Psion Omnii Hand-Held Computer User Manual... - Page 26 Side rail Slot for Snap Module arm Figure 2.3 Bottom View 1 - Docking Connector 2 - Alignment Pin Holes 3 - M2.5 Locking Screws (for firmly attaching devices) 4 - Hand Strap Slot Psion Omnii Hand-Held Computer User Manual...
-
Page 27: Omnii Modules Available
Attachment Screws (4) Battery Pack Omnii Modules Available To see a current list of Omnii accessories and modules, please go to the Psion website at: http://www.psion.com/us/products/handheld.htm Documents Available To see a current list of documents and download what you need, please go to the Knowledge Base on the Psion IngenuityWorking community website: http://community.psion.com/knowledge/w/knowledgebase/product-manuals.aspx... -
Page 28: Preparing The Omnii For Operation
If your computer is equipped with a hand strap, re-attach the clip to the slot at the base of the battery. • Switch the unit on (see “Switching the Omnii On and Off” on page 15). Psion Omnii Hand-Held Computer User Manual... -
Page 29: Switching The Omnii On And Off
Important: If your Omnii fails to power up, consider the following troubleshooting options: The battery may be overheated (>60C°), a non-Psion battery may be installed, or the battery may have fallen below the configured Suspend Threshold. See “Sus- pend Threshold and Estimated Battery Backup”... -
Page 30: Performing A Warm Reset
Using a coin, or other conductive item, connect pins 5 and 6 of the battery contacts for at least six seconds. Pin 6 Pin 5 • Replace the battery and power Omnii on. The terminal will boot as if from a cold reset. Psion Omnii Hand-Held Computer User Manual... -
Page 31: Attaching Carrying Accessories
Attaching Carrying Accessories Attaching Carrying Accessories Psion recommends that a carrying accessory — a hand strap — be installed on the Omnii before use. For de- tailed information, please see “Carrying and Protective Accessories” on page 136. Calibrating the Touchscreen Note: The touchscreen function can be turned off (see “Touch”... - Page 33 3.10 General Maintenance ............45 Psion Omnii Hand-Held Computer User Manual...
- Page 34 3.10.2 Cleaning the Omnii ..........45 Psion Omnii Hand-Held Computer User Manual...
-
Page 35: Getting To Know Your Omnii
Important: If your Omnii fails to power up, consider the following troubleshooting options: The battery may be overheated (>60C°), a non-Psion battery may be installed, or the battery may have fallen below the configured Suspend Threshold. See “Sus- pend Threshold and Estimated Battery Backup”... -
Page 36: The Keyboard
Figure 3.1 Keyboard Layouts [SCAN] Key [FN] Modifier Key [SYM] Key [Enter/Power] Key [SHIFT] Modifier Key [Windows] Key 36-Key Numeric 123 Keyboard 59-Key Alpha ABC Keyboard Psion Omnii Hand-Held Computer User Manual... -
Page 37: Regular Keys
The [CTRL] and [ALT] keys modify the function of the next key pressed and are application dependent. Pressing either key twice locks it 'on' (it appears underlined on the Taskbar). Pressing the key once again unlocks it. Psion Omnii Hand-Held Computer User Manual... -
Page 38: Modifier Keys
Note: Modifier keys are remapped in Control Panel, and the Symbol SIP will automatically show and use the new mappings after the next reboot. The onscreen keyboard corresponds to the specific keyboard on your Omnii—either numeric or alphanumeric. Psion Omnii Hand-Held Computer User Manual... -
Page 39: Activating Modifier Keys
(depending on your keyboard). To access the blue function keys, press the [FN] key followed by the appropriate alpha or function key. Psion Omnii Hand-Held Computer User Manual... -
Page 40: Macro Keys
Press the [FN] key again to unlock or turn it off. To choose the letter ‘b’: • Press the [FN] key, and press [2] twice. • Press the [FN] key again to unlock or turn it off. To choose the letter ‘c’: Psion Omnii Hand-Held Computer User Manual... -
Page 41: The Keypad Backlight
Stylus Properties dialog box in the Control Panel to recalibrate the screen. • In the Control Panel, choose the Stylus icon to display the Stylus Properties window. • Select the Calibration tab, and then choose the Recalibrate button. Psion Omnii Hand-Held Computer User Manual... -
Page 42: Indicators
Important: If an LED is illuminated in red, the operator should be cautious as this generally indicates an abnormal operating condition or active laser emission. Figure 3.3 LED Status Indicators 1. Battery Charge Status 2. Operating System Status 3. Radio Status 4. Scanner Status Psion Omnii Hand-Held Computer User Manual... -
Page 43: Battery Charge Status Led
The fourth (far right) LED indicates scanner status. Table 3.5 Scan LED Behaviour Function The scanner is not in use. Solid Red during scan Scan in progress. Solid Green after decode Successful scan. OFF when scan ended Flashing Red Unsuccessful scan. Psion Omnii Hand-Held Computer User Manual... -
Page 44: Onscreen Indicators
Good Weak No Radio Reception Reception Link WWAN Radio Signal Quality Wireless WAN icons in the taskbar indicate the status of your wide area network connection. For details, see “Taskbar Icons” on page G-3. Psion Omnii Hand-Held Computer User Manual... -
Page 45: Audio Indicators
Use a Phillips screwdriver to remove the SD cover screw. Flip the cover open or remove it. For a microSD card: • Slide the microSD card door to the left to unlock it. Flip it open. Psion Omnii Hand-Held Computer User Manual... -
Page 46: Scanners And Imagers
Extended Range: reads regular 1D barcodes (5 - 55mil) at short to medium distances (1m), as well as large 1D barcodes (e.g. 55 mil) at long distances. • 1D Imager: reads regular 1D and PDF417 barcodes at short to medium distances. Psion Omnii Hand-Held Computer User Manual... -
Page 47: Basic Scanner Operations
Check the barcode to make sure it is not damaged. Try scanning a different barcode to verify that the problem is not with the barcode. • Check that the barcode is within the proper range. • Does the hand-held display the warning without scanning? This suggests a hardware problem in the hand-held. Psion Omnii Hand-Held Computer User Manual... -
Page 48: Operating One Dimensional (1D) Internal Laser Scanners
Centre the framing marker in the field—either in the centre of the barcode you want to scan or in the centre of the area in which multiple barcodes are to be scanned. The illumination LEDs will flash (typically several times) and a picture of the barcode is taken. Psion Omnii Hand-Held Computer User Manual... -
Page 49: Windows Embedded Ce 6.0
[Windows] Keep in mind that unlike a desktop computer, the Omnii does not support key chording (pressing two keys at the same time). You must press one key followed by the next in sequence. Psion Omnii Hand-Held Computer User Manual... -
Page 50: The Windows Classic Shell Startup Desktop
Note: If the arrow keys do not highlight the desktop icons, the desktop may not be selected. Press [Windows] to display the Start Menu, and select Desktop. Now the desktop will be “in focus” and the arrow keys will highlight the icons. Psion Omnii Hand-Held Computer User Manual... -
Page 51: The Taskbar
If you’re using the keyboard: • Press [Windows] to display the Start Menu. • Highlight the Settings option, highlight Taskbar in the sub-menu, and press [Enter]. The Taskbar and Start Menu dialog box is displayed. Psion Omnii Hand-Held Computer User Manual... -
Page 52: The Start Menu
Type the underlined alpha character. For example, to display the Run dialog box, type the letter ‘r’. 3.8.2.2.1 Programs • Choose Programs to display a sub-menu of options. The programs displayed will be those resident in the Windows\Programs folder of the computer. Psion Omnii Hand-Held Computer User Manual... - Page 53 “Remote Desktop Connection” on page 97 provides a website with details about this option. Wi-Fi Config The Wi-Fi Config application is used to configure the Omnii 802.11a/b/g/n radio for one or more wireless network profiles. Psion Omnii Hand-Held Computer User Manual...
- Page 54 Task Manager The Task Manager allows you to switch to another task or to end an active task. To display the task manager window: • Tap on Shortcuts>Task Manager, or • Press [ALT] [ESC]. Psion Omnii Hand-Held Computer User Manual...
- Page 55 Control Panel The Control Panel contains applets used to configure hardware, the operating system and the shell. If your Omnii is running with the Psion Open TekTerm application or another application, additional configuration applets may appear in the Control Panel.
-
Page 56: The Psionvu Desktop Shell
The appearance and actions of the desktop can be changed by tapping on the PsionVU Shell icon on your desktop, which activates the PsionVU shell. Note: The Omnii will be reset if you choose to switch shells. Psion Omnii Hand-Held Computer User Manual... - Page 57 Open applications are shown in the top bar—the most recently opened is the first icon on the left. Tapping once on a program icon will maximize the application. This feature replaces the Task Manager of the Windows Classic Shell. Psion Omnii Hand-Held Computer User Manual...
-
Page 58: Restoring The Windows Classic Shell
Tap on the PsionVU Access icon in the Favourites Bar. 3.9.1 Restoring the Windows Classic Shell The default Desktop appearance and actions can be restored by tapping on the PsionVU Shell icon in the Favourites Bar. Psion Omnii Hand-Held Computer User Manual... -
Page 59: General Maintenance
Exposure to aircraft de-icing fluids can degrade the plastics on Omnii. If the Omnii is used near aircraft de-icing environments, regular rinsing with water is recommended. • To clean ink marks from the keypad and touchscreen, use isopropyl alcohol. Psion Omnii Hand-Held Computer User Manual... - Page 61 Psion Software Advantage........
- Page 62 4.28.2 Creating a Clone........... 112 Psion Omnii Hand-Held Computer User Manual...
- Page 63 4.33 WiFi Connect A.R.C............131 Psion Omnii Hand-Held Computer User Manual...
-
Page 65: Chapter 4: Configuration
4.1.1 Psion Software Advantage Psion Software Advantage is a collection of applications and features designed to support system adminis- trators and end users. These tools enable enterprises to customize the product to meet their needs and to maximize productivity. -
Page 66: Control Panel Applications
Changes the display backlight and the appearance (colour scheme) on the unit desktop. Dr. Debug Provides both error diagnostic and troubleshooting tools. Error Reporting Allows you to enable or disable Microsoft error reporting prompts. Psion Omnii Hand-Held Computer User Manual... - Page 67 Control Panel, and lock down access to various different components on the computer and the system tray icons for security. With PsionVU and PsionVU Shell (see “The PsionVU Desktop Shell” on page 42) you can customize the entire look and feel of your User Experience. Psion Omnii Hand-Held Computer User Manual...
- Page 68 Provides access to technology like GSM/GPRS, which allows wide area networking capability such as inter- net browsing via GSM/GPRS. It also provides access to the Phone API. For detailed information, see Appendix G: “Wireless Wide Area Network (WWAN) Settings”. Psion Omnii Hand-Held Computer User Manual...
-
Page 69: App Launch Keys
If you want to assign an application launch key that will open a specific document in the WordPad application, you need to browse to and choose that document while the cursor is in the Data field. • Tap on OK. Psion Omnii Hand-Held Computer User Manual... -
Page 70: Bluetooth ® Setup
Typically, when both radios operate in the hand-held at the same time, they cannot transmit simultaneously—this has a negative impact on overall system throughput. To minimize the impact on the backbone 802.11 network, Psion recommends using Bluetooth peripherals that have low transaction rates (such as printers and scanners). -
Page 71: Paired
The HSP (Headset Profile) allows users to connect their device to Bluetooth enabled headsets and other audio devices. HSP/HFP services provide the following unique menu options: • Connect Audio establishes an audio connection to the Bluetooth headset. Psion Omnii Hand-Held Computer User Manual... -
Page 72: Device
This menu allows you to filter the displayed devices by their COD. If, for example, you choose Computer from this menu, only the devices that have the matching Computer COD value will be displayed. Choosing All lists all detected devices. Psion Omnii Hand-Held Computer User Manual... -
Page 73: Device Pop-Up Menu
If the remote device has authentication enabled, type the PIN in this dialog box. • To proceed without authentication, tap on Next. After entering the device PIN, the Services dialog appears with a list of services available for that device. Psion Omnii Hand-Held Computer User Manual... - Page 74 Printer Port must be chosen here if you want to communicate with a paired Bluetooth printer. For further details, see “Mode” on page 61. • Once you’ve completed the information, tap on Next and then in the Services screen, click on Done. Psion Omnii Hand-Held Computer User Manual...
-
Page 75: Servers
The OPP Server allows other Bluetooth devices to send files to this device. • Tap on the check box to activate the server. 4.4.4 Mode Turn on Bluetooth activates the Bluetooth radio. Discoverable determines whether the Omnii is visible or invisible to other devices. Psion Omnii Hand-Held Computer User Manual... -
Page 76: About
Local Address displays the MAC address (BD_Addr) of the Bluetooth chip. HCI Version & LMP Version display the version of the chip firmware. Component indicates the version of the Psion Bluetooth Subsystem (the manager, drivers, etc). Profiles lists the supported profiles on this specific Omnii. - Page 77 Configure button to display the Device Properties dialog box. The Omnii communicates via Bluetooth to your Bluetooth equipped cellular telephone and retrieves the parameters for the Device Properties dialog box. Omnii then disconnects. Psion Omnii Hand-Held Computer User Manual...
- Page 78 The phone number you enter is network carrier dependent. Once you’ve specified all the necessary information, choose the Finish button. In the Control Panel, choose the Dialing icon. 12. The values in the Dialing Properties dialog box need to be edited according to your network carrier specifications. Psion Omnii Hand-Held Computer User Manual...
-
Page 79: Certificates
Your Omnii has certificates preinstalled in the computer. My Certificates is the repository for the device’s personal certificate store, Other Authorities is the repository for the intermediate certificate store, and Trusted Authorities is the repository for the Trusted Root certificate store. Psion Omnii Hand-Held Computer User Manual... -
Page 80: Compass
When the compass recalibration is complete, a message appears on the Omnii screen indicating successful calibration. Note: The accuracy of the digital compass is affected by the following: a) close proximity to large magnets or metal structures, and b) internal scanner/imager activation. Psion Omnii Hand-Held Computer User Manual... -
Page 81: Data Transfer Between Omnii And A Pc
To transfer data between your PC and your hand-held: • Tap on Start>Computer to display the drives. The Omnii will be visible here. • Open drives, files and folders as you would on your PC. Psion Omnii Hand-Held Computer User Manual... -
Page 82: Display Properties
(no key press, scanner trigger, etc.). Note: Keep in mind that this option may be restricted to supervisory use only. • In the Display Properties dialog box, open the Backlight tab. Psion Omnii Hand-Held Computer User Manual... - Page 83 ON at the configured intensity when the Omnii is operating with external power (not battery power). If the Omnii is drawing power from its battery, this option is ignored and the other parameters defined in Display Properties dialog box take effect. Psion Omnii Hand-Held Computer User Manual...
-
Page 84: Dr. Debug
4.9.1 Status This tab indicates the status (on/off) of the debug engines. Tapping on Browse logs displays error logs for your review. The logs should be used as reference when working with Psion Technical Support personnel. 4.9.2 Utilities The Utilities tab can be used to log network traffic. When you tap on the Start button, debug data is col- lected so that, if necessary, it can be forwarded to a Psion technician for evaluation. -
Page 85: Motion Meter
Omnii has sustained, the distance of the fall in meters, the duration in 10 of a second, and the date and time that the event occurred. The top 40 events are logged in a non-volatile loca- tion and can be used for diagnostic purposes by Psion or the site administrator. 4.9.4 Settings •... -
Page 86: Error Reporting
Always on – the GPS module is powered on at all times regardless of the power state of the hand-held (suspend). • On, and off in suspend – the GPS module is powered on, but if the Omnii is in suspend mode, the GPS module is turned off. Psion Omnii Hand-Held Computer User Manual... -
Page 87: Profiles
4.11.3 Programs Tap on the GPS Program Port drop-down menu to choose the communication (COM) port that the GPS software will use to communicate with the GPS receiver. Psion Omnii Hand-Held Computer User Manual... -
Page 88: Agps
Internet and should only be altered with the assistance of qualified Psion personnel. They will be able to help you configure your Psion devices and web server to retrieve the ephemeris data. Psion Omnii Hand-Held Computer User Manual... -
Page 89: Info
This tab provides general information about the GPS module such as the firmware version, the date on which files were last updated, and so on. If GPS module support service is required, you may be asked to tap on the Save button in this tab and forward the information to Psion support staff. 4.12 Imager &... -
Page 90: Input Panel
To customize the appearance and behaviour of the soft keyboard: Tap on the Input Panel icon in the Control Panel. Figure 4.2 Input Panel Properties • Tap on the Options button to change the appearance of your soft keyboard. Psion Omnii Hand-Held Computer User Manual... -
Page 91: Keyboard Properties
The value assigned for this parameter determines the delay in milliseconds between repeat characters. Sliding the Repeat Delay bar to the left increases the delay between key repeats, and sliding the bar to the right shortens the repeat delay time. Psion Omnii Hand-Held Computer User Manual... -
Page 92: Keyboard Backlight
Note: Tapping in the check box next to ‘When using external power, keep the backlight always ON’ forces the keypad backlight to remain on when the unit is operating with external power. 4.14.3 Keyboard One Shot Modes • In the Keyboard Properties dialog box, open the One Shots tab. Psion Omnii Hand-Held Computer User Manual... -
Page 93: Keyboard Macro Keys
In the Macro menu highlight a macro key number, for example macro 1, to assign a macro to macro key [M1]. Choose the Record button. A message screen is displayed instructing you to Enter Key Strokes to Record. Psion Omnii Hand-Held Computer User Manual... -
Page 94: Unicode Mapping
The Unicode Mapping tab is used to map combinations of virtual key values and [CTRL] and [SHIFT] states to Unicode™ values. This tab shows the configured Unicode character along with the Unicode value. For ex- Psion Omnii Hand-Held Computer User Manual... -
Page 95: Scancode Remapping
The Normal table defines unmodified key presses; the FN table defines key presses that occur when the [FN] modifier is on; the SYM table defines key presses that occur when the [SYM] modifier is on. The default Psion Omnii Hand-Held Computer User Manual... - Page 96 When Virtual Key is selected, you can choose to force [SHIFT] to be on or off when the virtual key is sent. If No Force is selected, the shift state is dependent on whether the shift state is on or off at the time the virtual key is sent. Psion Omnii Hand-Held Computer User Manual...
-
Page 97: Lock Sequence
A locked keyboard icon is displayed in the softkey bar when the keyboard is locked. Psion Omnii Hand-Held Computer User Manual... -
Page 98: Manage Triggers
“trigger consumer(s)”—of the trigger source. Along with keyboard keys, the external trigger (scan button) is software-based. When the specified key is pressed, the owner (for example, a decoded scanner) is sent a message. Psion Omnii Hand-Held Computer User Manual... -
Page 99: Add And Edit Trigger Mapping
These dialogs allow you to add and edit trigger mappings. Trigger Key This drop-down list allows you to specify the source of the trigger events, such as the Soft Scan, Left Scan, etc., for the trigger module selected. Psion Omnii Hand-Held Computer User Manual... -
Page 100: Microphone
By default, inactive owners are not shown. By checking this check box, all owners, both active and inactive, are displayed. 4.16 Microphone • In the Control Panel, choose the Microphone icon. Use this dialog box to adjust the gain for the specific microphones associated with your hand-held. Psion Omnii Hand-Held Computer User Manual... -
Page 101: Open Tekterm
The Omnii includes unique features that support Open TekTerm, a Psion application that has the ability to maintain multiple simultaneous sessions with a variety of host com- puters. For detailed information, please refer to the Open TekTerm Software User Manual, PN 8000073. -
Page 102: Pocket Pc Compatibility
4.20.2 Power Saving Suspend • In the Power Properties dialog box, open the Suspend tab. Power Source This drop-down menu allows you to specify whether the unit is using AC Power or Battery Power. Psion Omnii Hand-Held Computer User Manual... -
Page 103: Suspend Threshold And Estimated Battery Backup
Suspend Threshold and Estimated Battery Backup Suspend Timeout Important: Psion recommends setting the Suspend value to 3 minutes. To further reduce power consumption, carefully consider the duration of time that the display back- light is ‘on’ (see “Backlight” on page 68). -
Page 104: Advanced
Omnii enters Suspend Mode. To configure the radio, please refer to Appendix G: “Wireless Wide Area Network (WWAN) Settings”. 4.20.6 Battery Health The Battery Health service provides an estimate of battery health based on a number of different measure- ments, beyond just capacity. Psion Omnii Hand-Held Computer User Manual... - Page 105 Bold <b> (or removing the tag to unbold the text), you can change the text that will appear in the pop-up battery status screen. For example, the default text “Excellent” can be changed to: “Battery is excellent, and will last one day shift.”... Psion Omnii Hand-Held Computer User Manual...
-
Page 106: Psionvu Access
User). The computer must be reset following a change, and a confirmation will appear to enable you to continue or dismiss the change. When opening the PsionVu Settings option, the following menus will be available: Psion Omnii Hand-Held Computer User Manual... -
Page 107: Administrator Password
When an administrator password is set, the restricted options are accessed using a key combination. If a password has been set, the user would be prompted for the password. The option Show Password changes the displayed password from hidden (***) to readable. Psion Omnii Hand-Held Computer User Manual... -
Page 108: Shell Settings
The following options can be enabled or disabled in the Windows Classic Shell Desktop theme: • Start Menu Bar: If disabled, access to both Start Menu and Notifications are disabled. The Notifica- tion tooltips will still display. Any changes made will occur after a device reset. Psion Omnii Hand-Held Computer User Manual... -
Page 109: Restrictions
4.21.3 Restrictions This section deals with items that are by default available to users but can be restricted by an administrator. Advanced The Advanced menu lists the system features you can restrict or block. Psion Omnii Hand-Held Computer User Manual... -
Page 110: Control Panel Settings
This option enables you to Export your settings file (.xml), and save it in the location of your choice. In addi- tion, an Administrator has the option to Import these settings from one device to multiple devices of the same operating system. Psion Omnii Hand-Held Computer User Manual... -
Page 111: Remote Desktop Connection
Chapter 4: Configuration Remote Desktop Connection Important: A copy of this file should also be saved in a central repository for all Psion .xml files with a predefined name so that other Psion utilities can locate it. Tapping on the Export button will display a “Save As” Export Settings dialog, with the default name PsionVU_Settings.xml, which the Administrator can change even after it has been saved. -
Page 112: Barcodes
If you want to restore the factory defaults after making changes, the defaults can be applied to a selected parameter, sub-tree of parameters or all scanner parameters. • Press and hold on a symbology (e.g., Code 128) to display a pop-up menu. Psion Omnii Hand-Held Computer User Manual... -
Page 113: Options
Press and hold on the parameter you want to reset. • Choose Default parameter to reset the parameter to the default setting. 4.23.2 Options This tab allows you to tailor the double-click parameters, display, and data handling options associated with your scanner. Psion Omnii Hand-Held Computer User Manual... -
Page 114: 4.23.2.1 Double Click Parameters
Multiple Beep Tones You can set the audible scanner ‘beep’ to emit a series of three beeps instead of one. Set this parameter to on to enable the multiple beep tones. Psion Omnii Hand-Held Computer User Manual... -
Page 115: 4.23.2.3 Data Handling
Only one case will be applied to a barcode and a case will only be applied if all rules specified in the case are successful—if a rule within a case fails, the entire case fails. Psion Omnii Hand-Held Computer User Manual... - Page 116 In the Translation menu, tap on the Case # to create rules. • Tap on the No rule drop-down menu to display the rules. When you choose a rule, an associated screen is displayed in which you can define the rule. Psion Omnii Hand-Held Computer User Manual...
-
Page 117: 4.23.3.1 Case Rules
Pin 9 on the Omnii COM6 is reserved for 5V power out and is defaulted to OFF. This parameter must be set to ON to enable power to a Snap Module or Vehicle cradle. Psion Omnii Hand-Held Computer User Manual... - Page 118 On Sequence and the Trigger Off Sequence fields. When you press the trigger key, the Trigger On Sequence is sent and when you release the trigger key, the Trigger Off Sequence is sent, turning the trigger key on and off. Psion Omnii Hand-Held Computer User Manual...
-
Page 119: Screen Rotation
They must be dismounted before they can be formatted. To format an entire memory card: Select Start> Settings>Control Panel. In Control Panel, double-click on the Storage Manager icon. The Storage Manager menu opens: Psion Omnii Hand-Held Computer User Manual... -
Page 120: Creating Partitions
If more than one partition is desired, uncheck the Use All Available Diskspace check box, then specify the desired number of sectors to be used by the partition. Press OK. The new partition appears in the Partitions list. Psion Omnii Hand-Held Computer User Manual... -
Page 121: Partition Management
Tap the Properties button. The Partition Properties dialog appears. Tap the Dismount button. The partition is dismounted. The asterisk disappears next to its name in the partitions list. Tap the Format button. The Format dialog appears: Psion Omnii Hand-Held Computer User Manual... - Page 122 Tap the Mount button. The partition is mounted. The asterisk appears next to its name in the par- titions list. The Partition Properties dialog has buttons for additional functions. Partitions can be defragmented, and their file structure can be scanned. Psion Omnii Hand-Held Computer User Manual...
-
Page 123: Stylus Properties
Follow the directions in the Calibration tab to recalibrate the screen You will be prompted to save the calibration data. Note: If you do not receive a prompt to save your data, there could be a problem with your touch- screen hardware. Contact your Psion representative. Psion Omnii Hand-Held Computer User Manual... -
Page 124: Touch
Instead of expanding each section of items individually, you can also choose to open all the lists at once by choosing the Expand button, which will then change to a Collapse button to enable you to collapse all the sections as well. Psion Omnii Hand-Held Computer User Manual... -
Page 125: Total Recall
Total Recall Total Recall is a Psion utility developed to maintain applications and settings during a cold boot, as well as clone settings to other devices. This utility creates a restore point of a device at a known state. This can be... -
Page 126: Creating A Clone
In this menu, select All for a Full Clone, or Selected Options for a Settings Only Clone. If you choose Selected Options, a menu will open to enable you to decide which options you want cloned. Psion Omnii Hand-Held Computer User Manual... -
Page 127: Managing Profiles
\Flash Disk\TotalRecall folder. In an autorestore, Total Recall only restores the profile located in the \Flash Disk\TotalRecall folder. If you store your profile anywhere else it will not be restored. Psion Omnii Hand-Held Computer User Manual... - Page 128 USB key. The profile will be automatically installed to the computer’s \Flash Disk\TotalRecall folder. There is a short delay in deployment so that you can cancel the process if needed. USB drive prepared for cloning Autorun installation on next Omnii Psion Omnii Hand-Held Computer User Manual...
-
Page 129: Deleting A Profile
Temp folder—that is, data are always loaded from the FTP Server to the Temp folder and from the Temp folder to the FTP Server. If this option is disabled, a warm reset must be performed to accept the change. Psion Omnii Hand-Held Computer User Manual... -
Page 130: 4.29.1.2 Advanced Interface And Network Settings
SNTP (Simple Network Time Protocol) Server The SNTP Server Name typed in this dialog box is used to synchronize Omnii time with the server time. A warm reset must be performed once the server name as been entered. Psion Omnii Hand-Held Computer User Manual... -
Page 131: Registry Editor
The Voice tab displays a phone dialer used to dial phone numbers. The Voice menu provides commands which allow you to manage your phone contacts, view your phone history, and so on. Phone Number Entry Field Send Button Backspace Button End Button Universal International Mute Button Dialing Prefix Psion Omnii Hand-Held Computer User Manual... -
Page 132: Dialing A Number
Press the [End] key to terminate a phone call. [Talk] key [End] key 4.30.2 Receiving an Incoming Call To answer an incoming call: • Tap on the [Talk] button; it’s labelled with a green phone receiver. Psion Omnii Hand-Held Computer User Manual... -
Page 133: Voice Menu
Highlight the phone number that is currently On Hold, and choose Retrieve. Tap on Execute. Both calls will be listed as Active in the Call Management list. All calls are now conferenced so that you as well as your callers can speak to one another. Psion Omnii Hand-Held Computer User Manual... -
Page 134: 4.30.3.2 Call Lists
Note: Keep in mind that some services may not be supported by your network, or they may not have been subscribed to. • Tap on the service you want to enable. The service dialog boxes allow you to tailor your available services to meet your requirements. Psion Omnii Hand-Held Computer User Manual... -
Page 135: File Menu - Phonebook Management
Tap on the Execute button to save the phone number in your Phonebook. Phonebook entries are saved even after you exit Wireless WAN. Once you’ve added a phone number to the Phonebook, a list of new commands is available in the drop- down menu. Psion Omnii Hand-Held Computer User Manual... -
Page 136: Volume & Sounds Properties
Slide the volume button to the left to lower the volume or to the right to increase the volume. • Under the heading Enable sounds for, enable the conditions under which you want the hand-held to emit a sound. Psion Omnii Hand-Held Computer User Manual... -
Page 137: Sound Adjustments
4.32.1 Wi-Fi Config: Status The Status tab displays information about the wireless network to which the Omnii is configured to con- nect. When there are no network profiles configured, this tab is not populated. Psion Omnii Hand-Held Computer User Manual... -
Page 138: Wi-Fi Config: Configure
If, for example, you are using a different type of security for your network, the fields you complete may not match those described here. Psion Omnii Hand-Held Computer User Manual... -
Page 139: 4.32.2.2 Authentication Mode
These authentication modes use 802.1X with EAP authentication. When 802.1X is selected, the Omnii uses WEP encryption with automatic (as opposed to static) keying. For the others, the user may choose TKIP, AES or TKIP+AES encryption. Psion Omnii Hand-Held Computer User Manual... -
Page 140: 4.32.2.3 Encryption
Complete the fields in the Configure Profile screen. If you’re uncertain about some of the options, your system administrator will be able to provide the correct information for your wireless network. • Once you’ve completed the necessary fields, tap on OK. Psion Omnii Hand-Held Computer User Manual... -
Page 141: 4.32.2.5 Verify Server Certificate
The Status tab is displayed. The Status field displays ASSOCIATING while the 802.11a/b/g/n radio attempts to connect to the network. Once the association is complete, the Status tab is populated with the appropri- ate information about your network. Psion Omnii Hand-Held Computer User Manual... -
Page 142: Configuring Tcp/Ip
Tap on the radio icon in the taskbar, Tap on Start>Settings>Network and Dial-up Connections. Tap on the radio icon for which you want to assign an IP address—in the sample screen below, the icon is labelled SDIO86861. Psion Omnii Hand-Held Computer User Manual... -
Page 143: 4.32.3.2 Name Server
4.32.3.2 Name Server Note: If DHCP is enabled, name server addresses are assigned automatically. • In the SDIO86861 IP Information tab (see Figure 4.7), tap on the Configure button. • Tap on the Name Servers tab. Psion Omnii Hand-Held Computer User Manual... -
Page 144: Wi-Fi Config: Advanced
Once the reset is complete, if you checked the box next to Use Windows to configure my wireless set- tings, the Wireless Zero Config screen is displayed on the hand-held. Refer to Appendix H: “Wireless Zero Config Settings” for details. Psion Omnii Hand-Held Computer User Manual... -
Page 145: Monitoring The Network Connection
When you click on this icon, WiFiConnect A.R.C. configures the default WiFi interface. The WEP key is set to PsionPsion123. The SSID is set to Psion. The default interface becomes the active interface. Keep in mind that you must configure the access point and the hand-held(s) to use the same settings. - Page 147 5.7 Vehicle Cradles - Models ST1000 and ST1002 ........149 Psion Omnii Hand-Held Computer User Manual...
- Page 148 5.8.5.3 Indicator Does Not Light When Battery Installed ......158 Psion Omnii Hand-Held Computer User Manual...
-
Page 149: Chapter 5: Accessories
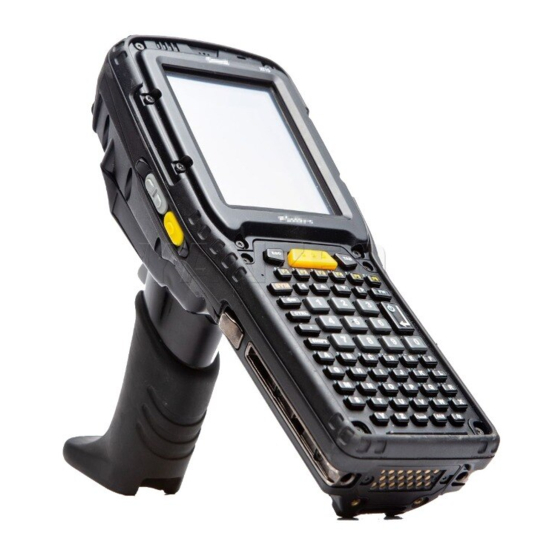
Position the pistol grip so that it fits snugly over the back of the unit and the holes in the pistol grip are aligned with the threaded inserts on the back of the hand-held. • Using a Phillips screwdriver, tighten the screws to a torque of 3 lbs-in (3kgf-cm) to secure the pistol grip in place. Psion Omnii Hand-Held Computer User Manual... -
Page 150: Carrying And Protective Accessories
Carrying and Protective Accessories Note: The Omnii Hand-Held Computer is a body worn device, and to maintain compliance with the FCC RF exposure guidelines, use a Psion approved carrying case. Use of non-approved accessories may vio- late FCC RF exposure guidelines. -
Page 151: The Hand Strap - Model St6025
If using the leg tie-down strap, wrap it around your leg and snap the buckle closed. Adjust the tightness of the strap for security and comfort. • Place the Omnii into the holster with the grip extending back through the custom opening. • If desired, attach the tether to the pistol grip. Psion Omnii Hand-Held Computer User Manual... -
Page 152: Power Accessories
115,200 bps. Pin 9 is reserved for 5V power out and is defaulted to off. To enable power to this port, in your Omnii desktop, go to Control Panel>Scanners, which opens the Scanner Settings menus. In the Ports menu, select on for the Power parameter under the COM6 port. Psion Omnii Hand-Held Computer User Manual... - Page 153 (Refer to Figure 5.6). • To remove the charger, press down on the base of the clip arms to release them from the Omnii side rails and slide the adaptor off. Psion Omnii Hand-Held Computer User Manual...
-
Page 154: Ac Wall Adaptor - Models St1050 And St1050-Ar
Insert the DC power plug on the Vehicle Power Outlet Adaptor into the DC IN port on the Snap Module. • Insert the Vehicle Power Outlet Adaptor plug into automotive power outlet in your vehicle. Note: Battery charging continues whether the hand-held is switched on or off. Psion Omnii Hand-Held Computer User Manual... -
Page 155: Chargers And Docking Stations: General Information
After unpacking your unit: • Visually inspect the charger for possible damage. • Install the IEC power cord (if applicable) and apply power. 5.4.4 Operator Controls The Omnii docking stations and chargers have no operator controls. Psion Omnii Hand-Held Computer User Manual... -
Page 156: Power Consumption Considerations
The Omnii can be inserted into two desktop docking stations which are designed to charge the battery in- stalled in the hand-held along with a spare battery pack: Models ST4002 and ST4003. Important: These docking stations can only be used to charge Psion approved lithium-ion batteries. The ST4002 and ST4003 desktop docking stations feature: •... -
Page 157: Charging A Battery Installed In The Omnii
The LED on the Omnii lights up indicating that the unit has external power and battery charging will begin. It is safe to leave the unit in the desktop docking station while it is not in use—the battery will not be over- charged. Psion Omnii Hand-Held Computer User Manual... -
Page 158: Indicators
Flashing Green Charge in progress. Flashing Yellow Battery is not charging due to out-of-temperature conditions. Solid Red A charging timeout, unable to read battery, or non Psion battery. 5.5.3 Operation 5.5.3.1 Charging the Omnii Battery The desktop docking station supplies DC power to enable the Omnii internal fast charger. -
Page 159: Troubleshooting
Your Psion battery and desktop docking station are carefully designed for safety and capacity perform- ance. If the battery or charger are not Psion approved products, or the safety mechanism is faulty, the spare charge slot LED or the Omnii LED will display red. -
Page 160: Quad Docking Station - Model No. St4004
An additional Ethernet interface is available for connecting more docking stations downstream, up to 4 on the same network. 5.6.1 Operator Controls The ST4004 has no operator controls or power switch. 5.6.2 Indicators The quad docking station is equipped with Ethernet activity and link LEDs (see Figure 5.14). Psion Omnii Hand-Held Computer User Manual... -
Page 161: Quad Docking Station Operation
Insert the DC power plug into the ST4004 rear DC IN connector (see Figure 5.14). Important: Use IEC-320 C13 power cords approved by Psion, with the ground pin connected to a proper earth-grounded receptacle. Check with a qualified electrician if you are uncertain of your receptacle grounding. -
Page 162: Cleaning The St4004
Omnii or with the docking station. Make sure a battery is installed in the Omnii, otherwise use an Omnii with a properly functioning charge indicator to isolate the problem. Psion Omnii Hand-Held Computer User Manual... -
Page 163: Power Led Does Not Light Up
The Omnii Charge Indicator LED is Red If the Omnii charge indicator is red when the Omnii is in any of the four bays, the quad dock cannot read the battery, is in charging timeout, or it is not a Psion battery. •... -
Page 164: Vehicle Cradle Mounting Recommendations
Figure 5.16 Front and back of ST1002 with Omnii Mounting holes Release button Power/Communications port Psion also supplies a range of standard mounts for the hand-held vehicle cradles, and the Omnii vehicle cradles are compatible with all of them. 5.7.1 Vehicle Cradle Mounting Recommendations... - Page 165 The following plate bases are available: • VESA Plate – MT3501 • Circular Plate – MT3502 Psion Omnii Hand-Held Computer User Manual...
-
Page 166: Insertion And Removal Of Omnii
Omnii to be certain that it is secure. • To remove the Omnii, press the release button on the front of the cradle until it releases. Figure 5.19 Inserting Omnii into the vehicle cradle Release button Psion Omnii Hand-Held Computer User Manual... -
Page 167: Maintaining The Vehicle Cradle
Two latches in the cradle hold the Omnii firmly in place. Although these latches are designed for at least 100,000 insertion and removal cycles, they will wear over time and will no longer lock the Omnii securely in the cradle. For replacement parts and instructions contact Psion. Partial disassembly is required. 5.7.4 ST1002 Powered Cradle Installation The ST1002 cradle is designed to allow the Omnii to be powered by a vehicle battery. -
Page 168: Installation In High Voltage Vehicles
For extreme wet environments, or environments where it is difficult to restrict vehicle operator access to the power connector, Psion offers a waterproof heat shrink kit (PN 1030022). The kit contains 3 pieces of waterproof, high shrink ratio heat shrink tubing which can be used to encapsulate the entire connector as- sembly. - Page 169 To enable power to this port, in your Omnii desktop, go to Control Panel>Scanners, which opens the Scanner Settings menus. In the Ports menu, select ON for the Power parameter under the COM6 port. Note: For the CA3002 Vehicle Power Outlet (CLA) Adaptor, replace with same fuse type and rating. Psion Omnii Hand-Held Computer User Manual...
-
Page 170: Battery Charger (6-Slot) - Model St3006
5°C to 39°C (41°F to 102°F). The charger will not charge batteries outside of this temperature range. For maximum performance, it is recommended that the charger be operated at room temperature—a temperature range between 18°C to 25°C (64°F to 77°F). Psion Omnii Hand-Held Computer User Manual... -
Page 171: Operator Controls
• Install the IEC power cord and apply power. Important: Use IEC-320 C13 power cords approved by Psion, with the ground pin connected to a proper earth-grounded receptacle. Check with a qualified electrician if you are uncertain of your receptacle grounding. -
Page 172: Power Self-Test Leds Don't Light Up
Inspect the charge slot contacts for damage (are they bent, flattened, twisted or broken). • Try inserting a battery that you know to be working in the charger slot. • Reconnect the mains power cable, and check that the slot indicator flashes at power up. Psion Omnii Hand-Held Computer User Manual... -
Page 173: A.1 Omnii Docking Connector
A.4 Omnii Battery Contacts ........... . .A-6 Psion Omnii Hand-Held Computer User Manual... - Page 175 The following are the pin assignments of the interface. Table A.1 Docking Connector Pinout Pin # Signal Pin # Signal GROUND USB_OTG_P DC_IN USB_OTG_M DOCK_LOW_PWR CHARGE_IN GROUND GROUND USB_OTG_VBUS DC_IN CHARGE_IN UART_RX GROUND GROUND DC_IN UART_TX USBH_P CHARGE_DATA USBH_M GROUND Psion Omnii Hand-Held Computer User Manual...
-
Page 176: A.2 Snap Modules Connectors
Snap Modules Connectors Pinout ST4001 ST4005 USB Micro B Connector USB Type A Connector DE9M Serial Connector Pin # Signal Pin # Signal Pin # Signal VBus VBus GROUND GROUND SHIELD GROUND SHIELD 5Vdc 1A power out Psion Omnii Hand-Held Computer User Manual... - Page 177 USB Type A Power Pin # Signal Pin # Signal Pin # Signal VBus VIN (11.5 to 30Vdc) GND (not chassis ground) MOTION DETECT DGROUND MOTION DETECT RETURN (not ground) GROUND 5Vdc 1A power out Psion Omnii Hand-Held Computer User Manual...
-
Page 178: A.4 Omnii Battery Contacts
Plastic Rip - provides mechanical polarity. BATT+ Positive lead of battery. BATT-CLK SMBus data clock. BATT-ID Connected to GND in the battery. BATT-DATA SMBus bi-directional data line. Negative lead of battery. Negative lead of battery. Psion Omnii Hand-Held Computer User Manual... -
Page 179: B.1 Required Applets
B.4.2 Color Camera Barcode Symbologies ........B-18 Psion Omnii Hand-Held Computer User Manual... -
Page 181: Required Applets
These presets encompass the majority of the most popular barcodes and their subtypes. The barcode de- coding symbology predefined presets define which barcodes can be decoded. The barcode decoding camera predefined presets determine how the barcode images are captured. Psion Omnii Hand-Held Computer User Manual... -
Page 182: Barcode Decoding Symbology Predefined Presets
The following presets enable successful image capture in almost all conditions. Note: It is recommended that the default preset be used whenever possible. Default This preset works in a wide range of conditions. It is optimized for a normal office lighting (about 300 Lux). Psion Omnii Hand-Held Computer User Manual... -
Page 183: Using The Imagers Applet
Choose a camera—specifically, Front Imager which is located at the top of the unit. B.3.1.2 Setting the Active Preset An active preset has an A to the right. To set an active preset: • Highlight the preset, and tap on the Activate button. Psion Omnii Hand-Held Computer User Manual... -
Page 184: B.3.1.4 Creating A Custom Preset
To ensure that it will work reliably, it should be as close as possible to the original predefined preset. To change a parameter value: • Highlight the custom preset, and double-tap on the Edit button. Psion Omnii Hand-Held Computer User Manual... -
Page 185: B.3.1.6 Removing A Custom Preset
Tap on Yes to remove the preset or No to cancel the operation. B.3.2 Configuring the Barcode Decoding Camera Presets (Barcoding Menu) To configure the barcode decoding camera presets: • Tap on Start>Settings>Control Panel>Imagers. • Tap on the Barcoding tab. Psion Omnii Hand-Held Computer User Manual... -
Page 186: B.3.2.1 Selecting A Camera
Highlight the preset, and tap on the Activate button. B.3.2.3 Viewing a Preset To view the parameter settings in a preset: • Highlight a preset, and double-tap on the View button. The associated preset window is displayed. Psion Omnii Hand-Held Computer User Manual... -
Page 187: B.3.2.4 Creating A Custom Preset
To ensure that it will work reliably, it should be as close as possible to the original predefined preset. To change a parameter value: • Highlight the custom preset, and double-tap on the Edit button. Psion Omnii Hand-Held Computer User Manual... -
Page 188: B.3.2.6 Removing A Custom Preset
Tap on Yes to remove the preset or No to cancel the operation. B.3.3 Configuring the Barcode Decoding Symbologies (Barcoding Menu) To configure the barcode decoding camera presets: • Tap on Start>Settings>Control Panel>Imagers. • Tap on the Barcoding tab. B-10 Psion Omnii Hand-Held Computer User Manual... -
Page 189: Setting The Active Preset
A new custom preset is created by modifying a preset—either a predefined preset or an existing custom preset. To create a custom preset: • Highlight a preset, and tap on the Add button. A screen like the sample following is displayed. B-11 Psion Omnii Hand-Held Computer User Manual... -
Page 190: Modifying A Custom Preset
When you’ve completed your edits, tap on OK. The parameter list is displayed; the new value for the changed parameter is shown. • Tap on OK to exit to the preset list and save the changes. B-12 Psion Omnii Hand-Held Computer User Manual... -
Page 191: Barcoding Menu - Configuring Symbologies
- Highlight the parameter, and then press the [SPACE] key or double-click the parameter. - An associated dialog box containing the valid range of values for the parameter and the current setting like the sample screen following is displayed. B-13 Psion Omnii Hand-Held Computer User Manual... -
Page 192: Translation Menu - Configuring Rules
• Tap on Start>Settings>Control Panel. • Tap on the Imagers icon, and then tap on the Translations tab. For instructions on adding, editing, and removing translation rules, refer to “Translations” on page 101. B-14 Psion Omnii Hand-Held Computer User Manual... -
Page 193: Advanced Menu
In the Advanced tab, tap on the Trigger Control button. • To view all the triggers and the hardware devices that are configured to use them, tap in the check box next to Show all modules. B-15 Psion Omnii Hand-Held Computer User Manual... -
Page 194: Barcode Symbologies
In the Camera Presets: drop-down menu at the top of the Imager & Camera Settings screen, choose Imager or Color Camera depending on which set of barcodes you want to work with. • Go to the Barcode Presets. B-16 Psion Omnii Hand-Held Computer User Manual... -
Page 195: Imager Barcode Symbologies
The barcode symbologies for the Imager are listed in this section. Table B.1 Imager Barcode Symbologies All 1D With Strong Recovery Enabled Code 39 Code 128 EAN 13 EAN 8 UPC-E UPC-A UPC/EAN Sharing Settings Code 93 (disabled) MSI Plessey (disabled) B-17 Psion Omnii Hand-Held Computer User Manual... -
Page 196: Color Camera Barcode Symbologies
Table B.2 Color Camera Barcode Symbologies All 1D With Strong Recovery Enabled Code 39 Code 128 EAN 13 EAN 8 UPC-E UPC-A Code 93 (disabled) Codabar Interleaved 2 of 5 (disabled) Gs1 DataBar (disabled) B-18 Psion Omnii Hand-Held Computer User Manual... - Page 197 2D QR Code 2D Maxicode (disabled) 2D Aztec (disabled) Postal: PlanNET (disabled) Postal: PostNET (disabled) Postal: Australia (disabled) Postal: Canadian (disabled) Postal: Japanese (disabled) Postal: Kix (disabled) Postal: Korean (disabled) Postal: Royal (disabled) B-19 Psion Omnii Hand-Held Computer User Manual...
- Page 199 C.5.1 Options ............C-10 Psion Omnii Hand-Held Computer User Manual...
-
Page 201: Barcode Settings
If you want to restore the factory defaults after making changes, the defaults can be applied to a selected parameter, sub-tree of parameters, or all scanner parameters. • Press and hold on a symbology (e.g., Code 128) to display a pop up a menu. Psion Omnii Hand-Held Computer User Manual... -
Page 202: Decoded (Internal) Scanners
Press and hold on the parameter you want to reset. • Choose Default parameter to reset the parameter to the default setting. Decoded (Internal) Scanners • Tap on the Scanner drop-down menu, and choose Decoded (internal). Psion Omnii Hand-Held Computer User Manual... -
Page 203: Options
Note: This parameter is only used if the Trigger Mode has been set to Continuous On and the Omnii is mounted in a fixed position; otherwise, ‘Low Power Timeout’ is not used. Parameter Scanning Setting this parameter to on enables decoding of parameter barcodes. Psion Omnii Hand-Held Computer User Manual... -
Page 204: Decoded (Internal) Data Options
A prefix and/or one or two suffixes may be appended to scan data for use in data editing. When you double- tap on these parameters, dialog boxes are displayed in which you can enter a value from 0 to 255. Psion Omnii Hand-Held Computer User Manual... -
Page 205: Decoded (Hhp
Tap on the Scanner drop-down menu, and choose Decoded (Intermec ISCP). C.4.1 Decoded (ISCP) Options Laser On Time The value assigned to this parameter determines how long the laser will remain on when the scan button or trigger is pressed. Psion Omnii Hand-Held Computer User Manual... -
Page 206: Decoded (Iscp) Advanced Options
Add AIM ID Prefix The AIM ID (Association for Automatic Identification and Mobility) is an international barcode identifier. When this parameter is enabled, the AIM ID is inserted at the beginning of the decoded barcode. Psion Omnii Hand-Held Computer User Manual... -
Page 207: C.5 Non-Decoded Scanners
Use the [UP] and [DOWN] arrow keys to highlight a parameter. • To change a parameter value, press [SPACE] or the [RIGHT] arrow key. If a field requires text entry, a text box is displayed in which you can enter the appropriate value. Psion Omnii Hand-Held Computer User Manual... -
Page 208: Options
Code 93 (disabled) Code 128 Code 11 (disabled) EAN 13 Interleaved 2 of 5 (disabled) EAN 8 MSI Plessey (disabled) UPC-A Discrete 2 of 5 (disabled) UPC-E IATA 2 of 5 (disabled) Codabar (disabled) C-10 Psion Omnii Hand-Held Computer User Manual... - Page 209 D.10.1 SE4600LR Decode Zones ..........D-15 Psion Omnii Hand-Held Computer User Manual...
-
Page 211: Se955 Scanner
SE955 Scanner This appendix lists specifications for the following internal scanners. For a current list of model numbers and descriptions for the Omnii scanner pod and back cover kits, please contact your Psion representative or go to http://www.psion.com/us/products/handheld.htm. SE955 Scanner... -
Page 212: Se965 Scanner
450 Ft Candles (4,844 Lux) Sunlight 8000 Ft Candles (86,111 Lux) Operating Temperature -22° F to 140° F/ -30° C to 60° C Storage Temperature -40° F to 158° F/ -40° C to 70° C Psion Omnii Hand-Held Computer User Manual... -
Page 213: Se965 Decode Zones
Appendix D: Internal Imager & Scanner Specifications SE965 Decode Zones D.2.1 SE965 Decode Zones Psion Omnii Hand-Held Computer User Manual... -
Page 214: Se1224Hp - High Performance Scanner
Laser On Time, Aim Duration, Power Mode, Trigger Mode, Bi-directional Redun- dancy, Symbology types/lengths, Data formatting. Ambient Light Artificial: 450 ft. candles (4844 Lux). Sunlight: 8000 ft. candles (86112 Lux). Laser Output Power (peak) 1.35 mW D.3.1 SE1224HP Decode Zones Psion Omnii Hand-Held Computer User Manual... -
Page 215: Se1524Er - Extended Range Scanner
Symbology types/lengths, Data formatting. Ambient Light Artificial: 450 ft. candles (4,844 Lux) Sunlight: 4,000 ft. candles (86,112 Lux). Laser Output Power (peak) 1.26 mW D.4.1 SE1524ER Decode Zones SE1524ER Decode Zone A (Short Range, Small Codes) Psion Omnii Hand-Held Computer User Manual... -
Page 216: Ev15 Imager
Works in any lighting conditions, from 0 to 100,000 lux D.5.1 EV15 Imager Decode Zone 0 Lux to 100,000 Lux Minimum Range Maximum Range Inches Inches Mil Size 14.5 35.5 High quality symbols in normal room light. Psion Omnii Hand-Held Computer User Manual... -
Page 217: Ea11 Decoded 2D Imager
Operating Current 170mA - 310mA (lighting condition dependent) Power Saving Mode Ambient Light Works in any lighting conditions, from 0 to 100,000 lux Regulatory Approvals UL, VDE certified, RoHS compliant D.6.1 EA11 Typical Reading Distances Psion Omnii Hand-Held Computer User Manual... -
Page 218: Ea20X Imager
410mA @ 3.3V scanning with power save Power Saving Mode Ambient Light From 0 to 100,000 lux Regulatory Approvals UL, cUL, VDE certified, RoHS compliant, Class 2 Laser D.7.1 EA20X Typical Reading Distances D-10 Psion Omnii Hand-Held Computer User Manual... -
Page 219: Hhp 5080Sr Imager/Decoder
2.1 in. (5.3cm) 13.2 in. (33.5cm) Data Matrix 15 (.038cm) 2.3 in. (5.8cm) 10.2 in. (25.9cm) 15 (.038cm) 3.1 in. (7.9cm) 8.8 in. (22.4cm) MaxiCode 35 (.089cm) 2.0 in. (5.1cm) 13.0 in. (33cm) D-11 Psion Omnii Hand-Held Computer User Manual... -
Page 220: Se4500Sr - Standard Range Imager
Maximum Engine Dimensions 11.8 mm H x 21.50 mm W x 16.3 mm D 0.46 in. H x 0.85 in.W x 0.64 in. D Weight 8.0 grams (0.28 oz) Electrical Interface 21 pin 0.3 mm pitch ZIF connector D-12 Psion Omnii Hand-Held Computer User Manual... -
Page 221: Se4500Sr Decode Zone
7.5 mil Code 39 10.6 10 mil PDF417 10.1 13 mil (100% UPC) 15.5 15 mil PDF417 14.7 15 mil Data Matrix 12.4 20 mil Code 39 24.7 38.1 12.7 25.4 50.8 63.5 Depth of Field D-13 Psion Omnii Hand-Held Computer User Manual... -
Page 222: Se4600Lr - Long Range Imager
-20º and 55º C for a period of 0.85 ± 0.1 msec 2500 G ± 5% in the direction of any of the six principal axes applied via the mounting surface at 23º C for a period of 0.70 ± 0.07 msec D-14 Psion Omnii Hand-Held Computer User Manual... -
Page 223: Se4600Lr Decode Zones
27 pin 0.3 mm pitch ZIF connector NOTE: Environmental and/or tolerance parameters are not cumulative. A thermal analysis is recommended if the application is subject to an extreme temperature environment. D.10.1 SE4600LR Decode Zones D-15 Psion Omnii Hand-Held Computer User Manual... - Page 224 Appendix D: Internal Imager & Scanner Specifications SE4600LR Decode Zones D-16 Psion Omnii Hand-Held Computer User Manual...
- Page 225 E.3.4 Bluetooth Radio ..........E-10 Psion Omnii Hand-Held Computer User Manual...
-
Page 227: The Omnii Hand-Held Computer (Model 7545
Walkie-talkie style Push-to-Talk – VoIP over Wi-Fi or WWAN. Vibration feedback. Power Management • Battery Pack: 5000 mAh high capacity Lithium-ion (for battery specifications, see “Lithium-ion Smart Battery 5000 mAh (ST3001)” on page E-5). Psion Omnii Hand-Held Computer User Manual... -
Page 228: Regulatory Approvals
Rain And Dust Resistance: IEC 60529, classification IP67. E.1.2 Regulatory Approvals • Woldwide Safety, EMC, RF, Laser approvals • CE Mark • E Mark (vehicle cradles) • RoHS compliant • WEEE compliant • REACH compliant Psion Omnii Hand-Held Computer User Manual... -
Page 229: Lithium-Ion Smart Battery 5000 Mah (St3001
-20°C to +50°C (-4°F to +122ºF). Storage at elevated temperatures not recommended. 25°C (77ºF)—recommended storage temperature. Cycle Life 300 cycles minimum with no degradation below 70% of nominal capacity based on 0.5C charge / 0.5C discharge rates (to 3.0 V) @ 23°C (73.4ºF). Psion Omnii Hand-Held Computer User Manual... -
Page 230: Wireless Radios
Noise reduction Interfaces Hirose U.FL-R-SMT 50 ohm antenna connector Antenna solder pad Molex 80-pin board-to-board connector: Power supply Audio: 2x analog, 1x digital Serial interface (ITU-T V.24 protocol) SIM card interface 3 V, 1.8 V Psion Omnii Hand-Held Computer User Manual... -
Page 231: Cinterion Ph8-P Gsm/Gprs/Edge/Umts/Hspa+ Radio
Modes Assisted GPS (control plane AGPS, E911) General Power saving modes GPS tracking in parallel to 2G/3G diversity operation Software AT commands Hayes, 3GPP TS 27.007 and 27.005, and proprietary Cinterion Wireless Modules commands Psion Omnii Hand-Held Computer User Manual... - Page 232 USB 2.0 High Speed (480Mbit/s) device interface UICC interface Supported chip cards: UICC/SIM/USIM 3V, 1.8V Special features Phonebook SIM and phone Antenna SAIC (Single Antenna Interference Cancellation) / DARP (Downlink Advanced Receiver Performance) RX diversity type 3i Psion Omnii Hand-Held Computer User Manual...
-
Page 233: Model Ra2070 802.11A/B/G/N Radio
6.5, 13, 19.5, 26, 39, 52, 58.5, 65 Mbps 802.11b 32% max 802.11g -26 dB max 802.11a -26 dB max 802.11n (2.4 GHz) -29 dB max 802.11n (5 GHz) -29 dB max Bluetooth TI Wilink6 proprietary WiFi-BT co-existent scheme. Coexistence Psion Omnii Hand-Held Computer User Manual... -
Page 234: Bluetooth Radio
2.400-2.4835 GHz Channels RX Sensitivity -90 dBm typical, -70 dBm max Data Rates V1.2=732.2 kbps and 57.6 kbps asymmetric, 433.9 kbps symmetric V2.0=2 & 3 Mbps 802.11 Coexistence TI Wilink6 proprietary WiFi-BT co-existent scheme. E-10 Psion Omnii Hand-Held Computer User Manual... - Page 235 F.4.3 System Properties ..........F-11 Psion Omnii Hand-Held Computer User Manual...
-
Page 237: The Omnii Xt15F Hand-Held Computer (Model 7545Xt
Note: The Omnii Hand-Held Computer is a body worn device, and to maintain compliance with the FCC RF exposure guidelines, use a Psion approved carrying case. Use of non-approved acces- sories may violate FCC RF exposure guidelines. Model Variants •... -
Page 238: Hardware Specifications
Model No. PS1350. However, Omnii XT15f Arctic units operating in temperatures from -30°C to +50°C, require the use of the power preregulator Model No. PS1370. For detailed information, see “ST1002 Powered Cradle Installation” on page 153. Psion Omnii Hand-Held Computer User Manual... -
Page 239: Regulatory Approvals
Figure F.2 Freezer Keyboard Layouts 34-Key Numeric Keyboard 58-Key Full Alpha Numeric Keyboard [SCAN] Key [FN] Keys [SYM] key [FN] Modifier key [Enter/Power] [SHIFT] Modifier key [Windows] key Psion Omnii Hand-Held Computer User Manual... -
Page 240: Lithium-Ion Smart Battery 5000 Mah (St3001) For Omnii Chiller Model
-20°C to +50°C (-4°F to +122ºF). Storage at elevated temperatures not recommended. 25°C (77ºF)—recommended storage temperature. Cycle Life 300 cycles minimum with no degradation below 70% of nominal capacity based on 0.5C charge / 0.5C discharge rates (to 3.0 V) @ 23°C (73.4ºF). Psion Omnii Hand-Held Computer User Manual... -
Page 241: Lithium-Ion Smart Battery 5300 Mah (St3002) For Omnii Arctic Model
Cycle Life 300 cycles minimum with no degradation below 70% of nominal capacity based on 2.5A - 4.20V charge / 2.5A - 2.75V discharge rates @ 25°C (77ºF). Figure F.3 ST3002 Battery and Safety Label Psion Omnii Hand-Held Computer User Manual... -
Page 242: Quick Defrost Application
• To set the time, slide the trackbar to the desired time and click OK. Values range from 0 to 5 minutes. Note: A longer suspend threshold will reduce your overall battery shift life. Psion Omnii Hand-Held Computer User Manual... -
Page 243: Scan Window
You have the option of setting the display temperatures to Celsius or Fahrenheit. F.4.2.1 Heater System This section displays information on the heater system. Status The LED state for this parameter indicates whether the communication with the Quick Defrost hardware is successful (green) or unsuccessful (red). Psion Omnii Hand-Held Computer User Manual... -
Page 244: Display And Scan Window Heaters
The system test feature allows you to test the functionality of all available heaters (for approximately 20 seconds) to make sure that the heating system — heaters and control board — are working properly. F-10 Psion Omnii Hand-Held Computer User Manual... -
Page 245: System Properties
System Properties In Control Panel>System Properties, the computer’s heater software and hardware components are listed under Heater Info. The information includes their identification, version or part numbers, and whether they have been installed. F-11 Psion Omnii Hand-Held Computer User Manual... - Page 247 G.2 Power Mode ............G-15 Psion Omnii Hand-Held Computer User Manual...
-
Page 249: Wireless Wan
Double-tap on the Wireless WAN icon in the taskbar. If the icon is not visible in the taskbar, the radio interface has been shut down or the modem has been re- moved: • In the Control Panel, choose the Wireless WAN icon. Psion Omnii Hand-Held Computer User Manual... -
Page 250: Disconnecting From A Network
When the computer’s network connection is severed, the Status field displays “Ready to connect”. The signal strength is displayed in the main Wireless WAN screen, even while a connection is active. The Rx bytes and Tx bytes fields estimate the amount of data transmitted and received, respectively. Psion Omnii Hand-Held Computer User Manual... -
Page 251: Shutting Down The Wireless Wan User Interface
The SIM card is missing. After the SIM has been inserted a warm boot may be required. • SIM failure. The SIM card is permanently disabled (e.g. because the wrong PUK has been entered too many times). A new SIM is needed. • Modem failure. Psion Omnii Hand-Held Computer User Manual... -
Page 252: Tools Menu
The modem did not respond to commands as expected. If a warm boot does not clear this condition, the modem may need to be replaced. • NDIS error. An internal software error has occurred. If a warm boot does not clear this condition, Psion technical support may need to investigate further. G.1.4 Tools Menu The Tools menu in the main Wireless WAN dialog box offers some additional, advanced setup features. - Page 253 The following actions are available: Show The parameters for the selected profile are displayed when you tap the stylus on this button. For the Default profile, the publicly known password is shown—otherwise, the password is hidden. Psion Omnii Hand-Held Computer User Manual...
- Page 254 CHAP (Challenge Handshake Authentication Protocol) instead. Reset The Reset button in the New Profile and Edit Profile dialog boxes resets all entry fields to the values they had when the dialog box was opened. Psion Omnii Hand-Held Computer User Manual...
-
Page 255: Security Configuration
If unauthorized access to the device is a concern, the Require PIN on resume check box should be checked. In this case, the PIN is not stored; whenever a PIN is required, you will be prompted to enter an appropriate value. Psion Omnii Hand-Held Computer User Manual... -
Page 256: Network Configuration
‘Emergency calls only’, ‘No network found’, ‘GPRS not available’ or ‘GPRS not allowed’. Configure Frequency Bands The network selection can be modified by enabling or disabling GSM and UMTS frequency bands. G-10 Psion Omnii Hand-Held Computer User Manual... -
Page 257: Driver Mode Configuration
GSM modem connected to a serial port of the compu- ter through USB or through Bluetooth. An external modem connected to a serial port must support 115.2 kbit/s, 8bit, no parity and hardware flow control. G-11 Psion Omnii Hand-Held Computer User Manual... -
Page 258: Modem Information
BCCH may be available. For the GSM 1800MHz and GSM 1900MHz bands it may not be possible to convert the ARFCN for BCCH and TCH to a frequency because the channel numbers overlap. This can be G-12 Psion Omnii Hand-Held Computer User Manual... -
Page 259: User Interface
Choosing Taskbar displays a dialog box in which you can determine which Wireless WAN icons will be dis- played in the taskbar. Sounds Tapping on the Sounds option displays a dialog box in which you can customize which sounds your Omnii will emit and when these sounds will be played. G-13 Psion Omnii Hand-Held Computer User Manual... -
Page 260: At Terminal
By checking the Store message in Outbox field a new message can be stored in the Outbox before being sent. If no storage space is available, or the modem does not support the storage of outgoing messages, then this check box is disabled. G-14 Psion Omnii Hand-Held Computer User Manual... -
Page 261: Inbox
The Voice tab is described in detail under “Voice – Using the WWAN Phone Dialer” on page 117. Power Mode The power mode of the modem is controlled through the Power menu in the Control Panel (not through the Wireless WAN user interface). See “WWAN Power Mode” on page 90. G-15 Psion Omnii Hand-Held Computer User Manual... - Page 263 H.3.3 Changing Network Properties ......... . .H-7 Psion Omnii Hand-Held Computer User Manual...
-
Page 265: Wireless Information
When you choose the Wireless LAN icon, an 802.11 Wireless LAN Settings window is displayed. This tab lists your radio statistics. Choosing the Zero button resets the statistics of the last four items—Packets IN, Packets OUT, IN errors and OUT errors. Psion Omnii Hand-Held Computer User Manual... -
Page 266: H.1.2 Wireless Information
Automatically connect to non-preferred networks in the Advanced dialog box (see Figure H.9). • To add a new configuration, tap on the Add New button. A blank Wireless Properties dialog box is displayed. Psion Omnii Hand-Held Computer User Manual... - Page 267 26 Hexadecimal digit sequence that matches the active WEP key on the access point. To assign a Network key, highlight The key is provided automatically, and uncheck the check box to disable this option. Psion Omnii Hand-Held Computer User Manual...
-
Page 268: Assigning An Ip Address
If your network is not using a DHCP server, you will need to assign an IP address. Refer to “IP Address” on page 128 for details about assigning an IP address. H.2.1 Name Server Refer to “Name Server” on page 129 for details about this option. Psion Omnii Hand-Held Computer User Manual... -
Page 269: Advanced Features
To change the properties of an existing preferred network: • Highlight the network that you want to modify. • Tap on the Properties button. • Make any necessary changes in the Wireless Properties dialog box, and press [Enter] to save the changes. Psion Omnii Hand-Held Computer User Manual... -
Page 271: I.1 Omnii Xt15Ni (Non-Incendive) Important Safety & Regulatory Information
Omnii XT15ni Battery Information..........I-4 Psion Omnii Hand-Held Computer User Manual... - Page 273 USA and Canada for use in Class I, Division 2-Groups A, B, C and D T6 environments. The users of this product are cautioned to use accessories and peripherals approved by Psion Inc. The use of accessories other than those recommended, or changes to this product that are not approved by Psion Inc., may void the compliance of this product and may result in the loss of the user's authority to operate...
-
Page 274: I.2 Omnii Xt15Ni Battery Information
100°C (212°F). Charge ONLY with Psion Model ST3001-NI. Do not short circuit; may cause burns. Keep away from children. Use ONLY Psion battery pack Model ST3001-NI. Risk of fire or explosion if incorrect battery pack is used. Promptly dispose of used battery pack according to the instructions.. - Page 275 Decoding symbology predefined presets B-3 (scanner double-click) Click Time displaying type of barcode 100 clone (Total Recall) 112 parameters 98 Clone to USB 114 Security C-10 Codepage 101 Translation tab 101 Command Prompt 38 barcode reader communication Psion Omnii Hand-Held Computer User Manual...
- Page 276 67 indicators docking stations 802.11 radio signal quality 30 quad docking station (ST4004) 146 battery 30 Dot Time C-5 C-10 docking devices 31 double-click LED functions 28 appending characters to a decoded•arcode 100 Psion Omnii Hand-Held Computer User Manual...
- Page 277 Low light near Parameter Scanning C-5 Predefined preset B-5 Parity, port replicator 104 Low power partitions Predefined preset B-4 creating 106 Low Power Timeout C-5 deleting 107 dismounting 107 formatting 107 Macro keys management 107 Psion Omnii Hand-Held Computer User Manual...
- Page 278 Continuous Scan Mode C-8 protective case 137 decoded C-9 PsionVU menus 92 decoded (internal) C-4 PsionVU settings decoded Intermec (ISCP) C-7 Administrator Password 93 Delete Char Set ECIs C-7 Control Panel Settings 96 Dot Time C-5 Psion Omnii Hand-Held Computer User Manual...
- Page 279 Suspend 42 AC power 30 Shutdown (Start Menu) 42 battery 30 signal quality, 802.11 30 docking devices 31 signal quality, WWAN 30 modifier keys 30 SIM card, inserting 31 WWAN radio signal quality 30 Psion Omnii Hand-Held Computer User Manual...
- Page 280 Windows Mobile Device Center, setting up 67 Windows Vista® 67 Wireless WAN G-3 – G-15 AT Terminal G-14 Drive Mode configuration G-11 modem information G-12 network diagnostics G-12 SMS Menu G-14 Use Virtual Serial Port G-7 Voice G-15 Psion Omnii Hand-Held Computer User Manual...
Need help?
Do you have a question about the 7545MBW and is the answer not in the manual?
Questions and answers