Table of Contents
Advertisement
Quick Links
Advertisement
Table of Contents

Related Manuals for Royal 240DX


Summary of Contents for Royal 240DX
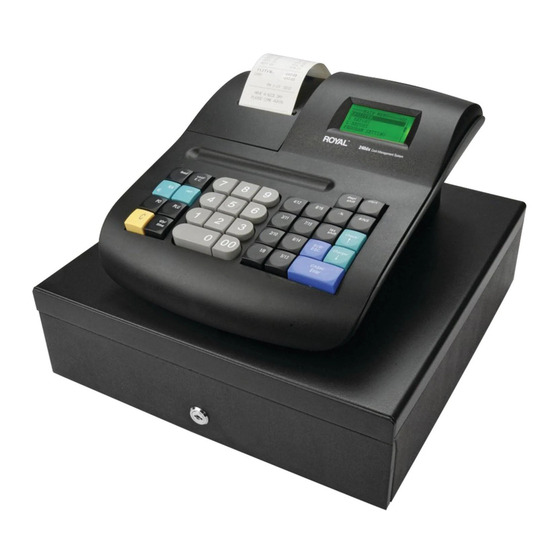
- Page 1 ® ROYAL 240DX Cash Register Instruction Manual...
-
Page 3: Table Of Contents
Programming the Sales Tax ..............12 PC-Based Software ................... 13 3. Getting To Know the Cash Register ........15 About the Displays ..................15 Clerk Display..................16 About the Menus on the Clerk Display ............16 Using the Keyboard ................... 17 Royal 240DX User’s Guide... - Page 4 12 Color ....................41 13 Subtotal .................... 41 14 Subtotal Amount ................41 15 Tax Amount ..................41 16 Double-Print ..................41 System Configuration ................42 Date Format ................... 42 Time Format ..................42 Date/Time Setting .................. 42 Royal 240DX User’s Guide...
- Page 5 Calculating Your Tax ................57 Example Tax Chart ................59 The Worksheet ..................60 Using VAT Tax Rates ................60 Printing a Confirmation Report ..............61 8. Running Report ............... 62 Running the Options Dump Report ............62 Royal 240DX User’s Guide...
- Page 6 Exempting Tax On An Item ............... 91 Minus Percentage Discount Sale .............. 91 Plus Percentage Sale ................92 Multiplication of a Department Unit Price ..........93 Multiplying By A Fraction ................93 No-Sale Function (Opening the Cash Drawer) .......... 94 Royal 240DX User’s Guide...
- Page 7 Voiding an Entire Sale before Finishing the Sale ........100 13. Product Information ............101 Specifications and Safety ................ 101 Safety and Legal Notices ................ 102 Software Licensing Agreement ............... 103 Manufacturer’s Limited Warranty............. 104 14. Ordering Supplies and Accessories ......... 106 Royal 240DX User’s Guide...
-
Page 8: Welcome
HAPTER Welcome Congratulations on purchasing your new Royal cash register! This register is designed to be easy to use so you can focus more on running your business. Before Starting Please read the following before you start to use the manual to set up and customize the cash register. -
Page 9: What Is In The Box
What is in the Box? Cash Register 1 starter roll of standard thermal paper, Royal Reorder Number 013127 (2¼ inch or 57.5 mm wide). RegisterLink software and DB9-RJ11 serial cable 1 set of keys, consisting of 2 Cash Drawer keys (515). -
Page 10: Getting Started
Your Cash Register-the Basics, page 22” to set up the basics of the cash register. Getting Started The Royal 240DX has a 5-Line LCD screen; setup is prompted through on screen instructions after you plug power into the cash register. This chapter will further explain the setup options. - Page 11 Other appliances can overload the circuit or cause electrical interference with the cash register. It is best that you use a circuit without other appliances already on it. Now follow the prompts on the screen. The rest of this chapter explains the setup options. Royal 240DX User’s Guide...
-
Page 12: Setting The Language
Do not put the tabs in the 2 holes in the bottom of the compartment. The cover will not close and you will break the tabs. Royal 240DX User’s Guide... -
Page 13: Installing The Paper Roll
24 hour format, which is normally used. To change to the 12 hour format, see Time Format on page42. You can set the cash register so that it does not print the time on receipts. For more information, see Print Parameters on page39. Royal 240DX User’s Guide... -
Page 14: Programming The Sales Tax
5 For straight tax, use the Number keys to enter the sales tax rate for your area. For example, if your local sales tax rate is 10%, enter 10000. To program other tax rates, press the following: Royal 240DX User’s Guide... -
Page 15: Pc-Based Software
This saves you the time of having to program each register individually. Check the Royal web site for any new features and upgrades to RegisterLink. Using the RegisterLink software requires connecting your computer to the cash register using the serial port. - Page 16 The RegisterLink software is on a CD. Please install the software from this CD. Then check for updates on the Royal web site (www.royal.com). If a later version of the RegisterLink software is available on the web site, download it from the web site and install it on your PC.
-
Page 17: Getting To Know The Cash Register
Customers will be able to see their transaction being ringed up. Your cash register has eight digits segment customer display. The digit display shows 8 digits for sales dollar amounts. Clerk screen Your cash register has a 5 line LCD display. Royal 240DX User’s Guide... -
Page 18: Clerk Display
You may see a scroll bar on the right side of the screen. This means that there are more options to see if you use the Arrow Up and Arrow Down keys. Royal 240DX User’s Guide... -
Page 19: Using The Keyboard
Up Your Cash Register - the Basics on page 22 and Setting up Your Cash Register Parameters on page 39. The following identifies some of the keys on the keyboard and what you can use them for Royal 240DX User’s Guide... - Page 20 Main menu from any point in the cash register menus exit the current screen and go back to the previous screen log on/off the clerk Royal 240DX User’s Guide...
-
Page 21: Using The Cash Drawer
If the key is lost or locked in the cash drawer, contact Royal. When you are using the cash drawer, make sure you lower the bill arms before you close the cash drawer. Never slam the drawer closed. Royal 240DX User’s Guide... - Page 22 Underneath the cash register, toward the back of the register, you see a small lever. 2 Push the lever in the only direction it will move. The cash drawer opens. If the cash drawer will not open, make sure it is not locked with the 515 Drawer key. Royal 240DX User’s Guide...
-
Page 23: Using The Accessory Drawer
It is a good place to put things like pens, pencils, and note pads. Because the drawer cannot be locked, it is not a good idea to put checks or valuables in it. You should put those in the cash drawer, under the coin tray. Royal 240DX User’s Guide... -
Page 24: Setting Up Your Cash Register - Thebasics
• and more Using the Displays Your cash register includes two displays: 1 for the clerk, or operator, and 1 for the customer. The customer display shows large, easy to read fluorescent digits for easy viewing. Royal 240DX User’s Guide... -
Page 25: The Clerk Screen
Table 2 Navigating the clerk screen To do this... Press this... Move up and down through the menu options Select the highlighted option Go back one menu level Clear your typed entry and start over Royal 240DX User’s Guide... -
Page 26: Adjusting The Contrast On The Clerk Screen
5 Press the Arrow Down key to select System Configuration. Press the CASH/Enter key. 6 Press the Arrow Down key to select Backlight Time. Press the CASH/Enter key. 7 Make your selection. When you are done, press the CASH/Enter key. Royal 240DX User’s Guide... -
Page 27: Setting Alphanumeric Descriptions
CASH/Enter key to select the highlighted symbol. Press the dept shift key again to exit this from screen. Important If you enter the wrong character, press the C key to clear the character. Now you can continue. Royal 240DX User’s Guide... -
Page 28: Using Double Wide Characters
The default printout for the footer message is null. Make a copy of the blank Worksheet below for future changes or revisions to your header message or footer message. Royal 240DX User’s Guide... - Page 29 S T R E Line 4 O P E N 7 A M 6 P M Line 5 F F E E T H E W O R Line 6 l c o m g a i Royal 240DX User’s Guide...
-
Page 30: Printing Options On Receipts
7 Follow the instructions on the display. Printing Options on Receipts You can specify if the following prints on receipts: • Clerk name and number • Tax amount • Machine number • and more • Time Royal 240DX User’s Guide... -
Page 31: Setting Clerk Numbers And Names
CASH/Enter key. If you did not program a Manager Password, go to the next step. 4 Press the Arrow Down key to select CLERK SETTING. Press the CASH/Enter key. 5 Press the Arrow Down key to select one clerk to set. Press the CASH/Enter key. Royal 240DX User’s Guide... -
Page 32: Using The Clerk System
Write your Passwords down in a safe place. If you forget the Passwords, you must do a Full System Clear procedure. A Full System Clear erases all transaction information and PROGRAM SETTING. For details on the Full System Clear, see Full System Clear on page 97. Royal 240DX User’s Guide... -
Page 33: Setting The Machine Number
After you are done PROGRAM SETTING the machine number, you can check your results. See Printing the Program Confirmation Report on page 43. To set the machine number PROGRAM SETTING SYSTEM PARAMETER System Configuration Machine No. Royal 240DX User’s Guide... -
Page 34: Programming Department
Programming Department Preset Price Programming Tax Status For specific information about each of the items above, see the next sections. After you are done, you can check your results. See Running the Department Confirmation Report on page 63. Royal 240DX User’s Guide... -
Page 35: Programming Department Names
If you enter the wrong character, press the C key to clear the character. Now you can continue. When you are finish programming the department description, press the CASH/Enter key to save. The information is saved in the cash register and you can program the next item. Royal 240DX User’s Guide... -
Page 36: Programming Department Preset Price
TAX 1, TAX 2 and TAX 3 TAX 1, TAX 2 and TAX 4 TAX 1, TAX 3 and TAX 4 TAX 2, TAX 3 and TAX 4 TAX 1, TAX 2, TAX 3 and TAX 4 Royal 240DX User’s Guide... -
Page 37: Programming Plu Descriptions
You can program PLUs without using a barcode reader. Use the following instructions. Important If you enter the wrong character, press the C key to clear the character. To program PLUs without a barcode reader PROGRAM SETTING PLU SETTING Royal 240DX User’s Guide... -
Page 38: Programming Plus With The Optional Barcode Reader
CASH/Enter key. Programming PLUs with the Optional Barcode Reader You can use the optional Royal model PS700 barcode reader to scan items and automatically ring them up. Barcode readers save time and reduce errors. The barcode reader must be held about ½ inch or closer above the symbol on the product to read the UPC or other barcode properly. -
Page 39: Printing The Program Confirmation Report
If the cash register makes a loud error beep, press the C key to stop it. If your cash register will not stop making a beeping sound after you press the C key, you can do three more things. Royal 240DX User’s Guide... - Page 40 If you did a Half System Clear and a Partial Clear and the error beep still does not stop, as a last resort, you can do a Full System Clear. For more information about the Full System Clear, see Full System Clear on page 86 Royal 240DX User’s Guide...
-
Page 41: Setting Up Your Cash Register Parameters
CASH/Enter key. If you did not program a Manager Password, go to the next step. 4 Press the Arrow Down key to select RECEIPT SETTING. Press the CASH/Enter key. 5 Press the Arrow Down key to select Print Parameters. Press the CASH/Enter key. Royal 240DX User’s Guide... -
Page 42: Receipt
7 Clerk Specifies if a Clerk name prints on the customer receipt. 8 NRGT(Non-Resettable Grand Total) Specifies if the NRGT prints on the customer receipt. 9 Auto Reprint Receipt Specifies if reprint on the customer receipt automatically. Royal 240DX User’s Guide... -
Page 43: 10 Real Time
15 Tax Amount Specifies to print the Tax information before the Total amount on the receipt or after the Total amount. 16 Double-Print Specifies five selections for Double-Height print: Null/ All/ Item/ Payment/ Item And Payment. Royal 240DX User’s Guide... -
Page 44: System Configuration
The Time Format is set by selecting from the following 2 options: This Date Format Looks like... 24 Hours 13:00 12 Hour 1:00 pm Date/Time Setting Specify the date, including month, date and year. Adjust the time: hours and minutes. Royal 240DX User’s Guide... -
Page 45: Tax System
Before changing the decimal digit you must clear the Daily Full report. Backlight Time Specifies to set the backlight time for the cash register Language Specify the default language of the machine for all the prompts, messages, on-screen instructions, and so on. Royal 240DX User’s Guide... -
Page 46: System Information
There are three members in -% setting: 1%/ 2%/3%.You can program the name, percentage and attribute of the -%. You can program the default the percentage for the -% member or you can enter the rate manually each time the -% key is pressed (Only for 1%). Royal 240DX User’s Guide... -
Page 47: Refund Setting
When you use the ref/-key, the descriptor of the refund appears on the display and prints on the receipt. Payment Setting You can specify a foreign currency to accept as payment when you total sales and program the exchange rate for when you accept this currency. Royal 240DX User’s Guide... -
Page 48: Halo
The Max is 99999999(Decimal is 0) Dept Shift Num Specifies setting minimum increment and average increment when press dept shift during transaction. The range is 0~60 Reprint Counter Specifies setting maximum reprint counter when press CASH/Enter after transaction Royal 240DX User’s Guide... -
Page 49: Parameters
Warn Out of Stock Specify whether pop-up warning when out of stock. Clear EJ (Full) Specify either Manual or Auto to clear the EJF. [00] Key Function Specify the key function of [00] key: [00] or [.] Royal 240DX User’s Guide... -
Page 50: Parameter Print
5 Press the Arrow Down key to select all. Press the CASH/Enter key to print all the parameters. 6 Press the Arrow Down key to select single. Press the CASH/Enter key to select one parameter. Press the CASH/Enter key Royal 240DX User’s Guide... -
Page 51: Ringing Up Sales And Using Training Mode
For more information about setting up the basics on your cash register, see Setting Up Your Cash Register - the Basics on page22. Reminder Do not press the Decimal Point key when ringing up a price Royal 240DX User’s Guide... -
Page 52: Ringing Up Sales Without A Plu Number
6 When you are done ringing up items, press the CASH/Enter key. The cash drawer opens and the receipt or journal prints. 7 Make any change needed and place the money you are given in the cash drawer. Royal 240DX User’s Guide... -
Page 53: Ringing Up Sales With The Optional Barcode Reader
Turning the customer receipt off doesn’t print the customer receipt. The built-in printer is turned off so that customer receipts are not automatically printed. The transaction details are still saved in memory. Royal 240DX User’s Guide... -
Page 54: Receipt On Demand
When you are using the cash register in Training mode, you cannot use any of the operations in the PRG, X, or Z modes. The transaction numbers and amounts do not count in the Register mode until you exit Training mode. Royal 240DX User’s Guide... -
Page 55: Entering And Exiting Training Mode
CASH/Enter key. 4 Using the Round number keys, enter the 000789. Press the SUB/ESC key. The receipt Exit Training mode print. 5 Now you can ring up sales normally. These sales do appear on sales reports. Royal 240DX User’s Guide... -
Page 56: Programming Complex Tax Rates
Within the tax system you select, you can program up to 4 different tax rates on your cash register. Each tax rate can be linked directly to a department key (see Programming Tax Status on page29), or by pressing the tax shift key before ringing up a sales entry. Royal 240DX User’s Guide... - Page 57 CASH/Enter key. If you did not program a Manager Password, go to the next step. 4 Press the Arrow Down key to select SYSTEM PARAMETER. Press the CASH/Enter key. 5 Press the Arrow Down key to select System Configuration. Press the CASH/Enter key. Royal 240DX User’s Guide...
-
Page 58: Programming Straight Add-On Tax In The United States
For instructions, see Calculating Your Tax on page 57.When you are done calculating your tax codes, return to this section. Before you start, you must know where the first irregular breakpoint and the first regular breakpoint are. Royal 240DX User’s Guide... -
Page 59: Calculating Your Tax
To do this you need to get a copy of your state's Retail Tax Chart from your local Tax Office. After you are done, write down the tax code and save the information for future reference. Royal 240DX User’s Guide... - Page 60 25, 25, 25, 25 are the Regular repeating breakpoint pattern. The Regular repeating breakpoint pattern is a point where you first see a repetition of one or more numbers, which then add up evenly to 100, 200, 300, and so on. Royal 240DX User’s Guide...
-
Page 61: Example Tax Chart
After at least 4 examples of the regular breakpoint, select Add and press CASH/Enter again Use the worksheet on the next page to calculate the irregular breakpoints and regular breakpoints for your local tax. Royal 240DX User’s Guide... -
Page 62: The Worksheet
2 Press the Arrow Down key to select PROGRAM SETTING. Press the CASH/Enter key. 3 If you are prompted for a Manager Password, type the password number and then press the CASH/Enter key. If you did not program a Manager Password, go to the next step. Royal 240DX User’s Guide... -
Page 63: Printing A Confirmation Report
5 digit number. 7 When you are done, press the CASH/Enter key. 8 Repeat for each tax you want to set. Printing a Confirmation Report To check your results, see the Parameter Print on page 48. Royal 240DX User’s Guide... -
Page 64: Running Report
You can print the Parameters Print report to check your programming results. For more information about programming the cash register, see Chapter5Setting up Your Cash Register Parameters on page39. The parameters Print report includes: All parameters settings Department parameters Royal 240DX User’s Guide... -
Page 65: Running The Department Confirmation Report
4 Press the Arrow Down key to select Parameters Print. Press the CASH/Enter key. 5 Press the Arrow Down key to select single. Press the CASH/Enter key. 6 Select Dept, Press the CASH/Enter key. The all programmed departments parameters prints. Royal 240DX User’s Guide... -
Page 66: Running The Plu Confirmation Report
Management reports show you information about how sales are progressing. You can run all reports as X reports and run some reports as Z reports. Royal 240DX User’s Guide... -
Page 67: About X Reports
Shows each department number, total items sold, dollar amount, and net sale amount rung up, either weekly or monthly. •7 - PTD Clerk Report Shows total sales amounts of each Clerk Number, either weekly or monthly. Royal 240DX User’s Guide... - Page 68 •18 - PTD DEPT Group Report Shows the specified department, quantity, dollar amount, and total sale amount, either weekly or monthly. •19 - EJF Report (All) Shows the information in the Electronic Journal. Royal 240DX User’s Guide...
-
Page 69: About Z Reports
Shows quantity and dollar amount of each PLU number rung up today. •4 - Daily Clerk Report Shows total sales amounts of each Clerk Number. •5 - Hourly Report Shows total sales amounts rung up each hour. Royal 240DX User’s Guide... -
Page 70: Running Reports
(C.E., Transvoid). Minus percentage discount (DISCOUNT), voids (VOID/C.E.) and returns (R.M.) are all deducted from the department totals and the plus percentage (ADD ON) is added to the department totals, depending on the parameter settings. Royal 240DX User’s Guide... - Page 71 Check 85.80 -->Check Sales Total Charge 80.80 -->Charge Sales Total *****Total in Drawer***** Cash 914.51 -->Cash Total in Drawer Check 85.80 -->Check Total in Drawer Charge 80.80 -->Charge Total in Drawer 04-11-2011 05-18 Date --> -->Time Royal 240DX User’s Guide...
-
Page 72: Report Sample
Report Sample Daily Department Report Daily PLU Report Daily Clerk Report Royal 240DX User’s Guide... - Page 73 Periodic Department Report Periodic Hourly Report Periodic Return Merchandise Report Royal 240DX User’s Guide...
-
Page 74: More Information About The Electronic Journal (Ej) Reports
At that point, all your transaction data is cleared and transactions start over again from zero. You lose all the electronic transaction history. You can print the entire Electronic Journal record on the printer in the cash register in either the X Mode or the Z Mode. Royal 240DX User’s Guide... - Page 75 4 Press the Arrow Down key to select the report you want. Press the CASH/Enter key. 5 The report appears on the screen. Use the Arrow keys to move through the report. You can view/ print the report or clear it. Royal 240DX User’s Guide...
- Page 76 The total available number of PLUs are shown with the number you are using. You also see the EJ information. If the number used is close to the total number of 150,000, print the EJ report to avoid losing important information. Royal 240DX User’s Guide...
-
Page 77: Using Sd Memory Card
Using SD Memory Card You can exchange data through an SD memory card between your register and a PC when managing the data in your register by using the Royal’s PC software “Customer Support Tool”. You can also save all necessary data in the register to an SD memory card for backup. -
Page 78: Data Saving
5 Select Full Report. Press the CASH/Enter key. 6 Press the Arrow Down key to select Save to SD card. Press the CASH/Enter key. The ECR is writing the daily full report to SD card, after writing over it will prompt “Written completed”. Royal 240DX User’s Guide... - Page 79 Export to EJ report files have the following documents EJ-INDEX Indicate report the first time and the last one receipt time of a receipt in the exported EJ file. EJ-04092011120544 Indicate the EJF exported time is 2011-04-09-12:05:44 Royal 240DX User’s Guide...
-
Page 80: Data Loading
5 Press the Arrow Down key to select Data Recovery. Press the CASH/Enter key. 6 Press the Arrow Down key to select Yes. The ECR is reading programming data from SD card, after reading over it will prompt “Succeed!” Royal 240DX User’s Guide... -
Page 81: Maintenance And Options
Fahrenheit or above 104 degrees Fahrenheit), allow the temperature inside the machine enough time to reach room temperature before turning it on. If you need electronic service, take the cash register to a Royal authorized service center. For more information, see Manufacturer’s Limited Warranty on page 105. -
Page 82: Installing A New Paper Roll
• If you do not need to print receipts: In Register, input 00and press SUB/ESC key. • If you want to print receipts: Lay the customer receipt paper over the receipt slot and close the Journal Compartment Cover. Royal 240DX User’s Guide... -
Page 83: Using The Battery System
• Put the batteries in the slots. Make sure that the positive and negative ends are in the right place. The batteries have a little plus (positive) and minus (negative) sign on each end to help you. Royal 240DX User’s Guide... -
Page 84: About The Serial Port
2 Open the RegisterLink software on your PC 3 On the cash register, go to the main menu, scroll down to PORT SETTING and press the CASH/Enter key. 4 Go to the RegisterLink software on the PC and follow the directions in RegisterLink. Royal 240DX User’s Guide... -
Page 85: Troubleshooting
5 If there is a FUNCTION error and an error message still appears on the display, press the C key. 6 As a last resort, follow the directions for a Full System Clear. See Full System Clear on page38. Royal 240DX User’s Guide... -
Page 86: No Receipt Printing
No Printing on the Receipt If the cash register is not printing on the receipt, make sure you are using thermal paper. Bond paper will not work in this cash register. If needed, contact the Royal Customer Support hotline at 1-800-272-6229 for additional help. -
Page 87: The Cash Register Does Not Work At All
Partial Reset. • As a last resort, perform a Full System Clear procedure. See Full System Clear. 2 If needed, contact the Royal Customer Support hotline at 1-800-272-6229 for additional help. Opening the Drawer When There is no Power If there is no power and you need to open the drawer, follow these instructions. -
Page 88: Half System Clear
30 Seconds. 2 Press 1379andPlug in the cash register. 3 Reprogram the cash register. 4 Continue with normal operations. If Nothing Helps If a problem still persists, call our Customer Service Support Line toll-free at 1-800-272-6229. Royal 240DX User’s Guide... -
Page 89: Examples
Charge Sale Check Sale Dept Shift Key Exempting Tax On An Item Minus Percentage Discount Sale Plus Percentage Sale Multiplication of a Department Unit Price Multiplying By A Fraction Royal 240DX User’s Guide... -
Page 90: Transaction Codes
Paid Out/ Received on Account REFUND Return (Refund) Subtotal Subtotal Tax1/ Tax2/ Tax3/ Tax4Rate Applied to a Sale T1/T2/T3/T4 Total of Sale TOTAL Represents Tax Total if selected in Print Options. Transaction Void an Entire Sale void Error-Correct ERROR-CORRECT Royal 240DX User’s Guide... -
Page 91: Sample Receipt
To add or force tax to a non-taxable department or a different tax rate 1 Press the key. 2 Press the key and select Tax 1. Press the 3 Press the key. 4 In the Number keys area, press 100, and then press the key. 5 Press the key. Royal 240DX User’s Guide... -
Page 92: Cash Sale With Tendering Change
To ring a check sale 1 In the Number keys area, press 100, and then press the key. 2 Press the key. You do not have to enter any amount before pressing the key. Royal 240DX User’s Guide... -
Page 93: Dept Shift Key
2 Press the 4 In the Number keys area, press 100, and then press the key. 5 Press the key. Minus Percentage Discount Sale Example 8: The following are two versions of Minus Percentage Discount Sales. Royal 240DX User’s Guide... -
Page 94: Plus Percentage Sale
Example 9: The following are two versions of the Plus Percentage Sale. Version 1 Note If no tax is programmed in your cash register, ring up a $1.00 item in Department 1 and apply a pre-programmed Plus Percentage Rate of 10% for Royal 240DX User’s Guide... -
Page 95: Multiplication Of A Department Unit Price
Department 1. Caution When multiplying by a fraction, you must use the decimal point in the fraction but not in the dollar amount. You must set the 00 key functions as decimal point Royal 240DX User’s Guide... -
Page 96: No-Sale Function (Opening The Cash Drawer)
1 In the Number keys area, press 1, and then press the key. 2 Press the key. Note PLUs follow the same procedure for ringing up Coupons, Refunds, Minus Percentage Discounts, Plus Percentages, and so on, as with ringing these items up for a Dept # sale. Royal 240DX User’s Guide... -
Page 97: Received-On-Account Sale
Example 18: Refund a $1.00 item in Department 1 and Refund a $1.50 after subtotal. To ring a return sale 1 Press the key. 2 In the Number keys area, press 100, and then press the key. 3 Press the key. Royal 240DX User’s Guide... -
Page 98: Split Tendering Sale
To void a department preset price 1 Press the key. 2 Press the key. 3 Press the key. Press Arrow Up key to select Department 1 4 Press the key and then press the key. 5 Press the key. Royal 240DX User’s Guide... -
Page 99: Error-Correct A Department Preset With A Minus Percentage Discount
To void a multiplication of a department preset price 1 In the Number keys area, press 3, and then press the key. 2 Press the key. 3 In the Number keys area, press 2, and press the key. 4 Press the key. Royal 240DX User’s Guide... -
Page 100: Error-Correct A Plu Sale
To void a PLU sale with a minus percentage discount In the Number keys area, press 1, and then press Press the key and Select 1% Press the key. Press the key and then press the key. Press the key. Royal 240DX User’s Guide... -
Page 101: Error-Correct A Plu Sale With A Plus Percentage Rate
3 Press the key and then press the key. 4 Press the key. Note If the Plus Percentage rate is NOT pre-programmed, type in the Plus Percentage Rate before pressing the -% key. Applies only for 1% Royal 240DX User’s Guide... -
Page 102: Voiding An Entire Sale Before Finishing The Sale
2, a $3.00 item in Department 3. To void a sale 1 Press the key. Press the key and Select 1% 2 Press the key. Press the key and Select 1% 3 Press the key. 4 Press the key. Royal 240DX User’s Guide... -
Page 103: Product Information
Memory Battery Roughly one month or so after power interruption Protection Technology CMOS RAM Electrical 8V~ 60Hz, 0.40A Characteristics Operating 0-40 Degrees Centigrade (32-104 Degrees Temperature Fahrenheit) Dimensions 12.75"W x 16.75"D x 11.75"H Weight 14.4-lbs. (6.5-kg) Royal 240DX User’s Guide... -
Page 104: Safety And Legal Notices
California to cause cancer, birth defects, or other reproductive harm. Wash hands after handling. Trademark Notice All trademarks, registered trademarks and service marks mentioned in this manual and with this product are for identification purposes only and are the property of their respective holders. Royal 240DX User’s Guide... -
Page 105: Software Licensing Agreement
TERMS. The product which you have purchased from Royal contains software (“the Software”) which is owned by Royal and/or third parties which have provided the same to Royal and which is protected by the United States copyright laws and treaty provisions. By purchasing this product containing the Software, you are agreeing to be bound by the terms of this license. -
Page 106: Manufacturer's Limited Warranty
NJ 08875 USA warrants that your NEW Royal Electronic Cash Register or Time Clock (“Product”) is free of defects of workmanship and materials. If there is a defect or malfunction of this Product, Royal will repair the Product free of charge as follows: PARTS: New or comparable rebuilt parts in exchange for defective parts for ONE YEAR from the date of purchase. - Page 107 Service Center. Royal and/or the Service Center cannot be held responsible for any loss or damage that occurs while in transit. For Authorized Service Centers within your local area, call 1-888-261-3888 or 1-800-272-6229. In Canada call 1-888-266-9380. Or you can call the Royal Corporate Service Center directly at 1-630-315-2603 for shipping instructions and additional information.
-
Page 108: Ordering Supplies And Accessories
Replacement Journal Paper Roll Spindle E16900150 Owner's Manual Royal 240DX Model PS700 Barcode Reader 16881W For Prices and Availability Call 1-888-261-4555 or visit our web site at www.royal.com. Prices and Availability Subject to Change Without Notice Royal 240DX User’s Guide... - Page 109 Receipt ....84 No Receipt Printing .. 84 No-Sale Function #/NS Information ..40 Data Loading..... 78 Getting Started ... 8 (Opening the Cash Data Saving ....76 Getting To Know the Drawer) ....94 Date/Time Setting ..42 Cash Register ..15 NRGT(Non-Resettable Decimal .....
- Page 110 Tax in the United Number ....50 Time ..... 11 Running Report ..62 Setting the Language 10 States ....56 Using Double Wide Programming Tax Running Reports ..68 Setting the Machine Characters .... 26 Running the Clerk Number ....31 Status ....
- Page 112 ® ROYAL ®®®® Royal Consumer Information Products, Inc. 379 Campus Drive Somerset, NJ 08875 Part No.:240DXMWim0408 Printed in China Date: Oct. 2013 Ver.: 002...
Need help?
Do you have a question about the 240DX and is the answer not in the manual?
Questions and answers