Table of Contents
Advertisement
Owner's Manual
Multimedia
Navigation
Navigation
System
Bluetooth Hands-Free
iPod™ and MP3 compatible
Back-up camera ready
Play DVDs, Audio CDs, MP3 Discs
Supports steering wheel controls
HD Radio™ Technology
Customizable backgrounds and illumination
Satellite Radio ready
Bluetooth Phonebook and favorites
E N T E R T A I N M E N T
S Y S T E M S
Advertisement
Table of Contents

Related Manuals for Rosen PR-UN1370-US


Summary of Contents for Rosen PR-UN1370-US
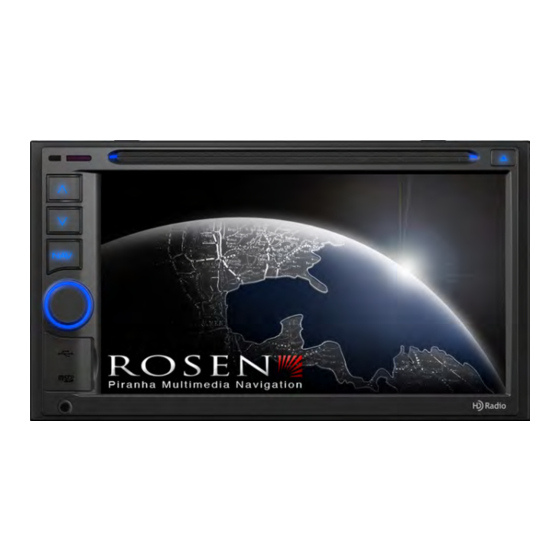
- Page 1 Owner’s Manual Multimedia Navigation Navigation System Bluetooth Hands-Free iPod™ and MP3 compatible Back-up camera ready Play DVDs, Audio CDs, MP3 Discs Supports steering wheel controls HD Radio™ Technology Customizable backgrounds and illumination Satellite Radio ready Bluetooth Phonebook and favorites E N T E R T A I N M E N T S Y S T E M S...
- Page 2 HD Radio Technology manufactured under license from iBiquity Digital Corporation. U.S. and Foreign Patents. HD Radio™ and the HD, HD Radio, and “Arc” logos are proprietary trademarks of iBiquity Digital Corp.
-
Page 3: Operational Panel
Operational Panel 7 8 9 9 11 Functions of Buttons 1. [PREVIOUS] Button • Press this button to choose the previous track/chapter. • Press this button in radio mode to auto search down. 2. [NEXT] Button • Press this button to choose the next track/chapter. •... -
Page 4: Remote Control
• Insert a disc with the label on the top side into the DVD/CD slot until it will be inserted automatically. 11. EJECT • Press this button to insert or eject a disc. Remote Control Signal transmitter Operating rang : 30°in all directions [MUTE] [OPEN] [Power/SRC]... -
Page 5: Functions Of Remote Control Buttons
• Do not dispose of batteries into fire or flames. • Dispose of spent batteries properly. Note: • The wireless remote control operation may not be optimal in direct sunlight. Functions of Remote Control Buttons / ] Button • Press this button to play or pause video and audio media. •... - Page 6 [ENT] Button Press to fix the entered data in the Key Pad screen or enter the item the cursor is on. [TAG] Button No function. [TITLE] Button Press to go to the title menu on the DVD. [ROOT] Button Press to go to the root menu on the DVD. [RPT] Button •...
- Page 7 SD/USB Mode •SD/USB Audio Operations This system can play audio files (MP3/WMA) stored in an SD/USB memory which is recognized as "SD/USB Mass Storage Class device". You can use your SD/USB memory as an audio device by simply copying desired audio files into it. Note: •...
- Page 8 • When an SD/USB memory is already connected Touch [SD/USB] button to select the SD/USB Audio mode. The system changes to the SD/USB Audio mode and starts playback from the previous position or from the beginning. NOTE: If you reconnect the same device that you disconnected last, the system will play back where it left off.
-
Page 9: Play/Pause Playback
SD/USB Play mode screen Return to the Main Menu button. Previous Track /Fast Backward button. System time. Play/Pause button. Next Track/Fast Forward button. Repeat button. Shuffle button. Direct Searching button. Voice dialing button. 10. Screen brightness button. 11. Mute button. 12. - Page 10 • Pressing [ ] button starts playback from the beginning of the current track; when this button is pressed again within about 3 seconds, playback starts from the beginning of previous track. Fast Forward /Fast Backward 1. Press [ ] or [ ] button and hold more than 2 seconds to start fast backward or fast forward during playback.
- Page 11 The numerical keypad screen Searching with the Track Number This operation allows searching using the track numbers in playing folder. 1. Touch [ ] button .The numerical keypad will appear on the screen. 2. Input the track number that you want to play back with [0] to [9] key. Playback starts from the track of the input track number.
- Page 12 1. Press this button can be back to father folder. 2. The current playing track. 3. Touch to turn to previous page. 4. Touch to turn to next page. Enter Track list Press [ ] button to display track list. Select any track to play directly. Click or press [ Artwork] button can enter the track list also.
- Page 13 • Files protected with any DRM cannot be played. Notes on using SD/USB memories • General notes When no support files, the file list display nothing. Select SD/USB Video mode Connect your SD/USB memory with video files to the SD/USB connector. The system will automatically detect the connected device, and the [SD/USB] button on main menu will be enabled.
- Page 14 2. Touch [ ] button again to resume playback. Switch to Previous/next file Press [ ] or [ ] button during playback to play previous /next video. • Pressing [ ] button starts playback from the beginning of the next video. •...
- Page 15 1. Press this button can be back to father folder. 2. Current playing video. 3. Touch to turn to previous page. 4. Touch to turn to next page. Exit Video list Press [ ] button to exit from list. Press the any video title can exit from list. Select a folder on display list Touch the folder title of the display list on the screen, the screen will display videos and folders in selected folder.
- Page 16 Searching with the Video Number This operation allows searching using the video numbers in playing folder. 1. Touch [ ] button .The numerical keypad will appear on the screen. 2. Input the video number that you want to play back with [0] to [9] key. Playback starts from the video of the input video number.
- Page 17 1. Previous picture button. 2. Play/Pause picture button. 3. Next picture button. 4. Go to list menu mode 5. Hide Operation bar and Shortcut bar 6. Operation bar. Play/Pause Playback The system can play picture one by one automatically. 1. Touch [ ] button to pause during playback.
- Page 18 The Picture files list screen 1. Press this button can be back to father folder. 2. Current playing picture. 3. Touch to turn to previous page. 4. Touch to turn to next page. Exit Picture list Press [ ] button to exit from picture list. Press the any video title can exit from list.
- Page 19 Select a picture on the display List This function allows you to select picture from a displayed list. 1. Touch the picture title on the display list. The selected picture will show. 2. When the desired picture is not displayed, press and flick the picture list up or down. 3.
- Page 20 HD Radio Operations Listening to the HD Radio broadcasts 1- Return to Main Menu 2- Time display 3- Call sign 4- Frequency display, touch to automatically seek next station in the direction of higher frequencies 5- Touch to change the next available sub channel 6- Voice dail, if the unit connect to a smart phone which can support this function this button can be enable 7- Change the back ground light...
-
Page 21: Hd Radio Stations
tuner mode. Each time the button is pressed, the radio reception band changes in the following order: FM1 FM2 FM3 AM FM1 FM2 FM3 AM… 3. Hold one preset station more than 3 seconds to save current station to the preset station list. -
Page 22: Manual Tuning
If on SPS, [ ] will go to lower SPS or MPS (SPS→MPS→Seek Freq). If not acquired, or on an MPS, [ ] will always be MPS→Lower Freq (not SPS). Manual Tuning Press the [FM/AM] UI button to select the radio band (FM1, FM2, FM3 or AM). Press the [ ] knob on the unit panel to change to tuning mode. - Page 23 Digital, CD-quality sound. HD Radio Technology enables local radio stations to broadcast a clean digital signal. AM sounds like today’s FM and FM sounds like a CD. Program Service Data: Contributes to the superior user experience of HD Radio Technology. Presents song name, artist, station IDs, HD2/HD3 Channel Guide, and other relevant data streams.
-
Page 24: Satellite Radio Operations
Satellite Radio Operations This function is available when a Satellite Radio Receiver is connected through the dedicated connection. Note: Satellite radio is a subscription service. Selecting a Satellite Radio mode Press the [SAT] button on Main Menu display. The system changes to the Satellite Radio mode. The SAT mode screen is displayed 1. -
Page 25: Channel Selection
Channel Selection 1. Touch the [SAT] button on the SAT Menu display to enter channel list preview mode. 2. Select the channel with the [ ] or [ ]. Only channels that can be received are selected. The receiver seeks the next available channel below or above the current channel. 3.Press the [ ] or [ ] button long to switch channel... -
Page 26: Settings Operation
Select channel with the Keypad 1. Touch [ ] button .The numerical keypad will appear on the screen. 2. Input the channel number that you want to select with [0] to [9] key. • If the input track number does not exist or searching with a track number is not allowed, the screen image will not change. -
Page 27: Camera Menu
Camera Menu Reverse Trigger Set the reverse ON or OFF. ON: When reverse the camera screen will display. OFF: When reverse The camera screen will not display. Set Image Set the camera display mode: Normal or Mirror. While reverse the Audio should be mute or not mute. Mute Audio Style Menu Illumination On: CPM lights on always, backlight follows the status... -
Page 28: Ipod/Iphone Operations
Set the LED of panel key color. Illumination Color Set the highlight of button in every source color. Hightlight Color Background Set the background wallpaper. Adjust LED of panel key brightness. LED Brightness Tabs Menu The system allow user to customize on the shortcut. A total of seven tabs are on the shortcut. - Page 29 the rear monitor. • When no data is present, the title display will remain blank. • The iPod/iPhone is used with the equalizer function turned OFF. • Set the iPod/iPhone’s language setting to English before connecting your iPod/iPhone. Some characters of the other languages may not be displayed correctly in this system.
- Page 30 Controlling the iPod/iPhone •iPod audio mode screen MENU Touch the [MENU] key to return to the Main Menu. PREVIOUS the previous track Touch the [ ] key to choose Touch and hold the [ ] key to fast backward. SYSTEM TIME DISPLAY PLAY/PAUSE Touch the [ ] key during playback to pause.
- Page 31 Touch the screen during the monitor off to the day mode. 11. MUTE Touch the [ ] key to mute the audio output, touch again to should be cannel. 12. LIST Touch the [ ] key to display the current play list, touch again to display the ID3 Information.
- Page 32 AUDIO TRACK LIST VIDEO Touch the [ ] key to display iPod/iPhone video. SEARCH Touch the [ ] key to search with the first alphabet in current list. LIST Touch the [ ] key to return to ID3 information display. LIST UP/DOWN list up and down scroll the list.
- Page 33 ] key to hide the operation key bar. Note: Video playback is not available on all iPod/ iPhone devices. Please contact your Rosen dealer for details. An optional connection cable or accessory may be required for this feature. iPod Video list mode screen...
-
Page 34: Bluetooth Telephone Operations
Bluetooth Telephone Operations When the connection with your Bluetooth cellular phone is established, the following functions are available on this unit: • Listening to your telephone calls on the car speakers. • Answering to an incoming call. • Making a call using the Ten-Key pad screen. •... -
Page 35: Register Your Cellular Phone (Pairing)
2. Perform setting for the desired item. See the following sections for detail. 3. When you finish confirming the Bluetooth information, touch the [ ] key to return to the Telephone screen. If you want to change the Pass Key setting of this unit, perform the following steps. 1. -
Page 36: Select The Cellular Phone
4. Touch your desired Cellular key to select the key for the cellular phone to be registered. • You cannot select the Cellular key of which another cellular phone is already registered. Select a blank Cellular key. 5. If entering the Pass Key code is prompted on your cellular phone, enter the Pass Key code set in this unit. -
Page 37: Telephone Operations
cellular phone. For details of the operation, see the operation manual of the cellular phone. Note: • Some cellular phones may not be able to transfer the Phone Book data. • Some cellular phones cannot transfer the Phone Book data when the hands-free mode is set or it is also registered in the Bluetooth mode. - Page 38 Note: • Depending on some special cellular phone, the Telephone Interrupt screen may be closed and the connection with this system may be disconnected when entering the Private mode. Making a call using the Phone Book You can use the Phone Book data obtained from the cellular phone to make a call from this unit.
-
Page 39: Bluetooth Audio Player Operations
Note: • If you wish to change the Favorite registered, once delete the corresponding telephone number from the current Favorite, and then add your desired telephone number again. • To delete the Favorite telephone number Delete 1. Touch the [ ] key to delete the telephone number. -
Page 40: Controlling The Bluetooth Audio Player
Controlling the Bluetooth audio player Note: • Occasionally, depending on the environment, playback sounds may be fragmented, or switch noises may be generated. Playing a music After the connection with a Bluetooth audio player is established, the play mode is automatically engaged. -
Page 41: Watching To A Disc
Note: If the reverse cable is connected correctly to the car, the head unit to go to camera mode automatically when the car is in reverses. 8 DISC Player Operations Watching to a disc 1. To load a disc: Insert the disc into the center of the insertion slot the label side facing up. Note: •... -
Page 42: Ejecting A Disc
Ejecting a disc 1. To eject a disc press eject button. The play mode then switches to the Tuner mode. If the disc is left in the ejected position for 15 seconds, the disc is automatically reloaded. In this case, the play mode will remain in the Tuner mode. Note: If you force a disc into before auto reloading, it may damage a disc. -
Page 43: Showing Dvd Player Mode Screen
DVD Normal Mode: Showing DVD Player mode screen After disc is loaded, the play mode is automatically engaged. Touch any place of the screen to display DVD Video menu,touch the screen again to return the playback screen. The display will return to the playback screen, if you do not touch the screen for 10 seconds. -
Page 44: Operate The Dvd Player Menu
8 - Hide Operation bar 9- Top Menu Button 10- DVD playback info 11 - Mute button 12 - Screen brightness button 13 - Voice dialing button 14- System time Operate the DVD Player menu You can select the button items displayed in the DVD menu by directly touching it. Play/Pause Playback 1. -
Page 45: Using The Title Menu
not touch the screen for 5 seconds. Using the Title Menu On DVD discs containing two or more titles, you can select from the title menu for playback. 1. Showing the DVD Video menu, touch button during playback. The title menu screen appears. *Depending on the disc, the title menu may not be called. - Page 46 3- Previous item Button 4- Next item Button Search with a Chapter/Title/Time Number You can locate the beginning of a scene using the chapter numbers or title numbers recorded on the DVD Video disc. 1. Touch button. 2. Touch chapter/Title/Time item the Key Pad screen appears with the chapter/Title/Time number input mode.
-
Page 47: Operate The Video Files Player Menu
among the angles during playback. [Angle] 1. Touch key on the remote control during playback. Each time you touch the key, you can switch among angles. 2. Touch button to switch among angles. * It may take time to switch among angles. * Depending on the disc, up to 9 angles may be recorded. - Page 48 7 - Previous Track /Fast Backward Button You can select the button items displayed in the Video files player menu by directly touching it. Play/Pause Playback 1. Touch [ ] button to pause during playback. 2. Touch [ ] button to resume playback. Switch to Previous/next file Touch [ button during playback to play previous /next file...
-
Page 49: Mp3/Wma Player Operations
MP3/WMA Player Operations Operate the MP3/WMA player menu After disc is loaded, the play mode is automatically engaged. Return to the Main Menu button. Previous Track /Fast Backward button. System time. Play/Pause button. Next Track/Fast Forward button. Repeat button. Shuffle button. Direct Searching button. - Page 50 • Pressing [ ] button starts playback from the beginning of the next track. • Pressing [ ] button starts playback from the beginning of the current track; when this button is pressed again within about 3 seconds, playback starts from the beginning of previous track. Fast Forward /Fast Backward 1.
- Page 51 The numerical keypad screen Searching with the Track Number This operation allows searching using the track numbers in playing folder. 1. Touch [ ] button .The numerical keypad will appear on the screen. 2. Input the track number that you want to play back with [0] to [9] key. Playback starts from the track of the input track number.
-
Page 52: Cd Player Operations
5. Press this button can enter the folder. 6. Video file Enter Track list Press [ ] button to display track list. Select any track to play directly. Click or press [ Artwork] button can enter the track list also. Exit Track list Press [ ] button to exit from track list. - Page 53 3. Next picture button. 4. Go to list menu mode 5. Hide Operation bar and Shortcut bar 6. Operation bar. Play/Pause Playback The system can play picture one by one automatically. 1. Touch [ ] button to pause during playback. 2.
- Page 54 3. Touch to turn to previous page. 4. Touch to turn to next page. Exit Picture list Press [ ] button to exit from picture list. Press the any picture title can exit from list. Select a folder on display list Touch the folder title of the display list on the screen, the screen will display files and folders in selected folder.
-
Page 55: Aux 1 / Aux 2 Operations
AUX 1 / AUX 2 Operations External peripheral devices, including a game console, camcorder, navigation unit, iPod/iPhone, etc. can be connected to the AUX 1 or AUX 2 connector on the front or back of this unit using the A/V media cables. Switching to AV1 / AV2 mode 1. -
Page 56: Rear Source Operations
Rear Source Operations If a monitor is installed in the rear zone and connected to the rear zone AV output, passengers in the back seat can control the DVD output using the rear zone remote control. See “Multi-Zone Remote Control” for instructions. Rear Source includes DVD, Auxin1, Auxin2 and iPod Video. -
Page 57: Video Setup Menu
Video Setup Menu TV Shape: Set TV Shape Normal or Cinema. Set Day: Set Day value from 0 to 20. Set Nigh: Set Nigh value from 0 to 20. Auto: Choose ON or OFF. -
Page 58: Audio Setup Menu
Touch the [ ] key to select the Rear Zone source. Rear Zone source include DVD、iPod、Auxin1、Auxin2. If user switch OFF, the rear zone will be closed. While touching the [ ] key, the rear zone should be activate. Audio Setup Menu This menu includes: EQ、Speaker、Sub-Out、Volume EQ:... - Page 59 Choose the Treble Crossover 5KHZ/10KHZ/15KHZ Treble Crossover: Choose the Mid Crossover 0.5KHZ/1KHZ/2KHZ Mid Crossover: Bass Crossover: Choose the Bass Crossover 50HZ/100HZ/200HZ Speaker: Fader: Choose the desired volume from -9 to 9 Balance: Choose the desired volume from -9 to 9 Sub-Out: Level: Choose the desired volume from -7 to 7...
- Page 60 This volume includes: Start Volume mode; Set Start Volume; BT Volume mode; Set BT Volume; TA Volume mode; Set TA Volume; NAV Volume mode; Set NAV Volume; Tuner Preamp; Disc Preamp; USB/SD/iPod Preamp; A/V Preamp Start Volume mode: Choose the Start Volume mode Set or Last. Set Start Volume: When Choose the Start Volume mode Set.
- Page 61 Disc Preamp: Choose the Disc Volume from 0 to 14 USB/SD/iPod Disc Preamp: Choose the USB/SD/ iPod Disc Volume from 0 to 14 A/V in Preamp: Choose the A/V Volume from 0 to 14 All Rights Reserved. Copyright Rosen Entertainment Systems...
Need help?
Do you have a question about the PR-UN1370-US and is the answer not in the manual?
Questions and answers