Advertisement
Advertisement
Table of Contents

Subscribe to Our Youtube Channel
Related Manuals for Innovative Technology ITNS-500


Summary of Contents for Innovative Technology ITNS-500
-
Page 1: Quick Start Guide
ITNS-500 Quick Start Guide... - Page 2 Make sure all negative films, slide films, cover trays and photos are free of dust and dirt before inserting into the ITNS-500 as this may affect the image quality when scanning. When cleaning films, please use a professionally recommended purger from a...
-
Page 3: Software Installation
Software Installation ITNS-500 Negative/Slide Scanner To use the ITNS-500, please complete the following installation in advance. Windows Installation 1. Turn on the computer. 2. Insert the installation CD into the CD-ROM drive and the installation CD menu will appear. Click the “Installation” button to begin. -
Page 4: Mac Installation
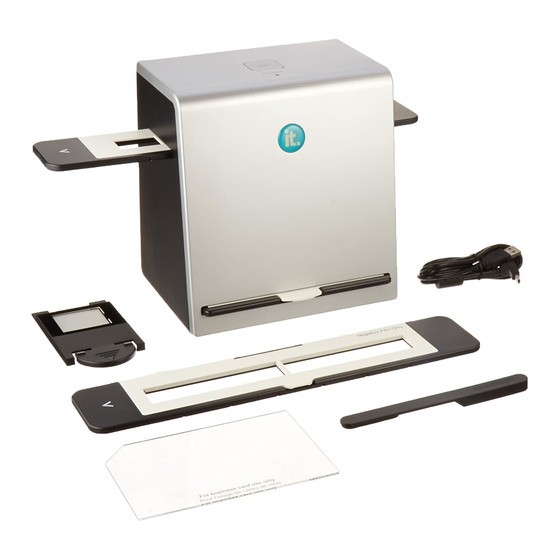
Mac Installation 1. Turn on Mac computer. 2. Insert the installation CD into the CD/DVD drive. 3. Copy “ImageScanTool.mpkg” to your computer and double-click it. If you are using a 10.7 operating system, copy the 10.7.5 file. If you are using a 10.8 operating system, copy the 10.8.4 file. - Page 5 Using the ITNS-500 Copy button Power status LED Film/Slide Photo/Business slot Card slot Slot for Backlight holder USB Port...
- Page 6 Note To avoid a mirror image, follow the serial numbers (from left to right) on top of film when installing negative film into holder. Figure 1 If the image is upside down [see fig. 2], the image can be corrected with the ”Rotate”...
- Page 7 Scanning Film/Slide 1. Put Film into film holder 2. Insert the film/slide backlight holder at the rear side of the ITNS-500 unit. 3. Plug the USB end of the supplied cable into your PC/Mac and the other end into the ITNS-500 unit.
- Page 8 4. Insert the film holder into the right side of the ITNS-500 unit. 5. Open the “Image Scan Tool” program to enter the operation interface as shown below. The program will go into Film/Slide Mode automatically.
-
Page 9: Scanning Photos
Scanning Photos 1. Remove the film/slide holder, as well as the backlight holder, from the ITNS-500 unit if either one is attached. Remove film/slide holder by sliding Remove backlight holder by pressing the holder to the left hand side. down the handle and pulling it out. - Page 10 3. Insert the photo holder into the photo slot of the ITNS-500 unit. 4. Open the “ImageScanTool” program to enter the operation interface as shown below. The program will go into Picture Mode automatically.
-
Page 11: Scanning Business Cards
3. Put the Business Card fixture on top of the Photo Holder. 4. Insert the entire photo holder, with the business card fixture, into the photo slot on the ITNS-500 unit, and select "Business Card" mode in the "Image ScanTool". - Page 12 5. Press the “Copy” button or click the “Snap Shot” button in the Image Scan Tool program to capture the image. 6. Make any necessary adjustments to the scanned image using the function buttons on right hand side of the Image Scan Tool program. -11-...
- Page 13 7. Save captured images to your computer. 8. Get final images from PC/Mac for further review and edit. -12-...
- Page 14 Revision: 1.0_8...
Need help?
Do you have a question about the ITNS-500 and is the answer not in the manual?
Questions and answers