Table of Contents
Advertisement
Quick Links
Advertisement
Table of Contents

Related Manuals for Innovative Technology ITNS-300


Summary of Contents for Innovative Technology ITNS-300
- Page 1 ITNS-300 Quick Installation Guide...
- Page 2 I. Unpack the ITNS-300 Quick Installation Guide Cleaning Brush II. Driver Installation 1. Insert unpacked CD into CD-ROM/DVD-ROM drive 2. Follow the on-screen instructions (XP/Vista/Windows 7)
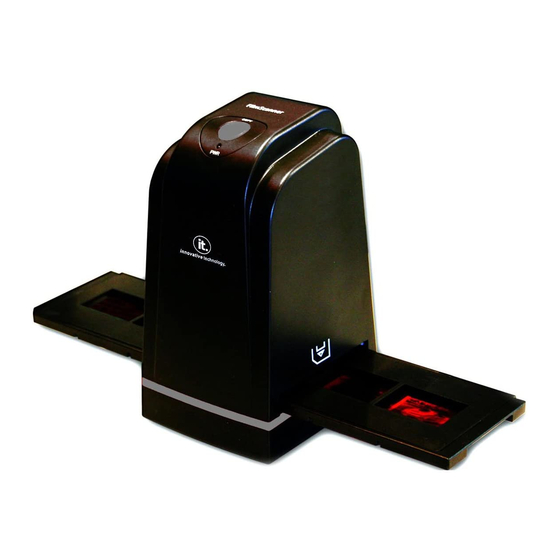
- Page 4 III. Using the ITNS-300 Function Indicator Copy button Power status LED USB Cable Film slot Installing film into the film holder: Install Slide Film into the holder labelled “Slide Only” : 1. Open the slide holder as illustrated 2. Place slide in recessed slot in holder...
- Page 5 Install Negative Film into the holder Labelled “Negative Film Only” : 1. Open the film holder as illustrated 2. Install film into negative film slot 3. Close the film holder Note To avoid mirror image, follow the serial numbers (from left to right) on top of film when installing negative film into holder.
- Page 6 Image Scan Tool Figure 3 How to use the ITNS-300 1. Put Film into film holder 2. Insert the holder into ITNS-300...
- Page 7 3. Connect the ITNS-300 to PC 4. Double click Image Scan Tool to enter operation interface Image Scan Tool 5. Press “Copy” button to capture the image...
- Page 8 6. Process necessary modification by using the function buttons in right hand side Image Scan Tool 7. Save captured images to PC Image Scan Tool 8. Get final images from the PC for further review and editing...
- Page 9 Instructions shall caution users that modifications not approved by the party responsible for compliance could void user's authority to operate the equipment. The following or equivalent as appropriate: “ NOTE: This equipment has been tested and found to comply with the limits for a Class B digital device, pursuant to Part 15 of the FCC Rules.
- Page 12 Driver Revision: 1.0_9...
Need help?
Do you have a question about the ITNS-300 and is the answer not in the manual?
Questions and answers
Can I use an external CD/DVD player if my laptop doesn't have one?
Yes. You can use an external CD/DVD player with the ITNS-300 to install the driver by inserting the provided CD into the drive and following the on-screen instructions.
This answer is automatically generated
what if you don't have a computer with a CD ROM. it there a way to down load without one.
No, the ITNS-300 requires a CD-ROM/DVD-ROM drive to install the necessary drivers, as stated in the installation instructions.
This answer is automatically generated