Table of Contents
Advertisement
Quick Links
Welcome Aboard!
Proper care and maintenance is an important part in keeping your Mercury Product operating at peak
efficiency for maximum performance and economy. The enclosed Owner's Registration Card is your key
to trouble‑free family fun. Refer to your Operation and Maintenance Manual for full details of your warranty
coverage.
Details of your nearest dealer can be found on www.marinepower.com where country maps and full
contact information are displayed.
Is your engine properly registered for warranty purpose? Please check on www.marinepower.com. If
necessary, please contact your local dealer.
Declaration of Conformity
If the outboard motor's serial number plate contains the CE mark in the lower left‑hand corner, the
following statement applies:
This outboard motor manufactured by Mercury Marine, Fond du Lac, WI, USA or Marine Power Europe
Inc. Park Industriel, de Petit‑Rechain, Belgium complies with the requirements of the following directives
and standards, as amended:
Recreational Craft Directive:
Owner's manual (A.2.5)
Handling characteristics (A.4)
Outboard engine starting (A.5.1.4)
Fuel tanks (A.5.2.2)
General steering system
Safety of Machinery Directive
Principles of safety integration (1.1.2)
Noise (1.5.8)
Vibration
Electromagnetic Compatibility Directive
Generic emission standard
Generic immunity standard
Vehicles, boats and internal combustion
engine driven devices ‑ radio disturbance
characteristics
Electrostatic discharge testing
This declaration is issued under the sole responsibility of Mercury Marine and Marine Power Europe.
ISO 10240
ISO 8665
ISO 11547
ISO 13591; ISO 8469
ABYC P‑17
EN 292‑1; EN 292‑2; EN 1050
ICOMIA 39/94
ICOMIA 38/94
EN 61000‑6‑3
EN 61000‑6‑1
SAE J551 (CISPR 12)
EN 61000‑6‑2; EN 61000‑4‑2; EN
61000‑4‑3
i
94/25/EC
98/37/EC
89/336/EC
Advertisement
Table of Contents

Related Manuals for Mercury jet 20


Summary of Contents for Mercury jet 20
-
Page 1: Declaration Of Conformity
Welcome Aboard! Proper care and maintenance is an important part in keeping your Mercury Product operating at peak efficiency for maximum performance and economy. The enclosed Owner's Registration Card is your key to trouble‑free family fun. Refer to your Operation and Maintenance Manual for full details of your warranty coverage. - Page 2 Patrick C. Mackey President, Mercury Marine, Fond du Lac, WI USA European Regulations Contact: Regulations and Product Safety Department, Mercury Marine, Fond du Lac, WI USA...
-
Page 3: Table Of Contents
Protecting People In The Water........................10 Wave And Wake Jumping..........................11 Exhaust Emissions............................11 Selecting Accessories For Your Outboard......................13 Safe Boating Suggestions..........................13 Recording Serial Number..........................14 Jet 20 Specifications............................14 Installation Installing Outboard............................15 Transporting Carrying Outboard............................16 Trailering Boat/Outboard........................... 16 Transporting Outboard When Removed From Boat.................. - Page 4 TABLE OF CONTENTS Setting The Operating Angle Of The Outboard ....................23 Operation Pre-Starting Check List............................. 24 Operating In Freezing Temperatures........................ 24 Operating In Salt Water Or Polluted Water....................... 24 Operating at High Elevations..........................24 Operating In Shallow Water..........................24 How the Jet Drive Operates..........................
- Page 5 TABLE OF CONTENTS Engine Over-Speed (Excessive RPM)......................49 Owner Service Assistance Local Repair Service............................50 Service Away From Home..........................50 Parts And Accessories Inquiries........................50 Service Assistance............................50 Mercury Marine Service Offices........................50...
-
Page 7: Warranty Information
You may change your address at any time, including at time of warranty claim, by calling Mercury Marine or sending a letter or fax with your name, old address, new address, and engine serial number to Mercury Marine’s warranty registration department. Your dealer can also process this change of information. -
Page 8: Outboard Limited Warranty United States, Canada And Europe
Mercury dealer authorized to service the product. If purchaser cannot deliver the product to such a dealer, written notice must be given to Mercury. We will then arrange for the inspection and any covered repair. Purchaser in that case shall pay for all related transportation charges and/ or travel time. -
Page 9: Outboard Limited Warranty
Outboard Limited Warranty (Confederation of Independent States, Middle‑East, and Africa WHAT IS COVERED: Mercury Marine warrants its new Outboard and Jet Products to be free of defects in material and workmanship during the period described below. DURATION OF COVERAGE: This Limited Warranty provides coverage for one (1) year from the date the product is first sold to a recreational use retail purchaser, or the date on which the product is first put into service, whichever occurs first. - Page 10 Mercury dealer authorized to service the product. If purchaser cannot deliver the product to such a dealer, written notice must be given to Mercury. We will then arrange for the inspection and any covered repair. Purchaser in that case shall pay for all related transportation charges and/ or travel time.
-
Page 11: Year Limited Warranty Against Corrosion
Mercury dealer authorized to service the product. If purchaser cannot deliver the product to such a dealer, written notice must be given to Mercury. We will then arrange for the inspection and any covered repair. Purchaser in that case shall pay for all related transportation charges and/ or travel time. -
Page 12: Warranty Coverage And Exclusions
Mercury Precision Parts or Quicksilver MerCathode system and/or Galvanic Isolator. Corrosion damage caused by improper application of copper base anti‑fouling paints is also not covered by this limited warranty. - Page 13 All incidental and/or consequential damages (storage charges, telephone or rental charges of any type, inconvenience or loss of time or income) are the owner's responsibility. Use of other than Mercury Precision or Quicksilver parts when making warranty repairs. Oils, lubricants or fluids changed as a matter of normal maintenance is customer's responsibility unless loss or contamination of same is caused by product failure that would be eligible for warranty consideration.
-
Page 14: General Information
GENERAL INFORMATION Boater's Responsibilities The operator (driver) is responsible for the correct and safe operation of the boat and safety of its occupants and general public. It is strongly recommended that each operator (driver) read and understand this entire manual before operating the outboard. Be sure at least one additional person on board is instructed in the basics of starting and operating the outboard and boat handling in case the driver is unable to operate the boat. -
Page 15: Lanyard Stop Switch
GENERAL INFORMATION Do not overpower or overload your boat. Most boats will carry a required capacity plate indicating the maximum acceptable power and load as determined by the manufacturer following certain federal guidelines. If in doubt, contact your dealer or the boat manufacturer. U.S. -
Page 16: Stopping The Boat In An Emergency
GENERAL INFORMATION We strongly recommend that other occupants be instructed on proper starting and operating procedures should they be required to operate the engine in an emergency (e.g. if the operator is accidentally ejected). WARNING Should the operator fall out of the boat, the possibility of serious injury or death from being run over by the boat can be greatly reduced by stopping the engine immediately. -
Page 17: Wave And Wake Jumping
GENERAL INFORMATION WHILE BOAT IS STATIONARY WARNING Avoid injury resulting from contacting the rotating impeller or having hair, clothing or loose objects drawn into the water intake and wrapping around the impeller shaft. Stay away from the water intake and never insert an object into the water intake or water outlet nozzle when the engine is running. - Page 18 GENERAL INFORMATION WARNING Avoid the combination of a running engine and poor ventilation. Prolonged exposure to carbon monoxide in sufficient concentration can lead to unconsciousness, brain damage, or death. GOOD VENTILATION Ventilate passenger area, open side curtains, or forward hatches to remove fumes. ob00316 Example of desired air flow through the boat.
-
Page 19: Selecting Accessories For Your Outboard
Some accessories not manufactured or sold by Mercury Marine are not designed to be safely used with your outboard or outboard operating system. Acquire and read the installation, operation, and maintenance manuals for all your selected accessories. -
Page 20: Recording Serial Number
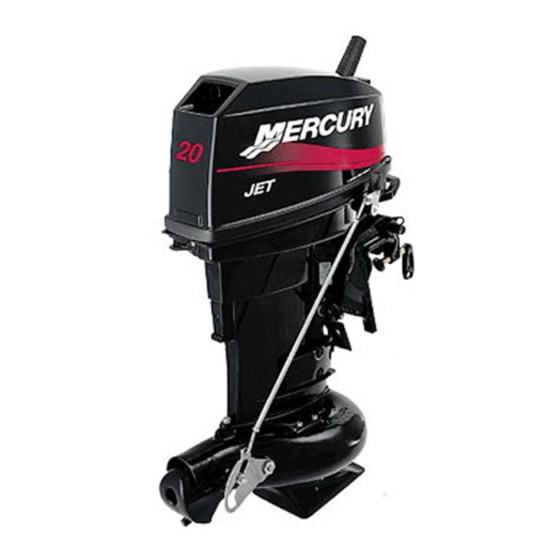
XXXX ob01356 Serial number Year manufactured Model year Certified Europe Insignia (as applicable) Model designation Jet 20 Specifications Models Jet Power Engine Horsepower Full Throttle RPM Range 5000 ‑ 6000 RPM Idle Speed in Forward Gear 750 ± 50 RPM... -
Page 21: Installation
INSTALLATION Installing Outboard WARNING Before operation, the outboard must be correctly installed with the required mounting hardware as shown. Failure to correctly fasten outboard could result in outboard ejecting off boat transom causing serious injury, death, or property damage. We strongly recommend that your dealer install your outboard and related accessories to ensure proper installation and good performance. -
Page 22: Transporting
TRANSPORTING Carrying Outboard The outboard has a carrying handle located in front and a rear hand grip in the bottom cowl. ob01381 Trailering Boat/Outboard Your boat should be trailered with the outboard tilted down in a vertical operating position. IMPORTANT: The tilt lock and shallow water drive feature on the outboard are not intended to support the outboard in the tilted position when trailering your boat. - Page 23 TRANSPORTING ob00325 AUTO-VENTING TYPE FUEL TANK Disconnect the remote fuel line from tank. This will close the air vent and prevent escape of fuel or vapors from tank. Install tether cap over the fuel line connector stem. This will protect the connector stem from being accidently pushed‑in, thus, allowing fuel or vapor to escape.
-
Page 24: Fuel And Oil
The fuel system components on your Mercury Marine engine will withstand up to 10% alcohol content in the gasoline. We do not know what percentage your boat's fuel system will withstand. Contact your boat manufacturer for specific recommendations on the boat's fuel system components (fuel tanks, fuel lines, and fittings). -
Page 25: Oil Recommendation
IMPORTANT: Oil must be NMMA certified TC‑W3 2‑Cycle oil. Mercury or Quicksilver Premium TC‑W3 2‑Cycle oil is recommended for this engine. For added protection and lubrication, Mercury or Quicksilver Premium Plus TC‑W3 2‑Cycle oil is recommended. If Mercury or Quicksilver outboard oil is not available, substitute another brand of 2‑cycle outboard oil that is NMMA Certified TC‑W3. -
Page 26: Features And Controls
FEATURES AND CONTROLS Features & Controls • Tiller Handle ‑ Handle can be tilted 100° for convenient handling during transportation and storage. 3173 • Starter Rope ‑ Pulling the starter rope cranks the engine over for starting. ob01383 • Primer/Idle Speed Knob ‑ Pulling the knob out supplies a small amount of fuel to the engine for cold starting. - Page 27 FEATURES AND CONTROLS ob00341 Loosen friction (counterclockwise) Tighten friction (clockwise) • Side Handle Gear Shift ‑ Controls gear shift. ob01385 NOTE: The outboard is equipped with a rewind starter lock‑out mechanism. The throttle grip will have to be in the start (slow speed) position in order to start engine. •...
-
Page 28: Tilting Operation
FEATURES AND CONTROLS ob01386 Tighten friction Loosen friction Tilting Operation TILTING TO FULL UP POSITION Stop the engine. Shift the outboard into forward gear. Take hold of the top cowl grip and raise outboard to the full up position. ob01387 Move the tilt lock lever to the lock position. -
Page 29: Setting The Operating Angle Of The Outboard
FEATURES AND CONTROLS ob01389 Setting The Operating Angle Of The Outboard The vertical operating angle of the outboard is adjusted by changing the position of the tilt pin in the adjustment holes provided. Proper adjustment allows the boat to achieve optimum performance, stability, and minimize steering effort. -
Page 30: Operation
(except in freezing temperatures) when not in use. Wash down the outboard exterior and flush out the exhaust outlet of the jet drive with fresh water after each use. Each month, spray Mercury Precision or Quicksilver Corrosion Guard on external metal surfaces. Operating at High Elevations... -
Page 31: How The Jet Drive Operates
OPERATION How the Jet Drive Operates A jet driven boat has substantially different handling characteristics compared to a propeller driven boat. It is recommended that the operator adjusts to these characteristics by experimenting in open water at both high and low speeds. -
Page 32: Steering The Boat
OPERATION In an emergency, putting the jet outboard into reverse and applying reverse throttle can rapidly slow down the boat and reduce stopping distance. However, such a maneuver may cause occupants in the boat to be thrown forward or possibly out of the boat. Steering The Boat The jet drive is dependent on water jet thrust for steering the boat. -
Page 33: Pre-Starting Instructions
OPERATION It is possible for debris to lodge between the impeller and jet housing wall, especially after the engine has been stopped. This will lock the driveshaft and will prevent the engine from being able to crank over for starting. Following are steps for dislodging the impeller. -
Page 34: Starting The Engine
OPERATION Starting The Engine Before starting, read the Pre‑Starting Check List, Special Operating Instructions, and Engine Break‑in Procedure in the Operation Section. Open fuel tank vent screw (in filler cap) on manual venting type fuel tanks. ob00348 Squeeze the fuel line primer bulb several times until it feels firm. ob00349 Set the lanyard stop switch to "RUN"... - Page 35 OPERATION ob01396 When engine is cold, pull out and push in the primer/idle speed knob one to three times to prime the engine. Leave the knob in the pulled out position when starting. ob01397 Pull the starter rope slowly until starter engages, then pull rapidly to crank the engine. Allow rope to return slowly.
-
Page 36: Gear Shifting
OPERATION IMPORTANT: If no water is coming out of the water pump indicator hole, stop engine and check cooling water intake for obstruction. No obstruction may indicate a water pump failure or blockage in the cooling system. These conditions will cause the engine to overheat. Have the outboard checked by your dealer. Operating the engine while overheated may cause serious engine damage. -
Page 37: Emergency Starting
OPERATION ob00361 Emergency Starting If the starter rope should break or the rewind starter fails, use the spare starter rope (provided) and follow this procedure. Shift outboard to neutral (N) position. ob01385 WARNING When using the emergency starter rope to start engine, the start at idle speed protection is inoperative. Make sure to have the engine speed set at slow, and the outboard gear shift positioned in neutral to prevent outboard from starting in gear. - Page 38 OPERATION ob01402 Remove three bolts and the rewind starter assembly. ob01403 WARNING To prevent getting an electrical shock, do not touch any ignition component, wiring, or spark plug wire when starting or running the engine. WARNING The exposed moving flywheel can cause serious injury. Keep your hands, hair, clothing, tools, and other objects away from engine when starting or running the engine.
-
Page 39: Maintenance
SELECTING REPLACEMENT PARTS FOR YOUR OUTBOARD We recommend using original Mercury Precision or Quicksilver replacement parts and Genuine Lubricants. WARNING Using a replacement part that is inferior to the original part could result in personal injury, death, or product failure. -
Page 40: Inspection And Maintenance Schedule
Check carburetor adjustments, if required. See Carburetor Adjustments. • Lubricate splines on the driveshaft. • Remove engine deposits with Quicksilver or Mercury Precision Power Tune Engine Cleaner. • Clean fuel tank pick up filter. • Saltwater use ‑ remove and grease the jet drive mounting hardware and reassemble. -
Page 41: Fuel System
MAINTENANCE ob00369 INSTALLATION Engage the front hook and push cowl back over the cowl seal. Push cowl down and move the rear latch lever up to lock. Fuel System WARNING Avoid serious injury or death from gasoline fire or explosion. Carefully follow all fuel system service instructions. -
Page 42: Exterior Care
MAINTENANCE 3933 ob01406 Cover O‑ring Filter element Sight bowl Installation Push the filter element (with open end toward cover) into the cover. Place the O‑ring seal into the sight bowl and screw the sight bowl hand tight into the cover. IMPORTANT: Visually inspect for fuel leakage from the filter by squeezing the primer bulb until firm, forcing fuel into the filter. -
Page 43: Impeller Clearance Adjustment
MAINTENANCE IMPORTANT: Do not sharpen or alter the top side lifting angle. Check the impeller blades occasionally for damage. Use a flat file to resharpen the leading edges. Sharpen to a 0.8 mm (1/32 in.) radius by removing material from bottom side only. ob01409 Leading edge Top side lifting angle... -
Page 44: Impeller Removal And Installation
MAINTENANCE Impeller Removal and Installation WARNING If the driveshaft is rotated while the engine is in gear, there is the possibility that the engine will crank over and start. To prevent this type of accidental engine starting and possible serious injury caused from being struck by a rotating impeller, always shift outboard to neutral position and remove spark plug leads when servicing the propeller. - Page 45 MAINTENANCE ob01412 Tabs Impeller nut Pull impeller straight off the shaft. If the impeller is tight, use a hammer and block of wood to rotate the impeller clockwise on the shaft until the keyway is directly above the flat on the shaft. This will free the jammed key and allow removal.
- Page 46 MAINTENANCE ob01413 Plastic sleeve Shims Impeller Nut retainer Shear key Impeller nut Turn the nut tight on the shaft to remove any play between the impeller and shaft. If the tabs on the retainer do not line up with the flats on the nut, remove the nut and turn the retainer over and re‑tighten the nut again.
- Page 47 Tabs Impeller nut NOTE: If the outboard is used in salt water, apply Quicksilver or Mercury Precision Anti‑Corrosion Grease around the entire mounting flange on the water intake housing and also to the threads on the six mounting bolts.
-
Page 48: Shift Link Rod Adjustment
MAINTENANCE ob01411 Description lb. in. lb. ft. Water intake housing mounting bolts Shift Link Rod Adjustment WARNING The shift link rod must be adjusted to lock the reverse gate against unexpected engagement (caused by water pressure hitting the gate) while operating the boat in forward. Activation of the reverse gate will cause sudden unexpected stopping of the boat. -
Page 49: Lubrication Points
Some discoloration of the grease is normal during the break‑in period on a new set of seals. Lubricate the following with Quicksilver or Mercury Precision Lubricants 2‑4‑C with Teflon or Special Lubricant 101. - Page 50 MAINTENANCE Tube Ref No. Description Where Used Part No. Steering friction adjustment shaft, 2-4-C with Teflon swivel bracket, transom 92-802859Q1 clamp screws, tilt tube, throttle/shift cable • Steering Friction Adjustment Shaft (Tiller Handle Models) ‑ Lubricate fitting. • Swivel Bracket ‑ Lubricate fitting. ob01417 Steering friction adjustment shaft Swivel bracket...
-
Page 51: Spark Plug Inspection And Replacement
MAINTENANCE • Lubricate the throttle and shift cable moving components and pivot locations. ob01420 Spark Plug Inspection and Replacement WARNING Avoid serious injury or death from fire or explosion caused by damaged spark plug boots. Damaged spark plug boots can emit sparks. Sparks can ignite fuel vapors under the engine cowl. To avoid damaging spark plug boots, do not use any sharp object or metal tool such as pliers, screwdriver, etc. -
Page 52: Carburetor Adjustments
MAINTENANCE Spark Plug Spark plug gap 1.0 mm (0.040 in.) Before installing spark plugs, clean off any dirt on the spark plug seats. Install plugs finger tight, and then tighten 1/4 turn or torque to specifications. Description lb. in. lb. ft. Spark plug Carburetor Adjustments SLOW SPEED MIXTURE ADJUSTMENT... -
Page 53: Submerged Outboard
MAINTENANCE Shift the outboard to forward gear and reduce engine speed to idle. Ensure the primer/fast idle knob is pushed all the way in and turned to the slowest idle speed. Adjust the idle speed screw to obtain the recommended engine idle speed. Refer to General Information ‑ Specification. -
Page 54: Storage
• With engine running at fast idle, stop the fuel flow by disconnecting the remote fuel line. When engine begins to stall, quickly spray Quicksilver or Mercury Precision Lubricants Storage Seal into carburetor until engine stops from lack of fuel. -
Page 55: Troubleshooting
TROUBLESHOOTING Engine Will Not Start POSSIBLE CAUSES • Lanyard stop switch not in "RUN" position. • Incorrect starting procedure. Refer to Operation section. • Old or contaminated gasoline. • Engine flooded. Refer to Operation section. • Fuel is not reaching the engine. a. -
Page 56: Local Repair Service
Your satisfaction with your outboard product is very important to your dealer and to us. If you ever have a problem, question or concern about your outboard product, contact your dealer or any authorized Mercury Marine dealership. If additional assistance is required, take these steps. -
Page 57: Owner Service Assistance
Telephone (954) 744‑3513 Mercury Marine 11650 Interchange Circle North Miramar, FL 33025 (954) 744‑3535 U.S.A. Japan Telephone 81‑053‑423‑2500 Mercury Marine - Japan Anshin-cho 283-1 Hamamatsu 81‑053‑423‑2510 Shizuoka-ken, Japan 435-0005 Japan Asia, Singapore Telephone 5466160 Mercury Marine Singapore 72 Loyang Way...
Need help?
Do you have a question about the jet 20 and is the answer not in the manual?
Questions and answers