
Related Manuals for Levante LEVPH750TPR


Summary of Contents for Levante LEVPH750TPR
-
Page 1: User Instructions
Panel Convector Heater User Instructions LEVPH750TPR, LEVPH1250TPR, LEVPH1500TPR, LEVPH2200TPR... -
Page 2: Important Safeguards
IMPORTANT SAFEGUARDS Before use, please read and follow these instructions carefully, even if you feel you are familiar with the product. They contain important information concerning the operation, safety and maintenance when using the product. Please retain these instructions for future use and reference. • When first installed you may experience a burning smell or a little smoke, this is normal and will fade within a few minutes. -
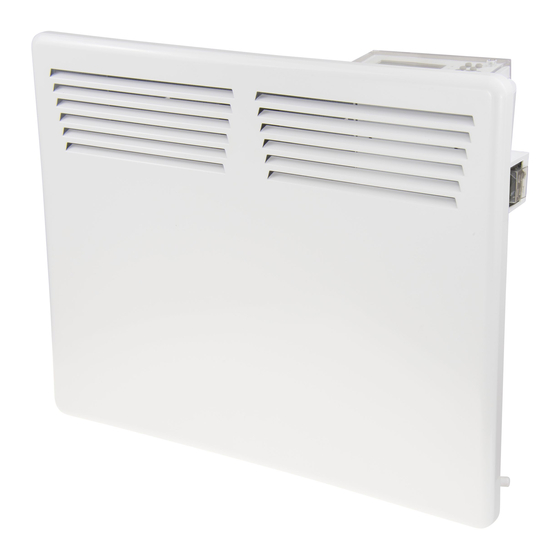
Page 3: Installation Guide
INSTALLATION GUIDE 1. When mounting the heater on to the wall 2. Detach the mounting bracket from the back of ensure the heater is unplugged from the mains the panel heater by pushing down on the top socket and all power switches are turned off. bracket and then pulling the top brackets out. A suitable wall mounting area requires at least The bottom section will then slide down and 150mm of empty clearance on ALL four sides. out, releasing the mounting bracket. 3. Position the bracket on the wall in the desired 4. Hang up the heater on the brackets and secure; location and mark the holes on the wall for Firstly locate the heater onto the lower bracket drilling, making sure the bracket is level. and push back to locate and click the upper Drill holes to a suitable depth and secure the brackets into position. Check heater is secure mounting bracket to the wall with the four and plug heater into mains socket. mounting screws supplied. For masonry walls use the wall plugs with screws provided. - Page 4 CONTROLS ˚C Power Copy Prog 1 - Main power switch 5 - Temperature selection 9 - Up button 2 - Red comfort light 6 - Program selection 10 - Down Button 3 - Yellow operating light 7 - Copy 11 - Programming Button 4 - Green economy light 8 - Timer selection Copy Digital Display Comfort Symbol Economy Symbol Lock Frost Symbol Degrees °C Power (W) Power ½...
-
Page 5: Setting The Day And Time
1. The function module The function module is equipped with an accurate thermal cut-out. It has a built-in timer with 13 programs, of which 12 are factory set and one is available for user programming. 2. Setting the Day and Time When first installed, or whenever the panel heater has been disconnected from the mains supply, the Day and Time will need to be set. To make changes to the LCD module settings the cover has to be removed by unscrewing the single locking screw 1. Press the timer button 8 The current “Day” setting will flash Use the Up 9 and Down 10 buttons to select the correct day Press the timer button 8 The current “Hour” setting will flash Use the Up 9 and Down 10 buttons to select the correct hour Press the timer button 8 The current “Minute” setting will flash Use the Up 9 and Down 10 buttons to select the correct minute 10. Press the timer button 8 11. The timer setting program will terminate and the selected day and time will be saved. 3. Temperature Selection The panel heater works with 2 temperature settings: A Low level setting and a high level setting. Each of these has to be set when the panel heater is installed. The default settings are 17 C for the low level and C for the high level. To alter the default settings: 1. Remove the LCD panel cover Press the temperature button 5 The high level temperature setting will be displayed Use the Up 9 and Down 10 buttons to select the required temperature. The high level temperature range is 9... -
Page 6: Description Of Programs
4. Description of Programs There are 13 programs which switch the heating between Low Level and High Level at various times of the day and night. 12 of these are pre-set and cannot be altered. The “UP” program can be defined by the user. The table below shows the Low/High times for each of the programs. Program Level Weekdays Saturdays Sundays 00:00 to 15:00 00:00 to 07:00 00:00 to 07:00 High 15:00 to 23:00 07:00 to 24:00 07:00 to 24:00 00:00 to 06:00 00:00 to 07:00 00:00 to 07:00 08:00 to 14:00 06:00 to 08:00 High 07:00 to 24:00 07:00 to 24:00 14:00 to 23:00 00:00 to 05:00 00:00 to 07:00 00:00 to 07:00 08:00 to 14:00 05:00 to 08:00 High 07:00 to 24:00 07:00 to 24:00 14:00 to 23:00 00:00 to 06:00 00:00 to 07:00 00:00 to 07:00 High 06:00 to 23:00 07:00 to 24:00... -
Page 7: Locking The Control Panel
4.2 Selecting a program To select any of the programs: 1. Press the program select button 6 The current selected program will be displayed Use the Up 9 and Down 10 buttons to select the required program Press the program select button 6 The program select option will terminate and the selected program will be saved and used to control the panel heater 4.3 Changing the settings for the user program (UP) To program the heating settings for the “UP” program: 1. Press the program select button 6 The current selected program will be displayed Use the Up 9 or Down 10 buttons to select the “UP” program Press the Prog button 11 Monday’s 24 hour programming screen will be displayed The 24 hour program is divided into half hour time slots and each has to be programmed. There are 2 options for each half hour slot. These can be set to either high level using the UP button 9 or low level using the DOWN button 10. When all the 24 hour time slots have been programmed the timer display will show 00:00 Press timer button 8 and the next 24 hour period will be displayed. Repeat steps 6 to 8 until all 7 days have been programmed with the required heating settings. 10. After 5 seconds the programming screen will end and the user settings saved. The “UP” program will be run with the current day settings displayed. 4.4 Copying 24-hour program In the “UP” program a 24 hour period’s settings can be copied from 1 day to the next to save having to program each day individually. - Page 8 CEF0913e...
Need help?
Do you have a question about the LEVPH750TPR and is the answer not in the manual?
Questions and answers