
Related Manuals for Teac CR-H238i


Summary of Contents for Teac CR-H238i
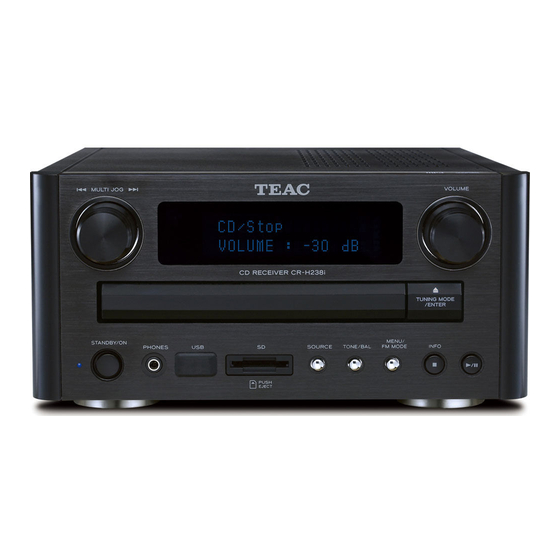
- Page 1 7202-090600301 CR - H238i CD Receiver OWNER'S MANUAL MODE D’EMPLOI MANUAL DEL USUARIO...
-
Page 2: Important Safety Instructions
10) Protect the power cord from being walked on or pinched particularly at plugs, convenience receptacles, and the point where they exit from the apparatus. CAUTION: TO REDUCE THE RISK OF ELECTRIC SHOCK, 11) Only use attachments/accessories specified by the DO NOT REMOVE COVER (OR BACK). - Page 3 TO EXPOSE THE ELECTRONICS. NO USER SERVICEABLE PARTS ARE WITHIN! < IF YOU ARE EXPERIENCING PROBLEMS WITH THIS PRODUCT, CONTACT TEAC FOR A SERVICE REFERRAL. DO NOT USE THE PRODUCT UNTIL IT HAS BEEN REPAIRED. < U S E O F C O N T R O L S O R A D J U S T M E N T S O R...
-
Page 4: Table Of Contents
Contents Before Use Thank you for choosing TEAC. Read this manual Read this before operations. < When the unit is turned on, switching on the TV may carefully to get the best performance from this unit. result in lines appearing on the TV screen, depending on the condition of the electric waves of the TV broadcast. -
Page 5: Beware Of Condensation
Maintenance Restoring system settings If the surface of the unit gets dirty, wipe with a soft cloth or use diluted neutral cleaning liquid. Be sure to remove any fluid completely. Do not use thinner, benzine or alcohol as they may damage the surface of the unit. -
Page 6: Discs
CD standard may not play back generating electrical devices. correctly in this player. If you use such discs in this unit, TEAC Corporation and its subsidiaries cannot be < Printable CD-R and CD-RW discs are not recommended, responsible for any consequences or guarantee the as the label side might be sticky and damage the unit. -
Page 7: Mp3 And Wma
This unit cannot display symbols and full- Compatible iPod Software size or double-byte characters (such as Japanese, In case your iPod will not work with the CR-H238i or Chinese, etc.) correctly. Also, be sure to use the file with the remote control unit, software update may extension. -
Page 8: Connection
Connection (1) CAUTION: < Switch off the power to all equipment before making any connections. < Read the instructions of each component you intend to use with this unit. < Be sure to insert each plug securely. To prevent humming and interference, avoid bundling the signal interconnection cables together with the AC power cord or speaker cables. -
Page 9: Ipod Dock
AUX1/AUX2 jacks S-VIDEO OUT terminal These jacks transmit an analog 2-channel audio This terminal outputs video signal from iPod. signal. Connect the components using commercially Use a commercially available S-Video cable to available RCA pin cables. connect the Dock to the S-Video input of a suitably equipped television or monitor. - Page 10 Connection (2) LINE Speaker Speaker (left) (right) Subwoofer 2. Turn the terminal cap counter clockwise to loosen it. Speaker terminals The speaker terminal caps cannot be fully removed < Use commercially available speaker cables. from the base. < The black speaker terminals are _ (negative). Generally, the + side of the speaker cable is marked 3.
-
Page 11: Connecting Antennas (Am/Fm)
Connecting Antennas (AM/FM) AM Indoor Loop Antenna FM Indoor Antenna The high-performance AM loop antenna provided Connect the lead-type FM antenna to the FM 75 Ω with this unit is sufficient for good reception in most socket, extend the lead and tune the tuner to your areas. -
Page 12: Part Names (Main Unit)
Part Names (main unit) MULTI JOG Remote Sensor In CD/USB/SD CARD mode, use this knob to skip When operating the remote control unit, point it tracks/files. towards the remote sensor. In iPod mode, use this knob to scroll up and down the menu. - Page 13 STANDBY/ON Play/Pause (y/J) Press this button to turn the unit on or put it in the In CD/USB/SD CARD/iPod mode, use this button to standby mode. start or pause playback. The standby indicator lights when the unit is in the standby mode. When the unit is turned on, the standby indicator goes off.
-
Page 14: Part Names (Remote Control Unit)
Part Names (remote control unit) CLEAR When programming tracks/files, use this button to clear the input track/file number. Search ( m/, ) In CD/USB/SD CARD/iPod mode, use these buttons to search for a part of a track/file/song. In TUNER mode, hold down these buttons to start auto tuning. - Page 15 PROGRAM Cursor ( / ) In CD/USB/SD CARD mode, use this button to enter While setting the clock or the timer, use these buttons the programme mode when playback is stopped. to change the item to set. In TUNER mode, use this button to enter the presetting mode.
-
Page 16: Remote Control Unit
Remote Control Unit The provided Remote Control Unit allows the unit to be Battery Replacement operated from a distance. If the distance required between the remote control When operating the remote control unit, point it towards unit and main unit decreases, the batteries are the REMOTE SENSOR on the front panel of the unit. -
Page 17: Basic Operation
Basic Operation (1) < You can use the AUX 1, AUX 2, TUNER, CD, USB, SD, Press the STANDBY/ON button to turn the unit on. and iPod buttons on the remote control unit to select Standby indicator a source directly. When the unit is turned on, the standby indicator goes off. - Page 18 Basic Operation (2) How to adjust bass, treble, balance of Available items speakers Bass Adjusts the level of low frequency sound range. The level can be adjusted from “− 10” to “+ 10”. BASS Press the TONE/BAL button repeatedly to select Treble an item to adjust.
-
Page 19: Sleep Timer
Muting Headphones To mute the sound temporarily, press the MUTING For private listening, first reduce the volume level to button. Press the MUTING button again to restore the minimum. Then insert the plug of your headphones sound. into the PHONES jack, and adjust the volume using the VOLUME knob. -
Page 20: Listening To Ipod
. button twice. < When headphones are plugged into the iPod, sound comes out from both the speakers of the CR-H238i and the headphones. < You can watch a video source stored on the iPod on the TV or monitor connected to the dock. -
Page 21: Repeat Playback
To search for a part of a song Repeat playback During playback, hold down the Search button Each time the REPEAT 1/ALL button is pressed, the (m or ,) and release it when the part you want repeat mode is changed as follows: to listen to is found. -
Page 22: Disc Playback
Disc Playback Press the Open/Close button (L) to close the tray. Press the SOURCE button repeatedly to select When an audio CD is loaded: “CD”. The total number of the tracks and total play time of the disc is displayed. CD/Stop T023 65:10... -
Page 23: Usb Playback
USB Playback < MP3/WMA files not contained in folders are automatically put in the “ROOT” folder, and playback starts from the first file of the ROOT folder. < If there are folders that have no MP3/WMA files, this unit skips them. <... -
Page 24: Sd Playback
SD Playback General Playback (disc/USB/SD) To suspend playback temporarily (pause mode) You can play MP3/WMA files recorded on an SD memory card. Press the SOURCE button repeatedly to select “SD CARD”. Press the Play/Pause button (G/J) during playback. Playback stops at the current position. To resume playback, press the Play/Pause button (G/J) again. -
Page 25: To Skip To The Next Or A Previous Track
To search for a part of a track/file To skip to the next or a previous track You can search for a part of a track/file in the following two ways: During playback, hold down the Search button (m or ,) and release it when the part you want to listen to is found. -
Page 26: Direct Playback (Disc/Usb/Sd)
Direct Playback (disc/USB/SD) Display While in stop or playback mode, you can use the Numeric buttons on the remote control unit to select a track/file. When you use the Numeric buttons, press the CD, USB or SD button on the remote control unit first. During playback, press the DISPLAY button repeatedly to change the information on the display. -
Page 27: Repeat Playback (Disc/Usb/Sd)
Repeat Playback (disc/USB/SD) Shuffle Playback (disc/USB/SD) Press the REPEAT 1/ALL button during playback. The Press the SHUFFLE button during playback or in stop repeat mode is changed as follows: mode. “Random” appears on the display, and the tracks/files will be played randomly. RPT 1 RPT Folder (Only MP3/WMA files) -
Page 28: Programmed Playback (Disc/Usb/Sd)
Programmed Playback (disc/USB/SD) Up to 30 tracks/files can be programmed in the desired Repeat steps to program more tracks/ order. files. Press the PROGRAM button in the stop mode. < If you make a mistake, press the CLEAR button. The last input track/file number will be deleted. - Page 29 To change or add a track/file to the To clear the program program In the stop mode, press the ENTER button repeatedly until the program number for which you want to change the track/file appears on the display. In the stop mode, press the PROGRAM button. <...
-
Page 30: Listening To An External Source
Listening to an External Source Listening to FM/AM Stations You can listen to the sound from an external component connected to the AUX 1 IN or AUX 2 IN jacks. Press the SOURCE button repeatedly to select Press the SOURCE button repeatedly to select “TUNER FM”... -
Page 31: Preset Tuning
Preset Tuning (1) Manual tune You can store up to 30 FM and 15 AM stations. Turn the MULTI JOG knob until the station you want to Preset Automatically listen to is found. On the remote control unit, press the Scroll buttons (°... -
Page 32: How To Select Preset Stations
Preset Tuning (2) Preset Manually How to select preset stations Tune in to a station you want to listen to (see page Press the Numeric buttons or the Skip buttons 30). (.//). Press the PROGRAM button. “__” blinks on the display. <... -
Page 33: Rds (Only For Europe)
RDS (Only for Europe) The Radio Data System (RDS) is a broadcasting service RDS Clock time (CT) which allows stations to send additional information Displays the time information provided from the along with the regular radio programme signal. station. When you select RDS Clock time, “RDS CLOCK TIME” RDS works on the FM waveband in Europe only. -
Page 34: Pty Search (Only For Europe)
PTY Search (Only for Europe) Press the ENTER button. The programme type stops blinking. You can search for stations by programme type. This function is available only on RDS services of FM waveband in Europe. Turn the MULTI JOG knob. Press the SOURCE button repeatedly to select “TUNER FM”. - Page 35 NEWS: RELIGION: Brief announcements, events, public opinion, reports, Religious programs. actual situations. PHONE IN: AFFAIRS: Programs in which the public expresses its view by A k i n d o f s u g g e s t i o n i n c l u d i n g p r a c t i c a l phone.
-
Page 36: Setting The Clock
Setting the Clock Press and hold the TIME MODE button for more Press the ENTER button. than 2 seconds. The minute value blinks. “CLOCK SETTING” appears on the display. < For Europe, the unit uses the 24-hour “military” clock. Press the Scroll buttons (° / ‡) to set the current For North America, the unit uses the 12-hour clock. -
Page 37: Using The Timer
Using the Timer (1) Press the Scroll buttons (° / ‡) to set the hour Setting the Timer of the stop time and press the ENTER button. < The unit can be programmed to turn on and off at specified times. <... - Page 38 Using the Timer (2) Press the Scroll buttons (° / ‡ ) to set the Press the STANDBY/ON button to turn the unit off volume level and press the ENTER button. (standby). Now the timer setting is stored in memory. The standby indicator blinks at 5-second intervals.
-
Page 39: Specifications
Specifications AMPLIFIER Section General Output Power ..25 W/ch (6 ohms, 0.5 %,1 kHz) Power Requirements Input Sensitivity ..... . . 340 mV/47 kΩ 230 V AC, 50 Hz (European model) Frequency Response 120 V AC, 60 Hz (North American model) -
Page 40: Troubleshooting
Check the dock adapter. Install the unit away from them, or turn them off. e Remove dust or obstacles from the Dock connector of the CR-H238i and the iPod, then insert the iPod Remote control does not work. again. - Page 41 For European customers Information for Users on Collection and Disposal of Old Equipment and used Batteries These symbols on the products, packaging, and/or accompanying documents mean that used electrical and electronic products and batteries should not be mixed with general household waste. For proper treatment, recovery and recycling of old products and used batteries, please take them to applicable collection points, in accordance with your national legislation and the Directives 2002/96/EC and 2006/66/EC.
- Page 42 7733 Telegraph Road, Montebello, California 90640 U.S.A. Phone: (323) 726-0303 TEAC CANADA LTD. 5939 Wallace Street, Mississauga, Ontario L4Z 1Z8, Canada Phone: (905) 890-8008 TEAC MEXICO, S.A. de C.V. Río Churubusco 364, Colonia Del Carmen, Delegación Coyoacàn, CP 04100, México DF, México Phone: (5255)5010-6000 TEAC UK LIMITED Suites 19 &...
Need help?
Do you have a question about the CR-H238i and is the answer not in the manual?
Questions and answers