Bosch Indego Quick Installation Manual
Robotic
Hide thumbs
Also See for Indego:
- Original instructions manual (466 pages) ,
- Installation manual (75 pages) ,
- Original instructions manual (63 pages)
Advertisement
Quick Links
Download this manual
See also:
Installation Manual
Indego Quick Installation Guide
Indego Kurzanleitung zur Installation
Guide d'installation rapide de l'Indego
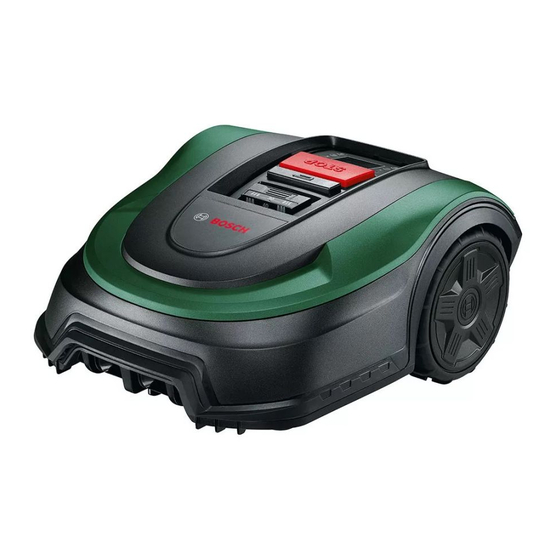
EN: Thank you for purchasing the Indego robotic lawnmower. Please check that all the items shown below are contained in the
1
carton. If not, please contact Support.
DE: Wir danken Ihnen für den Kauf eines Indego Rasenmähroboters. Bitte prüfen Sie, ob alle unten dargestellten Elemente im
Lieferumfang enthalten sind. Bei eventuellen Fehlmengen wenden Sie sich bitte an den Hersteller.
FR: Merci d'avoir acheté la tondeuse robot Indego. Avant de commencer l'installation, vérifiez que vous êtes en possession de tous
les éléments ci-après. Si ce n'est pas le cas, contactez la hotline.
EN: The docking station for the
2
Indego should be placed at the
side of the lawn. Please take note
of the space required around the
docking station. This will enable
the Indego to return to the dock-
ing station correctly.
DE: Die Basisstation für den Indego
sollte sich am Rand der Rasen-
fläche befinden. Bitte achten Sie
auf den erforderlichen Raum vor
und hinter der Basisstation. So
ist gewährleistet, dass der Indego
den Weg zur Basisstation problem-
los findet.
FR: La station de charge de
l'Indego doit être positionnée
sur un coté du jardin. Veuillez
prendre note de l'espace requis
autour de la station de charge.
L 'Indego retournera ainsi à sa
station de charge correctement.
EN: When looking at the docking station from inside the
lawn the charging pins should point to the left.
DE: Stehen Sie innerhalb der Rasenfläche, zeigen die Lade-
kontaktstifte nach links.
FR: Quand on se positionne à l'intérieur de la zone de
pelouse et que l'on regarde la station de charge, les plots
de charge doivent être orientés vers la gauche.
10 m
2 m
10 m
> 1,5 m
0,25 m
2 m
35 cm
> 1 m
> 2 m
max.
45 °C
Advertisement

Related Manuals for Bosch Indego


Summary of Contents for Bosch Indego
- Page 1 Indego Kurzanleitung zur Installation Guide d’installation rapide de l’Indego EN: Thank you for purchasing the Indego robotic lawnmower. Please check that all the items shown below are contained in the carton. If not, please contact Support. DE: Wir danken Ihnen für den Kauf eines Indego Rasenmähroboters. Bitte prüfen Sie, ob alle unten dargestellten Elemente im Lieferumfang enthalten sind.
- Page 2 Utilisez la rigole de crochets de fixation pour maintenir le câble en place. Lorsque vous remettez la station de charge par terre, assurez-vous que le câble reste bien fixé et bien droit. Cela permettra à l’Indego...
- Page 3 EN: Peg the wire 10 cm away from the docking sta- FR: Posez un cavalier sur le câble à 10 cm tion. Strip 10–15 mm of insulation off the wire. Then de la station de charge. Dénudez le câble connect the wire to the right hand (red) terminal. Do sur 10 à...
- Page 4 EN: Install the perimeter wire around the lawn area in an anticlockwise direction. Please take note of the distances the perimeter wire should be positioned from items within the cutting area. Ensure the wire doesn’t cross as this will affect operation. DE: Verlegen Sie jetzt den Begrenzungsdraht gegen den Uhrzeigersinn rund um die Rasenfläche.
- Page 5 EN: Insert the red isolator key into the Indego and turn it clockwise to switch the Indego on. Set the height of cut for the grass. Depending on the height of the grass in the lawn area, it is recommended to start with a higher setting and then gradually reduce the level.
- Page 9 äußeren Begrenzungsdraht. Vermeiden Sie es, den Indego während der Schritte 12 und 13 anzuheben oder zu unterbrechen. FR: Lors de la configuration, l’Indego cartographie la pelouse et en mémorise la forme. Pour cela, elle fait le tour de la surface à tondre et enregistre les distances parcourues.
Need help?
Do you have a question about the Indego and is the answer not in the manual?
Questions and answers