Table of Contents
Advertisement
Advertisement
Table of Contents

Subscribe to Our Youtube Channel
Related Manuals for Eclipse AVN30D


Summary of Contents for Eclipse AVN30D
-
Page 2: For The Safe Usage Of This Device
Read the following prior to using this device For the safe usage of this device The symbols described below are found in this instruction manual as well as on the device itself to insure its proper and safe usage and to prevent injury or damage to property. -
Page 3: Safety Precautions
Read the following prior to using this device Safety precautions • This device was made for vehicles equipped with a 12V battery. Do not use in a large truck, cold area vehicle or any other vehicle that uses a 24V battery. Otherwise, fires may result. - Page 4 Read the following prior to using this device • This device can be used when the engine switch is either at ON or ACC, how- ever, to avoid depleting the battery, operate it with the engine running. • This product must be operated only as on-board equipment, or it may cause electrical shock or injury.
- Page 5 • When there is a lot of vibration – when driving on a bad road for example – the unit may become unable to operate normally because it cannot read data from the disc. • Condensation may accumulate on the lens, which functions to read CDs and DVDs, immediately after turning ON the heater in cold temperatures.
-
Page 6: How The Instruction Manuals Are Organized
Read the following prior to using this device How the instruction manuals are organized Use each instruction manual in the following order. The instruction manuals for AVN 30D are composed of 3 versions. Reference Guide is included in the package. Use each manual separately depending on how you are using the device. -
Page 8: How To Use This Manual
Read the following prior to using this device How to use this manual Item title Section title A number and title is A title is assigned for each section. assigned for each item. Operation title A title is assigned for each operation purpose. - Page 9 Operation examples Each definite operation is given here. Operation switch Switches needed to perform operations are displayed. Section side heading Only the section side heading will appear. Operation screen A screen showing the operation will appear. Go to the next page The operation procedures are continued on the next page.
-
Page 10: Table Of Contents
Read the following prior to using this device Table of Contents For the safe usage of this device ....... .2 Safety precautions . - Page 11 Registering places ..........34 Register your home .
- Page 12 Read the following prior to using this device Switch the audio source (mode) ....... 74 Switching the audio source (mode) .
-
Page 14: Name Of Parts
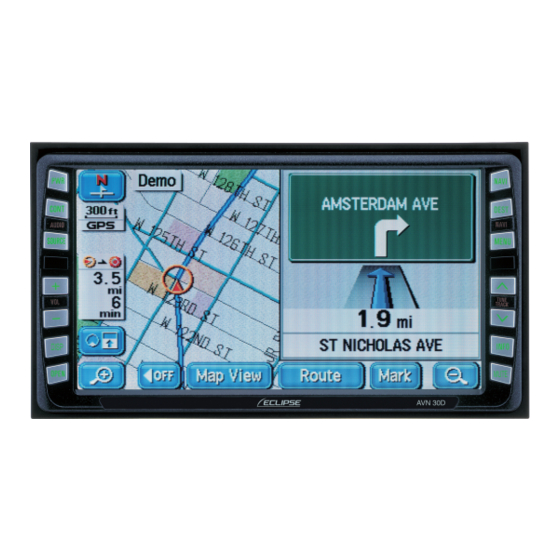
Introduction Name of parts The unit can be operated by pressing buttons on the frame of the panel (panel but- tons) and by touching buttons displayed on the screen (touch switches). This deck supports use of a remote control. The remote control is sold separately and can be purchased at your local retailer. -
Page 15: Touch Switches
Touch switches Unit can be operated by touching buttons on screen. Touch switch [About operation of touch switch] • Touch the buttons until a beep sound is emitted. • Touch the buttons lightly to prevent damage to the screen. • If a button does not respond, remove your finger and touch it again. -
Page 16: When Using For The First Time
Introduction When using for the first time Loading the program into the device After purchasing the device and using it for the first time, load the map disc program into the device. Turn the engine ON. Screen after turning the power ON Progress bar Touch DISPLAY OPEN/CLOSE... - Page 17 Select the language. • Touch I Agree to use English. • Touch Françis and then I Agree to use French. Map screen Wait approx. 30 seconds. NAVI • Press to display the map screen. Turn the engine OFF. Turn the engine ON and start the device. •...
-
Page 18: Turning The Power On Or Off
Introduction Turning the power ON or OFF How to turn the power ON or OFF When the engine is turned ON, the DVD/audio power will automatically turn ON and the Caution screen will appear. Touch to switch I Agree to the Navigation screen. The power will turn OFF when turning off the engine. -
Page 19: Inserting The Disc
Introduction Inserting the disc How to insert or eject a CD or DVD Insert an audio CD when wanting to listen to music. How to insert or eject a CD or DVD Press OPEN Touch either OPEN The display opens and the disc slots become accessible. - Page 20 Introduction Insert the desired disc into the slot. Map disc, DVD video When the CD or DVD is fully inserted, the display closes automatically. • As soon as an audio CD is inserted, playback starts. • As soon as a map disc is inserted, the navigation screen is displayed. •...
- Page 21 ■ Map disc (DVD-ROM) • Only use a specially made DVD navigation disc (For details, contact the store of purchase). ■ • DVDs labeled with the marks shown in the right can be used with this device. When using DVDR/RW (DVD-Recordable/ ReWritable) and DVD+R/RW (DVD+Recordable/ReWritable) discs, note that only those whose contents were...
- Page 22 Introduction How to eject a CD or DVD Press OPEN Touch to eject either disc. The display will open and the disc(s) are ejected. After removing the disc, touch CLOSE OPEN for approx. 1 second until a "beep" The display can be closed even after pressing sound is heard.
- Page 23 • If the vehicle's automatic transmission shift lever is in the "P" position or manual transmission lever is in the 1, 3, 5 or position, or if a bottle or other container is in the cup holder, this could interfere with the opening and closing of the display.
-
Page 24: Display Angle Adjustment
Introduction Display angle adjustment Adjust the angle of the display The screen viewing angle can be adjusted to any of 6 stepped positions when light from outside the vehicle makes viewing difficult. Press OPEN The TILT/EJECT screen is displayed. Touch TILT The display will tilt upwards by one step (5°). -
Page 25: Modes
Introduction Modes Get to know each mode This device has three main modes: "Navigation", "Information" "Audio DVD". You can switch from any mode to any mode. Mode Main functions ● Present location display ● Instructions to destination Navigation ● Geographical point registration (home and memory points) ●... -
Page 26: Operational Conditions
Introduction Operational conditions Each operation condition for device functions Depending on the following conditions (engine switch position), the device functions may or may not be operable. ×: Inoperable : Operable Engine ACC/ON ACC/ON With park- Display opened switch (LOCK) With parking ing brake released brake set Each... -
Page 27: Switching Modes
Introduction Switching modes Get to know how to switch modes Press the switches below to switch modes. Navigation screen Information screen NAVI INFO Press Press Audio operation screen CONT (OFF screen) Press . (Operation time) Appears when the audio or DVD functions are in operation. See the "OWNER'S MANUAL/ Audio"... -
Page 28: Map Operation
Navigation Map operation Check the positioning of your vehicle Press to display the area in which your vehicle is located. NAVI NAVI button Vehicle position mark The present location and the vehicle direction are displayed. The mark will move automatically as per the movements of the vehicle. -
Page 29: Move The Map (One-Touch Scroll)
Move the map (one-touch scroll) Touch the screen directly to move the map. While scrolling Cursor mark Touch the map and the cursor mark will appear in the middle of the screen. How to view the scroll screen Position name After moving the map, the name of the cursor position will appear for approx. -
Page 30: Change The Map Reduction Scale
Navigation Change the map reduction scale Touch the switch and the map reduction scale increases making for a wider range display. Touch the switch and the map reduction scale decreases for a more detailed map display. Touch Touch Scale bar Touch a number to switch the scale to that number. -
Page 31: Change The Orientation Of The Map
Change the orientation of the map The orientation of the map displayed on the screen can be switched to either north up (always having the map oriented north) or heading up (always having the map oriented in the direction of the heading). Touch the orientation mark ( ) to switch the map orientation. -
Page 32: Change The Map Display Method
Navigation Change the map display method The map display can be changed according to several conditions. There are two types of map display methods: Shows a regular map (flat). Shows a map separated into two halves. Touch Touch the desired display method. The touch switches on the displayed map brighten. -
Page 33: Display Various Points Of Interest On The Map
Display various points of interest on the map Various points of interest (landmarks) can be shown on the displayed map. Touch Map View Touch Show POI Icon Touch the to be POI Icon displayed. ● Other than the 6 types of multiple landmarks and screens can be displayed. -
Page 34: Registering Places
Navigation Registering places Register your home Register your home before starting to use the device. Registering your home will facilitate the setting of return routes when driving. When at home NAVI Press and proceed with operation after the map of the area surrounding your home appears. - Page 35 Touch Enter Touch Attribute Touch Not Registered Touch Icon Touch the mark to be registered on the map. ● Page 2 With Sound Touch to select a different mark. For details see "Changing the symbol of the memory point" in the OWNER'S MANUAL/Navigation.
- Page 36 Navigation Touch Press NAVI ● The present location will appear. NAVI...
- Page 37 When at a location other than your home Press (NAVI) MENU to retrieve the Menu screen. (NAVI) MENU Touch My Places Touch for Memory Points. Register Touch Address Enter the House Number one number at a time by touching the number switches on the screen.
- Page 38 Navigation Touch Enter the Street Name. ● If you make a mistake, touch to erase one entry at a time. ● A list may appear as you enter the number to facilitate entry. Entering the entire number may not be necessary. Touch the desired Street Name.
- Page 39 Touch Enter Touch Attribute Touch Not Registered Touch Icon Touch the mark to be registered on the map. ● Page 2 With Sound Touch to select a different mark. For details see "Changing the symbol of the memory point" in the OWNER'S MANUAL/Navigation.
- Page 40 Navigation Touch Press NAVI ● The present location will appear. NAVI...
-
Page 41: Register Favorite Places
Register favorite places Up to 106 favorite places (including your home and special memory entries) can be registered on the map. Registering a place will make a flag ( ) or a name appear on that spot. How to register from the map Touch the map and move the mark to the spot to be registered. - Page 42 Navigation To register a far away place ■ Register SAFECO FIELD located in Seattle, Washington. Press (NAVI) MENU to retrieve the Menu screen. (NAVI) MENU Touch My Places Touch for Memory Register Points. Touch Change Touch...
- Page 43 Touch Touch POI Name Touch in that order. ● If a list appears as you are entering the number, follow the procedure in (10) ( is not List displayed). Touch List ● If the number of candidates is high, narrow them City Category down by selecting from...
- Page 44 Navigation Touch 196 S ATLANTIC ST, Touch to move the map. ● When not moving the map, start from Touch Enter Touch Icon Touch the to be registered in Icon the map. ● Page 2 With Sound Touch to select a different mark.
- Page 45 Touch Press NAVI NAVI ● The present location will appear.
-
Page 46: Route Guidance
Navigation Route guidance How to start route guidance Indicating the destination will automatically start a search for routes to that place. This is called "Route Search". When the route search is complete, a route to the destination is set. This is called "Route Setting". -
Page 47: Route Search (Indicate Destination)
Navigation Route Search (indicate destination) Decide on a destination and start a route search Give information on the desired destination and search for a place. When searching immediately after moving the map ....[Enter] When returning home (with your home being registered)..[My Places] If the freeway entrance/exit name is known .. -
Page 48: How To Search After Moving The Map
Navigation How to search after moving the map Touch the map and move the mark. Touch Enter Touch and align the mark with the destination. Touch Enter ● symbol will appear on the mark position. All routes from the present location to the symbol will be searched for and displayed. -
Page 49: How To Return Home
How to return home Press DEST DEST Touch Touch Enter All routes from the present location to your home will be searched for and displayed. All routes are displayed. -
Page 50: When Searching Using The Freeway Entrance/Exit Name
Navigation When searching using the freeway entrance/exit name Press DEST DEST Touch Touch Freeway Ent./Exit Enter the one letter Freeway Name at a time by touching the switches on the screen. ● If having made a mistake, touch to erase one entry at a time. - Page 51 Touch either Entrance Exit select the freeway entrance or exit. ● The freeway entrance/exit names will be listed. Touch the corresponding entrance/exit name. ● The indicated entrance/exit map will appear. Touch Enter ● Touch to move the map. A route from the present location to the destination will appear.
-
Page 52: Searching Using The Latitude/Longitude Coordinates
Navigation Searching using the latitude/longitude coordinates Press DEST DEST Touch Touch Coordinates Enter the "Lat." one number at a time by touching the switches on the screen. ● Touch to switch between north latitude and south latitude. If the geographical point entered is not within the area recorded in the map disc, a map will not appear. - Page 53 Touch ● The entered point will appear. Touch Enter ● Touch to move the map. A route from the present location to the destination will appear. All routes are displayed.
-
Page 54: Route Setting
Navigation Route setting Set the desired route After deciding on a destination, recommended routes from the present location to the destination are searched for and displayed on the screen. Routes to the destination will be colored into the screen and the required time and distance to the destination will be displayed. - Page 55 ■ Touch switches Different routes are displayed to enable a selection 3 Routes (Refer to page 58). Enables you to change the displayed route, add a Route destination or change an interchange (IC). (For details, see "Changing the search result route" in the OWNER'S MANUAL/Navigation.) Starts route guidance.
-
Page 56: Check The Progression Of Your Journey
Navigation Check the progression of your journey Touch in the route Guide guidance display. Touch Map View Touch Route Overview Touch Turn List Touch ● The route information is displayed in segments at intersections, road type turning points, etc. ● Touch to display the map for that area. - Page 57 How to view the route information screen Intersection name display Destination 1 Heading display Interval distance display Current Map display location (vicinity of the cur- rent location)
-
Page 58: Select A Different Route
Navigation Select a different route A total of 3 recommended routes will be displayed, Quick 1, Quick 2 and Short, from which you may select one. Touch in the all route 3 Routes diagram display. ● The 3 routes are displayed in different colors. Touch Info. -
Page 59: Add Stops Along The Route
Add stops along the route You can change the route in advance if, for example, wanting to pick up a friend along the way to your destination or add another destination further away from the original one. Adding stops Adding a destination Route Original destination... - Page 60 Navigation Touch in the retrieved map. Enter Touch in the space to be added. ● An all route diagram display will appear with the changes. ● If setting between the present location and the destination, the addition becomes a stop. ●...
-
Page 61: Start Route Guidance
Navigation Start route guidance Route guidance Start driving and the device switches screens for each set point of reference, such as intersections, in accordance with the movement of your vehicle. Also, each reference point is announced in a clear voice. Present location screen during route guidance Depending on the route being taken, reference points will be explained using var- ious screens. - Page 62 Navigation Voice route guidance During route guidance, the distance up to a reference point and other information depending on road conditions and vehicle speed are announced with a clear voice. ■ When on a local road Corresponding with the vehicle speed, intersection names, the distances remain- ing up to intersections and the direction of the turn to be made are announced vocally in accordance with their conditions.
-
Page 63: Start Driving Following The Route Guidance
Start driving following the route guidance Touch in the all route Guide display screen. ● The present location screen appears. Please pro- ceed to the highlighted route, then the route guid- ance will start. The voice guidance may differ depending on the route conditions. Start driving. -
Page 64: Stop And Restart Guidance While In Progress
Navigation Stop and restart guidance while in progress Guidance can be stopped and restarted while in progress. Press (NAVI) MENU (NAVI) MENU ■ Stop guidance Touch Suspend Guidance ● Guidance is stopped. ● The route on the map disappears (the mark for the destination remains). -
Page 65: Delete The Destination
Delete the destination The set destination can be erased. Also, the set mark does not disappear even after having arrived at your destination according to the prescribed route. Delete it by performing the operation described below. (However, if setting a new destination, the previous mark will disappear.) Touch... - Page 66 Navigation Touch ● If there are destinations remaining, the device will automatically search the remaining destination(s) and an all route diagram will be displayed.
-
Page 67: Other Settings
Navigation Other settings How to display a clock on the navigation screen A GPS clock can be displayed on the map screen. Press (NAVI) MENU to retrieve the Menu screen. (NAVI) MENU Touch Setup Touch for Clock Indication. Touch Clock indication ●... -
Page 68: How To Turn Off The Navigation Screen
Navigation How to turn off the navigation screen The map screen can be turned off when not using the navigation system. Press DISP to retrieve the image quality adjustment screen. DISP Touch ● The contrast and brightness can be adjusted from the image quality adjustment screen. -
Page 69: How To Correct The Present Location
How to correct the present location Even if the vehicle position mark on the map gets out of alignment, the device will automatically correct the present location using map matching and GPS data while you drive (it may take up to several minutes depending on the case). - Page 70 Navigation Touch for Calibration. Adjust Touch Position/Direction Touch and move the map to the actual present location. Touch Enter Maps with a scale of 0.5 mile or greater detail can be corrected.
- Page 71 Touch to set the direction. ● To move the direction counterclockwise, touch To move it clockwise, touch Touch Enter...
- Page 72 Navigation Correcting the distance Press (NAVI) MENU to retrieve the Menu screen. (NAVI) MENU Touch Setup Touch for Calibration. Adjust Touch Tire Change ● Automatic correction is performed. • The device performs automatic distance correction (automatic correction) using GPS and vehicle speed signals. This may be delayed in the event of a sharp deviation that overwhelms the automatic correction function (changing a tire, being towed by another vehicle, etc.) In such a case, drive about 6 miles along a road indicated by favorable GPS...
-
Page 74: Switch The Audio Source (Mode)
Audio Switch the audio source (mode) Switching the audio source (mode) How to switch to the FM source Press (AUDIO) SOURCE ● The AUDIO MENU screen will be displayed. (AUDIO) SOURCE Touch Touch the desired audio source and that source will appear on the screen. - Page 75 ■ ■ AM radio operation screen FM radio operation screen ■ ■ CD operation screen MP3 operation screen ■ ■ DVD operation screen HD RADIO (IBOC) operation screen ■ ■ SIRIUS operation screen (optional) CD changer operation screen (optional) The device can automatically switch to the navigation screen or other screen while an audio operation screen is displayed.
-
Page 76: Am/Fm Radio Operation
Audio AM/FM radio operation How to listen to the AM/FM radio Select radio for the source Touch for AUDIO MENU. If an HD RADIO (IBOC) tuner is connected, IBOC reception is given priority. To MODE listen to AM/FM radio in this case, touch on the AM/FM radio operation screen and select "OFF". - Page 77 Automatically search for broadcast stations and record them This convenient function can search for broadcast stations from which a signal can be received and record them temporarily into preset switches. If they are not needed, they can easily be switched back to the broadcast stations originally recorded.
-
Page 78: Hd Radio (Iboc) Operation
Audio HD RADIO (IBOC) operation How to listen to the HD RADIO (IBOC) When receiving HD Radio (High Definition Radio) broadcasts, FM reception has the same quality as a CD, and AM reception has the same quality as conventional FM sound. Depending on the reception status, HD Radio can also receive analog broadcasts, which means reception is still possible in regions with no digital coverage. - Page 79 Automatically search for broadcast stations and record them This convenient function can search for broadcast stations from which a signal can be received and record them temporarily into preset switches. If they are not needed, they can easily be switched back to the broadcast stations originally recorded.
-
Page 80: Sirius Satellite Radio Operation
Audio SIRIUS satellite radio operation How to listen to the SIRIUS satellite radio With SIRIUS satellite radio, over 100 channels are available including music, news, and entertainment programs. You can select the channel you want from 14 categories such as POP and ROCK, or you can select a channel by direct input. - Page 81 Input a channel. Touch ENTER Displaying information about the track being played Touch TITLE on the SIRIUS operation screen. ● The file information recorded on the music you are listening to (the album name and title of the track) can be displayed. Touch Touch TITLE...
-
Page 82: Cd/Mp3 Player Operations
Audio CD/MP3 player operations How to listen to a CD/MP3 Play a CD/MP3 file ■ When a disc is not inserted Insert a disc. ● It automatically starts playing. ■ When a disc is inserted Touch for AUDIO MENU. If sound data and MP3 data are mixed on the same disc, only the data recorded in the first session can be played. - Page 83 Easy folder and music file selection (MP3 player) An MP3 compresses music data into 1/10 its original size enabling it to store about 10 times the music data of one CD. This device simultaneously displays 9 folders/files enabling the easy selection of desired music files. Touch one of the folder/file Folder/file selection switches selection switches.
-
Page 84: Stop Playing
Audio Stop playing Press Press again to play the last song. • If there are 10 or more music files in the same folder, press switch and display the data. • The file information (album name, song title) may not appear depending on the way the MP3 was compiled. -
Page 85: Dvd Player Operation
Audio DVD player operation How to view a DVD video Playing the DVD ■ When a disc is not inserted Insert a DVD. ● It automatically starts playing. ■ When a disc is inserted Touch for AUDIO MENU. Some DVDs may not be played automatically. In this case, play the DVD from the disc menu stored in the DVD. - Page 86 Audio Fast-forwarding/rewinding Press and hold the switch until a beep is heard. Fast-forward/rewind Buttons Operating the disc menu Touch Touch MENU TOP MENU Touch Touch select the video to play. Touch ENTER The menu screen displayed differs depending on the DVD disc.
- Page 87 Turning off the DVD Press Press again to play the last video.
-
Page 88: Adjusting Sound Quality
Audio Adjusting sound quality Adjusting sound quality You can meticulously adjust the sound of the music you want to hear to create your own little pseudo-concert hall. The acoustic field can be adjusted to center around the desired position and each speaker's volume and balance can also be adjusted. - Page 89 Adjust the sound in tune with the music being played Touch ● is displayed when touching and then CONT for a DVD or pressing for a VTR or touch the screen. ■ Select the set equalizer pattern Touch ● BACK Touch to record the setting and return the display to the previous screen.
- Page 90 Audio Adjust the center of the acoustic field to center around the desired position Touch ● is displayed when touching and then CONT for a DVD or pressing for a VTR or touch the screen. Touch POSITION (seat). ● Touch BACK to record the setting and return the display to the previous screen.
- Page 91 Adjusting the left/right front/rear volume balance Touch ● is displayed when touching and then CONT for a DVD or pressing for a VTR or touch the screen. Touch BAL FAD Touch the desired spot within the ● BACK Touch to record the setting and return the display to the previous screen.
-
Page 92: Other Settings
Audio Other settings Cancel the "beep" sound made when operating the switches The sound emitted when operating the panel or screen switches can be canceled (muffled). Press INFO to retrieve the INFORMATION screen. INFO Touch SETTING ● SETTING Various adjustments can be done from For details, see "Setting background screen"... -
Page 93: Switch The Screen Display Size
Switch the screen display size The screen size of DVD and VTR displays can be switched. Switch the DVD/VTR display screen size Touch WIDE ● WIDE is displayed when touching and then for a DVD. Touch the desired size. NORMAL mode WIDE 1 mode The size of a regular television screen with either The size of a regular television screen... -
Page 94: Specifications
For reference Specifications GPS antenna Dimensions 34(W) x 13.2(H) x 38(D)mm Weight approx. 25 g (Excluding cables and connectors) Power supply voltage 4.5 +/-0.5(V) Power consumption 10 to 30 (mA) Usage temperature -30 to 80 (°C) Storage temperature -40 to 100 (°C) Display Liquid crystal panel 6.5 type wide low reflection panel... - Page 95 Common component 15 W x 4 (1 kHz, 1% 4 Ω) (EIAJ) Rated output Maximum output 50 W x 4 (test voltage 14.4 V) 4 Ω (each channel) Suitable load impedance 13.2 VDC (11 - 16 V) Power source voltage Grounded 0.5 W x 4 output time approx.
Need help?
Do you have a question about the AVN30D and is the answer not in the manual?
Questions and answers