Table of Contents
Advertisement
Quick Links
OWNER'S MANUAL
DVD-Video / USB Multi-Source Receiver /
7" Wide Screen Monitor / Navigation /
®
Built-in Bluetooth
We appreciate your purchase of this main unit.
Please read through this manual for correct operation.
We suggest that after reading it you keep this manual
in a safe place for future reference.
wireless technology
Advertisement
Table of Contents

Subscribe to Our Youtube Channel
Related Manuals for Eclipse AVN76D


Summary of Contents for Eclipse AVN76D
- Page 1 OWNER'S MANUAL DVD-Video / USB Multi-Source Receiver / 7" Wide Screen Monitor / Navigation / ® Built-in Bluetooth wireless technology We appreciate your purchase of this main unit. Please read through this manual for correct operation. We suggest that after reading it you keep this manual in a safe place for future reference.
- Page 2 Facts to keep in mind when operating the main unit. Please read all materials such as manuals and warranties that have come with the product. ECLIPSE will not be responsible for unsatisfactory product performance due to failure to follow these instructions.
-
Page 3: Table Of Contents
Table of Contents Before Use 1. Safety precautions............14 2. Viewing this Document........... 18 3. About This Receiver ............19 Control Names and Operations................19 Panel buttons ......................... 19 Touch switch ........................20 About touch switch operations .................. 20 Turning the POWER ON or OFF ...............21 Turn on the power ...................... - Page 4 Brightness ......................... 34 Color balance (only applies to Video screen)............34 Color density (only applies to Video screen) ............. 34 5. Bluetooth Hands-Free Operation ........35 Using Bluetooth Hands-Free ................35 Hands-free screen display....................35 Registering a cell phone....................35 Registering from a cell phone ................... 36 Register by searching for cell phone on this receiver ..........
- Page 5 Route menu........................48 Management menu ......................48 User data management....................49 Map screen settings ....................... 49 Route planning option ....................50 Road Types Used for Route Planning:..............51 Route calculation methods: ..................51 Navigation settings ......................52 Regional settings......................52 Time and Time Zone Settings ...................
- Page 6 Saving route ........................74 Loading saved route....................... 75 Map screen........................75 About roads ........................79 3D Object types ......................79 Managing facilities information ..................79 Itinerary display ......................81 Route editing ........................82 Route information screen ....................82 Facility information, storage, and revision ..............84 Saving POIs ......................
- Page 7 Route Search and Advanced Search ..............97 Creating multiple destinations (adding intermediate points) .......... 97 Creating multiple destinations (adding new destination) ..........98 Deleting an intermediate point from the route ............... 99 Detour menu........................99 About Destination History ................99 Managing history ......................99 Deleting Destination History ................99 Deleting active route ......................
- Page 8 2. Accuracy and Error ............111 About measurement accuracy ..............111 About GPS Satellite Quality and Status ............111 About Errors in Present Location Display ............112 About Correction of Vehicle Position Detection by Map Matching ...112 About Accuracy of Present Position Display and Route Guidance ..112 About Road and Place-Name Data..............114 About Route Guidance ...................114 Starting Out...
- Page 9 Adjusting Sound Quality.................129 Adjusting sound quality ....................129 Storing sound quality....................129 Use a preset sound quality................... 130 5. Screen Settings............... 131 Switching Between Screen Modes ...............131 Audio Operations 1. Using Radio..............132 Using Radio .....................132 Listening to Radio ...................132 Tune a Desired Station..................132 Manual Tuning......................
- Page 10 3. How to Use SIRIUS Satellite Radio ....... 140 Using SIRIUS satellite radio ................140 Listening to SIRIUS Satellite Radio ...............140 Checking SIRIUS ID..................141 Changing SIRIUS Band ...................141 Selecting Channel to Listen to ...............141 Selecting from category....................141 Manually selecting channel ..................142 Automatically selecting channel ...................
- Page 11 6. Using MP3/WMA Player ..........152 Using MP3/WMA Player ..................152 Playing MP3/WMA File ...................152 Selecting desired folder..................153 Selecting from folder list ....................153 Select from linked folders .................... 154 Selecting Desired Music File ................154 Selecting from file name switch..................154 Select from linked files ....................
- Page 12 Fast Forward/Rewind ..................165 Finding Desired Music File ................165 Repeating Music File..................165 Random Play of Music Files ................166 About USB Devices ..................166 About supported USB memory standards..............166 Supported MP3 file standards ..................166 ID3 tags ........................166 Format of USB memory....................167 Visual operations 1.
- Page 13 Finding a Desired Video..................174 Finding by Chapter ....................... 174 Finding by Title Number ....................175 Finding by chapter number................... 175 Changing the Touch Switch Display .............176 Hiding the Touch Switch....................176 Relocating the Touch Switch Display ................176 Changing the Screen Display and Audio Mode..........177 Changing the Angle......................
- Page 14 View the list of playing back................191 Setting to the iPod Video Mode..............192 Select the video file to view from the list ..............192 Pausing......................193 Repeatedly Playing the Same Music File ............193 Random Play of Music Files ................194 Listen randomly from the list that is playing ..............194 Listen to an album randomly ..................
- Page 15 Reference 1. Necessary Information ........... 206 If the Following Messages Appear..............206 When You Think There Is a Malfunction ............209 2. Glossary ................211 3. Specifications ..............212...
-
Page 16: Before Use
● Do not modify this system for any uses other than that specified herein. Also, do not deviate from the installation procedures described herein. Eclipse will not be held liable for damages including, but not limited to serious injury, death or property damage resulting from installations that enable unintended operation. - Page 17 ● Do not place foreign objects in the disc insertion slot or iPod/USB input terminal. Fire or shocks may result. ● Do not disassemble or alter this main unit. Doing so may result in an accident, fire or shock. ● Do not let water or foreign objects enter the internal parts of this main unit. Doing so may result in smoke, fire or shock.
- Page 18 Before Use Safety precautions CAUTION ● Wiring and installing this main unit requires expertise and experience. Professional installation is recommended. Consult with your dealer or a professional installation expert. Incorrect wiring may damage the main unit or interfere with safe operation of the vehicle. ●...
- Page 19 IMPORTANT ● When there is a lot of vibration – when driving on a bad road for example – the main unit may become inoperable due to it not being able to read data from the disc. ● In cold temperatures, condensation may accumulate on the lens for readings CDs and DVDs immediately after turning ON the heater.
-
Page 20: Viewing This Document
Before Use Viewing this Document. Section title A title is assigned for each section. Item title A number and title is assigned for each item. Operation title A title is assigned for each operation . Detailed operation title A title is assigned for each detailed operation. -
Page 21: About This Receiver
Before Use About This Receiver Control Names and Operations You can operate this receiver by pressing the buttons (panel buttons) or by touching the switches displayed on the screen (touch switches). ■ Panel buttons Press each panel button to operate it. a Phone button Press to make a telephone call. -
Page 22: Touch Switch
Before Use About This Receiver ■ Touch switch Touch the switches on the screen to operate. IMPORTANT Touch the touch switches with your finger. Operating touch switches with the point of hard objects such as ballpoint pens or mechanical pencils can damage screen. Touch switch About touch switch operations ●... -
Page 23: Turning The Power On Or Off
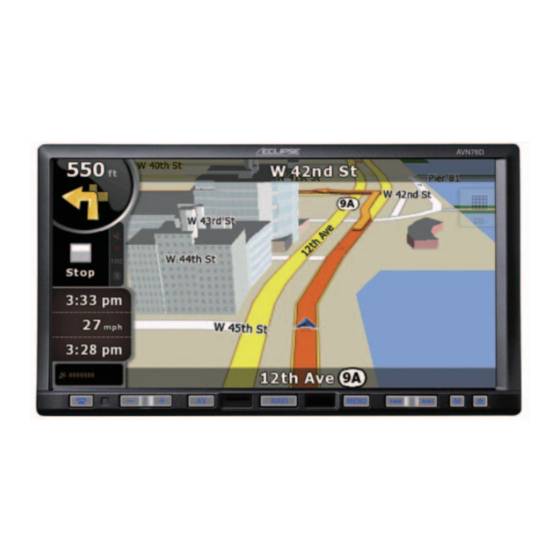
Turning the POWER ON or OFF At ignition, this receiver automatically switches on and displays the Navigation screen . When the engine is switched off, this receiver switches off. * The Navigation screen displays your present location. The Audio operations screen displays screen of audio source that was playing on last use. -
Page 24: Loading/Unloading A Disc
Before Use About This Receiver Loading/Unloading a Press Disc When you listen to music, insert a CD into the drive slot. Also, when you play a movie, insert Touch its DVD into the slot. ● The display will open to reveal insertion ■... -
Page 25: Unloading A Disc
■ Unloading a disc Insert a disc into the slot. IMPORTANT ● The display will close automatically when the disc is inserted. ● When unloading a disc, use the following notes. ● Hold a DVD or CD correctly (by inserting Automatic transmission (AT) car: your finger in its center hole and by holding If it is difficult to unload disc when the shift... -
Page 26: Adjusting The Display Angle
Before Use About This Receiver Adjusting the Display Press Angle When the screen shines due to ambient sunlight, you can adjust the angle of the Touch display. ● The disc will be ejected automatically. CAUTION When adjusting its angle, take care not to pinch your fingers. -
Page 27: About "Sd Memory Card" Slot
Press After adjusting the angle, press ATTENTION Touch of the angle adjustment. ● You can open the display even when it is tilted. When you close the display, it returns ● to the preset angle. Each touch returns the display from the ●... -
Page 28: About Modes Of This Receiver
Before Use About This Receiver About Modes of this Receiver The main modes of this receiver are MENU, Navigation, and Audio. Mode Main functions Navigation ● Display navigation menu screen ● Set destination, guidance (press ● Receive AM/FM radio ● Receive HD Radio ●... -
Page 29: Starting Each Mode
Starting each Mode ■ About screen display Press the following switches to switch among If DISC is loaded or USB or iPod is connected screens. while the Navigation screen is displayed, the screendisplay will appear. ■ Navigation screen After a short time, the screen display disappears automatically. -
Page 30: Operation Conditions Of This Receiver
Before Use About This Receiver Operation Conditions of this Receiver You can or cannot operate this receiver in the following conditions (the ignition key positions). : Operable; ×: Inoperable Engine switch Display open Function ON, vehicle at ON, vehicle in Turns OFF rest motion... -
Page 31: Main Unit Settings
Before Use Main Unit Settings Besides settings for navigation and audio operations, the following settings can be made. ● Rear View Camera Setting (See page 29) ● Guide Tone Setting (See page 30) ● Color Pattern Setting (See page 30) ●... -
Page 32: Guide Tone Setting
Before Use Main Unit Settings Guide Tone Setting Touch either (mute) to set the guide tone. You can set the “beep” sound issued on pressing the panel buttons and touching the ● On completion, touch to store the Done touch switches. setting and return to the immediately preceding screen. -
Page 33: Button Illumination Setting
Button Illumination Touch Setting Setting You can set the button illumination. Press Touch Info Touch , or to set the color pattern. ● On completion, touch to store the Done setting and return to the immediately preceding screen. Touch Setting... -
Page 34: Navi Voice Output Setting
Before Use Main Unit Settings Touch Touch Blue Setting ● On completion, touch to store the Done setting and return to the immediately preceding screen. Touch Front L Front R ● On completion, touch to store the Done Navi Voice Output setting and return to the immediately Setting preceding screen. -
Page 35: Screen Adjustment And Setting
Screen Adjustment and Touch Info Setting To make it easier to view the screen, switch between Day and Night based on whether the lights (sidelights, tail lights, license plate light) are on or off. In some vehicles, this receiver may be unable to detect whether lights are on or off. -
Page 36: Switching Between Night Picture And Day Picture
Before Use Main Unit Settings ■ Picture quality adjustment You can adjust the day picture and night picture independently. ● For the Video screen. ■ Switching between night picture and day picture. ● For the Navigation screen and Audio screen. When night picture is displayed, touch ●... -
Page 37: Bluetooth Hands-Free Operation
Before Use Bluetooth Hands-Free Operation Using Bluetooth Hands- ■ Hands-free screen display Free This receiver uses Bluetooth wireless Press technology to enable use of Bluetooth- supported cell phones. Connection with this ● The hands-free screen is displayed. receiver allows you to make calls without ●... -
Page 38: Registering From A Cell Phone
● “Searching...” is displayed. On the cell-phone, enter PIN CODE for this receiver. ● The name of this receiver is ECLIPSE BT. ● The default PIN CODE setting is 1234. ● Perform the cell phone operations with the Device information screen displayed. -
Page 39: Deleting Cell Phone Registration
■ Deleting cell phone registration Select the device name of the cell phone you wish to register Delete a cell phone registered on this receiver. Touch on the Hands-free Select screen. ● Search screen Enter the PIN CODE on the cell phone. -
Page 40: Connecting A Cell Phone
Before Use Bluetooth Hands-Free Operation ■ Connecting a cell phone ATTENTION ● When connection fails, “Bluetooth Connect a cell phone registered on this Connection Failed” is displayed. In this case, receiver. repeat the connection operations. ● Note that you cannot connect unregistered cell phones. -
Page 41: Making A Call
ATTENTION On completion, touch If the vehicle's battery is disconnected (for repairs to the vehicle or for removing this unit), ● A call is made to the entered number. all the Registered cell-phone, phone book and all call history in the memory will be lost. In such a case, redistilling cell-phone in the memory again. -
Page 42: Calling From The Telephone Book
Before Use Bluetooth Hands-Free Operation Select name or telephone number to Select person (name or telephone call from history. number) to call. ● Touch ● Touch to see other names to see other names or telephone numbers. or numbers. Touch , or PQRS WXYZ... -
Page 43: Receiving A Call
■ Receiving a call ATTENTION Refused calls are stored in the incoming call You can receive incoming calls in any source history. mode. When a call arrives, the Calling screen is displayed automatically. ■ Adjusting the ringtone volume When you hear the ringtone, touch CHECK Make adjustments to the ringtone during ●... -
Page 44: Hands-Free Settings
Before Use Bluetooth Hands-Free Operation Auto Answer settings ■ Hands-free settings Start talking five seconds after arrival of You can perform settings for hands-free incoming call. operation on the Phone setting screen. Touch Touch on the Hands-free Setting screen. Ringtone settings For setting to emit the cell-phone ringtones. -
Page 45: Starting Out
Starting Out About GPS Navigation Before Using the GPS Navigation ■ Simple mode Advanced mode The two operating modes of Navigation mainly differ in the menu structure and the number of available features. The controls and screen layouts are the same. ●... - Page 46 Starting Out About GPS Navigation Type Example Description How to use Virtual Alphabetic and Each key is a keyboard alphanumeric touch screen keyboards to switch. enter text and numbers. Type Example Description How to use Touch Touch to Only one touch switch initiate a is required.
-
Page 47: Operation
Operation Navigation Overview Navigation Menu This is the Navigation menu. From here, you can access the following screens. Touch the following switch on map screen: [Menu] Screen Touch switch Description [Map] The Map screen. Find [Find] Select destination (for example an address or a POI) or use the search engine of Navigation for any other reason (for example to look for the phone number of a POI). - Page 48 Operation Navigation Overview Touch switch Description Reference [Map Screen] You can fine-tune the appearance and content of the Map screen. [Route Planning] These settings determine how routes will be calculated. [Navigation] You can control how Navigation behaves during navigation. [Sound] You can adjust the voices of Navigation.
-
Page 49: Quick Menu
■ Quick Menu The Quick menu is a selection of controls that are frequently needed during navigation. It is opened from the Map screen. Touch the following switches on the map: Touch the switch in the Quick menu to start the Map screen immediately. Switches are on when lit up. -
Page 50: Route Menu
Operation Navigation Overview ■ Route menu Save, load and edit your routes. Touch the following switches: [Menu], [Route] Touch switch Description Reference [Route Info] Opens a screen with useful route data. [Itinerary] You can browse the driving instructions that Navigation follows during navigation. You can exclude maneuvers or streets to adjust the route to your preferences. -
Page 51: User Data Management
■ User data management You can manage settings implemented for saved data (Pins, POI, Favorites, History, and Track Logs) and programs. Touch the following switches :[Menu], [Manage], [User Data Management] Touch switch Description [Remove Pins] You can add Pins to locations on the map using the [Place Pin] switch from the Cursor menu(See page 60). -
Page 52: Route Planning Option
Operation Navigation Overview Touch switch Description [Street Names During Street names and POI icons can get in the way on the map during Navigation] navigation. With this switch you can suppress these map elements when Navigation is following your position on the map. If you move the map, both the street names and POI icons reappear immediately. -
Page 53: Road Types Used For Route Planning
Road Types Used for Route Planning: Type Description [Unpaved Roads] Navigation excludes unpaved roads by default: Unpaved roads can be in a bad condition and usually you cannot reach the speed limit on them. [Highways] You might need to avoid highways when you are driving a slow car or you are towing another vehicle. -
Page 54: Navigation Settings
Operation Navigation Overview ■ Navigation settings You can control how Navigation behaves during navigation. Touch the following switches: [Menu], [Settings], [Navigation] Touch switch Description [Keep Position on Road] This feature allows car drivers to always correct GPS position errors by matching the vehicle position to the road network. -
Page 55: Time And Time Zone Settings
Touch switch Description [Units] You can set the distance units to be used by the program. Navigation may not support all the listed units in some voice guidance languages. If you select a measurement unit not supported by the chosen voice guidance language, a warning message will appear. -
Page 56: Menu Settings
Operation Navigation Overview Touch switch Description [Speed Camera Warning] This feature allows you to receive a warning when approaching a Road Safety Camera. You must ensure on your own liability that using this feature is legal in the country where you intend to use it. The options are as follows: ●... -
Page 57: Tmc Settings
■ TMC settings You can set up the connection to the SIRIUS Traffic receiver. Touch the following switches: [Menu], [Settings], [Traffic INFO] ■ Safety Mode settings This feature is available in Advanced mode only. Touch the following switches: [Menu], [Settings], [Warnings], [Safety Mode] ■... - Page 58 Operation Navigation Overview Name Description Function Speedometer Shows the current speed both Touch this field to show it on the graphically and as a number. Map screen in one of the Trip Data fields. Distance Remaining Shows distance remaining to final Touch this field to show it on the destination.
-
Page 59: Trip Computer Screen
Symbol Description This value is not shown on the Map screen. This value appears on the Map screen in the Trip Data area. This is the value at the top. This value appears on the Map screen in the Trip Data area. This is the value in the middle. -
Page 60: Screen Adjustment And Setting
Operation Navigation Overview ATTENTION If the vehicle's battery is disconnected (for repairs to the vehicle or for removing this unit), all the Trip Computer history (Average Speed, Total time, etc) in the memory will be lost. Screen Adjustment and Setting ■... -
Page 61: Map Display
Map Display ■ Present location display Access from the Navigation menu by touching [MAP]. For further information about the Map screen, see “Map screen” on page 75. Navigation displays the route as follows. Symbol Name Description Current GPS position Your present position displayed on the map. Cursor (selected map position) The location selected in the Find menu, or a map point selected by touching the map. -
Page 62: Cursor Menu
Operation Navigation Overview Symbol Name Description Route color The route stands out against the map, both in daytime and night color modes. The active leg of the route is always displayed in a brighter shade than the inactive (upcoming) legs. Active leg of the route The section of the route on which you are driving. - Page 63 Touch switch Description [Info] Opens a new screen showing the address of the Cursor and nearby POIs. [More Options] Opens the full-screen Cursor menu with all the available options. [Set as Destination] Creates a new route with the Cursor as the destination. The previous route (if one exists) is deleted.
-
Page 64: Position Menu
Operation Navigation Overview ■ Position menu When you follow the recommended route on the map (the Cursor is the current GPS position), the Position menu replaces the Cursor menu. It does not contain switches that modify the current route, as the GPS position is not useful as a route point. To open Position, touch [Position]. -
Page 65: Map Menu Operations
■ Map menu operations Position marks on map ● Current GPS position: (See page 59) ● Selected location (Cursor): (See page 60) The following controls help you modify the map view to best suit your actual needs. Most of these controls appear with a single touch of the map, and disappear after a few seconds of inactivity. - Page 66 Operation Navigation Overview Action Touch switch Description Rotating left and right Changes the horizontal view angle of the map in 3D mode. When GPS position is available, Navigation always rotates the map so its top faces your direction of travel (Track-Up orientation). You can turn away from Track-Up with these switches.
-
Page 67: Map Screen Status Information And Hiding Operation
Action Touch switch Description Zoom preset Touch the preset switch once to set the zoom level to a fixed predetermined value. (Advanced mode only) Smart Zoom is disabled. These switches are available in 2D mode. Touch and hold the desired switch to set the zoom value as the current zoom level, or reset to an original value. - Page 68 Operation Navigation Overview Icon Information Details Action If the icon is a static GPS position and an active Touch this area to make picture, route route are available, but Navigation recalculate the calculation is needed. automatic off-route recalculation recommended route. is switched off, and you deviated from the route.
- Page 69 Icon Information Details Action Indicator strip Nothing happens if you touch this area of the ● Track Log recording screen. ● TMC status The following symbols appear in the Indicator strip: Navigation records a Track log when GPS position is available. Track log recording is disabled.
- Page 70 Operation Navigation Overview Icon Description Turn sharp left. Keep left. Continue straight in the intersection. Enter traffic circle. The number of the exit is shown in the circle, but only for the next turn. Enter freeway. Exit freeway. Board ferry. Leave ferry.
-
Page 71: Using The Cursor (At Selected Position)
Icon Type More information Distance information There are distance type values that can be shown. ● Distance remaining to destination ● Distance remaining to next via point ● Current altitude GPS reception quality shows the current accuracy of the position information. Icon Description GPS receiver not connected. -
Page 72: Present Location And Route Tracking
Operation Navigation Overview Touch switch Action [Place Pin] Marks the map with a Pin at the Cursor (available in Advanced mode only). [Routing Methods] Shows the different routes calculated by the available routing methods. Choose the one that best suits your needs (available in Advanced mode only). -
Page 73: Position Determination (Cursor)
■ Position determination (Cursor) If you select a location in the Find menu, or you touch the map when the map control switches are visible, the Cursor appears at the selected point on the map. Navigation displays the Cursor with a radiating red dot ( ) to make it visible at all zoom levels, even when it is in the background of a 3D map view. -
Page 74: Enabling Smart Zoom
Operation Navigation Overview Enabling smart zoom Touch the map to make the map control switches appear, and then touch to enable Smart Zoom. Fine-tuning Smart Zoom Touch the map to make the map control switches appear, and then touch and hold to open the Smart Zoom settings window. -
Page 75: Recording The Travelled Path (Creating A Track Log)
Recording the travelled path (creating a Track Log) Start driving. Touch the following switches: [Menu], [Settings], [Track Logs] Start recording: Touch [Record]. ● You can return to the map and continue driving. Repeat the above steps, then touch [Stop Recording] to stop the recording. ●... -
Page 76: Changing The Color Of A Track Log
Operation Navigation Overview Changing the color of a Track Log Touch the following switches: [Menu], [Settings], [Track Logs] Touch the desired Track Log and then touch one of the color switches. ■ Saving route This feature is available in Advanced mode only. The procedure is explained starting from the Map screen. -
Page 77: Loading Saved Route
■ Loading saved route This feature is available in Advanced mode only. The procedure is explained starting from the Map screen. Touch the following switches: [Menu], [Route], [Load Route] Touch the route you wish to navigate. In the very likely case that the start position of the saved route is different from the current GPS position, you need to confirm whether you want to stop navigating from the current GPS position to use the start point of the loaded route. - Page 78 Operation Navigation Overview...
- Page 79 During navigation, the screen shows route information and trip data (left screens), but when you tap the map, additional switches and controls appear for a few seconds (right screenshot). Most parts of the screen behave as switches. Symbol Name Action Main information.
- Page 80 Operation Navigation Overview Symbol Name Action Return to GPS position (appears when Touch this switch to move the map back to GPS position is available and you have the current GPS position. If the map has moved the map) been rotated in 3D mode, automatic map rotation is also re-enabled.
-
Page 81: About Roads
■ About roads Navigation shows the streets in a in a similar way to paper road maps. Their width and colors correspond to their importance. You can easily tell a freeway from a small street. CHECK If you prefer not to see street names during navigation, turn them off (See page 49). ■... - Page 82 Operation Navigation Overview Touch switch/icon Description This POI group is not shown on the map. This POI group and all its subgroups are shown on the map. This POI group and some of its subgroups are shown on the map. This POI group contains POIs that you saved.
-
Page 83: Itinerary Display
■ Itinerary display The Itinerary is a list of the route events, which are the driving instructions. On the Map screen you can display itineraries by the following methods. ● Touch the area between the Turn preview field where the next maneuver is shown and the Travel data field. -
Page 84: Route Editing
Operation Navigation Overview ■ Route editing This feature is available in Advanced mode only. Touch the following switches: [Menu], [Route], [Edit Route] A list of route points appears with the start point at the top of the list and the final destination at the bottom. - Page 85 Touch any of the fields to see data on the via points starting from the first one through the final destination. This screen includes following data and features: Name Description Function Route Line The upper part of this screen shows your Touch this field to change the planned route as a horizontal line.
-
Page 86: Facility Information, Storage, And Revision
Operation Navigation Overview ■ Facility information, storage, and revision A point of interest (POI) is a location that someone might find useful or interesting. Navigation comes with several thousand POIs included. You can create POIs independently in the application. POI locations are marked on the map with special icons. POI icons are quite large so you can easily recognize the symbol. -
Page 87: Using Keyboard Screen
Using Keyboard Screen You only need to enter letters or numbers in Navigation when you cannot avoid it. You can type with your fingertips on the full-screen keyboards and you can switch between various keyboard layouts, for example ABC, QWERTY, or numerical. Task Description Switching to another keyboard layout, for example... -
Page 88: Navigation Guidance
Navigation Guidance Navigation Guidance You can set up your route in Navigation in several ways: ● if you need a simple route (a route with only one destination and without any intermediate via points), you can select the destination and start navigating to it right away. ●... -
Page 89: Setting From Address
Setting from Address By default, Navigation proposes the country/state and city where you are. If If you know at least a part of the address, this needed, touch the switch with the is the quickest way to select the destination of name of the country on it, and select a the route. -
Page 90: Entering Addresses For Repeating House Number Allocation
Navigation Guidance Navigation Guidance ■ Entering addresses for repeating Touch [<Street Name>]. house number allocation ● Start entering the street name on the On some long roads house numbering is keyboard. restarted at some point. Hence, the same house number can appear twice or even ●... -
Page 91: Entering Address Without Knowing District Or Suburb
■ Entering address without Touch [<Street Name>]. knowing district or suburb ● Start entering the street name on the Long roads can run across several districts or keyboard. suburbs. You may not know what particular house number is located where. In this case, ●... -
Page 92: Selecting From Intersection
Navigation Guidance Navigation Guidance ■ Selecting from intersection Touch [<Street Name>]. Touch the following switches: [Find], ● Start entering the street name on the [Find Address] (Advanced mode). keyboard. ● After entering a couple of characters, the By default, Navigation proposes the names that match the string appear in a list. -
Page 93: Selecting From City Center
■ Selecting from city center Touch [<Street Name>]. The City Center is not the geometric center of ● Start entering the street name on the the city but an arbitrary point the map keyboard. creators have chosen. In towns and villages, it is usually chosen to be the most important ●... -
Page 94: Selecting From Zip Code
Navigation Guidance Navigation Guidance Touch [City Center]. Pick the city from the list. The map appears with the selected Touch [<Street Name>]. point in the middle. From the Cursor menu, touch [Set as Destination] ● Start entering the street name on the (Advanced mode). -
Page 95: Entering Quick Address
Setting from Favorites ■ Entering quick address You can select a location that you have ● When you are entering the name of a city already saved as a Favorite to be your or a street, Navigation only displays those destination. - Page 96 Navigation Guidance Navigation Guidance Select the area in which to search for When the list of results appears, you the POI. can sort the list. ● [Around Address]: The POI will be ● [Order by Name: Sort the list alphabetically searched for around a given address.
-
Page 97: Select From Saved Facility Information Search Criteria
The map appears with the selected ■ Select from saved facility point in the middle. From the Cursor information search criteria menu, touch [Set as Destination] (Advanced mode). The route is then Your can save POI search criteria in the POI automatically calculated, and you can section of the Manage menu. -
Page 98: Search Menu
Navigation Guidance Navigation Guidance Search Menu ■ Display route (in accordance with screen) Select the route destination. Touch the following switches: [Menu], [Find] The map can be moved and scaled to show the whole line of the route. You do not need Touch switch Description Reference... -
Page 99: Route Search And Advanced Search
Route Search and ■ Creating multiple destinations Advanced Search (adding intermediate points) Navigation calculates the route based on A multi-point route is created from a simple your preferences. route. Hence, the route must be non-active at first. One of the ways of expanding the route Route calculation methods is to keep the destination, and to add via ●... -
Page 100: Creating Multiple Destinations (Adding New Destination)
Navigation Guidance Navigation Guidance You have the following options: ■ Creating multiple destinations (adding new destination) Touch switch Action The selected point moves up in A multi-point route is created from a simple the list (becomes a via point to be reached earlier). -
Page 101: Deleting An Intermediate Point From The Route
About Destination ■ Deleting an intermediate point History from the route The simplest way to delete the next route ■ Managing history point (next via point) is to touch the Turn Preview field ( ) of the Map screen, then You can manage the list of recently used touch [Skip Next Via] to open the Route locations. -
Page 102: Managing Saved Routes
Navigation Guidance Navigation Guidance When Track Log details are shown: ■ Managing saved routes Touch switch Description You can manage previously saved routes. Switch with the Opens a Keyboard screen to let Touch following switches: [Menu], name of the you rename the Track Log. [Manage], [Saved Routes] Track Log Touch this switch to hide the... -
Page 103: Demonstration (Demo)
Demonstration (Demo) A simulation drives you through the route, following the driving instructions. You can choose between a simulation at high speed or at normal driving speed. For example, using route demonstration, you can check the bridges planned by Navigation. You can then avoid any bridges you do not wish to cross. -
Page 104: Storing Locations
Navigation Guidance Storing Locations Managing Favorites You can manage the list of your Favorites. Touch following switches: [Menu], [Manage], [Favorites] Touch switch Description Switch with Opens the selected Favorite for name of editing. Favorite Deletes the selected item from the list of Favorites. [Clear All] Clears the list of Favorites. -
Page 105: What To Do When
Navigation Guidance What to Do When... About GPS Satellite Quality and Status Touch and the GPS switch to open the GPS Data screen and check the GPS reception status. Icon Color Name Description Green GPS position Navigation is connected to the GPS quality indicator receiver and able to obtain GPS position information in 3D. -
Page 106: About Speed Warnings
Navigation Guidance What to Do When... Icon Color Name Description Coordinates Your current GPS position in WGS84 format. Status bars for Dark bars are for the yellow and lit bars the satellites are for the green satellites. The more satellites your GPS tracks (the green ones), the better is your calculated position. -
Page 107: Camera Warning
■ Camera warning The warning for Road Safety Cameras can be turned on in Warning Settings. Touch the following switches: [Menu], [Settings], [Warnings], [Speed Camera Warning] When you approach a Road Safety Camera with the warning enabled, the following happens. ●... -
Page 108: Road Safety Camera Directions
Navigation Guidance What to Do When... Symbol Type Description Section control These speed cameras work in pairs, and do not measure your current speed but your average speed between the two speed cameras. Both identify your car and record the exact time you pass them. They use the difference between the two points in time to calculate your average speed. -
Page 109: Optional Features
Optional Features Rear View Camera Operations If the separately sold rear view camera is installed, you can play the rearward status on the display on shifting into the back gear. CAUTION The rear view camera plays a mirror-reversed video image to give the same view as a rear or side mirror. -
Page 110: Imaging With The Rear View Camera
Optional Features Rear View Camera Operations ● When you change to back gear, the screen will turn white and then the image will quickly return to the screen. ● If the camera unit is exposed to strong light such as sunlight or headlights, a vertically-oriented white zone may appear. - Page 111 ATTENTION ● The image range displayed on the screen may vary depending on vehicle or road surface conditions. ● The image range displayed on the screen is limited; therefore, cannot display something that is located near both ends of the bumper or under the bumper. ●...
-
Page 112: What To Do When
What to Do When... Display of Connection Status Information You can check connection status information for the connections between this receiver and the vehicle. These connections include those for GPS information and parking signals. Display of Connection Item Content GPS information Status Information being received. -
Page 113: Accuracy And Error
What to Do When... Accuracy and Error About measurement accuracy GPS satellites are managed by the US Department of Defense and have a very high accuracy. However, when multipath effects are caused by reflections from buildings and the like, errors may occur. -
Page 114: About Errors In Present Location Display
What to Do When... Accuracy and Error About Errors in Present Location Display Since this receiver uses information from the GPS satellite signals to establish the present location, and the measurements from each of these include some error, the displayed present location may not match your actual position. - Page 115 The present location appears on a When turning on a road forking When making a turn, the present road running parallel to the road into two roads making a "Y" shape, location appears on the road just taken. the present location appears on before or after the road turned on.
-
Page 116: About Road And Place-Name Data
What to Do When... Accuracy and Error About Road and Place-Name Data There is always a possibility that roads and place-names will be modified after creation of the map data, in which case the provided names will differ from the actual names. About Route Guidance When having turned on an When searching for a route, the... - Page 117 While providing guidance on When searching for a route, the where you are headed, several route display may not appear in geographical names may be time for the next turn. indicated. Drive following the actual traffic regulations. ● When you are driving at high speed, it may take longer to perform the search. ●...
-
Page 118: Starting Out
Starting Out Before Use CAUTION ● Be very careful and pay full attention to safety when operating the audio controls while driving. Otherwise accidents may occur. Also, be sure to set the volume so that you can still adequately hear sounds outside the vehicle. Improper use may result in a traffic accident. - Page 119 ● Do not insert any objects other than discs into the disc slot. Damage could result. ● Be careful not to get your fingers or other objects caught behind the monitor when it is being retracted into place. Interference can cause an injury or damage the main unit. ●...
-
Page 120: About Discs
Starting Out Before Use About Discs ATTENTION ● In cold or rainy weather, just as the interior glass surface becomes fogged, dew (water condensation) may also settle on the receiver. When this occurs, disc playback may become intermittent or impossible. Dehumidify the air in the vehicle for a while before resuming playback. ●... -
Page 121: Handling Discs
● Do not use a CD and a See Through disc having a transparent or semi-transparent recording area as they may fail to load or unload or play their contents. ● A Copy Control CD (CCCD) may not be played as it does not meet the official CD Standard. - Page 122 Starting Out Before Use ■ Brand new CDs ● You may notice that some brand new discs are rough around Rough edges the center hole or outside. In this case, remove burrs or flakes Ballpoint pen around the edge using the side of a ballpoint pen before using a new disc.
-
Page 123: Switching Audio Source
Operation Switching Audio Source Switching the Audio Stopping audio mode Source Press Press Touch Audio Off Select the Audio mode you wish to use. ● Touch again to receive the Audio Off station you were receiving, the music you were playing or the video you were playing when you stopped the radio. -
Page 124: Source Operations Screen
Operation Source Operations Screen The Source operations screen appears as follows. ● Radio (AM) screen ● Satellite radio (SIRIUS) screen (optional) ● Radio (FM) screen ● Bluetooth audio screen ● HD Radio screen (optional) ● CD Player screen ● Satellite radio (XM) screen (optional) ●... - Page 125 ● DVD screen ● USB screen ● VTR screen ATTENTION Operation screen will cancelled automatically when no operation is performed for 6 seconds in the visual operation screens) DVD, iPod Video, and VTR. ● iPod screen (optional)
-
Page 126: Volume Control
Operation Volume Control Main Volume Control Press the VOL switch. ● (Right-hand side) Increases volume (Left-hand side): Decreases volume ● Press for at least one second will continue to increase the volume. Press for at least one second will continue to decrease the volume. aVolume switch ATTENTION ●... -
Page 127: Adjusting Sound Quality
Operation Adjusting sound quality You can set the sound quality and adjust the sound balance and the like. Display of Audio Settings Adjusting audio balance Screen You can adjust the forward and back, and left and right balance. When you switch to the Audio settings screen from any of the Audio operations screens, the following operations are available. -
Page 128: Sub-Woofer Settings
Operation Adjusting sound quality Sub-Woofer Settings ■ Switching the phase You can adjust the audio output when a sub- The sound outputted from the sub-woofer woofer is connected. includes the same frequency bands as the sound from the front/rear speakers, and cancellation can occur under some in-vehicle ■... -
Page 129: Setting Low Pass Filter
■ Setting low pass filter The low pass filter cuts out frequencies higher than the set frequency (high-band frequencies) and allows lower frequencies (low-band frequencies) to pass. Touch ● After completing the setting, touch Done to store the setting and return to the immediately preceding screen. -
Page 130: Setting Source Volume Control
Operation Adjusting sound quality Setting Source Volume Control You can set a volume difference for each audio mode. The differences between the volume of the FM mode in the initial state (initial value: 40), which is used as reference, and the volume levels set for each audio mode are stored. -
Page 131: Adjusting Sound Quality
Adjusting Sound Quality Touch You can adjust sound quality in the low band, the medium band and the high band. ● When you touch and hold, the value changes continuously but stops at the center value. Touch again to ■ Adjusting sound quality continue to change the value. -
Page 132: Use A Preset Sound Quality
Operation Adjusting sound quality ■ Use a preset sound quality Touch EQ Setting Touch (Low-band Power enhancement), (High-band Sharp enhancement), (Mid-band Vocal enhancement), or (User Custom preset value). ● To reset the sound quality, touch Flat... -
Page 133: Screen Settings
Operation Screen Settings proportions) and black side edges. Switching Between Screen Modes CHECK You can switch the screen mode from DVD, iPod Videos, or VTR settings screen. Opens Video settings screen. ● Wide1 A picture with a 3 (vertical) by 4 (horizontal) ●... -
Page 134: Audio Operations
Audio Operations Using Radio Using Radio Tune a Desired Station. CAUTION If the vehicle's battery is disconnected (for repairs to the vehicle or for removing the main unit), all the stations held in the memory will be lost. In such a case, set stations in the memory again. -
Page 135: Auto Tuning
Selecting Radio Band ■ Auto Tuning CHECK Press and hold for at least 1 second. You can switch the receiving band of FM radio when in FM radio mode. ● When a station having the frequency closest to the one shown on the screen is Touch Band tuned, the auto tuning stops. -
Page 136: Saving Station In Memory
Audio Operations Using Radio Saving Station in Memory ■ Automatic saving You can save a radio station in memory in the IMPORTANT auto or manual mode. ● You can select a station by simply touching a preset switch (any of [1] to [6]). The ■... -
Page 137: Using Hd Radio
Audio Operations Using HD Radio Using HD Radio ATTENTION ● When an HD Radio tuner is connected and When the optional HD Radio tuner is receiving digital station, “DIGITAL” connected you can receive HD Radio. appears. ● When an HD Radio tuner is connected, is enabled. -
Page 138: Select Desired Station
Audio Operations Using HD Radio Select Desired Station ATTENTION Auto tuning may fail in regions where the CAUTION received signal is weak. If the vehicle's battery is disconnected (for ■ Selecting from preset switch repairs to the vehicle or for removing the main unit), all stations in memory will be lost. -
Page 139: Saving Station In Memory
Saving Station in Memory ■ Automatic saving You can save a radio station in memory in the IMPORTANT auto or manual mode. ● You can select a station by simply touching a preset switch (any of [1] to [6]). The ■... -
Page 140: Displaying Title Information
Audio Operations Using HD Radio Displaying title Obtaining Tag information Information You can display album names, titles, artist When Tag information is available for a track names and genres during broadcasts. during a broadcast, you can acquire it. Touch Touch Title ●... -
Page 141: Receiving Sub-Channel Broadcasts
Receiving Sub-channel Broadcasts You can receive a sub-channel broadcasts, when they are available from the station being received. Touch Sub-ch ● Touch repeatedly to cycle through the sub- channels. -
Page 142: How To Use Sirius Satellite Radio
Audio Operations How to Use SIRIUS Satellite Radio Using SIRIUS satellite Listening to SIRIUS radio Satellite Radio When an optional SIRIUS satellite radio tuner With SIRIUS satellite radio, over 100 connected, SIRIUS satellite radio channels are available including music, broadcasts can be received. news, and entertainment programs. -
Page 143: Checking Sirius Id
Checking SIRIUS ID Changing SIRIUS Band The SIRIUS ID number is a 12-digit numerical code that is assigned each time Touch Band the SIRIUS satellite radio tuner is connected. ● The BAND changes as follows. Touch SIRIUS1 SIRIUS2 SIRIUS3 Direct SIRIUS4 SIRIUS1 …... -
Page 144: Manually Selecting Channel
Audio Operations How to Use SIRIUS Satellite Radio ■ Selecting a channel by entering it Touch the category you wish to listen directly. ● If there are more than 6 categories, it is possible to switch the list of categories by Touch Direct touching... -
Page 145: Saving Channels
Saving Channels Selecting Preset Channel Touch one of the touch switches, [1] to IMPORTANT [6], that appear on the display. If the vehicle's battery is disconnected (for repairs to the vehicle or for removing the ● The station preset to the selected touch main unit), all channels in memory will be switch is received. -
Page 146: Displaying Information About Current Broadcast
Audio Operations How to Use SIRIUS Satellite Radio Displaying Information about Current Broadcast When receiving a SIRIUS broadcast, you can display information about current broadcast, such as the channel, category, track title, artist, and channel number. Touch Title Touch to return to the Radio Preset preset screen. -
Page 147: How To Use Xm Satellite Radio
Audio Operations How to Use XM Satellite Radio Using XM Satellite Radio Listening to XM satellite radio When an optional XM satellite radio tuner is connected, XM satellite radio broadcasts can With XM satellite radio, over 100 channels be received. are available including music, news, and entertainment programs. -
Page 148: Checking Radio Id
Audio Operations How to Use XM Satellite Radio Checking RADIO ID Changing XM Band The RADIO ID number is an 8-digit numerical code that is assigned each time the XM Touch Band satellite radio tuner is connected. ● The BAND changes as follows. Touch [XM1] [XM2]... -
Page 149: Manually Selecting Channel
■ Selecting a channel by entering it Touch the category you wish to listen directly. ● If there are more than 6 categories, it is possible to switch the list of categories by Touch Direct touching ■ Manually selecting channel Enter a channel. -
Page 150: Saving Channels
Audio Operations How to Use XM Satellite Radio Saving Channels Selecting Preset Channel Touch one of the touch switches, [1] to IMPORTANT [6], that appear on the display. If the vehicle's battery is disconnected (for repairs to the vehicle or for removing the ●... - Page 151 Touch to return to the Radio Preset preset screen.
-
Page 152: Using Cd Player
Audio Operations Using CD Player Using CD Player Press Touch ● The disc starts to play. a Track UP/DOWN, Fast UP/DOWN button b MENU button c Scan switch d Random switch ATTENTION e AV button ● If track titles and other data are recorded in the CD-Text format, you can display them. -
Page 153: Fast Forwarding/Rewinding
Fast Forwarding/ Repeating Same Track Rewinding Touch Repeat You can fast forward or rewind the track currently being played. ● The track repeats. Press and hold for at least 1 ● When you touch , the track Repeat second. repeats until this function is cancelled. Touch again to cancel the repeat Repeat... -
Page 154: Using Mp3/Wma Player
Audio Operations Using MP3/WMA Player Using MP3/WMA Player Playing MP3/WMA File When you insert a CD-R/RW disc containing an MP3/WMA file into disc slot, the file is played. CAUTION ● Do not press the [e(OPEN/EJECT)] button when you are inserting a CD into disc slot. -
Page 155: Selecting Desired Folder
Selecting desired folder With a CD-R/RW inserted, press You can select a desired folder from the disc. ■ Selecting from folder list Touch ● The disc starts to play. Touch List ● The usual playing order is . (See page 158) ●... -
Page 156: Select From Linked Folders
Audio Operations Using MP3/WMA Player ■ Select from linked folders Select the folder you wish to use. ● When the following screen is displayed, Press touch to change between items. ● : Goes to previous folder and plays ● Touch to return to the immediately the first track in this folder. -
Page 157: Select From Linked Files
Finding Desired Music ■ Select from linked files File Press IMPORTANT ● To continue playing a desired track or file, ● Right: Advances to the next file. turn the Scan function OFF. Left (Press once.): Returns ● The entire disc is scanned once, and beginning of the playing file. -
Page 158: Repeating Music File
Audio Operations Using MP3/WMA Player Repeating Music File Random Play IMPORTANT IMPORTANT When you have selected any of scan, folder When you have selected any of scan, folder scan, repeat, folder repeat, random or folder scan, repeat, folder repeat, random or folder random, a corresponding message of Scan, random, a corresponding message of Scan, F.Scan, Repeat, F.Repeat, Random or... -
Page 159: About Mp3/Wma
About MP3/WMA MP3 (MPEG Audio Layer 3) is a standard format for audio compression. By using MP3, a file can be compressed to one-tenth the size of the original. WMA (Windows Media™ Audio) is the Microsoft's voice compression technology. WMA files can be compressed to a size smaller than MP3 files. -
Page 160: About Id3/Wma Tags
Audio Operations Using MP3/WMA Player ■ About ID3/WMA tags In MP3/WMA files, you can enter textual attribute information known as ID3 tag/WMA tags and save information such as track titles and artist names. This receiver supports ID3v.1.0 and ID3v.1.1 tags. This receiver supports the ISO 8859-1 codes only. -
Page 161: About File Names
● Maximum number of characters for folder and file names: 30 characters (including delimiter “.” and 3 characters of file extension) for MP3, but 15 characters (including delimiter “.” and 3 characters of file extension) for WMA. ● Supported characters for folder and file names: A to Z, 0 to 9, and underscore (_) ●... -
Page 162: Multi-Sessions
Audio Operations Using MP3/WMA Player ■ Multi-sessions Multi-sessions are supported and CD-R/RW with recorded MP3/WMA files can be played. When written with Track at once, however, finalize the disc with session close or write protect. ■ About playing MP3/WMA When you load a disc with MP3/WMA files, the system first checks all files recorded on the disc. -
Page 163: Converting Music Cd Into Mp3/Wma Files
■ Converting music CD into MP3/WMA files Prepare a PC and a commercially available MP3/WMA encoder (conversion) software (some of them are free). Load a music CD on the PC's CD-ROM drive and compress the music CD by following the procedure of MP3/WMA encoder software. MP3/WMA-format music data files are created. -
Page 164: Using Usb Music File Player
Audio Operations Using USB Music File Player Using USB Music File Playing USB Music Files Player CAUTION This receiver can play music files stored in a Connect the USB cable correctly so that it USB memory. Only MP3/WMA playback is does not interfere with safe operation of the available. -
Page 165: Selecting Desired Folder
Selecting Desired Folder ■ Select from linked folders You can select a desired folder from the USB memory. Press ■ Selecting from folder list ● : Goes to folder one level higher and plays the first track in this folder. : Goes to folder on level lower and Touch List... -
Page 166: Selecting Desired Music File
Audio Operations Using USB Music File Player Selecting Desired Music Touch the file you wish to play. File ● This plays the selected music file. You can select a track you want to play. ● When the following screen is displayed, touch to change between ■... -
Page 167: Fast Forward/Rewind
Fast Forward/Rewind Touch to perform a scan. Scan Touch and hold for at least 1 second to You can fast forward/rewind the track perform a folder scan. currently being played. ● Scan: Plays first 10 seconds of every file in the same folder layer as the file being Hold down for 1 or more... -
Page 168: Random Play Of Music Files
Audio Operations Using USB Music File Player ● Mass memory support: Random Play of Music USB mass storage (such as an external Files HDD) is supported. It will perform Random playback by ■ Supported MP3 file standards touching , and F Random Random playback by touching it for over 1 ●... -
Page 169: Format Of Usb Memory
■ Format of USB memory The following explains the definitions of these standards. ● Maximum number of directory layers: 8 layers ● Maximum number of characters for file names: Up to 254 characters (Total of folder name, file name, “.”, and 3-character file extension) ●... -
Page 170: Visual Operations
Visual operations Before Using the DVD Player This receiver can play high quality images and high quality digital sound of DVD videos. Also, you can select any of languages (such as dubbing and subtitles) recorded on the DVD by switching the video and audio channels. If the same scene is recorded in different angles, you can select an angle and play the video in the desired angle. -
Page 171: Discs
Discs ■ Types of Playable Discs This equipment conforms to NTSC color television methods, so please use discs that display “NTSC” on the disc or package. This equipment cannot play discs using color television methods other than NTSC (such as PAL, SECAM). Type and mark of playable disc Size/playing side Max. -
Page 172: Mark Indicated On Disc
Visual operations Before Using the DVD Player ■ Mark Indicated on Disc The following table shows the marks that are indicated on DVDs or packages. Mark Meaning Indicates the number of audio tracks. Indicates the number of subtitles. Indicates the number of angles. Indicates the image aspect ratio (ratio between the height and width of the TV screen) able to be selected. -
Page 173: Products Equipped With Macrovision
Products equipped with Macrovision This receiver is equipped with copyright protection technology that is protected under U.S.A. patents and other intellectual property rights, which are held by Macrovision Corporation or other rights holders. Using the copyright protection technology requires the permission of Macrovision Corporation, and the technology must be used only in general households and other limited viewing environments, except when expressly permitted by Macrovision Corporation. -
Page 174: Using The Dvd Player
Visual operations Using the DVD Player Using the DVD Player Watching a DVD Video Insert a DVD into the disc slot, and it will start IMPORTANT playing. To ensure driving safety, you cannot watch a video while driving. Press CHECK You can watch a video on a DVD only when Touch you have stopped your vehicle and applied the... -
Page 175: Video Operations
Fast Forwarding or Rewinding Using Video Operations Touch Switches IMPORTANT Hold down for 1 or more ● The touch switches and other operation seconds. icons are shown approximately 6 seconds. Touching the screen will display them ● It will fast forward (rewind) the video until again. -
Page 176: Stopping A Video
Visual operations Using the DVD Player ■ Stopping a Video Touch , and select the play-back menu. Touch Touch Enter Disc Menu Operations ATTENTION You can operate the menu recorded on the ● Display menu by touching Menu disc. Top Menu ●... -
Page 177: Finding By Title Number
■ Finding by Title Number ■ Finding by chapter number Touch Touch Search Next Touch , or Touch and enter the title number. ● If you touch , the title number is decremented or incremented by 1. ● If you touch , the title number is decremented or incremented by Touch... -
Page 178: Changing The Touch Switch Display
Visual operations Using the DVD Player ■ Relocating the Touch Switch Touch , or , and enter the menu number. Display ● If you touch , the menu number is decremented or incremented by Touch Next ● If you touch , the menu number is decremented or incremented by Touch... -
Page 179: Changing The Screen Display And Audio Mode
Changing the Screen Touch Change angle Display and Audio Mode ● Each time you touch , the Change angle You can change the subtitle language, audio angle number is changed, and the angles language, or display angle of a video to be recorded on the disc are toggled in played. -
Page 180: Changing The Audio Language
Visual operations Using the DVD Player ■ Changing the Audio Language Touch Subtitle If the target disc supports multiple audio languages, you can change them while playing. IMPORTANT ● Depending on the disc, it may only be possible to change audio languages from the top menu. -
Page 181: Switching Dvd Setting Display
Touch Touch Change audio Wide ● Each time you touch , the Change audio audio number is changed, and the audio languages recorded on the disc are toggled in sequence. Touch Normal Wide1 Wide2 ● Normal The screen is shown with the 3 (vertical) Switching DVD setting by 4 (horizontal) aspect ratio (normal TV display... -
Page 182: Dvd Player Setting
Visual operations Using the DVD Player DVD Player Setting If you touch each touch switch, you can configure the following setting. You can pre-specify the play-back audio mode or the language used to display subtitles or menus. You can also configure settings to display or hide the multi-angle mark or specify the parental screening level. -
Page 183: Specifying The Audio Language
Entering the Code ■ Specifying the Audio Language Touch on the preferential You can watch the play-back video in the Other audio language setting screen. desired language. Touch on the initial Audio Language setting screen. Enter the desired language code. ●... -
Page 184: Specifying The Subtitle Language
Visual operations Using the DVD Player Entering the Code ■ Specifying the Subtitle Language Touch on the preferential You can view the play-back video in the Other subtitle language setting screen. desired subtitle. Touch on the initial setting Sub Title screen. -
Page 185: Specifying The Menu Language
Entering the Code ■ Specifying the Menu Language Touch on the menu language You can specify the language to display Other setting screen. menus recorded on the disc. Touch on the initial Menu Language setting screen. Enter the desired language code. ●... -
Page 186: Setting Display Of Multi-Angle Mark
Visual operations Using the DVD Player ■ Setting display of multi-angle Touch the number digit by digit to enter the code number. mark ● If the code number is omitted, “----” is You can configure to display or hide the multi- displayed in the upper field. -
Page 187: Switching The Video Output
■ Switching the Video Output ATTENTION ● The code number is necessary. If a number is not entered, setting of viewer restriction will not be possible. Touch Video Out ● Once a code number is specified, you must enter it when using this item next time and after. -
Page 188: Language Code List
Visual operations Using the DVD Player Language Code List These codes are used to specify the language for audio tracks, subtitles and on-screen menu displays. Code Language Code Language Code Language Japanese Hausa Quechua 1001 0801 1721 English Hindi 0514 0809 1813 Rhaeto-Romance... -
Page 189: Using The Vtr
Visual operations Using the VTR Using the VTR Playing the VTR You can watch a video by connecting a commercially available VTR. You cannot, Press however, connect the iPod cable (video line) and VTR together. Touch IMPORTANT To ensure driving safety, you cannot watch a ●... -
Page 190: Changing The Vtr Setting Screen
Visual operations Using the VTR Changing the VTR Setting Screen Touch Wide Touch Normal Wide1 Wide2 ● Normal The screen is shown with the 3 (vertical) by 4 (horizontal) aspect ratio (normal TV screen size) and side edges are black. ●... -
Page 191: How To Operate Portable Audio Devices
(iPC- ● If this receiver does not support the 709). language used in iPod, album names, ● See the ECLIPSE Website (http:// titles, and artist names are displayed as www.eclipse-web.com/us/ blank. ipodcompatibility/index.html) for details on ●... -
Page 192: Fast Forward/Rewind
How to operate portable audio devices ® Using the iPod Player Selecting the Desired Press Music or Video File You can select a desired song or video. Touch Press ● Playback will begin. ● To the right: Advances to the next file. To the left: Returns to the beginning of the file being played. -
Page 193: View The List Of Playing Back
To select a track or program to play, Touch the name of the music file to be touch Playlists Artists Albums played. , or Podcasts Genres ● This plays the selected music file. ● This displays the list screen of the selected ●... -
Page 194: Setting To The Ipod Video Mode
How to operate portable audio devices ® Using the iPod Player Setting to the iPod Video Touch on the category to view. Mode ● Touch and the menu screen is Menu You can select and play a desired video file displayed. -
Page 195: Pausing
Repeatedly Playing the Touch on the video file to view. Same Music File ● This plays the selected video file. Touch Repeat ● Page will switch by touching if there is next page. ● This repeatedly plays the currently played ●... -
Page 196: Random Play Of Music Files
How to operate portable audio devices ® Using the iPod Player Random Play of Music ■ Listen to an album randomly Files The selected album can be played back randomly. However, the music files in the ■ Listen randomly from the list that album will be played back in order from the is playing beginning. -
Page 197: Listen All Music Files Random
■ Listen all music files random All music files can be played back randomly. Touch Shuffle All ● Once you touch , the random Shuffle All play continues until you cancel it. Touch again to cancel the random Shuffle All play. -
Page 198: Using Bluetooth Audio
How to operate portable audio devices Using Bluetooth Audio Using Bluetooth Audio ■ Registration of portable devices A Bluetooth compatible portable audio player Register a portable device to this receiver. (“portable device” hereafter) can be used as Portable devices can be registered in two a source for this unit by utilizing the Bluetooth ways, from the portable device, or by wireless communication technology. -
Page 199: Register By Searching For A Portable Device On This Receiver
Register by searching for a portable device on this receiver Touch Allow Connect Press Touch Bluetooth Audio On the portable device, enter PIN CODE for this receiver. ● The default PIN CODE setting is 1234. ● Perform the portable device operations with Device information... -
Page 200: Connection Of The Portable Device
How to operate portable audio devices Using Bluetooth Audio ■ Connection Select the device name of the portable portable device you wish to register device Connect a portable device registered on this receiver. Press Touch Bluetooth Audio Enter the PIN CODE on the portable device. -
Page 201: Cancelling A Portable Device Connection
■ Cancelling ■ Listening to the portable device portable device connection. Press Touch Bluetooth Audio a Random switch b File UP/DOWN, Fast UP/DOWN button c Repeat switch d MENU button e Play switch f AV button Touch Disconnect g Stop switch Press Touch Bluetooth Audio... -
Page 202: Stop The Playback
How to operate portable audio devices Using Bluetooth Audio ■ Selecting a Desired Music Touch ● Start the playback of the connected Press portable device. ● Right: Advances to the next music. Left (pressing once): Returns to the beginning of the music being played. Left (pressing more than two times): Returns to the previous music. -
Page 203: Random Play
■ Random Play Touch Random ● All titles of the Bluetooth Audio are played in random order. ● When you touch , the random Random play continues until you cancel it. When you touch again, the Random random play is cancelled. -
Page 204: About The Steering Wheel Switches
Others About the Steering Wheel Switches On vehicles equipped with steering wheel switches, these easy-access switches can be used to perform the main audio and other operations. ● For details of the steering wheel switch, please contact your local dealer. ●... - Page 205 ● Touch to return to the immediately Touch until the Command Store preceding screen. Select screen is displayed. ● Touch to return to the immediately preceding screen. Assign the desired functions to the steering wheel switch buttons by repeating Steps 6 through 7. Touch the command you wish to set.
-
Page 206: Compatibility With Steering Wheel Switches
Others About the Steering Wheel Switches Compatibility with Steering Wheel Switches The table below shows the compatibility between the steering wheel switches and this receiver. (Switches other than (u) and (d) are available for VTR operation.) Operation Switch Name Function Explanation of operation Common... - Page 207 Operation Switch Name Function Explanation of operation CD Player Track selection ● Selects the next track Press (u) or (d) briefly to Operations switches or previous track or select the next or previous beginning of the track. current track. Press and hold (u) or (d) ●...
-
Page 208: Necessary Information
Reference Necessary Information If the Following Messages Appear If the following messages appear, check the status again, referring to the cause and action. Message Cause Action In CD/MP3 WMA/DVD mode No DISC DISC is not inserted. Insert the DISC. The loaded disc is dirty or upside down. - Page 209 Message Cause Action Adjust to sub channel that can be SPS CH OFF Cannot receive sub channel received. Tag information is stored as Please wait. Storing Tag data enabled Store success Please wait. Storing of Tag information was success Tag **/50 Storage full Number of stored memories of Connect the iPod and transfer the...
- Page 210 Reference Necessary Information Message Cause Action Try receiving the signal again in Displayed when the XM satellite No signal the place where there are no radio signal is lost (during access) obstacles. Displayed when the XM channel Off air you are tuned to is not currently Tune to channels currently on air.
-
Page 211: When You Think There Is A Malfunction
When You Think There Is a Malfunction A slight difference in operation may be mistaken for a malfunction. Please check the items in the following table first. If the unit does not work, even after the appropriate remedial action has been taken, please contact your dealer. - Page 212 * Depending on your mobile phone, the mute function may not work correctly. If it does not, press on the main unit. Refer to the ECLIPSE Web site (http://www.eclipse-web.com) for details on applicable phone models.
-
Page 213: Glossary
Reference Glossary Please read the descriptions for following terms to enjoy more. ● GPS (Global Positioning System) GPS is a system to detect current location (latitude, longitude, altitude) by receiving radiowaves from normally 4 or more, or 3 in some cases, GPS satellites orbiting 21,000 km over the Earth. -
Page 214: Specifications
Reference Specifications <GPS antenna> Dimensions 34 (W) × 13.2 (H) × 38 (D) mm Weight approx. 25 g (Excluding cables and connectors) Power supply voltage 4.5 +/-0.5(V) Power consumption 10 to 30 (mA) Usage temperature -30 to 80 (°C) Storage temperature -40 to 100 (°C) <Display section>... - Page 215 <USB memory section> USB Interface 1.1/2.0 (support) Frequency Response 20Hz to 20,000Hz ±3dB S/N Ratio (A-weighted) 75 dB <Bluetooth> Compatible Bluetooth Ver.2.0 Compatible Profile HFP (Hands Free Profile) Ver.1.5 OPP (Object Push Profile) Ver.1.1 A2DP (Advanced Audio Distribution Profile) Ver. 1.0 AVRCP (Audio/Video Remote Control Profile) Ver.1.0 <Common component>...
Need help?
Do you have a question about the AVN76D and is the answer not in the manual?
Questions and answers