Table of Contents
Advertisement
Quick Links
DIGITAL VOICE
RECORDER
VN-741PC
USER MANUAL
Thank you for purchasing an Olympus digital voice recorder.
Please read these instructions for information about using the product
correctly and safely.
Keep the instructions handy for future reference.
To ensure successful recording, we recommend that you test the record
function and volume before use.
EN
1
2
3
4
5
6
Advertisement
Table of Contents

Related Manuals for Olympus VN-741PC


Summary of Contents for Olympus VN-741PC
-
Page 1: Table Of Contents
Menu Use with a PC Other information USER MANUAL Thank you for purchasing an Olympus digital voice recorder. Please read these instructions for information about using the product correctly and safely. Keep the instructions handy for future reference. To ensure successful recording, we recommend that you test the record... - Page 2 Table of contents Names of parts ............4 3 Playback Recorder ................4 Display (Normal mode) .............5 Playback ..............24 Display (Simple mode) ............6 Basic playback procedure ..........24 Fast-forwarding ..............25 1 Getting started Rewinding ..............25 Skipping to the beginning of a file .........26 Setup ..............
- Page 3 Table of contents LCD/Sound menu [LCD/Sound Menu] ......43 Indications used in this manual Adjusting the contrast [Contrast] ........43 Setting the LED indicator light [LED] .......43 NOTE Turning beeping sound ON/OFF [Beep] ......43 Changing the display language [Language] ....43 Describes precautions and operations that Device menu [Device Menu] ........44 should be absolutely avoided in using the Setting the time/date [Time &...
-
Page 4: Names Of Parts
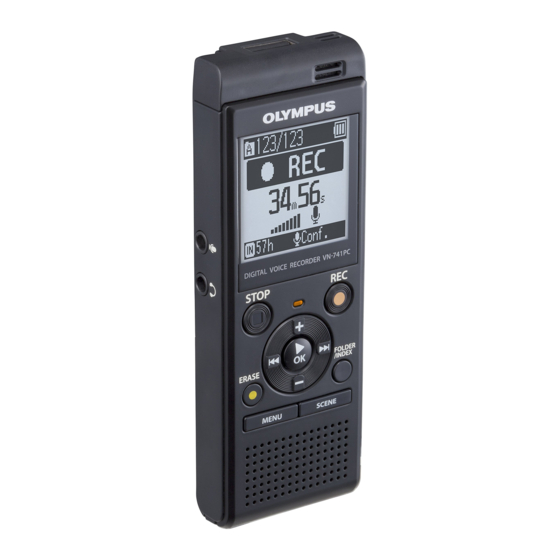
Names of parts Recorder & 1 USB connector $ + button 2 Display % 9 button 3 LED indicator light (LED) ^ `OK button 4 STOP ( 4) button & – button 5 ERASE button * Stand 6 MENU button ( USB connector slide lever 7 Built-in speaker ) Microphone jack ( ) -
Page 5: Display (Normal Mode)
Names of parts Display (Normal Mode) During recording mode During stop mode or playback mode 1 File name 7 Meanings of indicators shown in indicator display area 2 Battery indicator Rec Scene: 3 Folder indicator, Current file ]: Dictation number in folder/Total number ]: Meeting of recorded files in folder and file ]: Conference... -
Page 6: Display (Simple Mode)
Names of parts Display (Simple Mode) During recording mode During stop mode or playback mode 1 Folder indicator, Current file 7 File length (During stop mode), number in folder/Total number Playback position bar indicator of recorded files in folder and file (During playback mode) lock indicator 8 Rec Scene... -
Page 7: Getting Started
Getting started Setup After unpacking the voice recorder, follow the steps below to have it ready for use. Getting Inserting the battery started Getting Turning the power ON started Getting Setting the time/date started Set the voice recorder’s clock for use with file management. Getting Selecting the mode started... -
Page 8: Inserting The Battery
Setup Inserting the battery Before using the voice recorder, insert the battery in the battery compartment of the voice recorder. Slide open the battery cover Slide the battery cover while pressing down on it. completely closed. Insert AAA batteries, making sure to place the positive and negative terminals correctly. -
Page 9: Turning The Power On
Setup Turning the power ON Setting the time/date Press the 9 or 0 button to Slide the POWER switch to the [ON] position. select the item to set. Press the + or – button to change the number. • To change the setting of another item, press the 9 or 0 button to move the blinking cursor, then press the + or –... -
Page 10: Selecting The Mode
Setup Selecting the mode Press the + or – button to change the mode. [Normal Mode]: This is the standard mode in which all functions are available. [Simple Mode]: This mode lists frequently used functions. Displayed text becomes larger for easier viewing. Press the `OK button to finalize the setting. -
Page 11: Batteries
Batteries For users in Germany Battery indicator Olympus has an agreement with the GRS As the battery loses its remaining charge, the (Joint Battery Disposal Association) in battery indicator on the display changes as Germany to ensure environmentally-friendly follows: battery disposal. -
Page 12: Preventing Accidental Operation
Preventing accidental operation Setting the voice recorder to HOLD mode maintains the current operation and disables button operations. HOLD mode is a handy feature for preventing unintentional operation from accidentally pressing the button when the voice recorder is carried in a bag or pocket. It is also useful for preventing the voice recorder being accidentally stopped during recording. -
Page 13: Turning The Power Off
Turning the power OFF Existing data, menu settings and the clock setting are saved when the power is turned OFF. While the recorder is in stop Power Save mode mode, slide the POWER switch to the [OFF/HOLD] position. When the voice recorder has been stopped for at least 5 minutes after power ON, the display disappears and the voice recorder automatically enters... -
Page 14: Selecting Folders And Files
Selecting folders and files The recorder provides five folders, [ ], [ ], [ ] and [ ]. Each folder can store up to 200 files. Press the FOLDER/INDEX button while the voice recorder is in stop mode. a File number b Folder indicator •... -
Page 15: Recording
Recording Recording The voice recorder has five folders ([ ] to [ ]) in which recorded files can be saved. These folders provide a handy way to sort recordings into separate categories (such as business and leisure). Basic recording procedure Press the REC ( s) button to start Select the folder to save the recording in (☞... - Page 16 Recording NOTE Sound files recorded with the voice • To prevent the beginning of the recorder are automatically given a file recording being cut off, start recording name in the format below. after the LED indicator light has lit or recording indicator has appeared in 151001 _ 0001.MP3 the display.
-
Page 17: Pausing/Resuming Recording
Recording Pausing/resuming recording Recording settings Various recording settings are available, letting you tailor recording to different Press the REC ( s) button during recording conditions. recording. [Rec Level] Sets the recording level. (☞ P.38) [Rec Mode] Sets the recording sound (☞ P.38) quality. -
Page 18: Monitoring While Recording
Recording NOTE Monitoring while recording • To avoid unpleasantly loud sound, set the volume to [00] before plugging in You can monitor the recording as you are the earphone. making it by listening on the earphones • To prevent feedback, do not place the plugged into the voice recorder’s earphone earphone near the microphone while jack (... -
Page 19: Changing The Recording Scene [Rec Scene]
Changing the recording scene [Rec Scene] Changing the recording scene The voice recorder has pre-registered templates of optimum settings tailored to various recording applications such as conference and dictation. When selecting one of these templates you can enter several settings recommended for your recording application all in a single operation. - Page 20 Changing the recording scene [Rec Scene] [Duplication (Auto Divide)] [Rec Level] [Low] • [Rec Scene] also can be set from the [Rec Mode] [MP3 128 kbps] menu (☞ P.34). [Low Cut Filter] [Off] [VCVA] [Off] NOTE [Duplication (Timer)] • Recording menu settings cannot be [Rec Level] [Low] changed when a [Rec Scene] selection...
-
Page 21: Recording With An External Microphone
Recording with an external microphone Recording with an external microphone You can record audio input using an external microphone or other device connected to the voice recorder’s microphone jack ( ). Do not plug or unplug devices into voice recorder jacks while recording. -
Page 22: Recording From Another Connected Device
Recording from another connected device Recording audio from another device with this recorder Audio can be recorded when you have connected the audio output terminal (earphone jack) of another device and the microphone jack ( ) of the recorder using the connecting cord KA333 (optional) for duplication. - Page 23 Recording from another connected device Connect the voice recorder NOTE with another device using the • Do not plug or unplug devices into connecting cord KA333. voice recorder jacks while recording. • Perform adjustment of the recording To audio output terminal level on the other device.
-
Page 24: Playback
Playback Playback In addition to files recorded by the voice recorder, you can also play files in MP3 format transferred from a PC. Basic playback procedure Press the STOP ( 4) button to stop Select the file to play from the folder containing it (☞ P.14). -
Page 25: Fast-Forwarding
Playback Fast-forwarding Rewinding Fast-forwarding while the voice Rewinding while the voice recorder is recorder is in stop mode in stop mode With the voice recorder stopped, With the voice recorder stopped, press and hold the 9 button. press and hold the 0 button. •... -
Page 26: Skipping To The Beginning Of A File
Playback NOTE Skipping to the beginning of a file • If an index mark or temp mark is reached when skipping to the beginning of a file during playback, playback starts from the position of the mark. When skipping to the beginning of a file while the voice recorder is in stop mode, the mark is ignored (☞ P.31). -
Page 27: Playback Through The Earphones
Playback Playback through the earphones Playback settings You can select various file playback methods tailored to different applications and tastes. You can connect the earphones to the voice recorder’s earphone jack ( ) and listen to [Play Mode] Selecting from among three playback through them. - Page 28 Playback Music files If a music file transferred to the voice recorder is unplayable, check that its sampling rate and bit rate values are within the supported ranges. The sampling rate and bit rate combinations supported for music file playback by the voice recorder are shown below.
-
Page 29: Changing The Playback Speed
Playback Changing the playback speed Changing the playback speed is handy for speeding up conference presentations, or for slowing down parts difficult to discern when learning a language. Press the `OK button during NOTE playback. • Altered playback speed settings are retained even after power OFF. -
Page 30: A-B Repeat Playback
Playback A-B repeat playback The voice recorder has a function with which you repeat the playback of a portion (segment) of the file being played. Select a file for A-B repeat playback, and start playback. Press the REC ( s) button when playback reaches the desired start position for A-B repeat playback. -
Page 31: Index Marks/Temp Marks
Index marks can only be written in files created with Olympus voice recorders. For files created with other devices, you can temporarily store desired positions in the memory using temp marks. -
Page 32: Erasing Files
Erasing files Erasing files This section describes how to erase a single unneeded file from a folder, erase all the files in the current folder at once. Press the `OK button. Select the file you want to erase (☞ P.14). Press the ERASE button while the voice recorder is in stop mode. - Page 33 Erasing files NOTE • Files cannot be restored after being erased, so please check carefully before erasing a file. • You cannot delete folders through the recorder. • Locked files and read-only files cannot be erased (☞ P.37). • Before erasing a file, replace the battery to ensure it will not run out before the process has finished.
-
Page 34: Menu
Menu Setting menu items Basic operation In normal mode, menu items are arranged by tabs, letting you quickly set desired items by selecting a tab and then moving to the desired item within the tab. Follow the steps below to set a menu item. - Page 35 Setting menu items • You can also use the 9 button to Press the + or – button to change perform this operation. the setting. Press the + or – button to select the desired setting item. When the screen display is [Simple Mode].
- Page 36 Setting menu items Press the STOP ( 4) button to exit Menu items that can be set during the menu screen. recording Normal mode only [Rec Level] [VCVA] [Low Cut Filter] [LED] • When the menu screen is displayed Menu items that can be set during during recording or playback, press Playback the MENU button to return to the...
-
Page 37: File Menu [File Menu]
File menu [File Menu] Preventing accidental file erasure Displaying file information [File Lock] [Property] The file lock feature lets you lock important You can display the information of a file from files to prevent them being accidentally a menu screen. erased. -
Page 38: Recording Menu [Rec Menu]
Recording menu [Rec Menu] Selecting the recording level Setting the recording mode [Rec Level] [Rec Mode] You can change the recording level You can prioritize sound quality or recording (sensitivity) as needed for your recording time. Select the recording mode that best application. -
Page 39: Reducing Noise During Recording [Low Cut Filter]
Recording menu [Rec Menu] Reducing noise during recording Adjusting the voice activation level for voice-activated recording [Low Cut Filter] Press the REC ( s) button to start With the voice recorder's low cut filter recording. function you can make recordings that reduce humming sounds from air- •... - Page 40 Recording menu [Rec Menu] • Increasing the setting number increases the VCVA activation sensitivity, enabling quieter sounds to activate the start of recording. • Adjust the VCVA voice activation level to suit the recording conditions (to cope with high levels of surrounding noise or alike).
-
Page 41: Playback Menu [Play Menu]
Playback menu [Play Menu] • When [Playback range] is set to Selecting playback modes [Folder], [End] blinks in the display for [Play Mode] 2 seconds after the last file in the folder has been played, then playback stops at the start position of the first file in Several playback modes are available for the folder. - Page 42 Playback menu [Play Menu] Press the + or – button to select a NOTE setting. • Forward/reverse skip operations over a When [Forward Skip] was selected: skip space that contains an index mark/ temp mark or the starting position of a [File Skip], [10 sec.
-
Page 43: Lcd/Sound Menu [Lcd/Sound Menu]
LCD/Sound menu [LCD/Sound Menu] Adjusting the contrast Turning beeping sound ON/OFF [Contrast] [Beep] You can adjust the contrast of the display to The voice recorder makes beeping sounds 12 different levels. when buttons are pressed, or to warn in case of operation errors. -
Page 44: Device Menu [Device Menu]
Device menu [Device Menu] Setting the time/date • When setting the hour or minute, each [Time & Date] time you press the FOLDER/INDEX button the display changes between If you set the date and time, you will be the AM/PM and 24-hour clock formats. able to check when a file was recorded in Example: 10:38 PM the information for each file accessed from... -
Page 45: Selecting The Mode [Mode Select]
Device menu [Device Menu] Selecting the mode Rec Menu: [Mode Select] Rec Level: High Rec Mode: MP3 128 kbps Low Cut Filter: Off With this recorder, you can choose between VCVA: Off normal mode and simple mode, which lists Rec Scene: Off frequently used functions. -
Page 46: Formatting A Recording Media [Format]
Device menu [Device Menu] NOTE Formatting a recording media • Never format the voice recorder from [Format] a PC. • Formatting erases all the existing data, Formatting a recording media erases all including locked files and read-only existing files saved on it. Be sure to transfer all files. -
Page 47: Checking Recording Media Information [Memory Info.]
Device menu [Device Menu] Checking recording media information [Memory Info.] You can display the capacity and remaining memory space of the recording media from a menu screen. NOTE • Some recording media memory capacity is used as a management area, so the actual usable capacity will always be slightly less than the displayed capacity. -
Page 48: Use With A Pc
Use with a PC When connecting the voice recorder to a PC you can do the following: • You can enjoy language content or music files in MP3 format stored on your PC. • Use the voice recorder as external storage to save or load data to/from your PC. - Page 49 PC operating environment PC connection precautions • When uploading or downloading a file to or from the voice recorder, data transfer will continue as long as the voice recorder’s LED indicator light is flashing, even if the PC data communication screen disappears. Never disconnect the USB connector before data communication has finished.
-
Page 50: Pc Connection/Disconnection
USB hub may result in unstable operation. Do not use a USB hub if operation is unstable. • Use only a compatible Olympus USB extension cable. Operation is not guaranteed if another manufacturer’s cable is used. Also, never use this dedicated cable with any other company’s products. -
Page 51: Disconnecting The Voice Recorder From A Pc
PC connection/disconnection Disconnecting the voice recorder from a PC Macintosh Windows Drag-and-drop the removable Click [ ] on the task bar in the disk icon for the voice recorder lower right hand corner of the shown on the desktop to the screen and click [Eject DIGITAL trash can icon. -
Page 52: Transferring Files To A Pc
PC, and vice-versa. The voice recorder’s five folders are displayed on the PC as [FOLDER_A], [FOLDER_B], [FOLDER_C], [FOLDER_D] and [FOLDER_E] (Fig. C). You can copy voice recorder files to any folder on the PC (Fig. D). Drive name Folder names FOLDER_A VN-741PC RECORDER FOLDER_B FOLDER_C FOLDER_D Folder FOLDER_E Copy these files to the PC. - Page 53 Transferring files to a PC Macintosh Connect the voice recorder to the PC (☞ P.50). • When the voice recorder is connected to the Macintosh operating system, it is recognized and displayed on the desktop with the model name as the drive name. Double-click the removable disk icon labeled with your voice recorder’s model name.
-
Page 54: Other Information
The maximum number of files Folder full (200) have been saved in the Erase unneeded files (☞ P.32). folder. An internal memory error Contact the Olympus Customer Memory error occurred. Support Center (☞ back cover). Memory full There is no remaining memory. - Page 55 Alarm message list Message Meaning Action required Can’t create the system file. The voice recorder is unable to Connect the voice recorder to a PC Connect to PC and erase create a management file due to and erase unneeded files. unnecessary file low remaining memory.
-
Page 56: Troubleshooting
Troubleshooting Problem Possible cause Solution Check that the positive and negative The battery is not inserted terminals of the battery are placed properly. correctly (☞ P.8). The display is blank. The remaining battery power Replace the battery (☞ P.8). is low. The power is OFF. - Page 57 Troubleshooting Problem Possible cause Solution The connected external Sound recorded by a connected external microphone is a mono mono microphone is recorded on the left An audio file is not microphone. channel only. recorded in stereo. [Rec Mode] is set to a mono Set [Rec Mode] to a stereo recording recording format.
- Page 58 Troubleshooting Problem Possible cause Solution The maximum number of marks Erase unneeded marks (☞ P.31). (99) has been reached. Unable to write index The file is locked. Unlock the file (☞ P.37). marks/temp marks. Unlock the file, or undo the read-only The file is a read-only file.
-
Page 59: Recorder Care
Recorder care s Exterior • Wipe gently with a soft cloth. If the recorder is very dirty, soak the cloth in mild soapy water and wring well. Wipe the recorder with the damp cloth and then wipe it with a dry cloth. s Display •... -
Page 60: Accessories (Optional)
Accessories (optional) Accessories for Olympus voice recorders can be purchased directly from the Online Shop on the Olympus website. Availability of accessories differs depending on the country. ME51SW stereo microphone TP8 telephone pickup microphone Has a large-diameter built-in microphone An earphone microphone that can for sensitive stereo recording. -
Page 61: Copyright And Trademark Information
• Note that Olympus will assume no liability in the event of damages, lost earnings, or any claims from third parties resulting from improper use of the product. Trademarks and registered trademarks •... -
Page 62: Safety Precautions
1 Remove the battery immediately. in property damage, if equipment is 2 Contact your place of purchase or handled incorrectly. an Olympus service center for repair. Continued use may result in fire or electric shock. s Do not use the voice recorder or... - Page 63 It may cause overheating, electric shock yourself. Contact your place of purchase or fire. or an Olympus repair center or service s Do not connect the battery directly center. (Do not touch the battery with to a power outlet or car cigarette bare hands when removing it.
- Page 64 • Note that Olympus will assume no liability for damages or lost earnings resulting from recorded data damage or loss, regardless of the nature or cause thereof.
- Page 65 Safety precautions <Recorded file precautions> • Note that Olympus will assume no liability for recorded files being erased or becoming unplayable due to voice recorder or PC failure. • Recording of copyrighted material is permitted when the recording is for your personal use only.
-
Page 66: Specifications
Specifications 4 Power source General items Standard voltage: 3 V 4 Recording formats Battery: Two AAA dry cell batteries MP3 format (model LR03) 4 Sampling frequency 4 External dimensions 111.5 × 39 × 18 mm 128 kbps 44.1 kHz (Not including largest projection) 64 kbps mono 44.1 kHz 4 Weight... - Page 67 90 hours (approx.) NOTE • The battery life figures shown here were determined using an Olympus test method (When [LED] is set to [Off]). Actual battery life figures will vary greatly according to the battery used and usage conditions (Changing the playback speed function may affect the battery life).
- Page 68 Specifications Maximum recording time per file • Regardless of the amount of remaining memory, the maximum recording time per file is restricted to the following values: Recording mode 128 kbps 64 kbps mono 8 kbps mono 74 h. 30 min. 149 hours 1193 hours Recording time...
- Page 69 For customers in Europe: The “CE” mark indicates that this product complies with the European requirements for safety, health, environment and customer protection. CE-mark products are for sale in Europe. This symbol [crossed-out wheeled bin WEEE Annex IV] indicates separate collection of waste electrical and electronic equipment in the EU countries.
- Page 70 OLYMPUS CORPORATION 2951 Ishikawa-machi, Hachioji-shi, Tokyo 192-8507, Japan. OLYMPUS EUROPA SE & CO. KG Premises: Consumer Product Division Wendenstrasse 14 - 18, 20097 Hamburg, Germany. Tel. :+49 40 -23 77 3-0 / Fax +49 40 - 23 07 61 Goods delivery: Modul H, Willi-Bleicher Str.
Need help?
Do you have a question about the VN-741PC and is the answer not in the manual?
Questions and answers