Table of Contents
Advertisement
Service
Manual
This manual is to be used by qualified appliance technicians only.
Viking does not assume any responsibility for property damage
or personal injury for improper service procedures done by an
unqualified person.
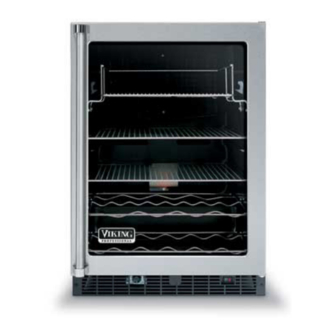
2008 24 Inch
Undercounter
Refrigeration
This Base Manual covers general and
specific information including, but not
limited to the following models:
DFRD144
DFUR143
DFUR144
DFUW144
DUAR143
DUAR144
DURD144
DUWC144
VUAR143
VUAR144
VURD144
VUWC144
SMR-0003
July 2008
Advertisement
Table of Contents

Related Manuals for Viking DFRD144


Summary of Contents for Viking DFRD144
-
Page 1: Undercounter Refrigeration
Service Manual This manual is to be used by qualified appliance technicians only. Viking does not assume any responsibility for property damage or personal injury for improper service procedures done by an unqualified person. 2008 24 Inch This Base Manual covers general and... -
Page 2: Important Information
Important Information Important Notices for Service Technicians Viking Range Corporation will not be responsible for personal injury or property damage arising from service performed by anyone other than Viking Factory Authorized Service Agencies. Pride and workmanship go into every product to provide our customers with quality products. It is possible, however, that during its lifetime a product may require service. -
Page 3: Table Of Contents
Show Room Mode ............ 11 Error Code Detection ..........11 Error Code Detection Reference ......11 Service Diagnostics Mode ........12 Software Model Number .......... 12 Available Component Tests ........12 Ordering Parts ............12 SMR-0003 © Viking Range Corporation... -
Page 4: General Information
• Reasonable care and safe work methods should be practiced when working on any Viking product. Never work with energized electrical equipment in wet or damp areas. SMR-0003 © Viking Range Corporation... -
Page 5: Basic Refrigeration Tools
NEUTRAL OR GROUND OF THE CIRCUIT. • Properly grounded outlet is required for this unit. • It is recommended that a single circuit receptacle be used for this unit only. DO NOT USE AN EXTENSION CORD. SMR-0003 © Viking Range Corporation... -
Page 6: Diagnostic Information
If low side pressure is above pressure in chart above, it does not sense the temperature required to cycle the check for the following: unit off. Restricted air flow Dirty condenser coil Overcharged system Low side leak SMR-0003 © Viking Range Corporation... -
Page 7: Re-Charging
Lint, dust, hair, and dirt build-up needs to be removed from the condenser periodically to allow the unit to perform properly. SMR-0003 © Viking Range Corporation... -
Page 8: Evaporator
0.19 amp or more, check for resistance in air movement or objects touching the fan blade. If this is not found, replace the condenser fan. Evaporator plate for DFUR, DUAR, and, VUAR beverage centers SMR-0003 © Viking Range Corporation... -
Page 9: Thermistors
Compare the recorded resistance with figure in Resistance versus Temperature Chart. If measured resistance falls 4% or greater outside the resistance given below, the thermistor is bad and will need to be replaced. SMR-0003 © Viking Range Corporation... -
Page 10: User Interface Panel And Tru Protect™ System
PRESS AND HOLD Overview Interior Light and Switch Viking’s Tru Protect™ system informs the user if the For Wine Cellars/Beverage Centers: unit is not functioning properly through both visual and The light will automatically turn on when the door is audible alerts. -
Page 11: Warning Alarm
The display will show the last set point entered. Disabling Show Room Mode: To exit Show Room Mode, initiate a “Power On Reset” (POR) only. SMR-0003 © Viking Range Corporation... -
Page 12: Service Diagnostics Mode
For product information, call 1.888.VIKNG1 (845.4641) reed sensor. The component tests available are or visit the Viking Web Site at vikingrange.com described in Available Component Tests chart. SMR-0003 © Viking Range Corporation... -
Page 13: Troubleshooting Procedures
Audible alarm sounding six times audible and display alarms. NOTE: every minute and LED light flashing Although pressing the “ON/OFF” red. button will reset the alarms, the alarm will resume if alarm condition still exists. SMR-0003 © Viking Range Corporation... - Page 14 1. After five minutes of no To restart, press and hold the keypad entry, Service Mode “WARMER” button while pressing the Service Mode disabled automatically. will automatically disable. “COLDER” button four times within five seconds. SMR-0003 © Viking Range Corporation...
- Page 15 LED indicates Tru Protect™ disabled. Software model number does not 1. Wrong unit software installed. Call Viking Customer Service to match the unit purchased, i.e. - 11 obtain new user interface. should correspond to a 24 in. wine cellar.
-
Page 16: Component Testing Procedures
..........• Ensure that there is no blockage of the intake or exhaust side of condenser. • Ensure that condenser is free of dust, lint, or hair that may hinder heat transfer. Condenser SMR-0003 © Viking Range Corporation... - Page 17 (i.e. an ice bath). Measure resistance across wire leads. Compare measurement with values in Resistance versus Temperature Evaporator Chart (see Thermistors) ....• If observed resistance is greater than 4% out Thermistor of spec, replace thermistor. SMR-0003 © Viking Range Corporation...
- Page 18 .......... If terminals read open or dead short, replace overload. Overload Remove overload from circuit and allow 2 min. to cool. Check resistance between overload terminals If terminals read open or dead short, replace overload. PTC Starter SMR-0003 © Viking Range Corporation...
-
Page 19: Disassembly
(see illustration below). Remove Screws Remove screws securing the mechanical baseplate. Slide out the mechanical baseplate SMR-0003 © Viking Range Corporation... -
Page 20: Compressor
Reinstall the PTC starter and overload and wire according to the wiring diagram. Reinstall the compressor cap. Reinstall the screws that secure the baseplate to the chair frame of the unit. Be sure to fasten down the ground wire to the baseplate. SMR-0003 © Viking Range Corporation... -
Page 21: Condenser
(black smooth wire) from the lights: one on the inside top of the drawer and one on wire harness. the underside of the divider. Remove the condenser fan. Reverse the removal procedure for installation. SMR-0003 © Viking Range Corporation... - Page 22 Unhook lens from wire connector and remove it from the divider. Discard the lens. Attach wire connector to new lens and snap lens back into place. Reattach divider section to the unit. SMR-0003 © Viking Range Corporation...
-
Page 23: Wiring Diagrams And Schematics
REED BOARD SWITCH AURA LIGHT AURA LIGHT DOOR CONTROL BOARD DETAIL MAGNET TOP VIEW BLK/YEL WHITE CONDENSER TECUMSEH COMPRESSOR CONNECTION WHT/YEL CAPACITOR CONNECTION CONTROL BOARD CABINET FAN SERVICE CORD CHASSIS GND.-GRN DFUW144, DUWC 144, VUWC144 SMR-0003 © Viking Range Corporation... -
Page 24: Beverage Center Wiring Schematic
USER INTERFACE REED BOARD SWITCH AURA LIGHT AURA LIGHT DOOR CONTROL BOARD DETAIL MAGNET TOP VIEW BLK/YEL WHITE CONDENSER TECUMSEH COMPRESSOR WHT/YEL CAPACITOR CONTROL BOARD SERVICE CORD CHASSIS GND.-GRN DFUR143, DFUR144, DUAR143 DUAR144, VUAR143, VUAR144 SMR-0003 © Viking Range Corporation... -
Page 25: Refrigerated Drawer Wiring Schematic
CONTROL BOARD DETAIL MAGNET TOP VIEW BLK/YEL HEATER- WHITE ANTI-SWEAT CONDENSER SERVICE CONNECTION WHITE EMBRACO LED LIGHT LED LIGHT COMPRESSOR CONTROL BOARD CABINET FAN CABINET FAN 80RD ONLY SERVICE CORD CHASSIS GND.-GRN DFRD144, DURD144, VURD144 SMR-0003 © Viking Range Corporation...