Advertisement
Diamond Cipher AES 256-Bit ExDrive
(DCED256ES / DCED256EU)
Technical Support
If you need any assistance to get your unit functioning properly, please have your
product information ready and contact Addonics Technical Support at:
Hours: 8:30 am - 6:00 pm PST
Phone: 408-453-6212
Email: http://www.addonics.com/support/query/
T E C H N O L O G I E S
User Guide
www.addonics.com
www.addonics.com
v7.1.11
Advertisement
Table of Contents

Related Manuals for Addonics Technologies DCED256ES


Summary of Contents for Addonics Technologies DCED256ES
- Page 1 T E C H N O L O G I E S User Guide Diamond Cipher AES 256-Bit ExDrive (DCED256ES / DCED256EU) www.addonics.com www.addonics.com v7.1.11 Technical Support If you need any assistance to get your unit functioning properly, please have your...
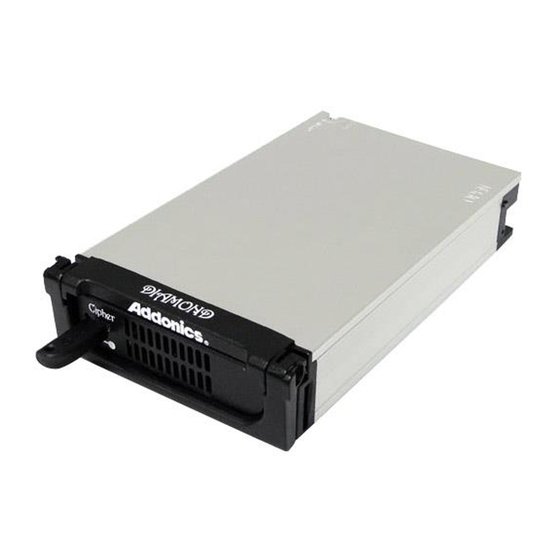
- Page 2 Enclosure Overview Top Cover Handle Encryption Key Cipher Active LED Cipher Key Socket Diamond Cipher key Check to make sure you have the correct version of the Diamond Cipher key. The key should match the label at the back of the drive enclosure.
- Page 3 IMPORTANT There is no back door for the Diamond Cipher encrypted hard drive if the key is lost or stolen. To ensure there is a spare key, your Diamond Cipher bundled kit comes with one pair of Diamond Cipher keys. These 2 keys have identical encryption code. One of these keys should be kept in a safe and secure location and can be sent back to Addonics for duplicating additional keys.
- Page 4 Hardware Installation Guide Step 1 Use a Philips screwdriver to turn the cover securing screw into the “OPEN” position. Step 2 Slide the aluminum cover towards the back end of the Diamond and remove it. Step 3 For SATA Drive Carefully place the SATA hard drive with the label facing up into the Diamond enclosure.
- Page 5 Step 4 Turn the Diamond enclosure over with the hard drive mounting holes facing up. Use the included flat head screws to secure the hard drive onto the bottom of the enclosure and turn in the screw to the “LOCK” position. www.addonics.com Technical Support (M-F 8:30am - 6:00pm PST) Phone: 408-453-6212...
-
Page 6: Cable Connections
Cable Connections Mini-Din Power Connector eSATA Connector P O W E R O N O F F Power and Drive Activity LED from Hard Drive Power Switch www.addonics.com Technical Support (M-F 8:30am - 6:00pm PST) Phone: 408-453-6212 Email: www.addonics.com/support/query/... - Page 7 DIN power connector located at the back of the enclosure. Data: Model: DCED256ES Connect the eSATA to eSATA cable to the eSATA connector located at the back of the enclosure and the other end of the eSATA cable to the eSATA connector on your SATA host controller with eSATA ports.
- Page 8 CONTACT US www.addonics.com Phone: 408-573-8580 Fax: 408-573-8588 Email: http://www.addonics.com/sales/query/...
Need help?
Do you have a question about the DCED256ES and is the answer not in the manual?
Questions and answers