Table of Contents
Advertisement
Available languages
Available languages
Quick Links
Amplifier Manual
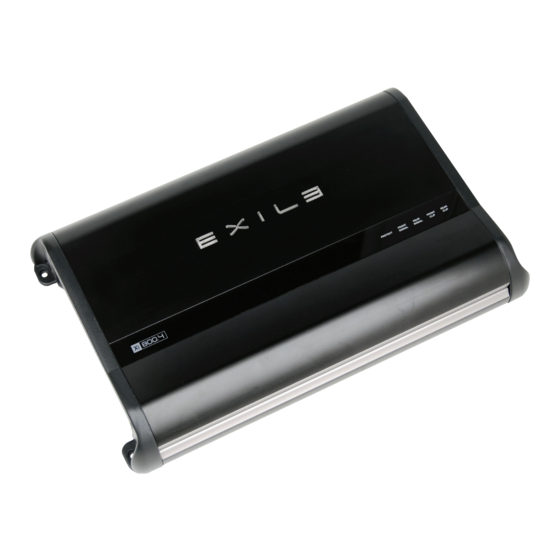
Models: Xi1500.1, Xi2500.1, Xi1K, Xi800.4
Manuel de l'amplificateur
ISD MONITORING SYSTEM
Every amplifier has a built in backlit display that shows the end user what is
happening inside the amplifier. The ISD circuit is constantly monitoring the
signal, power output and protection conditions of the amplifier.
ICE COOLING SYSTEM
High density aluminum heatsink, internal heatsink fins and vented die cast
endcaps are all carefully engineered to work in sync to keep the amplifier
running cool and impossible to overheat.
EASY CLICK CROSSOVER SYSTEM
All crossover frequency potentiometers have 41 detents or "clicks" so the end
user can set the exact crossover frequency desired.
BLUE OR WHITE SELECTABLE LOGO COLOR
Flip the switch to choose blue or white logo color. When the amplifier turns
on, the color will be the opposite for a few seconds as it slowly changes/fades
to the color selected by the switch.
HIGH LEVEL INPUT WITH SIGNAL SENSING AUTO TURN ON
Perfect to make factory or OEM system integration simple.
THROTTLEBOX TECHNOLOGY
Throttle Box™ allows the Captain to actively shape the sound of the tower
speakers depending on the real world listener position i.e. wake boarding
(far out), wake surfing (close in) or cove (stationary).Whatever the case may
be, Throttle Box™ tunes your tower speakers from full throttle (wide open) to
Sound Quality (completely engaged).
Amplifier Manual
© 2009 Exile Car Audio • www.exileaudio.com
Advertisement
Table of Contents

Related Manuals for Exile Xi2500.1


Summary of Contents for Exile Xi2500.1
- Page 1 Amplifier Manual Models: Xi1500.1, Xi2500.1, Xi1K, Xi800.4 Manuel de l’amplificateur ISD MONITORING SYSTEM Every amplifier has a built in backlit display that shows the end user what is happening inside the amplifier. The ISD circuit is constantly monitoring the signal, power output and protection conditions of the amplifier. ICE COOLING SYSTEM High density aluminum heatsink, internal heatsink fins and vented die cast endcaps are all carefully engineered to work in sync to keep the amplifier running cool and impossible to overheat. EASY CLICK CROSSOVER SYSTEM All crossover frequency potentiometers have 41 detents or “clicks” so the end user can set the exact crossover frequency desired. BLUE OR WHITE SELECTABLE LOGO COLOR Flip the switch to choose blue or white logo color. When the amplifier turns on, the color will be the opposite for a few seconds as it slowly changes/fades to the color selected by the switch. HIGH LEVEL INPUT WITH SIGNAL SENSING AUTO TURN ON Perfect to make factory or OEM system integration simple.
- Page 2 Xi1500.1 Xi1500.1 Into 1 ohm 1500 x 1 Puissance nominale 1 ohm: 1500 x 1 Recommended Fuse Size: 100A Taille de fusible recommandée: 100A Power/Ground Wire Size: 4 Gauge Taille du fil d’alimentation/de masse: 4 Gauge Dimensions: 16”L x 10”W x 2.45”H Dimensions: 16 po L x 10 po W x 2.45 po H Xi2500.1 Xi2500.1 Into 1 ohm 2500 x 1 Puissance nominale 1 ohm: 2500 x 1 Recommended Fuse Size: 200A Taille de fusible recommandée: 200A Power/Ground Wire Size: 1/0 Gauge Taille du fil d’alimentation/de masse: 1/0 Gauge Dimensions: 18”L x 10”W x 2.45”H Dimensions: 18 po L x 10 po W x 2.45 po H TWO AND FOUR CHANNEL SPECIFICATIONS...
- Page 3 Provides a full range signal for an additional amplifier. There is no signal loss if THROTTLEBOX ON/OFF using this output. Turns Throttlebox on or off. LP and HP CROSSOVER FREQUENCY THROTTLEBOX LEVEL CONTROL Controls the crossover point for the speaker outputs. This eliminates high This port is for connecting an (optional) ThrottleBoxT remote controller. or low frequencies from reaching the speakers. The crossover frequency is ThrottleBoxT allows you actively shape the sound of the tower speakers adjustable with a 18dB per octave slope. The potentiometers have 41 detents depending on the real world listener’s position to the boat. see the chart to set the exact crossover frequency desired. Recommended Adjustment (based on rider distance) 100% engaged -Wake boarding @ 80ft+ 40% engaged - Wake surfing @ 20ft+ 0% engaged, turned off - Party cove @ 0 to 5ft 12V+ This must be connected to the fused positive terminal (+12V) of the car’s This must be connected to the negative terminal of the car’s battery or bolted battery. to a clean, unpainted part of the chassis of the vehicle. REMOTE SPEAKER OUTPUTS This must be connected to switched +12V, usually a trigger wire coming from Used to connect the amplifier to speakers. The two + terminals are wired the head unit or ignition. together internally, the - terminals are also wired together internally. Minimum speaker cable size is 12 gauge. Minimum impedance is 1 ohm. Amplifier Manual © 2010 Exile Audio • www.exileaudio.com...
- Page 4 LOGO LED SWITCH Used to select if the amplifier logo color is white or blue. Please note when the BASS BOOST amplifier turns on, the color will be the opposite for a few seconds then slowly Variable bass boost from 0 to 18dB @ 45 Hz for rear channels only. change to the color selected by the switch. HI INPUT 2ch/4ch MODE Connect a factory system’s headunit or amplifier outputs. Using the HI level 2ch: Headunit has one pair of cables into front Input. input the amplifier will automatically turn on and off using the factory system’s 4ch: Headunit has two pairs of cables into front and rear inputs. audio signal as a trigger. REMOTE BASS LEVEL CONTROL This port is for connecting the optional remote level control (XRB1). This allows up to 20dB of volume adjustment. This is not a bass boost, it controls the level of the entire low pass signal of the rear channels. 12V+ This must be connected to the fused positive terminal (+12V) of the This must be connected to the negative terminal of the car’s battery or bolted car’s battery. to a clean, unpainted part of the chassis of the vehicle. REMOTE SPEAKER OUTPUTS This must be connected to switched +12V, usually a trigger wire coming from Used to connect the amplifier to speakers. Use the left + and right - terminals the head unit or ignition. for bridged mode. Minimum speaker cable size is 16 gauge. Use 12 gauge for bridged operation. Minimum impedance is 4 ohm bridged or 2 ohm stereo. © 2010 Exile Audio • www.exileaudio.com Amplifier Manual...
- Page 5 Amplifier Owner’s Manual Xi1500.1 - Xi2500.1 Monoblock Power Amplifiers INPUT GAIN Connect preamp signal cables from the head unit to these terminals. Used to reach maximum amplifier power with a wide variety of headunits. The amplifier is more sensitive to input signals when set to .2 and less sensitive when set to 8. OUTPUT Provides a full range signal for an additional amplifier. There is no signal loss if SUBSONIC CROSSOVER FREQUENCY using this output. Controls the highpass crossover point for the speaker outputs to eliminate extreme low frequencies. The crossover is always on with a 24dB per octave LP CROSSOVER FREQUENCY slope. The potentiometers have 41 detents see the chart to set the exact Controls the lowpass crossover point for the speaker outputs. The crossover crossover frequency desired. is always on with a 24dB per octave slope. The potentiometers have 41 detents see the chart to set the exact crossover frequency desired. LOGO LED SWITCH Used to select if the amplifier logo color is white or blue. Please note when BASS BOOST the amplifier turns on, the color will be the opposite for a few seconds then Variable bass boost from 0 to 18dB @ 45 Hz. slowly change to the color selected by the switch.
- Page 6 5 seconds) of time, then you need to reduce system volume or gain of the amplifier. PROTECT Lights red if there is a problem with the audio system. For example, speaker wire gets pinched/shorted together, blown a voice coil or running too low of an impedance, the ISD display will let you know. System Tuning Install all system fuses. 12. R epeat input sensitivity adjustments for all other amplifiers. S et the amplifier’s input sensitivity Note: The Exile amplifier’s sensitivity, bass boost and XRB1 Level controls have controls to their minimum positions (full no affect on the auxiliary outputs. An amplifier connected to the auxiliary outputs counterclockwise). receives the same signal level available to the Exile amplifier’s inputs (unity gain). S et all amplifier signal routing switches according to your system’s design. M ake preliminary adjustments to the crossover frequency, usually 80Hz is 13. R educe the headunit’s volume to a comfortable level. good starting point for high and low pass. It may be necessary to fine tune the crossover frequency later for the best overall 14. L isten to various musical selections to check overall system sound quality. balance. Compare front to rear, midbass to midrange, etc. If one speaker set is too loud compared to another,...
-
Page 7: Crossover Settings
Amplifier Owner’s Manual EASY CLICK TECHNOLOGY Crossover Settings Easy Click technology is our commitment to making our products easy to use and ultra accurate for the professional or DIY installer. All crossover frequency potentiometers have 41 detents or “clicks” so the end user can set the exact cross over frequency desired. No more turning the potentiometer and guessing where your crossover points are. You get exact control of your amplifier’s output. Xi2500.1 - Xi1500.1 Xi800.4 - Xi1k Harpoon Subsonic Bass Boost Bass Boost clicks clicks (10~55hz) (30~300Hz) (20~400hz) (40~400Hz) 10.5 11.7 13.1 13.5 13.8 14.3 14.8 15.3 15.8 16.1 10.5 16.5 10.9... - Page 8 Active ™ ThrottleBox allumé ou éteint. FRÉQUENCE DE FILTRE PASSIF PASSE-BAS et PASSE-HAUT THROTTLEBOX LEVEL CONTROL Contrôle les points de filtre pour les sorties du haut-parleur. Cela évite Ce port sert à connecter un (facultatif) contrôleur ThrottleBoxT à distance. que les hautes ou faibles fréquences n’atteignent les haut-parleurs. La ThrottleBoxT vous permet activement à façonner le son de la tour de haut- fréquence du filtre passif est réglable avec une pente de 18 dB par octave. parleurs selon la position de l’auditeur du monde réel pour le bateau. Les potentiomètres comprennent 41 crans, voir le graphique pour définir la fréquence de filtre passif exactement souhaitée. Ajustement recommandé (selon la distance coureur) + 100% d’embarquement engagés Wake-@ 80ft 40% l’activité - wake surf @ + 20ft 0% engagés, éteint - Cove Party @ 0 à 5 pi 12V+ Doit être relié à la borne positive protégée par fusible (+12 V) de la batterie de This must be connected to the negative terminal of the car’s battery or bolted la voiture. to a clean, unpainted part of the chassis of the vehicle. SORTIES HAUT-PARLEUR BORNE TÉLÉCOMMANDE Sert à relier l’amplificateur aux haut-parleurs. Utilisez les bornes + gauche Doit être relié à la borne +12 V commutée, généralement un fil d’amorçage et – droite pour le mode en dérivation. La taille de câble haut-parleur minimale sortant de l’unité principale ou de l’allumage. est le calibre 16. Utilisez un calibre 12 pour le fonctionnement en dérivation. L’impédance minimale est de 1 ohms © 2010 Exile Audio • www.exileaudio.com Amplifier Manual...
- Page 9 2 canaux : ’ unité principale a une paire de câbles dans l’entrée avant. 4 canaux : l ’unité principale a deux paires de câbles dans les entrées avant et HI INPUT arrière. Branchez l’unité centrale d’un système d’usine ou de sorties de l’amplificateur. Utilisation de l’entrée de niveau III de l’amplificateur va automatiquement COMMANDE À DISTANCE DU NIVEAU DES BASSES activer et désactiver le signal audio en utilisant le système industriel comme Ce port sert à connecter la télécommande de niveau optionnelle (XRB1). un déclencheur. Cela permet un ajustement du volume allant jusqu’à 20 dB. Ce n’est pas une amplification des basses mais permet de contrôler le niveau du signal du filtre passe-bas. 12V+ MASSE Doit être relié à la borne positive protégée par fusible (+12 V) de la batterie de Doit être relié à la borne négative de la batterie de la voiture ou boulonné sur un élément propre et non peint du châssis du véhicule. la voiture. SORTIES HAUT-PARLEUR BORNE TÉLÉCOMMANDE Sert à relier l’amplificateur aux haut-parleurs. Utilisez les bornes + gauche Doit être relié à la borne +12 V commutée, généralement un fil d’amorçage et – droite pour le mode en dérivation. La taille de câble haut-parleur minimale sortant de l’unité principale ou de l’allumage. est le calibre 16. Utilisez un calibre 12 pour le fonctionnement en dérivation. L’impédance minimale est de 4 ohms en dérivation ou de 2 ohms en stéréo. Amplifier Manual © 2010 Exile Audio • www.exileaudio.com...
- Page 10 Amplifier Owner’s Manual Xi1500.1 - Xi2500.1 Monoblock Power Amplifiers ENTRÉE GAIN Sert à atteindre une puissance d’amplificateur maximale avec une grande Reliez les câbles de signal préampli de l’unité principale sur ces bornes. variété d’unités principales. L’amplificateur est plus sensible aux signaux d’entrée lorsqu’il est réglé sur .2 et moins sensible lorsqu’il est réglé sur 8. SORTIE Fournit un signal pleine gamme pour un amplificateur supplémentaire. Il n’y a FRÉQUENCE DU FILTRE PASSIF SUBSONIQUE pas de perte de signal en cas d’utilisation de cette sortie. Contrôle le point de filtre passe-haut pour les sorties du haut-parleur afin d’éliminer les fréquences extrêmement basses. Le filtre passif est toujours en marche avec une pente de 24 dB par octave. Les potentiomètres LPF CROSSOVER FREQUENCY comprennent 41 crans, voir le graphique pour définir la fréquence de filtre Controls the lowpass crossover point for the speaker outputs. The crossover passif exactement souhaitée. is always on with a 24dB per octave slope. The potentiometers have 41 detents see the chart to set the exact crossover frequency desired.. LOGO LED SWITCH SORTIE MAÎTRE - ENTRÉE ESCLAVE Utilisé pour sélectionner si le logo de l’amplificateur est de couleur blanche...
- Page 11 4 ou 5 secondes) de temps, alors vous avez besoin pour réduire le volume système ou de gain de l’amplificateur. PROTECT S’allume en rouge s’il ya un problème avec le système audio. Par exemple, le fil haut-parleurs est coincé / court-circuit, soufflé une bobine de voix ou en cours d’exécution trop faible d’une impédance, l’affichage de la ISD vous le fera savoir. System Tuning I nstallez tous les fusibles du système. 12. R épétez les réglages de la sensibilité de l’entrée pour tous les autres amplificateurs. R églez les commandes de sensibilité de l’entrée de l’amplificateur sur leurs Remarque : La sensibilité de l’amplificateur Exile, l’amplification des basses et positions minimales (entièrement dans le les commandes de niveau XRB1 n’ont aucun effet sur les sorties auxiliaires. Un sens inverse des aiguilles d’une montre). amplificateur relié aux sorties auxiliaires reçoit le même niveau de signal que celui disponible sur les entrées de l’amplificateur Exile (gain unitaire). R églez tous les interrupteurs de routage du signal de l’amplificateur en fonction de la conception de votre système. 13. R éduisez le volume de l’unité principale à un niveau confortable. A pportez des ajustements préliminaires à la fréquence du filtre passif, 80 Hz est 14. É coutez les différentes sélections musicales pour vérifier la balance globale généralement un bon point de départ pour du système. Comparez l’avant à l’arrière, les basses moyennes à la plage...
- Page 12 Amplifier Owner’s Manual EXILEAUDIO PORTLAND, OR USA DESIGNED AND ENGINEERED IN THE USA WWW.EXILEAUDIO.COM LIMITED WARRANTY Exile warrants this product to be free from defects in material and workmanship under normal use for a period of one years from date of original purchase when purchased from an Authorized Exile Dealer. If the product is labeled B Stock/Refurbished and purchased from an Authorized Exile Dealer, it is warranted for 90 days from date of purchase, regardless of place of installation. Should service be necessary under this warranty for any reason due to manufacturing defect or malfunction during the warranty period, Exile will replace or repair (at its discretion) the defective merchandise with equivalent merchandise at no charge. Warranty replacements on B-Stock merchandise may have cosmetic scratches and blemishes. Discontinued products may be replaced with more current equivalent products. This warranty is valid only for the original purchaser and is not extended to owners of the product subsequent to the original purchaser. Any applicable implied warranties are limited in duration to a period of the express warranty as provided herein beginning with the date of the original purchase at retail, and no warranties, whether express or implied, shall apply to this product thereafter. Some states do not allow limitations on implied warranties, therefore these exclusions may not apply to you. This warranty gives you specific legal rights; however you may have other rights that vary from state to state. This warranty is only valid within the USA, for warranties outside of the USA consult the appropriate international distributor. © 2010 Exile Audio • www.exileaudio.com Amplifier Manual...
Need help?
Do you have a question about the Xi2500.1 and is the answer not in the manual?
Questions and answers