Sign In
Upload
Download
Table of Contents
Contents
Add to my manuals
Delete from my manuals
Share
URL of this page:
HTML Link:
Bookmark this page
Add
Manual will be automatically added to "My Manuals"
Print this page
×
Bookmark added
×
Added to my manuals
Manuals
Brands
MSI Manuals
Motherboard
Z97 PC Mate
Preface
MSI Z97 PC Mate Preface
Hide thumbs
1
2
3
4
5
6
7
8
9
10
Table Of Contents
11
12
13
14
15
16
17
18
19
20
21
22
23
24
25
26
27
28
29
30
31
32
33
34
35
36
37
38
39
40
41
42
43
44
45
46
47
48
49
50
51
52
53
54
55
56
57
58
59
60
61
62
63
64
65
66
67
68
69
70
71
72
73
74
75
76
77
78
79
80
81
82
83
84
85
86
87
88
89
90
91
92
93
94
95
96
97
98
99
100
101
102
page
of
102
Go
/
102
Contents
Table of Contents
Bookmarks
Table of Contents
Preface
Copyright Notice
Revision History
Smartphone Application
Technical Support
Safety Instructions
FCC-B Radio Frequency Interference Statement
CE Conformity
Radiation Exposure Statement
European Community Compliance Statement
Japan VCCI Class B Statement
Korea Warning Statements
Battery Information
Chemical Substances Information
WEEE (Waste Electrical and Electronic Equipment) Statement
Table of Contents
Chapter 1 Getting Started
Packing Contents
Optional Accessories
Assembly Precautions
Motherboard Specifications
Connectors Quick Guide
Back Panel Quick Guide
CPU (Central Processing Unit)
Introduction to the LGA 1150 CPU
CPU & Heatsink Installation
Memory
Dual-Channel Mode Population Rule
Mounting Screw Holes
Power Supply
JPWR1~2: ATX Power Connectors
Expansion Slots
PCI_E1~4: Pcie Expansion Slots
PCI1~2: PCI Expansion Slots
Video/ Graphics Cards
Single Video Card Installation
Internal Connectors
SATA1~6: SATA Connectors
CPUFAN1~2,SYSFAN1~3: Fan Power Connectors
JFP1, JFP2: System Panel Connectors
JUSB1~2: USB 2.0 Expansion Connectors
JUSB3: USB 3.0 Expansion Connector
JCI1: Chassis Intrusion Connector
JAUD1: Front Panel Audio Connector
JTPM1: TPM Module Connector
JCOM1: Serial Port Connector
JLPT1: Parallel Port Connector
Jumpers
JBAT1: Clear CMOS Jumper
Drivers and Utilities
Driver/ Utilities Installation
Chapter 2 Quick Installation
Memory Installation
Motherboard Installation
Power Connectors Installation
SATA HDD Installation
Msata SSD Installation
Front Panel Connector Installation
JFP1 Connector Installation
Front Panel Audio Connector Installation
Peripheral Connector Installation
USB2.0 Connector Installation
USB3.0 Connector Installation
Graphics Card Installation
Chapter 3 BIOS Setup
Entering Setup
Entering BIOS Setup
Press <Del> to Run BIOS Setup, or <F11> to Run Boot Menu
Overview
Operation
Settings
System Status
Advanced
Boot
Security
Save & Exit
M-Flash
Oc Profile
Hardware Monitor
Appendix A Intel SBA (Optional
Prerequisites
Installing Intel SBA
Software Configuration
Software Panel Overview
Password Settings
Help Button
Appendix B Intel RAID
Introduction
Using Intel Rapid Storage Technology Option ROM
Create Raid Volume
Recovery Volume Options
Degraded RAID Array
System Acceleration (Optional
RST Synchronization (Optional
Advertisement
Quick Links
1
Motherboard Specifications
2
Connectors Quick Guide
3
Jfp1, Jfp2: System Panel Connectors
Download this manual
Preface
Z97 PC Mate
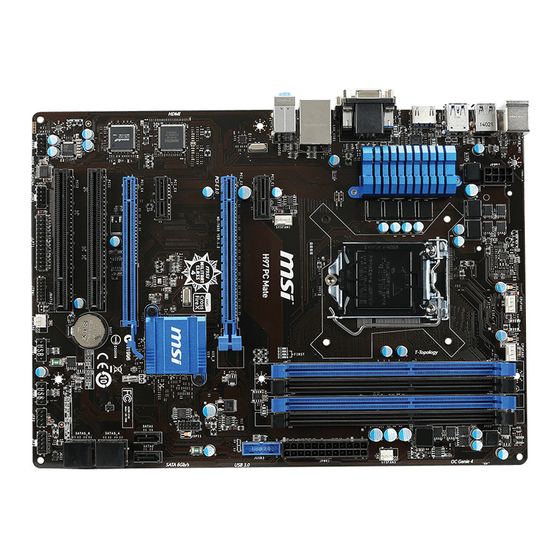
H97 PC Mate
Motherboard
G52-78501X4
Table of
Contents
Previous
Page
Next
Page
1
2
3
4
5
Advertisement
Table of Contents
Need help?
Do you have a question about the Z97 PC Mate and is the answer not in the manual?
Ask a question
Questions and answers
Related Manuals for MSI Z97 PC Mate
Motherboard MSI Z97 GAMING 5 User Manual
Atx motherboard (108 pages)
Motherboard MSI Z97 GAMING 5 Manual
(186 pages)
Motherboard MSI Z97M-G43 User Manual
Micro-star motherboard (108 pages)
Motherboard MSI H97M-G43 Manual
(178 pages)
Motherboard MSI Z97-G45 GAMING Manual
(182 pages)
Motherboard MSI Z97 GAMING 3 Manual
(112 pages)
Motherboard MSI Z97 GAMING 7 Preface
(114 pages)
Motherboard MSI Z97-G43 GAMING Owner's Manual
(102 pages)
Motherboard MSI Z97-GD65 Instruction Manual
Gaming series motherboards (116 pages)
Motherboard MSI Z97 XPOWER AC Manual
(240 pages)
Motherboard MSI Z97I GAMING AC Manual
(104 pages)
Motherboard MSI Z97M GAMING Manual
(108 pages)
Motherboard MSI Z97M GAMING Manual
(108 pages)
Motherboard MSI Z97-G55 SLI Instructions Manual
(104 pages)
Motherboard MSI Z97S SLI PLUS Manual
(225 pages)
Motherboard MSI Z97 GUARD-PRO Manual
(108 pages)
This manual is also suitable for:
H97 pc mate
Table of Contents
Save PDF
Print
Rename the bookmark
Delete bookmark?
Delete from my manuals?
Login
Sign In
OR
Sign in with Facebook
Sign in with Google
Upload manual
Upload from disk
Upload from URL


Need help?
Do you have a question about the Z97 PC Mate and is the answer not in the manual?
Questions and answers