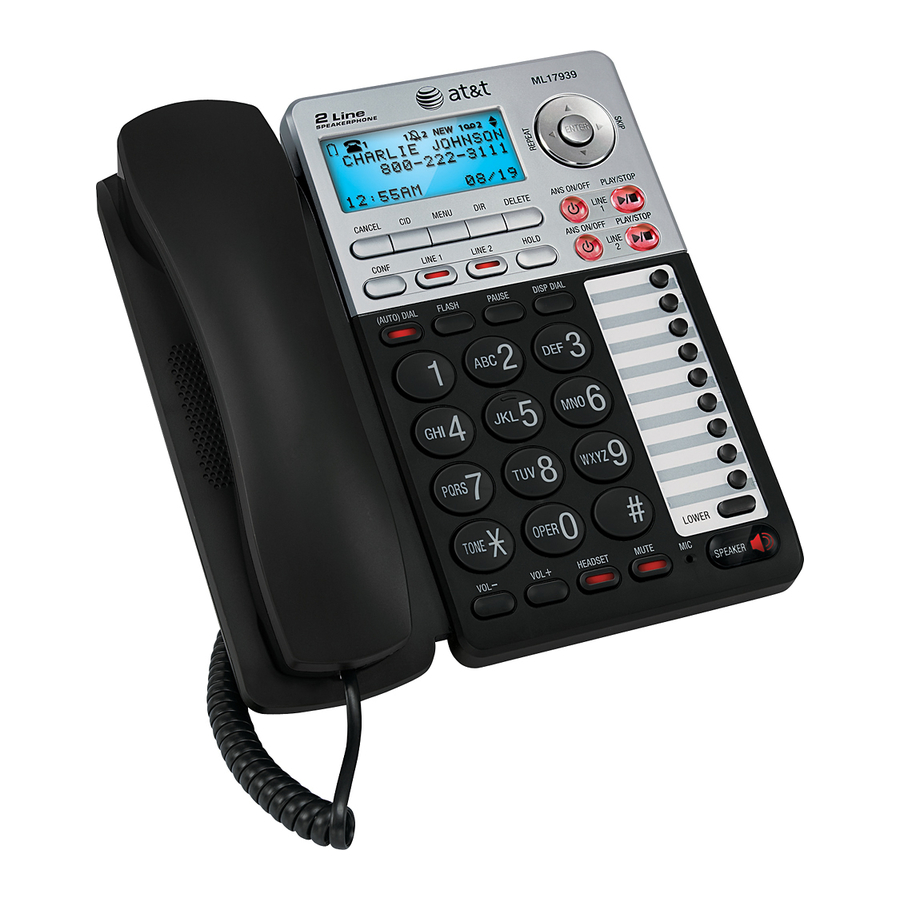
AT&T ML17939 User Manual
Two-line corded telephone/ answering system with
caller id/call waiting
Hide thumbs
Also See for ML17939:
- User manual (82 pages) ,
- Quick start manual (15 pages) ,
- User manual (82 pages)

Related Manuals for AT&T ML17939


Summary of Contents for AT&T ML17939
- Page 1 User’s manual ML17939 Two-line corded telephone/ answering system with caller ID/call waiting...
- Page 2 You can also visit our website at 1 (800) 222-3111. 1 (866) 288-4268. call In Canada, dial Model number: ML17939 Type: Two-line corded telephone/answering system with caller ID/call waiting Serial number: __________________________________________________________ Purchase date: __________________________________________________________ Place of purchase: Both the model and serial numbers of your AT&T product can be found on the bottom of the telephone base.
-
Page 3: Parts Checklist
Handset with coiled Power adapter handset cord Telephone line cords: clear Mounting bracket (2-conductor) and black (4-conductor) User’s manual Quick start guide ML17939 ML17939 Two-line corded telephone/ Two-line corded telephone/ answering system with answering system with caller ID/call waiting caller ID/call waiting Replacement User’s manual... -
Page 4: Table Of Contents
User’s manual ML17939 Two-line corded telephone/ answering system with caller ID/call waiting Table of contents Getting started Clear voicemail indicator ....21 Turn COVM (central office Quick reference guide ......2 voicemail) on or off ......22 Optional backup battery installation ..........4 Telephone operation Telephone installation ......5... - Page 5 Directory Remote code .........51 Priority code ..........52 Directory overview ........35 Message alert tone ......52 Directory memory capacity ....35 Character chart ........35 Answering system operation Directory operation .........36 Answering system and voicemail ..53 Creating a directory entry ....36 Answering system operation ....54 Reviewing directory entries ...36 Message capacity ........54 Searching by name ......37...
-
Page 6: Getting Started
Getting started Installation preparation You must install the power See pages 6-7 for easy adapter before using the instructions. telephone. If you subscribe to high speed Internet service (DSL - digital subscriber line) through your telephone line, you must install a DSL filter between each telephone line cord and telephone wall jack (pages 6 and 7). -
Page 7: Quick Reference Guide
Getting started Quick reference guide DELETE ENTER Press to delete the displayed directory, or call history entry (pages 38 Press to select and 42). a menu item or to save a setting Press to backspace and erase a digit or character (pages 32 and 36). (page 14). - Page 8 Getting started Quick reference guide fLASh PAUSE During a call, press to answer an incoming call Press to insert a two-second when you receive a call waiting alert (page 27). dialing pause in a number stored in the directory or speed dial memory (pages 36 and 32).
-
Page 9: Optional Backup Battery Installation
Getting started Optional backup battery installation Install three AA alkaline batteries (purchased separately) to use this telephone in the event of a power failure. If power fails with working batteries installed, all functions work properly except for the display illumination. If power fails and no batteries are installed, you can make or answer calls on line 1 using only the handset. -
Page 10: Telephone Installation
Getting started Telephone installation Telephone base installation Install the mounting bracket for tabletop use. option 1: To install your telephone in a low tabletop position, insert the fixed tabs of the mounting bracket into slots . Press the flexible tabs into slots until they click into place. - Page 11 Getting started Telephone installation Connect the telephone line cord(s) and the power cord to the telephone base. If you subscribe to high speed Internet service (DSL - digital subscriber line) through your telephone line, you must install a DSL filter between each telephone line cord and telephone wall jack.
- Page 12 Getting started Telephone installation option 2: If you have two one-line wall jacks, install your telephone base, as shown below. Plug the other end of Plug the other end of the black telephone the clear telephone line cord (4-conductor) line cord (2-conductor) into the wall jack.
-
Page 13: Data Port
Getting started Data port If you want to connect another device (such as a modem or fax machine) to the wall jack, use the port labeled DATA on the back of the telephone base. The data port uses line 2 only. DATA port... -
Page 14: Installation Options
Getting started Installation options If you want to mount your telephone on a wall, connect the telephone base to a standard dual-stud telephone wall-mounting plate. If you do not have this mounting plate, you can purchase one from many hardware or consumer electronics retailers. - Page 15 Getting started Installation options Plug the coiled handset cord into the handset and the telephone base. Plug the small end of the power adapter cord into the power jack on the back of the telephone base. Plug the telephone line cords into the wall jacks. option 1: If you have a single two-line wall jack, use only the black telephone line cord (4-conductor).
-
Page 16: Wall To Tabletop Installation
Getting started Installation options Wrap the telephone line cord, as shown below. Mount the telephone on the mounting plate until it is held securely into position. Plug the large end of the power adapter into an electrical outlet not controlled by a wall switch. wall to tabletop installation To return the telephone base from wall installation to tabletop position: Unwrap the telephone line cord. - Page 17 Getting started Installation options Hold down the switch hook on the telephone base, then slide the handset tab upwards to remove it from the slot. Rotate the handset tab 180 degrees, then push the handset tab down into the slot until it locks into position. Switch hook Follow the steps in Telephone base installation on pages 5-7 to install your telephone for tabletop use.
-
Page 18: Optional Headset
Getting started Optional headset You can use this telephone hands free when you install any industry standard 2.5mm corded telephone headset (purchased separately). The telephone plays an error tone if you press hEADSET when a headset is not plugged into the headset jack. -
Page 19: Menu Setup
Menu setup Telephone settings Menu overview Use the menus to change the telephone settings. When the telephone is idle, press MENU to enter the main menu. Press to scroll to the feature to be changed. Press ENTER. Press to scroll to the desired settings. Press ENTER to save your selection. -
Page 20: Ringer Volume
Menu setup Telephone settings Ringer volume You can set the ringer volume level (1-6) or turn the ringer off. When the ringer is off, Ringer muted appears on the screen. When the telephone is idle, press MENU. PHONE SETTINGS Ringers to scroll to Phone settings. -
Page 21: Lcd Language
Menu setup Telephone settings LCD language Use this feature to change the display language that is used in all menus and screens. This telephone uses English for display by default. When the telephone is idle, press MENU. PHONE SETTINGS to scroll to Phone settings. Press ENTER. Press Ringers Press... -
Page 22: Key Tone
Set date/time Menu setup SET DaTE Telephone settings __/__/__ MM/DD/yy Press ENTER to move to the time setting. Use the dialing keys to enter the time. To enter a number that is less than 10, you have to enter a 0 10, you have to enter a 0 , you have to enter a 0 a 0 0... -
Page 23: Call Settings
Menu setup Call settings Set the primary line Use this feature to select the default telephone line to be used when you make calls. The primary line is set to Line 1 by default. When the telephone is idle, press MENU. CaLL SETTINGS Primary line to scroll to Call settings. -
Page 24: Choose The Preferred Mode
Menu setup Call settings Choose the preferred mode You can set the Preferred mode to speakerphone or headset. Your selection is used automatically when dialing a number from the directory, redial or call history without lifting the handset. Your selection is also used for speed dialing when auto speaker is set to on (see Turn auto speaker on or off on page 18). -
Page 25: Choose How To Store Repeat Calls In The Call History
Menu setup Call settings Choose how to store repeat calls in the call history Use this feature to choose how new calls from the same number are displayed in the call history. If you want to store only the last call of repeated calls, select Combined. -
Page 26: Voicemail Indicator Settings
Menu setup Voicemail indicator settings voicemail indicator If you subscribe to voicemail service offered by your telephone service provider, this feature provides a visual indication when you have new voicemail messages on either line. voicemail displays and the corresponding line blinks on the L2:12 Missed L2:12 Missed screen to indicate there are new voicemail messages... -
Page 27: Turn Covm (Central Office Voicemail) On Or Off
Menu setup Voicemail indicator settings Turn CovM (central office voicemail) on or off If you subscribe to voicemail service on any line with your telephone service provider, turn on the CovM feature for that telephone line. If you do not subscribe to voicemail service or want to disable the indicator, turn the CovM feature off. -
Page 28: Telephone Operation
Telephone operation Basic operation The telephone is set to use line 1 by default for making calls. To change the primary line, see Set the primary line on page 18. When you answer a call, the telephone automatically selects the ringing line. Making, answering or ending a call Elapsed time Elapsed time... -
Page 29: On Hook Dialing (Predialing)
Telephone operation Basic operation -oR- Press the LINE button of the ringing line to answer the call with the preferred mode (see Choose the preferred mode on page 19). on hook dialing (predialing) Use the dialing keys to enter a telephone number. Press DELETE to make corrections when entering the telephone number. -
Page 30: Redial
Telephone operation Basic operation Redial The last five telephone numbers dialed (up to 32 digits) are stored in the redial memory. To dial one of the five most recently dialed numbers: When the telephone is idle, press (AUTo) REDIAL to enter the redial list and display the most recently called numbers. -
Page 31: Auto Redial
Telephone operation Basic operation To delete a redial entry: When the telephone is idle, press (AUTo) REDIAL to enter the redial list and display the most recently called numbers. Press to scroll to the desired number. . Press DELETE to delete the displayed entry. -oR- REDIaL #. -
Page 32: Options While On Calls
Telephone operation Options while on calls volume control When you are on a call, press voL + to increase the handset, speakerphone or headset listening volume. Press voL - to decrease the listening volume. There are two beeps when you reach the minimum or maximum level. flash/call waiting If you subscribe to call waiting service from your telephone service provider (see About caller ID on pages 39-40), and someone calls while you are... -
Page 33: Temporary Tone Dialing
Telephone operation Options while on calls Temporary tone dialing If you have dial pulse (rotary) dialing service only, use this feature to temporarily switch from dial pulse to touch-tone dialing during a call. During a call, press Use the dialing keys to enter the number you wish to dial. The telephone sends touch-tone signals. -
Page 34: Two-Way Recording
Telephone operation Options while on calls To drop one line: Press the LINE button for the caller you want to speak • End Line 1 End Line 2 with. The other call is disconnected automatically. End Conference -oR- Directory Press MENU. Press to scroll to End Line 1 or End Line 2. -
Page 35: Chain Dialing
Telephone operation Options while on calls Chain dialing Use this feature to initiate a dialing sequence from numbers stored in the directory, speed dial memory, call history or redial while you are on a call. Chain dialing can be useful if you wish to dial other numbers (such as bank account numbers or access codes) during a call. -
Page 36: Speed Dial
Speed dial Speed dial memory overview This telephone has 18 speed dial locations for storing telephone numbers. You can store up to 24 digits in each location. The first nine locations can be accessed by using only the speed dial keys. To access the remaining nine locations, press LowER and then the speed dial key for the desired location. -
Page 37: Speed Dial Operation
Speed dial Speed dial operation Storing a number in a speed dial location Use the following steps to store a telephone number in the desired speed dial memory location. Directory When the telephone is idle, press MENU. Call log to scroll to Speed dial. Press ENTER. Press Speed dial Phone settings... -
Page 38: Editing A Speed Dial Number
Speed dial Speed dial operation Editing a speed dial number Follow the steps to edit a speed dial number. Follow the steps in Reviewing a speed dial number SPEED DIaL#01 on page 32 to display a speed dial number. 888-722-7702 to scroll to Edit. -
Page 39: Deleting A Speed Dial Number
Speed dial Speed dial operation To dial the speed dial number while reviewing: SPEED DIaL#01 Follow the steps in Reviewing a speed dial number 888-722-7702 on page 32 to display a speed dial number. Lift the handset or press SPEAKER or hEADSET. -
Page 40: Directory Overview
Directory Directory overview Directory memory capacity The directory of this telephone can store up to 100 entries, with a maximum of 16 alphanumeric characters (including spaces) for names and 32 digits for telephone numbers. A convenient search feature can help you quickly find and dial numbers (see Searching by name on page 37). -
Page 41: Directory Operation
Directory Directory operation Creating a directory entry Use the following steps to store a name and number in the directory. When the telephone is idle, press MENU. Directory to scroll to Directory. Press ENTER. Press Call log Speed dial Press to scroll to Add contact. -
Page 42: Searching By Name
Directory Directory operation Searching by name Follow the steps to search for directory entries by name. Follow the steps in Reviewing directory entries on page 36 to enter the directory. When in the directory, press the dialing keys to start a name search. The directory shows the first name beginning with the first letter on the dialing key (if there is one). -
Page 43: Copying Directory Entries To Speed Dial Memory
Directory Directory operation Copying directory entries to speed dial memory To copy the directory entries (up to 24 digits) into the speed dial memory for easy dialing, follow the steps. Christine Smith Display the desired entry in the directory 888-722-7702 (see Reviewing directory entries on page 36). -
Page 44: Caller Id
Caller ID About caller ID This product supports caller ID services offered by most telephone service providers. Caller ID allows you to see the name, number, date and time of calls. The available caller ID information will appear after the first or second ring. Information about caller ID with call waiting Caller ID with call waiting lets you see the name and telephone number of the caller before answering the telephone, and while on another call. -
Page 45: How Caller Id History (Call Log) Works
Caller ID About caller ID how caller ID history (call log) works The telephone stores caller ID information for the last 99 incoming calls. Entries are stored in reverse chronological order. The telephone deletes the oldest entry when the log is full to make room for new calls. If you answer a call before the information appears on the screen, it does not show in the caller ID history. -
Page 46: Caller Id Operation
Caller ID Caller ID operation Memory match If the incoming telephone number matches the last seven digits of the telephone number in your directory, the name that appears on the screen matches the corresponding Chris Chris name in your directory. 888-722-7702 888-722-7702 8:00am... -
Page 47: Dialing Options
Caller ID Caller ID operation Dialing options Although the incoming call history entries have 10 digits (the area code plus the seven-digit number), in Christine Smith Christine Smith 888-722-7702 888-722-7702 some areas, you may need to dial only the seven 8:00am 8:00am 1/11... -
Page 48: Saving A Call History Entry To The Directory
Caller ID Caller ID operation Saving a call history entry to the directory When in the call history (see Reviewing call history on page 41), press to scroll to the desired entry. Press to scroll to Copy to DIR. REPEAT SKIP -oR- Christine Smith... -
Page 49: Saving A Call History Entry To A Speed Dial Location
Caller ID Caller ID operation Saving a call history entry to a speed dial location When in the call history (see Reviewing call history on page 41), press to scroll to the desired entry (up to 24 digits). Press to scroll to Copy to SpDial. REPEAT SKIP -oR-... -
Page 50: Reasons For Missing Caller Id Information
Caller ID Reasons for missing caller ID information Screen message Reason The caller prefers not to show the name. Private name The caller prefers not to show the telephone Private number number. The caller prefers not to show the name and Private caller telephone number. -
Page 51: Answering System Settings
Answering system settings Answering system settings voice prompts The answering system setup for each telephone line is separate. The telephone generates voice prompts to guide you through your answering system setup. Announcement selection If you select Annc A only, announcement A plays when calls are answered by the answering system. -
Page 52: Announcement A And B
Answering system settings Answering system settings Announcement A and B The default greeting for announcements A and B is “Hello, please leave a message after the tone.” The telephone is preset to answer with the default announcement A. You can use this default announcement or replace it with your own. -
Page 53: Announcement A And B Time Settings
Answering system settings Answering system settings Announcement A and B time settings These settings allow you to set different time intervals for when to play your two different announcements (see Announcement selection on page 46). The default start times for announcements A and B are 8:00am and 5:00pm, respectively. -
Page 54: Answer On/Off
Answering system settings Answering system settings Answer on/off By default, the answering system is on and ready to record messages on each telephone line. When the answering system of the corresponding line is on, the corresponding /ANS oN/off indicator light is on. If you turn the answering system off, the answering system does not answer calls and record incoming messages. -
Page 55: Call Screening
Answering system settings Answering system settings Call screening Use this feature to set whether incoming messages are played through the speaker while they are being recorded. Call screening is on by default. When the telephone is idle, press MENU. to scroll to Answering sys. Press ENTER. Press aNS SyS SETUP M1 Call screening... -
Page 56: Incoming Message Length
Answering system settings Answering system settings Incoming message length Use this feature to set the recording time allowed for incoming messages. The message length is one minute by default. When the telephone is idle, press MENU. aNS SyS SETUP M1 Call screening to scroll to Answering sys. -
Page 57: Priority Code
Answering system settings Answering system settings Priority code Priority calling allows a caller to enter a code during the outgoing announcement that plays a special tone so that you know who is calling. To enable a priority call, set the priority code to on and enter a three-digit priority code (000-999). -
Page 58: Answering System Operation
Answering system operation Answering system and voicemail Your telephone has separate indicators for two different types of voice messages: those left on its built-in answering system and those left at your service provider’s voicemail (fees may apply). Your telephone’s built-in answering system messages and voicemail messages are separate. -
Page 59: Answering System Operation
Answering system operation Answering system operation Message capacity The answering system of each line can record and store up to 99 messages. The recording time of each message depends on the message length you set (see Incoming message length on page 51). The total storage capacity of each line for the announcement, messages, memos or two-way recording is approximately 12 minutes. -
Page 60: Message Playback
Answering system operation Answering system operation Message playback If you have new messages on either line, the indicator for that line /PLA�/SToP flashes. The indicator turns off after you listen to the new messages. /PLA�/SToP When playback begins, the total number of messages is announced. Before each message, you hear the date and time of the recording. -
Page 61: Delete All Old Messages
Answering system operation Answering system operation Delete all old messages Use this feature to delete old (reviewed) messages. You cannot delete new messages until you review them. You cannot retrieve deleted messages. When the telephone is idle, press MENU. MaILBOX 1 to scroll to Answering sys. -
Page 62: Remote Access
Answering system operation Remote access A three-digit security code is required to access the answering system remotely from any touch-tone telephone. The default code is 500. See Remote code on page 51 to change it. To remotely access the answering system: Dial your telephone number from any touch-tone telephone. -
Page 63: Appendix
Appendix Screen icons, indicator lights and alert tones Indicator lights Lighted display LINE 1/LINE 2 indicator On when the telephone line is in use. Flashes slowly when the call is on hold. Flashes rapidly when there is an incoming call. (AUTo) REDIAL On when auto redial /PLA�/SToP indicator... -
Page 64: Alert Tones
Appendix Screen icons, indicator lights and alert tones Alert tones One short beep • There are new messages that have not been reviewed when the message alert tone is turned on. • While your telephone conversation is being recorded, you will hear one beep per minute. -
Page 65: Screen Display Messages
Appendix Screen display messages All call history entries have been removed. all deleted All old messages in the selected mailbox have been all old messages deleted. deleted! The number you entered in the directory has already already saved been saved. The call is answered by the answering system. - Page 66 Appendix Screen display messages The answering system is recording a message. Recording message The ringer is muted. Ringer muted The entry has been saved successfully into the directory. Saved to Directory The voicemail indicator has been deleted. VM indicator cleared There is a new voicemail message on line X.
-
Page 67: Troubleshooting
If changing the telephone line cord does not help, the wall jack (or the wiring to this wall jack) may be defective. Try using a different wall jack in your home to connect your ML17939 telephone, or contact your telephone service provider (charges may apply). - Page 68 Appendix Troubleshooting • Check that all the telephones connected to the same telephone line are hung up. • Eliminate any background noise. Noise from a television, radio or other appliances might cause the telephone to not dial out properly. If you cannot eliminate the background noise, first try muting the corded handset before dialing, or dialing from another room with less background noise.
- Page 69 Appendix Troubleshooting • If you subscribe to high-speed Internet service (DSL - digital subscriber line) through your telephone line(s), you must install a DSL filter between each telephone line cord and telephone wall jack (see Telephone base installation on pages 6-7). The filter prevents noise and caller ID problems caused by DSL interference.
- Page 70 Appendix Troubleshooting System does not respond to remote commands. • Make sure the remote code is on and you have entered a three-digit remote code (see Remote code on page 51). • Make sure you are calling from a touch-tone telephone. When you dial a number, you should hear tones.
- Page 71 Appendix Troubleshooting I cannot retrieve voicemail messages. • Your telephone has both a built-in answering system and voicemail indication. They are independent features and each alerts you to new messages differently (see Answering system and voicemail on page 53). If you subscribe to voicemail service from your telephone service provider (charges may apply), contact your telephone service provider for more information on how to access your voicemail.
-
Page 72: General Product Care
Appendix General product care To keep your telephone working well and looking good, follow these guidelines: • Avoid putting it near heating appliances and devices that generate electrical noise (for example, motors or fluorescent lamps). • DO NOT expose it to direct sunlight or moisture. •... -
Page 73: Important Safety Information
Appendix Important safety information This symbol is to alert you to important operating or servicing instructions that may appear in this user’s manual. Always follow basic safety precautions when using this product to reduce the risk of injury, fire, or electric shock. Safety information •... -
Page 74: For C-Ul Compliance
Appendix For C-UL compliance In compliance with the bilingual requirements for safety, caution, and warning markings of Canadian Federal and Provincial/Territorial statutes and regulations, the French version of Important safety information is included. Mesures de sécurité importantes Ce symbole vous alertera d’informations importantes ou d’instructions d’entretien pouvant apparaître dans ce guide d’utilisation. - Page 75 Appendix For C-UL compliance MISES EN GARDE: N’utilisez seulement l’adaptateur inclus avec ce produit. Pour obtenir www.telephones.att.com une pièce de rechange, visitez notre site Web au 1-800-222-3111 1-866-288-4268 composez le . Au Canada, composez le Spécifiquement en rapport avec les téléphones avec fil •...
-
Page 76: Fcc And Acta Information
Appendix FCC and ACTA information If this equipment was approved for connection to the telephone network prior to July 23, 2001, it complies with Part 68 of the Federal Communications Commission (FCC) rules. If the equipment was approved after that date, it complies with the Part 68 rules and with the Technical Requirements for Connection of Equipment to the Telephone Network adopted by the Administrative Council for Terminal Attachments (ACTA). - Page 77 Appendix FCC and ACTA information Programming/testing of emergency numbers If this product has memory dialing locations, you may choose to store police, fire department and emergency medical service telephone numbers in these locations. If you do, please keep three things in mind: We recommend that you also write the telephone number on the directory card (if applicable), so that you can still dial the emergency number manually if the memory dialing feature doesn’t work.
-
Page 78: Part 15 Of Fcc Rules
Appendix Part 15 of FCC rules Some telephone equipment generates, uses, and can radiate radio-frequency energy and, if not installed and used properly, may cause interference to radio and television reception. This product has been tested and found to meet the standards for a class B digital device, as specified in Part 15 of the FCC rules. -
Page 79: Limited Warranty
Appendix Limited warranty The AT&T brand is used under license - any repair, replacement or warranty service, and all questions about this product should be directed to: In the United States of America, call 1 (800) 222-3111 www.telephones.att.com or visit . - Page 80 Appendix Limited warranty how do you get warranty service? To obtain warranty service in the United States of America, visit www.telephones.att.com 1 (800) 222-3111 or call . In Canada, please 1 (866) 288-4268 dial . NOTE: Before calling for service, please review the user’s manual.
-
Page 81: Technical Specifications
Appendix Technical specifications Operating temperature 32°F — 122°F 0°C — 50°C Power adapter input: 100-120V AC 60Hz output: 6V DC 400mA Optional backup batteries three 1.5V alkaline batteries... -
Page 82: Index
Index Index Delete all old messages, 56 Alert tones, 59 Directory Annc A time, 48 Capacity, 35 Annc B time, 48 Create entries, 36 Announcement A, B Delete entries, 38 Delete, 47 Dial entries, 38 Play, 47 Review entries, 36 Record, 47 Save entries to speed dial, 38 Answer a call, 23... - Page 83 Index Index Index Make a call, 23 Safety information, 68 Memory match, 41 Screen display messages, 60–61 Memos, 56 Screen icons, 58 Message alert tone, 52 Scroll rate, 17 Message capacity, 54 Special caller ID messages, 45 Message playback, 55 Speed dial Missed calls indicator, 41 Delete a number, 34...
- Page 84 Record new announcement B ........*8 End the call ................*9 Turn the answering system on or off ......0 ML17939 Two-line corded telephone/answering system with caller ID/call waiting © 2010-2015 Advanced American Telephones. All Rights Reserved. AT&T and the AT&T logo are trademarks of AT&T Intellectual Property licensed to Advanced American Telephones, San Antonio, TX 78219.
- Page 85 www.telephones.att.com Clearspeak ® is a registered trademark of Advanced American Telephones. © 2010-2015 Advanced American Telephones. All Rights Reserved. AT&T and the AT&T logo are trademarks of AT&T Intellectual Property licensed to Advanced American Telephones, San Antonio, TX 78219. Printed in China. Issue 12.0 AT&T 01/15.
Need help?
Do you have a question about the ML17939 and is the answer not in the manual?
Questions and answers
automated system keeps turning on and i can't figure out how to turn it off ML17939
To turn off the automated answering system on the AT&T ML17939, follow these steps:
1. When the telephone is idle, press the MENU button.
2. Use the arrow keys to scroll to "Answering sys." and press ENTER.
3. Scroll to "Mailbox 1" or "Mailbox 2" and press ENTER.
4. Scroll to "Answer on/off" and press ENTER.
5. Scroll to "off" and press ENTER to save the setting.
Alternatively, you can press the /ANS ON/OFF LINE 1 or /ANS ON/OFF LINE 2 button to turn the system off. The indicator light will turn off.
This answer is automatically generated