Advertisement
Quick Guide to Operating the Yaesu 857D
This Quick Guide to Operating the Yaesu 857-D, through a series of five graduated exercises,
introduces operating the radio, its controls, and builds up confidence with the rig. There are
several references to the 857-D manual that came with the radio, so please have the manual handy
and use it when indicated as part of the exercises.
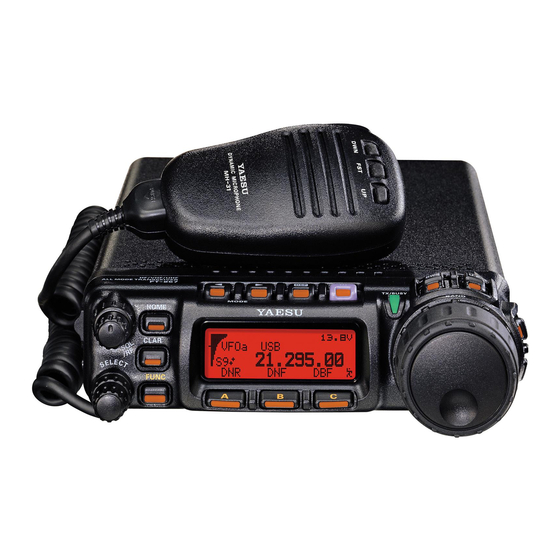
The Yaesu 857D HF/VHF/UHF 100 Watt transceiver is impressively multi-functional but very
compact. There is not much front panel real estate for knobs and buttons to control the radio.
Therefore many of the knobs and buttons perform multiple functions based on active menus
contained within the radio that interact with the display and control the radio.
One basic concept to keep in mind when operating the radio is that the radio has a VFO mode and
a Memory mode and behaves differently depending on the active mode. In VFO mode the radio is
very responsive to its full command structure. In Memory mode operator control is inhibited - the
radio rightfully assumes that the preset frequencies and operational parameters you have
previously stored in each memory location are to be protected from inadvertent tampering.
Therefore, one of the first controls the new operator needs to learn is the V/M key which toggles
the radio between VFO mode or Memory mode. Again, the radio will be fully responsive to
commands when either VFOa or VFOb is indicated in the upper left of the display instead of a
Mnnn.
Effectively operating the 857-D requires understanding the concept that there are two menu
system structures stacked on top of each other, sort of like a 17-story building stacked on top of a
broad foundation. The broad foundation is the MENU and consists of 91 menu items. I like to
think that when Yaesu first designed the 857D the engineers started with this 91-item base as the
original plan for operator control. They added some responsiveness by allowing you to place a
skip flag on any of the 91 items that might not be used frequently. You can then set Item #1 so that
the items with the skip flag would not be displayed during normal operation.
The designers soon found out they needed even more responsiveness, so they put the A, B, C keys
along the bottom of the display, then added a second menu structure, called the Multi-Function
Menu to assign various functions to these three A, B, C keys. You get to choose from a 17 row
list, as to which row will be assigned to the A, B, C keys. Again Yaesu did this to make the radio
more operationally agile. Some of the functions assigned to the A, B, C, keys do in fact jump to
some of the 91 items in the base MENU. Therefore you have to know how to navigate the
controls for both menu structures.
The base MENU structure of 91 items is entered by pressing and holding the FUNC key for one
second then using the Select Knob to select which of the 91 items to view and/or change. The
other menu structure, the Multi-Function Menu is entered by briefly pressing the FUNC key, then
using the Select Knob to select which of the 17 rows of the multi-function menu to assign to the
A, B, C keys. Both operations sound similar, but there is a profound difference in how they work.
When you have entered the MENU you have all the time in the world to use the Select Knob to
pick one of the 91 items. Conversely, when briefly pressing the FUNC key to enter the Multi
Function Menu, if the Select Knob is left unturned for five seconds, the radio automatically exits
Advertisement
Table of Contents

Subscribe to Our Youtube Channel
Related Manuals for Yaesu 857D


Summary of Contents for Yaesu 857D
- Page 1 Menu to assign various functions to these three A, B, C keys. You get to choose from a 17 row list, as to which row will be assigned to the A, B, C keys. Again Yaesu did this to make the radio more operationally agile.
- Page 2 The purpose of this document is to “learn by doing”. Through a series of simple, graduated tasks the Ham operator will be introduced to key operating concepts and actually operate the FT-857D. This radio has a built–in speaker. If you wish to use headphones, the headphone mini-jack is located on the left side of the radio about ¾...
- Page 3 8. Turn the Radio Off – Press and hold the Pwr On/Off button for one second.(Blue button top R Center of Fnt Panel) Congratulations, you have made an excellent start at learning how the FT-857D operates. Now quickly build confidence by trying other (NETS) frequencies - LSB at 7232Khz and USB at 14.280Mhz.
- Page 4 8. Turn the Radio Off – Press and hold the Pwr On/Off button for one second.(Blue button top R Center of Fnt Panel) The Select Knob performs many functions on the FT-857D. We just learned in Memory Mode it selects the memory location to access. In VFO or MTUNE modes, the SelectKnob performs rapid tuning in two different ways.
- Page 5 The MENU on the other hand is a list of 91 single items that you may need to access less frequently. It is accessed by pressing and holding the FUNC key for one second Also, some Multi Function Keys will jump to a MENU item. Place the radio in operation and use the Multi Function Keys.
- Page 6 Task #4: Place the radio in operation & reduce HF power from 100W to 50W. 1. Place the radio in operation – Do steps 1 to 7 from Task#1. Note: HF, VHF, and UHF power levels (100W, 50W, 20W), are set independently. The current band needs to be an HF band to start this training task.
- Page 7 1. Place the radio in operation – do steps 1 to 7 from Task#1 to place the radio in HF mode. Note: The current band should be an HF band to start this training task. 2. Do Steps 1 thru 5 on Page 40, Clarifier – Receiver Incremental Tuning of the FT-857D manual to introduce using RIT.
Need help?
Do you have a question about the 857D and is the answer not in the manual?
Questions and answers