Table of Contents
Advertisement
Quick Links
Advertisement
Table of Contents

Related Manuals for Pioneer SC-LX73


Summary of Contents for Pioneer SC-LX73
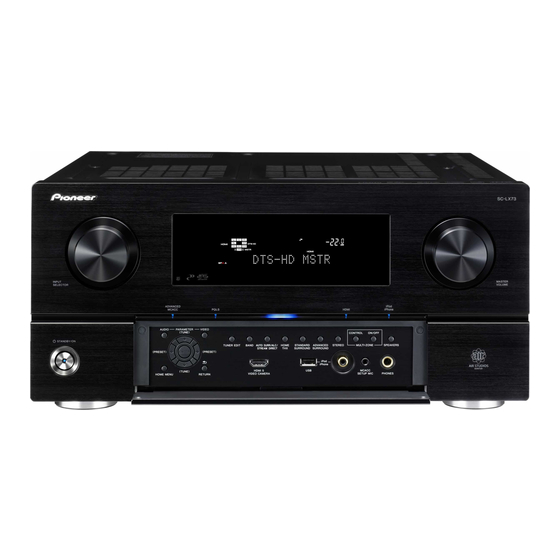
- Page 1 Operating Instructions SC-LX SC-LX audio/video multi-channel receiver...
-
Page 2: Operating Environment
IMPORTANT CAUTION RISK OF ELECTRIC SHOCK DO NOT OPEN The lightning flash with arrowhead symbol, CAUTION: The exclamation point within an equilateral within an equilateral triangle, is intended to TO PREVENT THE RISK OF ELECTRIC triangle is intended to alert the user to the alert the user to the presence of uninsulated SHOCK, DO NOT REMOVE COVER (OR presence of important operating and... - Page 3 Voltage selector VENTILATION CAUTION You can find the voltage selector switch on the rear When installing this unit, make sure to leave space around the unit for ventilation to improve heat radiation panel of multi-voltage models. The factory setting for the voltage selector is (at least 20 cm at top, 10 cm at rear, and 20 cm at each 220-230 V.
-
Page 4: Table Of Contents
....... 40 Remote control (In case of SC-LX73)....14 Switching components on and off using the Display . - Page 5 Bluetooth ADAPTER for Wireless Enjoyment of 09 Using other functions Music ........53 Setting the Audio options .
- Page 6 ....132 Preset code list (SC-LX73 only) ....133 Specifications.
- Page 7 • Operating multiple receivers (page 79) • Setting the remote to control other components (page 79) • Using the RF communications function (page 86) SC-LX73: • Operating multiple receivers (page 91) • Setting the remote to control other components (page 92)
-
Page 8: Before You Start
SC-LX83: PQLS Bit-stream/PQLS Multi Surround/PQLS 2ch Audio. SC-LX73: PQLS Multi Surround/PQLS 2ch Audio. 2 Home Media Gallery is only supported on the SC-LX83. 3 The Bluetooth ADAPTER (AS-BT100) is sold separately. 4 The CU-RF100 is included with the SC-LX83, sold separately with the SC-LX73. -
Page 9: Checking What's In The Box
• Omni-directional remote control (CU-RF100) • RF adapter • IR blaster cable x2 In case of SC-LX73 • AA/LR6 dry cell batteries x4 The batteries included with the unit are to check initial operations; they may not last over a long period. -
Page 10: Operating Range Of Remote Control Unit
Note 1 The RF adapter and CU-RF100 omni-directional remote control are included with the SC-LX83, sold separately with the SC-LX73. 2 The maximum line-of-sight distance for RF two-way communications is about 10 meters. This line-of-sight communications distance is a rough... -
Page 11: Controls And Displays
Controls and displays Chapter 2: Controls and displays The remote has been conveniently color-coded according to component control using the following system: Remote control (In case of SC-LX83) • White – Receiver control, TV control This section explains how to operate the remote control for the receiver. -
Page 12: Remote Control Display
Controls and displays STATUS – Press to check selected receiver settings 14 MUTE (page 76). Mutes the sound or restores the sound if it has been muted (adjusting the volume also restores the sound). PHASE CTRL – Press to switch on/off Phase Control or Full Band Phase Control (page 59). -
Page 13: Rf Adapter
Controls and displays RF adapter (Gray box with black letters): Two-way MAIN communications are established and the receiver’s power is off. Front (White letters only): Two-way communications are MAIN not working well. In this case, the area indicating the receiver’s status (12) is not displayed. Remote control code sending indicator This appears when signals are sent from the remote control. -
Page 14: Remote Control (In Case Of Sc-Lx73)
Controls and displays RECEIVER This switches between standby and on for this receiver. Remote control (In case of SC-LX73) This section explains how to operate the remote control MULTI OPERATION – Use to perform multi for the receiver. operations (page 94). -
Page 15: Display
Controls and displays HDMI OUT – Switch the HDMI output terminal RECEIVER (page 76). Switches the remote to control the receiver (used to select the white commands). SIGNAL SEL – Use to select an input signal (page 58). Switch to perform operations in the main zone. MCACC –... - Page 16 Lights when the Phase Control or Full Band Phase setting. (Not displayed when set to 1.) (SC-LX83: page 79, Control is switched on (page 58 and 59). SC-LX73: page 91) Analog signal indicators Light to indicate reducing the level of an analog signal (page 75).
-
Page 17: Front Panel
Controls and displays Front panel INPUT MASTER SELECTOR VOLUME ADVANCED iPod MCACC PQLS HDMI iPhone STANDBY/ON AUDIO PARAMETER VIDEO (TUNE) CONTROL ON/OFF TUNER EDIT BAND AUTO SURR/ALC/ HOME STANDARD ADVANCED STEREO MULTI-ZONE SPEAKERS STREAM DIRECT SURROUND SURROUND ENTER (PRESET) (PRESET) iPod iPhone... - Page 18 Controls and displays 11 TUNER EDIT Use with ////ENTER to memorize and name stations for recall (page 51). 12 BAND Switches between AM and FM radio bands (page 51). 13 Listening mode buttons AUTO SURR/ALC/STREAM DIRECT – Switches between Auto Surround (page 55), Auto Level Control, Optimum Surround mode and Stream Direct mode (page 58).
-
Page 19: Connecting Your Equipment
This receiver provides you with many connection possibilities, but it doesn’t have to be difficult. This chapter explains the kinds of components you can connect to make up your home theater system. Important • Illustration shows the SC-LX83, however connections for the SC-LX73 are the same except where noted. Rear panel SC-LX83... -
Page 20: Connecting The Rf Adapter (Sc-Lx83 Only)
CD-R/TAPE COAX-3 RF adapter a.SC-LX83 only. • SC-LX73 only: The CU-RF100 omni-directional remote control (separately sold) can be connected to the RS- 232C and EXTENSION terminals. Using the CU- RF100 lets you display the receiver’s display information on the remote control display in your... -
Page 21: Determining The Speakers' Application
Connecting your equipment [C] 7.1 channel surround system & Speaker B Determining the speakers’ application connection • Speaker System setting: Speaker B This unit permits you to build various surround systems, in accordance with the number of speakers you have. •... -
Page 22: Other Speaker Connections
Connecting your equipment [E] 5.1 channel surround system & ZONE 2 connection (Multi Zone) Placing the speakers • Speaker System setting: ZONE 2 Refer to the chart below for placement of the speakers With these connections you can simultaneously enjoy you intend to connect. -
Page 23: Connecting The Speakers
Connecting your equipment • Place the center speaker above or below the TV so that the sound of the center channel is localized at Connecting the speakers the TV screen. Also, make sure the center speaker Each speaker connection on the receiver comprises a does not cross the line formed by the leading edge of positive (+) and negative (–) terminal. -
Page 24: Installing Your Speaker System
Connecting your equipment Installing your speaker system At the very least, front left and right speakers only are necessary. Note that your main surround speakers should always be connected as a pair, but you can connect just one surround back speaker if you like (it must be connected to the left surround back terminal). -
Page 25: Bi-Amping Your Speakers
Connecting your equipment Bi-amping your speakers Front right Front left Bi-amp compatible Bi-amp compatible speaker speaker High High Center Subwoofer AC IN OUT 1 OUT 2 LAN ( 10/100 ) ADAPTER PORT (CONTROL) HDMI (OUTPUT 5 V ASSIGNABLE 100 mA MAX) COMPONENT VIDEO COAXIAL OPTICAL... -
Page 26: Selecting The Speaker System
Connecting your equipment ZONE 2 setup Selecting the Speaker system With these connections you can simultaneously enjoy 5.1-channel surround sound in the main zone with stereo The front height terminals can be used for front wide and playback on another component in ZONE 2. Speaker B connections, in addition to for the front height speakers. -
Page 27: About Hdmi
Connecting your equipment If several video components are assigned to the same input function (see The Input Setup menu on page 45), About HDMI the converter gives priority to HDMI, component, then The HDMI connection transfers uncompressed digital composite (in that order). video, as well as almost every kind of digital audio. -
Page 28: Connecting Your Tv And Playback Components
Connecting your equipment Connecting your TV and playback components Connecting using HDMI If you have an HDMI or DVI (with HDCP) equipped component (Blu-ray disc player (BD), etc.), you can connect it to this receiver using a commercially available HDMI cable. If the TV and playback components support the Control with HDMI feature, the convenient Control with HDMI functions can be used (see Control with HDMI function on page 67). -
Page 29: Connecting Your Dvd Player With No Hdmi Output
Connecting your equipment Connecting your DVD player with no HDMI output This diagram shows connections of a TV (with HDMI input) and DVD player (or other playback component with no HDMI output) to the receiver. DVD player, etc. HDMI/DVI-compatible monitor Select one Select one HDMI IN... -
Page 30: Connecting Your Tv With No Hdmi Input
Connecting your equipment Connecting your TV with no HDMI input This diagram shows connections of a TV (with no HDMI input) and DVD player (or other playback component) to the receiver. • With these connections, the picture is not output to the TV even if the DVD player is connected with an HDMI cable. Connect the DVD player’s video signals using a composite or component cord. -
Page 31: Connecting An Hdd/Dvd Recorder, Bd Recorder And Other Video Sources
Connecting your equipment Connecting an HDD/DVD recorder, BD recorder and other video sources This receiver has two sets of audio/video inputs and outputs suitable for connecting analog or digital video devices, including HDD/DVD recorders and BD recorders. When you set up the receiver you’ll need to tell the receiver which input you connected the recorder to (see also The Input Setup menu on page 45). -
Page 32: Connecting A Satellite/Cable Receiver Or Other Set-Top Box
Connecting your equipment Connecting a satellite/cable receiver or other set-top box Satellite and cable receivers, and terrestrial digital TV tuners are all examples of so-called ‘set-top boxes’. When you set up the receiver you’ll need to tell the receiver which input you connected the set-top box to (see The Input Setup menu on page 45). -
Page 33: Connecting The Multichannel Analog Inputs
Connecting your equipment Connecting the multichannel analog inputs For DVD Audio and SACD playback, your DVD player may have 5.1, 6.1 or 7.1 channel analog outputs (depending on whether your player supports surround back channels). Make sure that the player is set to output multichannel analog audio. -
Page 34: Connecting Other Audio Components
Connecting your equipment Connecting other audio components This receiver has both digital and analog inputs, allowing you to connect audio components for playback. When you set up the receiver you’ll need to tell the receiver which input you connected the component to (see also The Input Setup menu on page 45). -
Page 35: Connecting Additional Amplifiers
Connecting your equipment Connecting additional amplifiers Connecting AM/FM antennas This receiver has more than enough power for any home Connect the AM loop antenna and the FM wire antenna use, but it’s possible to add additional amplifiers to every as shown below. To improve reception and sound quality, channel of your system using the pre-outs. -
Page 36: Connecting External Antennas
150 mA MAX) CU-RF100 Note 1 For the INTERNET RADIO (SC-LX73 only), HOME MEDIA GALLERY (SC-LX83 only) and iPod/USB inputs, it is not possible use the same input in ZONE 2 and ZONE 3 simultaneously. 2 SC-LX83 only: • COMPONENT VIDEO ZONE 2 OUT can be used to output clear images. -
Page 37: Connecting To The Network Through Lan Interface
Connecting your equipment MULTI-ZONE setup using speaker terminals (ZONE 2) You must select ZONE 2 in Speaker system setting on Connecting to the network through page 110 to use this setup. LAN interface • Connect a TV monitor to the VIDEO ZONE 2 OUT By connecting this receiver to the network via the LAN jacks on this receiver. -
Page 38: Connecting The Bluetooth® Adapter
Note 1 The Bluetooth ADAPTER (AS-BT100) is sold separately. 2 • The Bluetooth wireless technology enabled device must support A2DP profiles. • Pioneer does not guarantee proper connection and operation of this unit with all Bluetooth wireless technology enabled devices. -
Page 39: Connecting A Usb Device For Advanced Mcacc Output
(as listed on page 142 of this manual) as well as the • If you want to link a Pioneer component to the IR instructions necessary for using it. receiver, see Operating other Pioneer components See the documentation provided with the Advanced with this unit’s sensor below to connect to the... -
Page 40: Operating Other Pioneer Components With This Unit's Sensor
CAUTION: RS-232C TRIGGER SPEAKER IMPEDANCE 6 Ω - 16 Ω . to the CONTROL IN jack of another Pioneer component. (OUTPUT (OUTPUT 5 V 12 V 150 mA MAX) Use a cable with a mono mini-plug on each end for the... -
Page 41: Plugging In The Receiver
Check the power cord once in a while. If you find it damaged, ask your nearest Pioneer authorized independent service company for a replacement. • Do not use any power cord other than the one supplied with this unit. -
Page 42: Basic Setup
(OSD Language) mode differs for the remote controls included with The language used on the Graphical User Interface the SC-LX83 and SC-LX73. For the SC-LX83’s remote screen can be changed. control, set the remote control operation selector switch to RECEIVER. For the SC-LX73’s remote •... -
Page 43: Automatically Conducting Optimum Sound Tuning
Basic Setup Make sure there are no obstacles between the speakers and the microphone. Automatically conducting optimum sound tuning (Full Auto MCACC) AUDIO PARAMETER VIDEO (TUNE) CONTROL ON/OFF The Full Auto MCACC Setup measures the acoustic TUNER EDIT BAND AUTO SURR/ALC/ HOME STANDARD ADVANCED... -
Page 44: Problems When Using The Auto Mcacc Setup
Basic Setup • MCACC – The six MCACC presets are used for storing • If you see an ERR message (or the speaker surround sound settings for different listening configuration displayed isn’t correct), there may be a positions. Simply choose an unused preset for now problem with the speaker connection. -
Page 45: The Input Setup Menu
(see Control with HDMI function on page 67). the input function buttons.) b.SC-LX83 only. c.SC-LX73 only. d.SC-LX83 only. (assignment possible) for the SC-LX73. Note 1 Devices connected to 12 volt triggers can be associated with HDMI OUT switching. For details, see HDMI Setup on page 68. -
Page 46: Basic Playback
Turn down the volume of your TV so that all sound is the SC-LX83 and SC-LX73. For the SC-LX83’s remote coming from the speakers connected to this receiver. control, set the remote control operation selector switch to RECEIVER. -
Page 47: Playing An Ipod
• Features such as the equalizer cannot be controlled using this receiver, and we recommend switching the equalizer off before connecting. • Pioneer cannot under any circumstances accept responsibility for any direct or indirect loss arising from any inconvenience or loss of recorded material resulting from the iPod failure. -
Page 48: Playing A Usb Device
3 Make sure the receiver is in standby when disconnecting the USB device. 4 SC-LX73 only: The iPod/USB function cannot be selected in the main zone when the Internet radio function is selected in the sub zone. Also, the iPod/USB function cannot be selected in the sub zone when the Internet radio function is selected in the main zone. -
Page 49: Playing Back Photo Files Stored On A Usb Memory Device
CTRL PTY SEARCH • Theme – Add various effects to the slideshow. SC-LX73: • Interval – Set the interval for switching the photos. • Press iPod USB to switch the remote control to the This may not be available depending on the Theme iPod/USB operation mode. -
Page 50: About Playable File Formats
Basic playback About playable file formats The USB function of this receiver supports the following file formats. Note that some file formats are not available for playback although they are listed as playable file formats. Music files Category Extension Stream .mp3 MPEG-1, 2, 2.5 Audio Layer-3 Sampling frequency... -
Page 51: Listening To The Radio
Basic playback Tuning directly to a station Listening to the radio SC-LX83 only: Set the remote control operation The following steps show you how to tune in to FM and selector switch to SOURCE. AM radio broadcasts using the automatic (search) and Press TUNER to select the tuner. -
Page 52: Naming Station Presets
• This section describes how to listen to Internet radio listen to onto this receiver, you will be able to select those on the SC-LX73. On the SC-LX83, Internet radio is Internet radio stations. You can program up to 24 operated with Home Media Gallery. -
Page 53: Bluetooth Adapter For Wireless Enjoyment Of Music
Proxy’ menu (page 112). ® Music data Bluetooth Select ‘Internet Radio Setting’. ADAPTER The following programming screen will be shown on the browser. This receiver Pioneer Top Menu Top Menu Internet Radio Setting Title J-POP Update Connection OK http://www.xxxxxxx.net:9500... -
Page 54: Pairing The Bluetooth Adapter And Bluetooth Wireless Technology Device
Bluetooth SIG, Inc. and any use of technology device. Switch on the Bluetooth wireless technology device that such marks by Pioneer Corporation is under license. Other trademarks and trade names are those of their you want to make pair, place it near the receiver and set respective owners. -
Page 55: Listening To Your System
The sound balancer controls three major theater sound elements dialogue, bass and surround with the SC-LX83 and SC-LX73. For the SC-LX83’s remote original algorithm. control, set the remote control operation selector switch to RECEIVER. -
Page 56: Using The Home Thx Modes
4 Neural Surround can be selected for 2-channel signals for which the input signal is PCM (48 kHz or less), Dolby Digital, DTS or analog 2- channel sources. 5 • ULTRA2 for the SC-LX83, SELECT2 for the SC-LX73. Unavailable with only one surround back speaker connected or not connected. -
Page 57: Using The Advanced Surround Effects
Listening to your system Using the Advanced surround effects Listening in stereo The Advanced surround effects can be used for a variety of additional surround sound effects. Most Advanced Surround When you select STEREO, you will hear the source modes are designed to be used with film soundtracks, but through just the front left and right speakers (and some modes are also suited for music sources. -
Page 58: Using Stream Direct
Listening to your system Set the remote control to the receiver operation mode. Using Stream Direct Use the Stream Direct modes when you want to hear the While listening to a source, press MCACC. truest possible reproduction of a source. All unnecessary Press repeatedly to select one of the six MCACC presets signal processing is bypassed, and you’re left with the See Data Management on page 107 to check and... -
Page 59: Better Sound Using Phase Control And Full Band Phase Control (Sc-Lx83 Only)
Listening to your system Phase Control technology provides coherent sound where the group delay characteristics are not effectively reproduction through the use of phase matching for an flattened. This phase distortion of the speakers optimal sound image. The default setting is on and we subsequently causes group delay (the delay of low- recommend leaving Phase Control switched on for all frequency sound against high-frequency sound) during... -
Page 60: Playback With Home Media Gallery Inputs (Sc-Lx83 Only)
DHCP server function, it created, edited, and managed by the vTuner is necessary to set up the network manually. Otherwise, database service exclusively for use with the Pioneer you cannot play back audio files stored on components products. -
Page 61: Authorizing This Receiver
Playback with HOME MEDIA GALLERY inputs (SC-LX83 only) • Favorites – Favorite songs currently being registered Authorizing this receiver In order to be able to play with Home Media Gallery, this • Recently played – Internet Radio listening history receiver must be authorized. This happens automatically (most recent 20 incidents) when the receiver makes a connection over the network to Depending on the selected category, the names of... -
Page 62: Listening To Internet Radio Stations
Internet radio stations broadcasting a variety of services The access code required for registration on the special from every corner of the world. Some are hosted, Pioneer Internet radio site is displayed. Make a memo of managed, and broadcast by private individuals while this address. -
Page 63: Playing Back Your Favorite Songs
Playback with HOME MEDIA GALLERY inputs (SC-LX83 only) Playing back your favorite songs Set the remote control operation selector switch to SOURCE. You can register up to 20 of your favorite songs or Internet radio stations in the Favorites folder. Note that only the Select the class that you want to retrieve an audio files stored on components on the network can be Internet radio station from. -
Page 64: Content Playable Over A Network
• Depending on the security software installed on a connected PC and the setting of such software, network connection may be blocked. Pioneer is not responsible for any malfunction of the player and/or the Home Media Gallery features due to communication error/malfunctions associated with your network connection and/or your PC, or other connected equipment. -
Page 65: About Playable File Formats
Playback with HOME MEDIA GALLERY inputs (SC-LX83 only) About playable file formats The Home Media Gallery feature of this receiver supports the following file formats. Note that some file formats are not available for playback although they are listed as playable file formats. Also, the compatibility of file formats varies depending on the type of server. -
Page 66: Glossary
100 different countries around the globe. For more detail about vTuner, visit the following website: http://www.radio-pioneer.com “This product is protected by certain intellectual property rights of NEMS and BridgeCo. Use or distribution of such... -
Page 67: Control With Hdmi Function
You can use synchronized operation for a connected TV the SC-LX83 and SC-LX73. For the SC-LX83’s remote and up to five other components. control, set the remote control operation selector switch to RECEIVER. For the SC-LX73’s remote •... -
Page 68: Hdmi Setup
Control with HDMI function Select the ‘Standby Through’ setting you want. It is possible to transfer signals from an HDMI-connected HDMI Setup player to the TV when this receiver's power is on standby You must adjust the settings of this receiver as well as the as long as Control is ON, but the amount of energy connected Control with HDMI-compatible components consumed rises. -
Page 69: About Synchronized Operations
The synchronized operations below can be used when below. the receiver’s Control with HDMI function is connected to a TV of a brand other than Pioneer that supports the • From the menu screen of the Control with HDMI- Control with HDMI function. (Depending on the TV,... -
Page 70: Setting The Pqls Function
PQLS effect is enabled, the PQLS effect is disabled. • When this receiver is connected by HDMI cable to a Pioneer player that is compatible with the PQLS function via HDMI connection and HDMI reauthentication is performed (the HDMI indicator blinks), the PQLS effect is enabled and the listening mode is set to AUTO SURROUND if a listening mode other than AUTO SURROUND, ALC, DIRECT, PURE DIRECT, OPTIMUM SURR (SC-LX83 only) or STEREO is selected. -
Page 71: Using Other Functions
Delay) soundtrack will be slightly out of 1 second = 25 the SC-LX83 and SC-LX73. For the SC-LX83’s remote sync with the picture. By adding a frames (PAL) / control, set the remote control operation selector... - Page 72 HOME MEDIA GALLERY (SC-LX83 only), Provides a better blend of the 0 to 7 INTERNET RADIO (SC-LX73 only) or ADAPTER PORT input C. WIDTH function, by default S.RTRV is set to ON. front speakers by spreading the...
-
Page 73: Setting The Video Options
HDMI with the SPEAKERS button. 480p/576p OUT connector, select this • When inputting Dolby True HD (SC-LX73 only), DTS-HD or DTS Express audio signals, the Virtual Surround Back mode cannot be according to the resolution of your 720p used if no surround signals are recorded in the source. -
Page 74: Switching The Speaker Terminals
Using other functions Setting What it does Option(s) Switching the speaker terminals Adjusts the overall brightness. –6 to +6 BRIGHT (Brightness) Default: 0 If you selected Speaker B at Speaker system setting on page 110, you can switch between speakers using the Adjusts the contrast between light –6 to +6 CONTRAST... -
Page 75: Making An Audio Or A Video Recording
MASTER Use to set the listening volume in the sub component. VOLUME +/– zone. (SC-LX73) Reducing the level of an analog signal VOL +/– (SC-LX83) The input attenuator lowers the input level of an analog signal when it’s too strong. You can use this if you find... -
Page 76: Using The Sleep Timer
Using other functions Using the sleep timer Using the Web Control function The sleep timer switches the receiver into standby after a The receiver can be operated using a browser from a specified amount of time so you can fall asleep without computer connected on the same LAN as the receiver. -
Page 77: Resetting The System
Sound Retriever iPod/USB, HOME MEDIA GALLERY (SC- Switch the receiver into standby. LX83 only), INTERNET RADIO (SC-LX73 While holding down ENTER on the front panel, only), ADAPTER press STANDBY/ON. PORT function The display shows RESET NO . -
Page 78: Controlling The Rest Of Your System (In Case Of Sc-Lx83)
Controlling the rest of your See “Renaming input function names in system (In case of SC-LX73) on page 91. synchrony with the receiver” on page 88. ERASE This function is used to erase remote control codes that have been learned. -
Page 79: Operating Multiple Receivers
2 You can’t assign TUNER, HMG NET RADIO, ADAPTER and iPod USB. 3 • When using a Pioneer HDD recorder, please select PIONEER DVR 450, 451 or 452. • When using a Pioneer flat panel TV released prior to summer 2005, please select preset code 644. -
Page 80: Programming Signals From Other Remote Controls
Note 1 The remote can store about 200 preset codes (this has been tested with codes of Pioneer format only). 2 • You can’t assign TUNER, HMG NET RADIO, ADAPTER and iPod USB. -
Page 81: Resetting The Input Assignment Of One Of The Input Function Buttons
Controlling the rest of your system (In case of SC-LX83) Press the input function button corresponding to the command to be erased, then press ENTER. Confirming preset codes The remote display flashes PRESS KEY. Use this feature to check which preset code is assigned Press and hold the button to be erased for two to an input function button. -
Page 82: Direct Function
Controlling the rest of your system (In case of SC-LX83) While pressing MULTI OPERATION, press HOME MENU. Direct function The remote display shows SETUP MENU. • Default setting: ON Use / to select ‘MULTI OPERATE’ or ‘SYSTEM You can use the direct function feature to control one OFF’... -
Page 83: Using Multi Operations
• You don’t need to program the receiver to switch on or off. This is done automatically. Controlling components With Pioneer components, you don’t need to: This remote control can control components after entering the proper codes (see Selecting preset codes •... - Page 84 Controlling the rest of your system (In case of SC-LX83) Button(s) TV (Monitor) BD/DVD HDD/DVR SAT/CATV SOURCE POWER ON/OFF POWER ON/OFF POWER ON/OFF POWER ON/OFF POWER ON/OFF POWER ON/OFF Number buttons numerics numerics numerics numerics numerics numerics KURO LINK CLEAR –...
- Page 85 Controlling the rest of your system (In case of SC-LX83) Button(s) CD/CD-R/SACD MD/DAT TAPE Button(s) TV (Projector) SOURCE POWER ON/OFF POWER ON/OFF POWER ON/OFF POWER ON/OFF SOURCE POWER ON Number buttons numerics numerics numerics – MOVIE • (dot) >10/CLEAR CLEAR CLEAR...
-
Page 86: Using The Rf Communications Function
Controlling the rest of your system (In case of SC-LX83) Using the RF communications function IR blaster (only required when you want to operate other components by RF two-way communications) (max. 4 components) ANTENNA AM LOOP FM UNBAL 75 CONTROL RS-232C (OUTPUT 5 V 150 mA MAX) -
Page 87: Pairing The Rf Adapter And Remote Control
Controlling the rest of your system (In case of SC-LX83) Use / to select the receiver zone for which you Pairing the RF adapter and remote control want to use RF two-way communications, then press Pairing is necessary in order to use the RF ENTER. -
Page 88: Renaming Input Function Names In Synchrony With The Receiver
Controlling the rest of your system (In case of SC-LX83) Connect the IR blaster cable to the RF Adapter’s IR Blaster terminal and mount the transmitter on the Renaming input function names in component you want to operate with RF synchrony with the receiver communications. -
Page 89: Setting The Remote Control Operation Mode
Controlling the rest of your system (In case of SC-LX83) Examples of common devices utilizing the 2.4 GHz band: Setting the remote control operation • Cordless phone mode • Cordless facsimile • Default setting: ON • Microwave oven When the remote control operation mode is turned on •... -
Page 90: Usable Range
CAUTION • With the exception of cases determined by law to be the subject of legal liability, Pioneer refuses all responsibility for any harm resulting to the customer or other person as a result of the use of this remote control. -
Page 91: Controlling The Rest Of Your System (In Case Of Sc-Lx73)
Controlling the rest of your system (In case of SC-LX73) Controlling the rest of your system (In case of SC-LX73) Setting What it does Important Reset This is a function for resetting preset codes that • This section includes explanations for the SC-LX73’s have been set. -
Page 92: Setting The Remote To Control Other Components
See Preset code list (SC-LX73 only) on page 133. The LED blinks once and flashes continuously. Note 1 The remote can store about 120 preset codes from other components (this has been tested with codes of Pioneer format only). -
Page 93: Erasing One Of The Remote Control Button Settings
Controlling the rest of your system (In case of SC-LX73) Point the two remote controls towards each other, then press the button that will be doing the learning on Erasing all learnt settings that are in this receiver’s remote control. -
Page 94: Setting The Backlight Mode
2 Some remote controllers for other manufacturers' devices use the same signals for switching the power on and off. In some cases, even if this receiver is programmed to perform these commands, power to the non-Pioneer devices may not be switched on and off correctly. Program... -
Page 95: Programming A Multi Operation Or A Shutdown Sequence
Controlling the rest of your system (In case of SC-LX73) Programming a Multi operation or a Using System off shutdown sequence Press MULTI OPERATION. The LED flashes continuously. Press and hold R.SETUP, then press “3” for three seconds. Within five seconds, press SOURCE. -
Page 96: Resetting The Remote Control Settings
Controlling the rest of your system (In case of SC-LX73) Resetting the remote control settings Controlling components Use this procedure to reset all the remote control’s This remote control can control components after entering the proper codes (see Setting the remote to settings to the factory default. - Page 97 Controlling the rest of your system (In case of SC-LX73) Button(s) TV (Monitor) BD/DVD HDD/DVR SAT/CATV SOURCE POWER ON/OFF POWER ON/OFF POWER ON/OFF POWER ON/OFF POWER ON/OFF POWER ON/OFF Number buttons numerics numerics numerics numerics numerics numerics KURO LINK CLEAR •...
- Page 98 Controlling the rest of your system (In case of SC-LX73) Button(s) TV (Projector) Button(s) CD/CD-R/SACD MD/DAT TAPE SOURCE POWER ON SOURCE POWER ON/OFF POWER ON/OFF POWER ON/OFF POWER ON/OFF MOVIE Number buttons numerics numerics numerics STANDARD • (dot) >10/CLEAR...
-
Page 99: The Advanced Mcacc Menu
Select the setting you want to adjust. mode differs for the remote controls included with • Full Auto MCACC – See Automatically conducting the SC-LX83 and SC-LX73. For the SC-LX83’s remote optimum sound tuning (Full Auto MCACC) on control, set the remote control operation selector page 43 for a quick and effective automatic surround switch to RECEIVER. - Page 100 The Advanced MCACC menu Select ‘Auto MCACC’ from the Advanced MCACC 2nd reference 3rd reference menu, then press ENTER. point point If the Advanced MCACC screen is not displayed, refer to Making receiver settings from the Advanced MCACC menu on page 99. Select the parameters you want to set.
-
Page 101: Manual Mcacc Setup
The Advanced MCACC menu • With error messages (such as Too much ambient The Auto MCACC Setup procedure is completed and noise! or Check microphone) select RETRY after the Advanced MCACC menu reappears automatically. checking for ambient noise (see Problems when The settings made in the Auto MCACC Setup should give using the Auto MCACC Setup on page 44) and you excellent surround sound from your system, but it is... -
Page 102: Fine Channel Level
The Advanced MCACC menu Select ‘Manual MCACC’ from the Advanced Select each channel in turn and adjust the levels (+/ MCACC menu. –12.0 dB) as necessary. Use / to adjust the volume of the speaker you See Making receiver settings from the Advanced MCACC menu on page 99 if you’re not already at this screen. -
Page 103: Standing Wave
The Advanced MCACC menu When you’re finished, press RETURN. Select ‘EQ Adjust’ from the Manual MCACC setup You will return to the Manual MCACC setup menu. menu. Select the channel(s) you want and adjust to your Standing Wave liking. • Default setting: ON /ATT 0.0dB (all filters) Use /... - Page 104 The Advanced MCACC menu • Type B: Reverb characteristics for different • EQ ON – You will see the reverb characteristics of channels your listening area with the equalization performed by this receiver (after calibration). Note that the EQ Front L Level response may not appear entirely flat due to adjustments necessary for your listening area.
-
Page 105: Precision Distance (Sc-Lx83 Only)
The Advanced MCACC menu After the Acoustic Calibration Equalization is set, you are given the option to check the settings on-screen. Checking MCACC Data At the procedure of Automatically conducting optimum Precision Distance (SC-LX83 only) sound tuning (Full Auto MCACC) on page 43, the Before using this function, perform the Full Auto MCACC procedure of Automatic MCACC (Expert) on page 99 or Setup procedure (see page 43). -
Page 106: Speaker Setting
The Advanced MCACC menu Press to highlight ‘MCACC’, then use / to Press RETURN to go back to the MCACC Data Check menu, repeating steps 2 and 3 to check other select the MCACC preset you want to check. settings. -
Page 107: Output Mcacc Data
The Advanced MCACC menu Output MCACC data Data Management Before continuing, make sure you have completed step 2 in Checking MCACC Data on page 105. The data This system allows you to store up to six MCACC presets, measured with the Advanced MCACC function is allowing you to calibrate your system for different transmitted to the USB device. -
Page 108: Copying Mcacc Preset Data
The Advanced MCACC menu Copying MCACC preset data If you want to manually adjust the Acoustic Calibration EQ (see Manual MCACC setup on page 101), we recommend copying your current settings to an unused MCACC preset. Instead of just a flat EQ curve, this will give you a reference point from which to start. -
Page 109: The System Setup And Other Setup Menus
114). • The procedure for setting the receiver operation mode differs for the remote controls included with the SC-LX83 and SC-LX73. For the SC-LX83’s remote Manual speaker setup control, set the remote control operation selector switch to RECEIVER. For the SC-LX73’s remote... -
Page 110: Speaker System Setting
The System Setup and Other Setup menus Speaker system setting When ‘Setting Change?’ is displayed, select Yes. If No is selected, the setting is not changed. • Default setting: Normal(SB/FH) You will return to the Manual SP Setup menu. There are several ways you can use the speaker terminals with this receiver. -
Page 111: Channel Level
The System Setup and Other Setup menus • Surr – Select LARGE if your surround speakers Channel Level reproduce bass frequencies effectively. Select Using the channel level settings, you can adjust the SMALL to send bass frequencies to the other overall balance of your speaker system, an important speakers or subwoofer. -
Page 112: X-Curve
• 1.2 m< – Surround back speakers more than 1.2 m apart (default). Note 1 Since the principal is the same, X-Curve isn’t applied when you’re using any of the Home THX, Pure direct or Optimum surround modes. 2 Ultra2 for the SC-LX83, Select2 for the SC-LX73. -
Page 113: Ip Address/Proxy Setting
The System Setup and Other Setup menus IP address/Proxy setting Select ‘IP Address, Proxy’ from the Network Setup menu. In case the router connected to the LAN terminal on this receiver is a broadband router (with a built-in DHCP Select the DHCP setting you want. server function), simply turn on the DHCP server When you select ON, the network is automatically set up, function, and you will not need to set up the network... -
Page 114: The Other Setup Menu
MUTE is pressed. standby mode (page 115). • FULL (default) – No sound. • EXTENSION Setup (SC-LX73 only) – Allows the CU- RF100 to be used even when the receiver is in the • –40.0dB/–20.0dB – The volume will be turned down standby mode (page 115). -
Page 115: Flicker Reduction Setup
When you’re finished, press RETURN. You will return to the Other Setup menu. EXTENSION Setup (SC-LX73 only) • Default setting: OFF The CU-RF100 can be used to operate the receiver by RF communications. To do so, set the EXTENSION setting to ON. -
Page 116: Additional Information
The three major elements in positioning the speakers are the listening position, the sound field will seem cramped. distance, angle and orientation (the direction in which Testing by the Pioneer Multi-channel Research Group the speakers are pointing). has shown that a good sense of sound positioning can be... -
Page 117: Positional Relationship Between Speakers And Monitor
Sometimes the trouble may lie in another component. Investigate the other components and electrical appliances being used. If the trouble cannot be rectified even after exercising the checks listed below, ask your nearest Pioneer authorized independent service company to carry out repair work. Note •... -
Page 118: No Sound
If so, re-attach the speaker wires, making sure there are no stray strands. indicator blinks. • The receiver may have a serious problem. Disconnect from the power and call a Pioneer authorized independent service company. AMP ERR blinks in the display, •... -
Page 119: Other Audio Problems
Additional information Symptom Remedy No sound from front height or • Check that the front height or front wide speakers are set to LARGE or SMALL, and the surround front wide speakers. speakers are not set to NO (see Speaker Setting on page 110). •... -
Page 120: Adapter Port
Additional information Symptom Remedy Everything seems to be set up • The speakers may be out of phase. Check that the positive/negative speaker terminals on the correctly, but the playback receiver are matched with the corresponding terminals on the speakers (see Connecting the sound is odd. -
Page 121: Video
Additional information Video Symptom Remedy No image is output when an • Check the video connections of the source component (see page 31). input is selected. • For HDMI, or when digital video conversion is set to OFF and a TV and another component are connected with different cords (in Setting the Video options on page 73), you must connect your TV to this receiver using the same type of video cable as you used to connect your video component. -
Page 122: Professional Calibration Eq Graphical Output
Additional information Symptom Remedy Can’t adjust the Fine Speaker • Check that the speakers are all in phase (make sure the positive (+) and negative (–) terminals are Distance setting (page 102) matched up properly). properly. SC-LX83 only: Gauge (value) •... -
Page 123: Remote Control
(see Programming signals from other remote controls on page 80 (SC- LX83) / page 92 (SC-LX73)). If they still do not work, they may be in a special format that cannot be registered on this receiver’s remote control. Operate the device using another remote control. -
Page 124: Hdmi
Additional information Symptoms Causes Remedies Receiver’s power does not Network Standby at Network Setup is set to Set Network Standby at Network Setup to ON turn on when the power is (page 112). OFF. turned on using the Web Control function. HDMI Symptom Remedy... -
Page 125: Important Information Regarding The Hdmi Connection
Additional information Important information regarding the HDMI connection There are cases where you may not be able to route HDMI signals through this receiver (this depends on the HDMI- equipped component you are connecting–check with the manufacturer for HDMI compatibility information). If you aren’t receiving HDMI signals properly through this receiver (from your component), please try one of the following configurations when connecting up. -
Page 126: Internet Radio (Sc-Lx73 Only)
Class keyboard. Cannot enter correct text Keyboard is not US-international layout keyboard. Use a US-international layout keyboard. NB: using the USB keyboard. Some characters cannot be entered. Internet radio (SC-LX73 only) Symptoms Causes Remedies Cannot access the network. The LAN cable is not firmly connected. -
Page 127: Home Media Gallery (Sc-Lx83 Only)
Additional information HOME MEDIA GALLERY (SC-LX83 only) Symptoms Causes Remedies Cannot access the network. The LAN cable is not firmly connected. Firmly connect the LAN cable (page 37). The router is not switched on. Switch on the router. Internet security software is currently installed in There are cases where a component with Internet the connected component. - Page 128 Additional information Symptoms Causes Remedies Cannot access Windows In case of Windows Media Player 11: You are Instead of logging onto the domain, log onto the Media Player 11 or Windows currently logged onto the domain through your local machine (page 61). Media Player 12.
-
Page 129: Surround Sound Formats
In case of SC-LX83 Dolby The Dolby technologies are explained below. See www.dolby.com for more detailed information. In case of SC-LX73 Manufactured under license from Dolby Laboratories. “Dolby”, “Pro Logic”, “Surround EX” and the double-D symbol are trademarks of Dolby Laboratories. - Page 130 Additional information • THX Ultra2/Select2 Plus • ASA Description Before any home theatre component can be THX Ultra2/Select2 Plus ASA is a proprietary THX technology which processes the sound fed certified, it must incorporate all the features above and also pass a to 2 side and 2 back surround speakers to provide the optimal rigorous series of quality and performance tests.
-
Page 131: About Ipod
Additional information About iPod About FLAC FLAC Decoder Copyright © 2000, 2001, 2002, 2003, 2004, 2005, 2006, 2007 Josh Coalson Redistribution and use in source and binary forms, with or without modification, are permitted provided that the following conditions are met: •... -
Page 132: Auto Surround, Alc And Stream Direct With Different Input Signal Formats
Additional information Auto Surround, ALC and Stream Direct with different input signal formats The following charts show what you will hear with different input signal formats, depending on the Stream Direct mode (see Using Stream Direct on page 58) you have selected. Stereo (2 channel) signal formats Input signal format Auto Surround / ALC / DIRECT... -
Page 133: Preset Code List (Sc-Lx73 Only)
Additional information Preset code list (SC-LX73 only) You should have no problem controlling a component if you find the manufacturer in this list, but please note that there are cases where codes for the manufacturer in the list will not work for the model that you are using. There are also cases where only certain functions may be controllable after assigning the proper preset code. - Page 134 Additional information Geant Casino 0041 Karcher 0010, 0026, 0027, 0037, 0040 Neufunk 0039, 0040 Reflex 0040 GEC 0026, 0031, 0034, 0037, 0040, Kawasho 0113 New Tech 0027, 0034, 0039, 0040, Revox 0010, 0034, 0037, 0040, 0114 0114 Kendo 0010, 0029, 0030, 0040 Rex 0025, 0030, 0031 Geloso 0027, 0030, 0039 New World 0028...
- Page 135 If operations are not possible using the preset codes below, you may be able to conduct operations with the preset codes for the DVD, BD. Pioneer 2238, 2239, 2240, 2241, 2242, Panasonic 2165, 2171 Sony 2170, 2173, 2174, 2175, 2178...
- Page 136 Formenti/Phoenix 1006 Schneider 1000, 1002, 1003, 1004, Matsui 1002, 1005 1005, 1006, 1007, 1017, 1018 Frontech 1004 Satellite Set Top Box Pioneer 6096, 6095, 6080, 6176, 0196 ADB 6050 Allvision 6128, 6114, 6075 Ankaro 6056 Akai 6090 Amitronica 6056 Ansonic 6121...
- Page 137 Additional information Arcus 6069 Daewoo 6143, 6056, 6071, 6144, 6058 GOD Digital 6090 Manata 6132, 6056 Armstrong 6090 Dantax 6104 Gold Box 6096, 6095 Manhattan 6052, 6127 Arnion 6127 Deltasat 6068 Gold Vision 6123 Marantz 6090 ASA 6106 Denver 6121 Golden Interstar 6126 Maspro 6053, 6056 Asat 6090...
- Page 138 Additional information Pilotime 6154 Schaub Lorenz 6072, 6121 Sumin 6075 Triasat 6112 Pino 6114 Schneider 6074, 6103 Sunny 6127 Triax 6096, 6090, 6132, 6135, 6065, 6129, 6104, 6079, 6137, 6089, 6133, Pixx 6067 Schwaiger 6143, 6132, 6138, 6131, Sunsat 6056 6120, 6071, 6140, 6103, 6119, 6056, 6106, 6078, 6068, 6114, 6075, 6064, Planet 6137...
- Page 139 Additional information Cable Set Top Box Pioneer 0197, 6081 General Instrument 6152, 6142 Optus 6152 StarHub 6152 Orange 6136 Supercable 6152 ABC 6142 Humax 6100, 6124 ADB 6051 Pace 6097 Telewest 6101 Jerrold 6152, 6142 Auna 6051 Panasonic 6116 Thomson 6146, 6100...
-
Page 140: Specifications
RS-232C cable type ..9-pin, cross type, female-female 7 ch total ... . 770 W (SC-LX83)/700 W (SC-LX73) EXTENSION terminal (SC-LX73 only) ..5 V, 150 mA Maximum power output (1 kHz, THD 10 %, 6 Ω, 1 ch Drive ) -
Page 141: Cleaning The Unit
Power cord ........1 These operating instructions Incase of SC-LX73: MCACC Setup microphone (APM7009) ....1 Remote control unit (AXD7592). -
Page 142: Pioneer Authorized Distributors
When using the Advanced MCACC setup, you have the option of displaying the results using a computer. To obtain the software for this feature (as referred to in Connecting a USB device for Advanced MCACC output on page 39 and Output MCACC data on page 107), please contact the Pioneer Authorized Distributor for your area as listed above. - Page 143 Additional information...
- Page 144 253 Alexandra Road, #04-01, Singapore 159936 TEL: 65-6472-7555 PIONEER ELECTRONICS AUSTRALIA PTY. LTD. 178-184 Boundary Road, Braeside, Victoria 3195, Australia, TEL: (03) 9586-6300 PIONEER ELECTRONICS DE MEXICO S.A. DE C.V. Blvd.Manuel Avila Camacho 138 10 piso Col.Lomas de Chapultepec, Mexico, D.F. 11000 TEL: 55-9178-4270 K002_B1_En Published by Pioneer Corporation.
Need help?
Do you have a question about the SC-LX73 and is the answer not in the manual?
Questions and answers
Merhaba bu amfinin bende türkçe açıklaması yok rica etsem bana gönderebilirmisiniz, teşekkür ederim