
Related Manuals for STOVES SGB600MFSE


Summary of Contents for STOVES SGB600MFSE
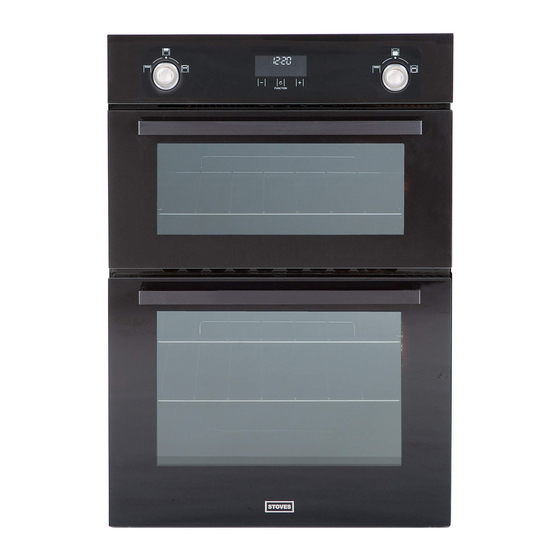
- Page 1 Users Guide & Installation Handbook Stoves Professional Gas Built In UK Part No 082755803 Date 27/11/2014...
- Page 2 CONTENTS & INTRODUCTION CONTENTS WARRANTY • SAFETY Your new appliance comes with our • USING THE PRODUCT 12-month guarantee, protecting you against electrical and mechanical • CLEANING breakdown. To register your appliance please call 0844 481 0182, complete • INSTALLATION INSTRUCTIONS the registration form included or register •...
- Page 3 CONTENTS & INTRODUCTION Our policy is one of constant development and improvement, therefore we cannot guarantee the strict accuracy of all of our illustrations and specifications - changes may have been made subsequent to publishing. GAS WARNING If you smell gas: Do not try to light any appliance. Do not touch any electrical switch.
- Page 4 BEFORE USING THE PRODUCT • Make sure that you have removed all packaging and wrapping. Some of the items inside this appliance may have additional wrapping. • It is advised that you turn the ovens and/or grill on for a short while. This will burn off any residues left from manufacturing.
- Page 5 SAFETY surfaces. BEFORE USING THE PRODUCT Make sure that you have removed all WARNING! - Servicing should packaging and wrapping. Some of the be carried out only by authorised items inside this appliance may have personnel. additional wrapping. Please note:- these safety warnings cover both gas and electric products.
- Page 6 SAFETY Prolonged intensive use of the result in shattering of the glass. WARNING! - Do not operate the appliance may call for additional ventilation, for example opening appliance without the glass panel of a window, or more effective correctly fitted. ventilation, for example increasing CAUTION: This appliance is for the level of mechanical ventilation cooking purposes only.
-
Page 7: Using The Grill
USING THE GRILL 60cm Product 90cm Product Caution: Accessible parts may be hot The cooling fan when the grill is used, young children When the grill is switched on, you will should be kept away. hear the cooling fan come on - this keeps the fascia and control knobs of the ap- A grill pan handle can be purchased as an pliance cool during grilling. - Page 8 USING THE GRILL Timer Symbols The first setting is Eco grill . To switch to the full grill setting touch the centre of The following image identifies the symbols the control knob and the display will show that will be found on the timer display. for full grill. Important: The door must be kept open when the grill is used.
-
Page 9: Oven Furniture
USING THE TOP OVEN - 90cm ONLY If you are not preheating the oven, the Top Oven Control cooking times in the baking guides may Light Only Mode need to be extended, as they are based on a preheated oven. Turn the oven control knob towards the symbol. - Page 10 USING THE TOP OVEN - 90cm ONLY facing upwards. time. Slow cooking times will be about three Slow cooking times as long as conventional cooking Make sure that frozen foods are thorough- times. ly THAWED before cooking. Do not slow cook joints of meat or poultry weighing more than 2¼kg/4½lb.
- Page 11 USING THE TOP OVEN - 90cm ONLY Top Oven Baking Guide - Temperature Dish Recom- Suggested Approximate mended shelf position cooking time temperature (preheated oven) Scones middle - top 8 - 15 mins Meringues bottom 2 - 3 hours Cakes Small cakes middle - top 15 - 25 mins...
- Page 12 USING THE TOP OVEN - 90cm ONLY Traditional fruit cakes • Turkey should be roasted at gas mark 5 for 20 minutes per lb, plus 20 It should be remembered that ovens can minutes, unless packaging advises vary over time, therefore cooking times otherwise.
- Page 13 USING THE TOP OVEN - 90cm ONLY • For joints cooked in foil or covered per 450g (1lb) extra cooking time. roasters, and for lidded casseroles, • Position the oven shelf so that the add 5 minutes per 450g (1lb) to the meat or poultry is in the centre of the calculated cooking time.
-
Page 14: Using The Main Oven
USING THE MAIN OVEN 3rd Touch - Pizza Setting Main Oven Control The display will show the Pizza mode set- Light Only Mode ting Turn the oven control knob towards the Touching the control knob again will revert symbol. back to fanned oven. The first position is the light only mode and Preheat can be used to aid you in the cleaning of... - Page 15 USING THE MAIN OVEN Touch 1 - Dual grill (60cm ONLY) Oven shelves The display will show the grill symbol Extra shelves may be ordered from your local supplier. Touching the centre of the control knob again will revert back to single grill. The oven shelf must be positioned with the upstand at the rear of the oven and facing upwards.
- Page 16 USING THE MAIN OVEN Main Oven Baking Guide - Gas Mark Dish Recom- Suggested Approximate mended shelf position cooking time gas mark (preheated oven) Scones middle - top 8 - 15 mins Meringues bottom 2 - 3 hours Cakes Small cakes middle - top 15 - 25 mins Whisked sponge...
- Page 17 USING THE MAIN OVEN Main Oven Baking Guide - Temperature Dish Recom- Suggested Approximate mended shelf position cooking time temperature (preheated oven) Scones middle - top 8 - 15 mins Meringues bottom 2 - 3 hours Cakes Small cakes middle - top 15 - 25 mins Whisked sponge middle - top...
- Page 18 USING THE MAIN OVEN Traditional fruit cakes • Turkey should be roasted at gas mark 5 for 20 minutes per lb, plus 20 It should be remembered that ovens can minutes, unless packaging advises vary over time, therefore cooking times otherwise.
- Page 19 USING THE MAIN OVEN • For joints cooked in foil or covered roasters, and for lidded casseroles, add 5 minutes per 450g (1lb) to the calculated cooking time. • Smaller joints weighing less than 1.25kg (2½lb) may require 5 minutes per 450g (1lb) extra cooking time.
- Page 20 USING THE TOUCH PROGRAMMER Select a function Plus - increase time or volume Minus - decrease time or volume Power ON/initial operation After connecting the appliance to the mains, the display shows the default TIME of DAY flashing. In the event of a power failure, the oven & grill elements will not automatically switch on when power is resumed;...
-
Page 21: Minute Minder
USING THE TOUCH PROGRAMMER Minute Minder TIME, the MANUAL mode changes to the AUTOMATIC mode, the COOKING POT Select the MINUTE MINDER mode by using symbol & the current TIME of DAY are the FUNCTION symbol until the MINUTE displayed. MINDER symbol is flashing. The MIN- UTE MINDER can be set using the... - Page 22 USING THE TOUCH PROGRAMMER Fully Automatic This mode is used to set the COOKING TIME and END of COOKING TIME and al- lows the oven to switch on at the correct time to ensure the food is ready for the desired end time.
-
Page 23: Ventilation Requirements
INSTALLATION Before you start: Please read the instruc- In the Republic of Ireland, Installers tions. Planning your installation will save should refer to IS813 Domestic Gas Appli- you time and effort. ances. Ventilation Requirements Prior to installation, ensure that the local distribution conditions (nature of the gas The room containing the appliance should and gas pressure) and the adjustment of have an air supply in accordance with BS... -
Page 24: Housing Dimensions
INSTALLATION - 60CM STEP 1 : PREPARE INSTALLATION Do not lift the appliance by the door handle. Whilst every care is taken to elimi- nate burrs and raw edges from this product,please take care when handling - we recommend the use of protective gloves during installation. - Page 25 INSTALLATION - 60CM i) When installed in a typical 600mm Ensure that you route all mains electrical deep built in housing unit, the false back cables and flexible tubing well clear of should be removed from the housing unit any adjacent heat source, such as an to provide the necessary depth for oven, grill or hob.
- Page 26 INSTALLATION - 90CM STEP 1 : PREPARE INSTALLATION Cut 12mm from the top of any plinth that Do not lift the appliance by the door may be fitted (see diagram). handle. Important: Do not modify the outer Remove the fixing screws from the panels of this appliance in any way. polythene bag on the top of the appli- ance, but leave the appliance in the base tray packaging until you are ready to install it.
- Page 27 INSTALLATION - 90CM Dimensions The appliance is designed to fit into a standard 600mm wide housing unit, with minimum internal dimensions as shown. Note: All sizes are nominal, some variation is to be expected. Step 2 : Connect to gas supply 3. Use a 900mm - 1125mm length of 1. The inlet to the appliance is ISO 7 flexible connector.
- Page 28 INSTALLATION Make sure that the flexible Brown Live. connector does not block the cooling As the colours of the wires in the mains fan inlet. lead for the appliance may not correspond with the coloured markings identifying the 4. Flexible connections should comply terminals in your plug, proceed as follows: with BS 669.
- Page 29 INSTALLATION For products without a plug This appliance must be connected by a competent person, who is a member of a competent person scheme, using fixed wiring via a double pole switched fused spur outlet, with a contact separation of 3mm at all poles. Use a 13 amp fuse. Warning: This appliance must be earthed.
- Page 30 INSTALLATION Step 4: Secure appliance into hous- 60/90 fixing positions ing unit Note : The unit housing the appliance must be appropriately fixed. Ensure that the appliance is centrally located. Take care not to damage the appliance or cabinetry. 60cm ovens - Open the oven door and screw the 4 fixing screws through the holes in the front frame.
- Page 31 INSTALLATION Anti-stain trim (if fitted) The anti-stain trim is factory fitted to the edges of the appliance front frame. This trim provides the cabinetry with extra protection from any escape of heat. - When Installing the product, ensure the anti-stain trim is correctly located on the edges of the front frame, before positioning and securing the appliance to the cabinet.
-
Page 32: Oven Ignition
INSTALLATION Commissioning Oven Ignition Follow the instructions for turning on the Pressure test point oven. Turn the oven full on to 250°C or setting 9. The automatic ignition system Use the oven burner. From inside the will spark automatically. The sparking will oven remove the burner cowl. -
Page 33: Technical Data
TECHNICAL DATA Data badge Appliance class Lower part of front frame and rear of Class 3, built-in oven and grill appliance Countries of destination Gas category GB - Great Britain, IE - Ireland (20) Electrical supply Pressure setting 220 - 240V ~ 50Hz G20 Natural Gas @ 20 mbar 2660W Warning: This cooker must be earthed. - Page 34 CUSTOMER CARE CUSTOMER CARE WEB SHOP range of Bake ware and Cookware essen- tials including Roasting Pans, Cake Tins Having purchased a superior cooker, hob and Non-Stick Cooking Liners. or hood from us, you’ll naturally want to keep it looking great. And who better to For all enquires, please visit our Web Shop at www.gdhaonline.co.uk or help you care for it than the manufac-...
- Page 35 CUSTOMER CARE CUSTOMER CARE CHANGING LIGHT BULBS (where fitted) Warning: There is a risk of electric shock, so always make sure you have turned off and unplugged your appliance before starting. Always allow the product to cool down before you change a bulb.
- Page 36 CUSTOMER CARE FAQs duce condensation when the oven is cooling down with food inside. What parts of the appliance can be Should the cooling fan continue to washed in a dishwasher? run once the appliance has been • Any enamelled parts such as the grill switched off? pan can be cleaned in a dishwasher, •...
-
Page 37: Troubleshooting
TROUBLESHOOTING In the unlikely event of your product developing a fault follow these simple steps. If this does not resolve the issue try switching the appliance off at the wall, leave for 15 seconds and retry. If these steps do not resolve the issue then call the service department. Error Code Meaning Resolution... - Page 38 Please keep this handbook for future reference, or for anyone else who may use the appliance.
- Page 39 Please keep this handbook for future reference, or for anyone else who may use the appliance.
- Page 40 CUSTOMER CARE CUSTOMER CARE To contact Stoves about your appliance, please call Warranty Registration 0844 481 0182 to register your appliance Customer Care Helpline 0844 815 3740 in case of difficulty within the UK Alternatively general, spares and service information is available from our website at www.stoves.co.uk...
Need help?
Do you have a question about the SGB600MFSE and is the answer not in the manual?
Questions and answers