Table of Contents
Advertisement
Advertisement
Table of Contents

Subscribe to Our Youtube Channel
Related Manuals for Baby Lock Amelia BL100A


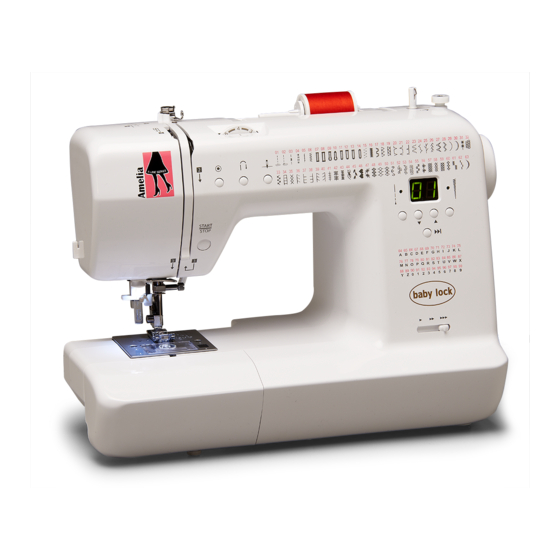
Summary of Contents for Baby Lock Amelia BL100A
- Page 3 Never operate this sewing machine if it has a damaged cord or plug, if it is not working properly, if it has been dropped or damaged, dropped into water. Return this sewing machine to the nearest authorized retailer for examination, repair, electrical or mechanical adjustment. The incorrect or damaged plate can cause the needle to break.
- Page 5 CORDED BUTTONHOLES OPENING THE ACCESSORY COMPARTMENT LARGE EXTENSION TABLE AND PIPING STRAIGHT STITCH SEAMING AND QUILTING DARNING CHANGING THE NEEDLE PATCH WORK REVERSE STITCH BUTTON SEWING LETTERS NEEDLE UP/DOWN BUTTON SEWING SPEED CONTROLLER LOCK STITCH START/STOP BUTTON STITCH REFERENCE CHART 33-37 OPERATIONAL PANEL NEEDLE THREADER...
- Page 6 Horizontal Spool Pin Face Cover Reverse Stitch Button Bobbin Winder Shaft Bobbin Winder Stop Handwheel Start/Stop Button Stitch Width Button Sewing Speed Controller Pattern Selector Buttons with Accessory Compartment Stitch Length Button Upper Thread Guide Thread Cutter Needle Up/Down Button Forward Button Thread Tension Dial...
- Page 7 20. Carrying Handle 21. Main Power Switch 22. Power Cord Receptacle 23. Foot Controller Jack 24. Power Cord 25. Foot Controller 26. Lower Thread Guide 27. Needle Threader Lever 28. Needle Threader 29. Buttonhole Lever 30. Presser Foot Holder Screw 31.
- Page 8 1. Needle Set 2. Bobbin(4) (one in machine) 3. Spool Cap(large) 4. Spool Cap(small) 5. Needle Plate Screwdriver 6. Screwdriver(small) 7. Seam Ripper with Brush 8. Buttonhole Foot 9. Overcasting Foot 10. Zipper Foot Open Toe Foot Straight Stitch Foot 13.
- Page 9 REMOVING THE FLAT BED ATTACHMENT Pull the flat bed attachment off to the left. With the flat bed attachment removed, free arm sewing is available for another sewing purpose. Install the flat bed attachment back in its original position. TOTE BAG Unzip the tote bag for placing or removing the machine.
-
Page 10: Changing The Needle
lever. presser feet. holder To attach, tighten the screw after raising the presser foot holder. Presser foot holder screw CHANGING THE NEEDLE with screwdriver. - Page 11 Note This appliance has a polarized plug(one blade wider than the other). To reduce the risk of electrical shock , this plug is intended to fit in a polarized outlet only one way. If the plug does not fit fully into the outlet reverse the plug.
- Page 12 Stitches 1, 2 and 6: The REVERSE STITCH button will sew in reverse while the button is pressed and return to forward stitching when the button is released. Other stitches: The REVERSE STITCH button will sew 3-4 stitches to tie-off the stitching and then stop sewing.
- Page 13 START/STOP BUTTON This button will be deactivated. When using stitches 1,2 and 6, the machine will continue to sew reverse at slow speed while this button is pressed. When released, the machine will sew forward. When sewing other stitches, the reverse stitch button is used as a reinforcement stitch. SEWING SPEED CONTROLLER The sewing speed controller only functions while using the START/STOP button.
- Page 14 OPERATIONAL PANEL Forward button Stitch length : Press stitch length button, indicator light, LED display auto change to show the size of stitch length. Stitch width : Press stitch width button, indicator light, LED display auto change to show the size of stitch width.
- Page 15 Remove the bobbin cover by sliding the bobbin cover latch to right and push down the left lower corner of this cover at same time. Use a bobbin that has been correctly wound with thread, otherwise the needle may break or the thread tension will be incorrect.
- Page 16 Insert the bobbin into bobbin case with the thread unwinding counterclockwise. the bobbin cover.
- Page 17 1. Raise presser foot lever. 2. Press the needle up/down button or rotate the handwheel toward you to raise the needle into the up position. 3. Place a spool of thread onto the spool pin and secure with the proper size spool cap.(see page 11) 4.
- Page 18 NEEDLE THREADER 2.Set needle in up position. 3.Lower the threader slowly and draw thread through thread guide(A) and pull toward the right. Lower the lever as far as it will go so the threader turns and the hook pin will go through the needle eye. Position thread below the needle eye and under the hook pin.
- Page 19 Cut the threads with the thread cutter on left side of the machine.
- Page 20 (If using foot control, press pedal while pressing reverse stitch button.) (If using foot control, release reverse stitch button and press foot control to sew forward.) SEAM GUIDE ON THE STITCH PLATE...
- Page 21 Upper and bobbin threads should interlock approximately in the middle of fabric. Turn the tension dial to a lower number to loosen the upper thread tension. Bobbin thread is visible Top side of fabric Turn the tension dial to a higher number to tighten Upper thread is visible the upper thread tension Bottom side of fabric...
- Page 22 Like shown in drawing, stitches on top side of fabric are good but bottom side tends to have a bunch of thread, it usually means that the upper thread is not threaded correctly ( especially threading of the upper thread tension regulator may not correct.)Refer to page 13 for correct threading.
- Page 23 Stitch length Hold the upper thread and bobbin thread loosely behind the presser foot.
- Page 24 Stitch Width When you sew a satin stitch by shortening the stitch length, attach the open toe foot. By simply removing the flat bed attachment, machine becomes a free arm machine making hard to reach areas readily accessible. Refer to page 5 for removing flat bed attachment.
- Page 25 Overcasting stitches (width 7.0-5.0) are used for preventing raveling of fabrics. Some stitches can sew the seam and overcasting at the same time. Therefore, it is convenient for sewing easy to ravel and stretch fabrics. 18 19 USING THE ALL-PURPOSE FOOT D.
- Page 26 21 22 This stitch will sew without stitches showing on right side of fabric. Note: If too much of the stitching shows on the right side of the fabric, change to a narrower stitch width or move the guide on the foot to the right. If the zigzag does not meet the fold, widen the stitch width or move the guide on the foot to the left.
- Page 27 If this lever is not in position, the number will be flashed on LED screen.
- Page 30 Note: You may use stitch #02 if needle position has to be adjusted closer to your zipper or piping. CAUTION:When using this stitch be extremely careful that the needle does not hit the presser foot. Turn handwheel towards you to insure the needle passes through the zipper foot opening.
-
Page 31: Straight Stitch Seaming And Quilting
STRAIGHT STITCH SEAMING AND QUILTING STRAIGHT STITCH SEAMING QUILTING Darning Select center needle position, straight stitch sewing stitch number 01. Set darning plate on the top of the needle plate over feed dog teeth. Align tabs on bottom of darning plate and snap into the two openings located on each side of feed dog teeth on needle plate. - Page 32 26 28 a variety of different fabrics. -28-...
- Page 33 36 37 38 39 40 29 30 -29-...
-
Page 34: Sewing Letters
SEWING LETTERS When you sew letters please use the open toe foot instead of all-purpose presser foot, it will have good effect and quality on your sewing. Please refer to letter chart to select numbers for the desired letters you want to sew. Select desired letters by pressing pattern selector. - Page 35 supply by removing the plug from the electric outlet. Please switch off the power and unplug from electric outlet before you start cleaning. Remove the bobbin and bobbin case(2) 4.Clean the feed dog and hook area with the lint brush. -31-...
- Page 36 Dirt in the bobbin and hook area. Clean the bobbin and hook area. Incorrect size of needle on stretch of needle fabric. Use stretch needle Darning plate attached. Remove darning plate. Clean the feed dog area. Remove the needle plate and bobbin case and clean the hook race and feed dog.
- Page 37 STITCH REFERENCE CHART Stitch Width (mm) Stitch Length (mm) Stitch name Pattern Application Auto Manual Auto Manual Straight Stitch Attaching zippers, basic stitching and sewing 0.5-4.5 (Center) gathers or pintucks,etc Straight Stitch 0.0,3.5,7.0 0.5-4.5 Basic stitching, sewing gathers or pintucks,etc (Left -Middle- Right) (Left,Center,Right) (Left)
- Page 38 STITCH REFERENCE CHART Stitch Width (mm) Stitch Length (mm) Stitch name Pattern Application Auto Manual Auto Manual Buttonhole Buttonholes on thin, medium weight fabric 0.3-0.8 Overcasting on medium weight or stretch fabric, 3-step zigzag 3.0-7.0 0.5-2.0 attaching elastic, darning, etc Satin stitch Satin stitching 3.0-7.0...
- Page 39 STITCH REFERENCE CHART Stitch Width (mm) Stitch Length (mm) Stitch name Pattern Application Auto Manual Auto Manual Decorative Decorative stitching 3.0-7.0 1.0-3.0 Faggoting Decorative stitch 5.0-7.0 1.0-2.0 stitch Decorative Decorative stitching 1.0-2.0 Decorative Decorative stitching 1.0-2.0 Decorative Decorative stitching Decorative Decorative stitching 5.0-7.0 1.0-2.0...
- Page 40 STITCH REFERENCE CHART Stitch Width (mm) Stitch Length (mm) Stitch name Application Pattern Auto Manual Auto Manual Decorative Applique, decorative stitching 3.0-7.0 1.0-3.0 Decorative hemming on thin medium weight and Decorative 3.0-7.0 1.0-3.0 plain weave fabrics, heirloom stitching, etc. Decorative Decorative stitching Decorative Decorative stitching...
- Page 41 STITCH REFERENCE CHART Stitch Width (mm) Stitch Length (mm) Stitch name Pattern Application Auto Manual Auto Manual Decorative Decorative stitching 5.0-7.0 1.5-2.0 Decorative Decorative stitching 3.0-7.0 1.5-3.5 Decorative Decorative stitching 5.0-7.0 1.0-2.0 Decorative Decorative stitching 5.0-7.0 1.0-2.0 Decorative Decorative and cross stitching 5.0-7.0 1.0-2.0 Cross stitch...
Need help?
Do you have a question about the Amelia BL100A and is the answer not in the manual?
Questions and answers