Motorola TalkAbout T900 User Manual
Hide thumbs
Also See for TalkAbout T900:
- User manual (104 pages) ,
- Quick start manual (4 pages) ,
- User manual (26 pages)
Table of Contents
Advertisement
Quick Links
Advertisement
Table of Contents

Related Manuals for Motorola TalkAbout T900


Summary of Contents for Motorola TalkAbout T900
- Page 1 User's Guide ™ Personal Interactive Communicator Model T900 FLEX™ Technology...
-
Page 3: Introduction
Congratulations on your purchase of the TalkAbout T900 Personal Interactive Communicator. Whether receiving or sending messages, the TalkAbout T900 Personal Interactive Communicator can become a vital part of your business and personal life and change the way you communicate with family, friends, and business associates. - Page 4 MOTOROLA, the Stylized M Logo, and all other trademarks indicated as such herein are trademarks of Motorola, Inc. ® Reg. U.S. Pat. & Tm. Off. © 2000, 2001 Motorola, Inc. All rights reserved. Printed in the U.S.A. ITC00-003 Personal Communications Sector 1500 Gateway Blvd., Boynton Beach, FL 33426-8292...
-
Page 5: Table Of Contents
Contents Setting the Key Click....25 Introduction ........1 Creating a Signature....25 Effective Use of Your Setting the Font Size....26 Communicator ......2 Time and Date ......27 Safety and General Information... 5 Setting the Time and Date..27 Getting Started...... - Page 6 Composing a Message ..38 Folders ......... 56 Sending a Message ....38 Accessing the MailBox ........39 MailBox Folders ....56 Previewing and Reading Using Your Personal Folder ..58 Messages ......40 Using Your News/Info Folder..59 Previewing Messages ....42 InBoxes ........
-
Page 7: Communicator
Safety and General Information IMPORTANT INFORMATION ON SAFE AND EFFICIENT OPERATION. READ THIS INFORMATION BEFORE USING YOUR PERSONAL INTERACTIVE COMMUNICATOR. The information provided in this document supersedes the general safety information contained in user guides published prior to July 2000. For information regarding radio use in a hazardous atmosphere please refer to the Factory Mutual (FM) Approval Manual Supplement or Instruction Card, which is included with radio models that offer this capability. - Page 8 Exposure to Radio Frequency Energy Your Motorola Personal Interactive Communicator is designed to comply with the following national and international standards and guidelines regarding exposure of human beings to radio frequency electromagnetic energy: • United States Federal Communications Commission, Code of Federal Regulations; 47 CFR part 2 sub-part J.
- Page 9 To maintain compliance with exposure guidelines, if you wear a Personal Interactive Communicator on your body when transmitting, always place the Personal Interactive Communicator in a Motorola supplied or approved clip, holder, holster, case, or body harness. Use of FCC/Health...
- Page 10 (2.5 cm) from your body when transmitting. Approved Accessories For a list of approved Motorola accessories call 1-800-422-4210 or visit our website at www.mot.com. Electromagnetic Interference/Compatibility NOTE: Nearly every electronic device is susceptible to...
- Page 11 Personal Interactive Communicator must be in accordance with applicable regulations per airline crew instructions. • MEDICAL DEVICES Pacemakers The Advanced Medical Technology Association recommends that a minimum separation of 6 inches (15 centimeters) be maintained between a handheld wireless Personal Interactive Communicator and a pacemaker.
- Page 12 • turn the Personal Interactive Communicator OFF immediately if you have any reason to suspect that interference is taking place. Hearing Aids Some digital wireless Personal Interactive Communicators may interfere with some hearing aids. In the event of such interference, you may want to consult your hearing aid manufacturer to discuss alternatives.
- Page 13 Safety and General • USE WHILE DRIVING Check the laws and regulations on the use of a Personal Interactive Communicator in the area where you drive. Always obey them. When using your Personal Interactive Communicator while driving, please: • give full attention to driving and to the road. •...
- Page 14 • POTENTIALLY EXPLOSIVE ATMOSPHERES Turn off your Personal Interactive Communicator prior to entering any area with a potentially explosive atmosphere, unless it is a Personal Interactive Communicator type especially qualified for use in such areas as "Intrinsically Safe". Do not remove, install, or charge batteries in such areas.
- Page 15 • BLASTING CAPS AND AREAS To avoid possible interference with blasting operations, turn off your Personal Interactive Communicator when you are near electrical blasting caps, in a blasting area, or in areas posted: “Turn off two-way radio”. Obey all signs and instructions.
-
Page 16: Getting Started
Getting Started Battery Information Your communicator uses one AA-size alkaline battery (do not use carbon-zinc batteries), which also recharges the internal transmit power source. Two AA-size batteries are included with your communicator. One is installed. Check the battery gauge in the Vital Signs menu and replace the installed battery as needed. -
Page 17: Installing/Replacing The Battery
Installing/Replacing the Battery Slide Latch Slide Door Caution! You must match the (+) and (-) polarity 000092-O markings. If you insert the battery backwards, your pager settings (time, date, etc.) will be erased. Note: If you replaced a dead battery, wait a few hours before 000139-O using your communicator to ensure proper operation. -
Page 18: Control Buttons
Control Buttons Flip Escape/ Backlight Message Acknowledge CAPS Clear/Delete Symbol Menu/Space Navigation Buttons Enter... - Page 19 Control Button Description Houses and protects the LCD screen. Flip Open to awaken the communicator; close to activate sleep mode. Press to return to preceding screen without accepting any changes. Also, Escape/ press to access the Status screen Backlight from the Main menu, or press and hold to turn on and off the backlight.
- Page 20 Control Button Description Press y or z to scroll through menu Navigation selections. Press w or x to page buttons through menu options. Activates the Alt-mode control keys (color-coded yellow). The status icon ) is displayed. The next key pressed activates an Alt-mode function.
-
Page 21: Alt-Mode Functions
ALT-mode Functions The following key sequences provide access to the corresponding ALT-mode functions. Control Description Buttons ALT-Lock — Activates the Alt-mode control keys (color-coded yellow). To exit, press again. Cancel — Clears the entire message screen when composing a message. CAPS Lock —... -
Page 22: Turning On Your Communicator
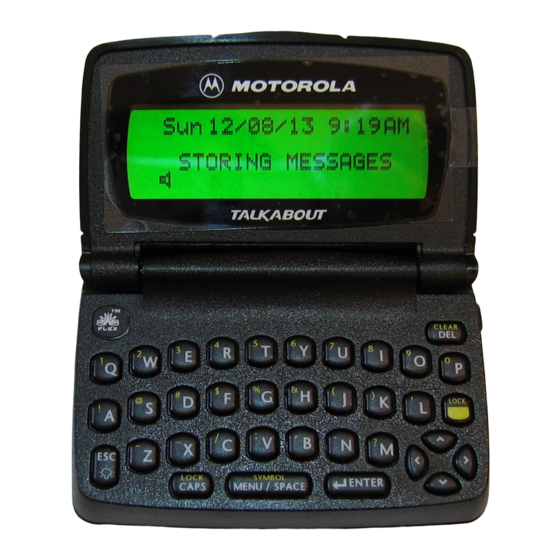
Turning On Your Communicator Ensure that a fresh battery is properly installed as described in “Installing/Replacing the Battery” on page 15. Open the flip and press any key to turn your communicator on. The communicator emits a 4-second power-up alert, and displays the Status screen. -
Page 23: Turning Off Your Communicator
Turning Off Your Communicator You should turn off your communicator to save battery power. The communicator receives any stored messages, once the unit is turned back on in the coverage area. Press To Display Then Press y or z / Power Off y or z ? Yes Setting Transmitter Mode... -
Page 24: Messaging Service Instructions
Messaging Service Instructions To begin messaging service, contact your service provider for instructions. The phone number of the messaging service can be found in the literature provided by the service provider. Sending a Test Message to Yourself After you activate your service, you should test your communicator and service by sending a message to yourself. -
Page 25: Backlight
Backlight In low-light conditions, press and hold H to turn on the backlight. The backlight remains illuminated until the communicator times out and returns to the Standby screen. To manually turn the backlight off, press and hold H. Setting Up Your Communicator This section explains how to set the time and date, alarm time, alert mode, News/Info InBox alerts, and other features. - Page 26 • Delete Messages • Preferences • Vital Signs • Power Off the Communicator Accessing the Communicator Features from the Main Menu From the Standby screen, press any key (the Status screen U, {, w, x, y, or z displays momentarily). Or press to go directly to the Main Menu.
-
Page 27: Setting The Key Click
Setting the Key Click When this feature is turned on and the communicator is in audible mode, a "click" is emitted whenever a button is pressed. Press To Display Then Press y or z t Preferences y or z < Key Click y or z { to ? On... -
Page 28: Setting The Font Size
Setting the Font Size. Press To Display Then Press y or z t Preferences y or z Aa Font Size y or z { to aa Normal AA Large select. { again to save. -
Page 29: Time And Date
Time and Date Setting the Time and Date Press To Display Then Press y or z t Preferences y or z M Set Time & Date y or z w or x for Desired hour minutes y or z w or x for Desired minutes: Set first digit ( date... -
Page 30: Alerts
Alerts Alert icons are displayed on the Status screen. If an audible alert is selected, l is displayed. • If k is selected, k is displayed. • Vibrate If @ • is selected, no alert icon is displayed. Silent • Alert durations are shortened when the battery is low. -
Page 31: Setting The Alert Volume
Setting the Alert Volume Press To Display Then Press y or z t Preferences y or z < Alert Volume z or w { to This moves the cursor to the left ( ) or to the right ( ) to save. -
Page 32: Private Time
Reminder Alert Types • Audible - a chirp. • Vibrate - a short vibration. • Chirp and vibrate - a chirp followed by a 1-second vibration. • Vibrate and beep - a 2-second vibration followed by a beep. Private Time Private Time mode lets you specify a time period during which the communicator operates without an audible or vibrate alert. -
Page 33: Setting Private Time
Setting Private Time Press To Display Then Press y or z t Preferences y or z h Set Private Time y or z (Private Time activated) i((Private Time deactivated) y, z, { to To set time (when it starts) w or x time (when it ends). -
Page 34: Setting The Quiet Mode
Setting the Quiet Mode Press To Display Then Press y or z t Preferences y or z k Quiet Mode y or z { to ? On select. { again to save. Note: When you turn on the Quiet Mode, a flashes on the Status screen to remind you. -
Page 35: Addresses
Addresses Your Address Book can store data for up to 250 people. Each entry can include a name; wireless and e-mail addresses; home, work, pager, mobile phone, and fax/other numbers; and notes. Creating an Address Book Entry Press To Display Then Press y or z # Address Book... -
Page 36: Searching The Address Book
Searching the Address Book You can use search instead of scrolling through the entries. Press To Display Then Press y or z # Address Book y or z ! Search Keyboard First few characters until desired entry is highlighted. Deleting Addresses Press To Display Then Press... -
Page 37: Editing Addresses
Editing Addresses Press To Display Then Press y or z # Address Book y or z Desired entry Entry Options menu y or z 6 Edit Entry y or z Desired field to edit Keyboard Desired changes Repeat for all fields. y or z # Save Entry... -
Page 38: Messages
Messages This section describes how to select the addressee, compose a message, and send messages. Selecting the Address(es) You can send a message to one or more addressees and to multiple addresses for the same addressee. Press To Display Then Press y or z T Send Message y or z... - Page 39 Note: The Communicator returns to the Send Message menu, and replaces E\Add Addresses E Select Address Note: The selection is unavailable until you Send Message compose the message and select an address. Entering an Address Not in Your Address Book You can send messages to addresses that are not permanently added to your Address Book.
-
Page 40: Composing A Message
Composing a Message Press To Display Then Press y or z T Send Message y or z 6 Write Message Keyboard Your message Note: The communicator returns to the Send Message menu, and displays a checkmark in the Write Message selection. Sending a Message To send a message you need a selected address, and a composed message. -
Page 41: Mailbox
MailBox The MailBox receives incoming messages transmitted to your communicator. The MailBox allows you to read, save, respond, forward, and delete messages. It provides a transmission status log for messages sent and acts as a holding area for unsent messages, which are categorized into the following types: Q Sending in Progress (Flashing) \ Sent Successfully Send Message Failed... -
Page 42: Previewing And Reading Messages
Previewing and Reading Messages • When you receive a personal or information service message, the Status screen is displayed and an alert is given according to your settings. A flashing E (MailBox) or j (News/Info) indicates which type of message has been received. - Page 43 • If turned on, the third line of the Status screen displays text messages that indicate carrier-specific service modes. Refer to your service provider literature. If programmed ] displays whenever you are out of your • coverage area. Upon returning to your coverage area, ]] no longer displays on the Status screen.
-
Page 44: Previewing Messages
Previewing Messages Press To Display Then Press y or z E MailBox j News/Info InBox y or z E InBox T OutBox display list of D Drafts Folder messages. Desired Info InBox (shown in groups of four) The following icons can be displayed to the left of each message in the preview list. -
Page 45: Reading Messages
Reading Messages Press To Display Then Press y or z Desired message y or z Message text line-by-line Message text page-by-page. If there is additional text, É and Ñ display to the left of the screen. Note: If preset, the time and date the message was received displays at the end of each message. -
Page 46: Working With The Message Options Menu
Scrolling Between Messages While reading a message, you can quickly display another one. Press To Display Then Press y, z or The previous message { to The next message read text. Working with the Message Options Menu You can access the Message Options Menu from any of the InBoxes available in the MailBox. - Page 47 Press To Display Then Press y or z E MailBox y or z E InBox T OutBox D Drafts Folder y or z Desired message y or z Desired option from the Message Options Menu See the following sections for more information on each of the message options in the menu: 7 Next Message Reply to Message,...
-
Page 48: Replying To Messages
Replying to Messages You can compose your own custom reply to a message or use one of the pre-programmed replies from the list. Sending a Custom Reply Press To Display Then Press Message Options menu y or z b Reply to Message y or z 6 Custom Reply Keyboard... - Page 49 Sending a Pre-programmed Reply Press To Display Then Press Message Options menu y or z b Reply to Message y or z Desired reply from list of pre-programmed replies. MESSAGE TRANSMITTING Note: Q flashes to the left of the message to indicate the reply is in progress.
-
Page 50: Resending Messages
Resending Messages This option is available only for messages in your OutBox that were not successfully transmitted. If the message doesn’t show or Ç to the left, its option menu will not display this option. Press To Display Then Press Message Options menu y or z b Resend Message... -
Page 51: Deleting Messages
Press To Display Then Press Message Options menu y or z 0 Forward Message y or z 6 Write Message Keyboard Appended text y or z E Select Address y or z Desired address(es) MESSAGE TRANSMITTING Deleting Messages Press | to immediately delete a read message, whether it is only highlighted in a list or open while you are reading it. - Page 52 If you try to delete an unread message from a list, a confirmation message displays. You can select ? Yes continue or select and cancel the deletion. @ No You can also delete messages as follows: • Using the Message Options Menu •...
- Page 53 Deleting All Read Messages Perform this option from the Main Menu. See “Using the Main Menu” on page 23. Messages in your Personal Folder and News/Info Folder are not affected by this function. Press To Display Then Press y or z J Delete Messages y or z ? Yes...
-
Page 54: Animated Icons
Press To Display Then Press y or z Highlight the InBox y or z J Delete Read Messages J Delete All Messages y or z ? Yes Messaging Emoticons Your communicator provides 25 messaging emoticons you can add to all your messages. To insert a smiley face, for example, type :-) and the pager will display instead. -
Page 55: Advanced Messaging
Advanced Messaging Using Info-On-Demand With Info-On-Demand, you can request information such as News, Sports, and Stocks. This information is sent to your communicator as a MailBox message. Press To Display Then Press y or z Info-On-Demand y or z Desired topic REQUEST TRANSMITTING wait 2-3 topic icon flashing... -
Page 56: Setting News Autopreview
Note: This is a network and subscription-dependent feature. Not available in all areas. ITC01-057 Setting News AutoPreview When this feature is turned on and you receive an information service message, pressing any key takes you directly to the News/Info InBox. Turning On News AutoPreview Press To Display... -
Page 57: Alarms
Alarms The alarm can be set for a specific time and date, or it can be used as a daily alarm. When an alarm is set, K is displayed on the Status screen. Press any key to silence an alarm. Setting the Alarm Press To Display... -
Page 58: Folders
Note: To set a Daily Alarm, increment the month field past 12 (or day field past 31) to automatically display --/--/-- Folders The MailBox contains your InBox, OutBox and Drafts Folder. In all of these folders you can preview, read, delete, and send these messages. - Page 59 Your InBox All incoming personal messages are saved into the MailBox InBox. Your OutBox All outgoing personal messages are saved into the MailBox OutBox. Your Drafts Folder All outgoing personal messages that have not been sent are automatically saved into the MailBox Drafts Folder.
-
Page 60: Using Your Personal Folder
Using Your Personal Folder Access your Personal Folder from the Main Menu. Use it to save personal messages and protect them from the J option and from automatic deletion when Delete Messages memory is full. In this folder you can preview, read, delete, and send messages. -
Page 61: Using Your News/Info Folder
Using Your News/Info Folder Use your News/Info Folder to save News/Info messages and protect them from the J option and from Delete Messages automatic deletion when memory is full. In this folder you can preview, read, delete, and forward messages. See “Messages” on page 36 for more information. -
Page 62: Inboxes
InBoxes There are two inboxes for your communicator: the MailBox and the News/Info InBox. Using Your MailBox InBox Please see “Messages” on page 36 for detailed information on how to use the MailBox. Using Your News/Info InBox When your communicator receives information service messages, they go to the News/Info InBox. - Page 63 Creating a Sub-InBox Within the News/Info InBox, you can create up to 16 Sub-InBoxes to organize the incoming messages. A message under , for example, creates the 04: * Sports Update* Sub-InBox, . Once created, the new n * Sports Update * InBox will receive all the messages that arrive under that topic.
- Page 64 Setting the InBox History After creating a new Sub-InBox, you can specify how many messages it will store for you. This is the InBox History. You can specify up to eight history messages to be stored. If you only wish to see the latest message, set it to "No History." When the Sub-InBox has no history, every new message overwrites the previous one.
- Page 65 Moving a Sub-InBox Press To Display Then Press y or z j News/Info InBox y or z Highlight the desired Sub-InBox y or z o Move InBox Up p Move InBox Down Deleting a Sub-InBox Press To Display Then Press y or z j News/Info InBox y or z...
-
Page 66: Vital Signs
Note: Deleting a Sub-InBox deletes all messages in it. Vital Signs Vital Signs include the battery status, message memory usage, and information about your communicator. Checking Battery Status Press To Display Then Press y or z ; Vital Signs y or z : Battery åååååå... - Page 67 Checking Message Memory Usage Press To Display Then Press y or z ; Vital Signs y or z = Message Memory Percentage of usage for Mail/Pers Box and News/Info Box Displaying Communicator Information Press To Display Then Press y or z ;...
-
Page 68: Mymail
PC mailbox and on your wireless device. This feature is dependent on the purchase of a separate software application. Please refer to www.motorola.com. Once you purchase the software and install it on your PC, the following steps activate MyMail in your TalkAbout T900 pager. -
Page 69: Setting Up Mymail
Note: For more information and access to the MyMail Desktop or Desktop Plus for the T900 User Guide, please go to: www.motorola.com/mymail. Under MyMail Desktop or MyMail Desktop Plus, click on T900 2way, then scroll down to Support, and click on View the User Manual. -
Page 70: Use And Care
Use and Care glub glub Clean with a soft Do not immerse Do not use alcohol cloth dampened in water. or other cleaning with soap and water. solutions. Do not expose to ... or extreme ... or moisture. excessive heat... shock... -
Page 71: Questions
Questions? 1-800-548-9954 0990-168556 1-800-793-7834 (TTY) Text Telephone www.motorola.com FCC Compliance This device complies with part 15 of the FCC Rules. Operation is subject to the following two conditions: (1) This device may not cause harmful interference, and (2) this device must accept any interference received, including interference that may cause undesired operation. - Page 72 accordance with the instructions, may cause harmful interference to radio communications. However, there is no guarantee that interference will not occur in a particular installation. If this equipment does cause harmful interference to radio or television reception, which can be determined by turning the equipment off and on, the user is encouraged to try to correct the interference by one or more of the following measures: •...
-
Page 73: Limited Warranty
Canada What this Warranty Covers Defects in materials and workmanship in the following new “Products” manufactured, sold or certified by Motorola, with which this limited warranty is included in/on the package: (a) wireless cellular telephones, pagers and two-way radios that operate via “Personal Radio Service”... - Page 74 (such as CD-ROM) that tangibly embodies each copy of any software sold and/or certified by Motorola for use with Products. Software that is not tangibly embodied in media and that is purchased separately from Products (such as software that is downloaded from the internet) comes “as is”...
- Page 75 covers, including bezel, PhoneWrap™ or case (any model); and (b) ear buds and boom headsets that transmit mono sound through a wire connection (this does not include ear buds or boom headsets that either transmit stereo sound or that are wireless, or both). •...
- Page 76 Accessories and software -- call the number designated for the product with which they are used. You will receive instructions on how to ship the Products to Motorola or our designated resource. If instructed to ship the Products, you must ship them with freight, duties and insurance...
- Page 77 prepaid. Regardless of where you are instructed to return the Products, you must include: (a) a copy of your receipt, bill of sale or other comparable proof of purchase; (b) a written description of the problem; (c) the name of your service provider (if this Product requires subscription service);...
- Page 78 Motorola for use with the Products (“ancillary equipment”), or any damage to the Products or ancillary equipment as a result of such use. Among other things, “ancillary equipment” includes batteries, chargers, adaptors, and power supplies not manufactured or supplied by Motorola.
- Page 79 (b) board serial numbers that do not match each other, or board serial numbers that do not match the housing; or (c) nonconforming or non-Motorola housings or parts. Any of these voids the warranty. •...
- Page 80 We will provide information on repair availability, rates, methods of payment, where to send the Products, etc. VII. Some Other Limitations This is Motorola’s complete warranty for the Products, and states your exclusive remedies. This warranty is given in lieu of all other...
- Page 81 In no event shall Motorola be liable, whether in contract or tort (including negligence) for damages in excess of the purchase...
- Page 82 VIII. Patent and Software Provisions At Motorola’s expense, we will defend you, and pay costs and damages that may be finally awarded against you, to the extent that a lawsuit is based on a claim that the Products directly infringe a United States patent.
- Page 83 The depreciation will be an equal amount per year over the lifetime of the Products, as established by Motorola. Motorola will have no liability to you with respect to any claim of patent infringement that is based upon the combination of the Products or parts furnished under this limited warranty with ancillary equipment, as defined in VI., above.
- Page 84 To obtain information on Motorola Personal Communications Products, including warranty service, accessories and optional Extended Warranties on selected Products, please call: Canada Cellular 1-800-331-6456 All Products 1-800-461-4575 Paging 1-800-548-9954 TTY (Text Telephone) FRS Radios 1-800-353-2729 1-888-390-6456 TTY (Text Telephone) 1-888-390-6456 Accessories and software -- call the telephone number designated above for the product with which they are used.
- Page 85 DO NOT SHIP PRODUCTS TO THESE ADDRESSES – INSTEAD PLEASE CALL. To correspond with Motorola about the Products, please write us at http://www.motorola.com or at: In the U.S.A.: Motorola, Inc. 600 North U.S. Highway 45 Libertyville, IL 60048 In Canada:...
-
Page 86: Export Law And Patents
The Motorola products described in this manual may include copyrighted Motorola and third party software stored in semiconductor memories or other media. Laws in the United States and other countries preserve for Motorola and third party software providers certain exclusive rights for copyrighted... - Page 87 Furthermore, the purchase of the Motorola products shall not be deemed to grant either directly or by implication, estoppel, or otherwise, any license under the copyrights, patents, or patent applications of Motorola or any...
-
Page 88: Notes
Notes... -
Page 90: Personal Numbers
Personal Numbers Use the spaces provided below to write down your Personal Interactive Communicator’s wireless address, and the number of your service provider. Additional spaces have been provided to write down the wireless address, pager number, or e-mail address of your family and friends. Service Provider Wireless Address Family and Friends... - Page 92 P e r s o n a l C o m m u n i c a t i o n s S e c t o r 1 5 0 0 G a t e w a y B l v d . , B o y n t o n B e a c h , F L 3 3 4 2 6 - 8 2 9 2 P r i n t e d i n U .
- Page 93 T900 Quick Reference Card Power On Delete Message/InBox MailBox Successful Reply/Send News/Info InBox Unsuccessful Reply/Send Send Message Message Contains Info-On-Demand Custom Reply Choices Address Book InBox Personal Folder/Move InBox - Messages Read Message to Folder News/Info InBox News/Info Folder InBox Alert Selected Preferences Out of Range Vital Signs...
- Page 94 Messaging Emoticons Picture Triad Description Picture Triad Description Smiley 8<) Teddy Wink Magic Cool Love Pfrrt... Well Done! Grrr... o< Party! Hooray! Ball i i i @>- Flowers >*< Boom! Drink Deadly Lunch :<* Meow! Cloudy :># Woof! >o< Sunny Broken Note: See “ALT-mode Functions”...
Need help?
Do you have a question about the TalkAbout T900 and is the answer not in the manual?
Questions and answers
Can I receive messages from mobile phone and vice versa .
The Motorola TalkAbout T900 can send and receive email messages and two-way pages if it has an active plan. However, there is no specific mention that it can directly send and receive SMS messages from mobile phones.
This answer is automatically generated