Table of Contents
Advertisement
Quick Links
Download this manual
See also:
Service Manual
Advertisement
Table of Contents

Subscribe to Our Youtube Channel
Related Manuals for Sony KP-44PX3U


Summary of Contents for Sony KP-44PX3U
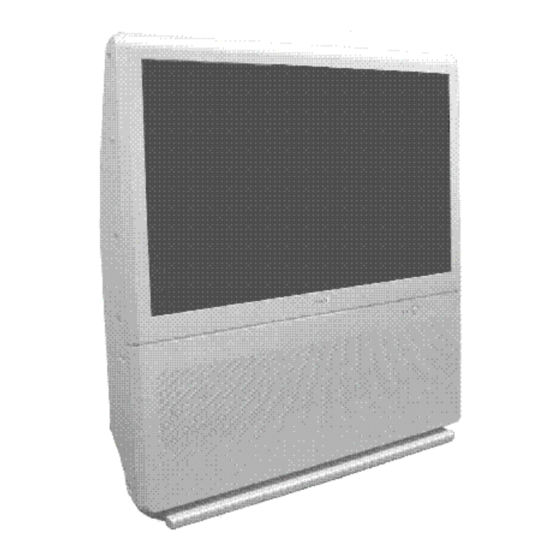
- Page 1 4-102-591-41 (1) Projection TV Operating Instructions Before operating the TV, please read the “Safety Information” section of this manual. Retain this manual for future reference. KP-44PX3U ©2004 by Sony Corporation...
-
Page 2: Notice For Customers In The United Kingdom
If the plug supplied with this equipment has a detachable fuse cover, be sure to attach the fuse cover after you change the fuse. Never use the plug without the fuse cover. If you should lose the fuse cover, please contact your nearest Sony service station. FUSE How to replace the fuse Open the fuse compartment with a blade screwdriver, and replace the fuse. -
Page 3: Table Of Contents
Introduction Thank you for choosing this Sony product. Before operating the TV, please read this manual thoroughly and retain it for future reference. • Symbols used in the manual: • Important information. • Buttons shaded white on the remote control show you the buttons you have to press to follow the sequence of •... -
Page 4: Safety Information
Safety Information For environmental and safety reasons, it Never push objects of any kind into the is recommended that the TV set is not This set is to operate on a 220-240V AC set as this could result in a fire or electric left in standby mode when not in use. - Page 5 Repeated extended daily usage of the same image, or programme can also result in this occurrence which is not covered by the Sony warranty. Safety Information...
-
Page 6: Overview & Installation
Checking the Accessories supplied 2 Batteries (AA size) 1 Remote control (RM-945) Inserting Batteries into the Remote Control Make sure you insert the supplied batteries using the correct polarities. Always remember to dispose of used batteries in an environmental friendly way. Overview &... -
Page 7: Overview Of Remote Control Buttons
5 seconds). b) Selecting VCR double-digit: if Media Selector (w;) is switched to VCR, press this button to select double-digit channels for Sony's VCR e.g. 23, press -/-- first and next the buttons 2 and 3. -
Page 8: Overview Of The Projection Tv Buttons
Overview of the TV Buttons Programme Up or Down Buttons (Selects TV channels) Volume control buttons Selecting Input source Auto Convergence Auto Start Up Button Button. For details (starts the auto Start Up see page 11 sequence, see page 9) Press on the Video Input mark... -
Page 9: First Time Operation
Switching On the TV and Automatically Tuning The first time you switch on your TV, a sequence of menu screens appear on the TV enabling you to: 1) choose the language of the menu screen 2) check how to connect optional equipment to your TV, 3) search and store all available channels (TV Broadcast) and 4) change the order in which the channels (TV Broadcast) appear on the screen. - Page 10 The Auto Tuning menu appears on the screen. Press the OK Do you want to start button to select Yes. automatic tuning? The TV starts to automatically search and store all Auto Tuning available broadcast channels for you. Programmes found: This procedure could take some minutes.
-
Page 11: Adjusting Colour Registration (Convergence)
Adjusting Colour Registration (Convergence) Due to the earth’s magnetism, the picture might become undefined and you could see different colours on the outlines of the images. In that case, proceed as follows: Auto converge the Red, Green, and Blue Lines Press on the mark on the right side of the projection TV to reveal control panel. -
Page 12: Tv Functions
Introducing and Using the Menu System Your Projection TV uses an On-Screen menu system to guide you through the operations. Use the following buttons on the Remote Control to operate the menu system: Picture Adjustment To switch on the menu screens: Picture Mode: Live Contrast:... -
Page 13: The Picture Adjustment Menu
The Picture Adjustment Menu MENU The “Picture Adjustment” menu allows you to alter the picture settings. To do this: Picture Adjustment Picture Adjustment Press the MENU button and then press OK to Picture Mode: Live Picture Mode: Live enter this menu. Next press to select the Contrast: Contrast:... -
Page 14: The Sound Adjustment Menu
The Sound Adjustment Menu The “Sound Adjustment” menu allows you to MENU Picture Adjustment alter the sound settings. Picture Mode: Live Contrast: Reset Noise Reduction: Auto To do this: Colour Tone: Cold Press the MENU button and press to select , then press OK to enter this menu. - Page 15 Right picture if you want to listen to the right screen. * The “BBE High Definition Sound system” is manufactured by Sony Corporation under license from BBE Sound, Inc. It is covered by U.S. Patent No. 4,638,258 and No.
-
Page 16: The Features Menu
The Features Menu The “Features” menu allows you to alter MENU Picture Adjustment various settings of the TV. Picture Mode: Live Contrast: Reset Noise Reduction: Auto To do this: Colour Tone: Cold Press the MENU button and press twice to select , then press OK to enter this menu. -
Page 17: Av3 Output
AV3 OUTPUT This option allows you to select the source to be output from the Scart connector 3 so that you can record from this Scart any signal coming from the TV or from an external equipment connected to the Scart connector 2 or right side connectors 4 or 4 and... -
Page 18: The Set Up Menu
The Set Up Menu The “Set Up” menu allows you to alter various MENU Picture Adjustment options on this TV. Picture Mode: Live Contrast: Reset Noise Reduction: Auto To do this: Colour Tone: Cold Press the MENU button and press three times to select , then press OK to enter this... -
Page 19: Programme Labels
PROGRAMME LABELS This option allows you to name a channel using up to five characters (letters or numbers). To do this: Once you have entered the "Set Up" menu as it is explained in the previous page and after selecting the option, press OK, then press to select the programme number with the channel you wish to name. -
Page 20: Manual Programme Preset
MANUAL PROGRAMME PRESET This option allows you to: Preset channels or the VCR channel one by one to the programme order of your choice. To do this: Once you have entered the “Set Up”menu as it is explained on page 18 and after selecting the "Manual Programme Preset"... -
Page 21: Pap (Picture And Picture)
PAP (PICTURE AND PICTURE) PAP divides the screen into two, to watch two pictures in format 4:3 simultaneously. Switching PAP on and off Press to display PAP. One of the screens will be framed to indicate that this is Navegador the active screen. -
Page 22: Teletext
Teletext Teletext is an information service transmitted by most TV stations. The index page of the teletext service (usually page 100) gives you information on how to use the service. To operate teletext, use the remote control buttons as indicated below. •... -
Page 23: Nextview
NexTView* *(depending on availability of service). NexTView is an on-screen electronic programme guide, providing you with programme information for different broadcasters. When looking for information you can search by theme (sports, art, etc...) or date. If wrong characters appear when viewing NexTView, use the menu system to enter the “Language” menu (see page 18) and select the same language as the NexTView is broadcasted. -
Page 24: Additional Information
Connecting Equipment to the TV • Using the following instructions you can connect a wide range of optional equipment to your TV set. • Connecting cables are not supplied. Decoder/ Set Top Box S VHS/Hi8/ camcorder 8mm/Hi8/ camcorder Decoder/ Set Top Box Hi-fi DVD recorder •... -
Page 25: Viewing Pictures From Equipment Connected To The Tv
Connecting Audio Equipment to the TV Conect your audio equipment to the audio output sockets D if you wish to amplify the audio output from TV. Next , using the menu system, select the “Sound Adjustment” menu and set the “TV Speakers” to “One Time Off” or "Permanently Off"... -
Page 26: Smartlink
SmartLink SmartLink is a direct link between your projection TV set and a VCR. For SmartLink you need: • A VCR which supports SmartLink, NextView Link, Easy Link or Megalogic. • Megalogic is a trademark of Grundig Corporation. • EasyLink is a trademark of Philips Corporation. •... -
Page 27: Remote Control Configuration For Vcr Or Dvd
Remote Control Configuration for VCR or DVD In it’s default condition this remote control will operate the basic functions of this Sony TV, Sony DVDs and most Sony VCRs. To control VCRs and DVDs of other manufacturers (and some Sony VCR models), the remote control needs to be configured. -
Page 28: Remote Control Configuration For Av Devices
To eliminate the amount of remote controls you need, this remote control will operate the main functions of some Sony’s DAV, Sony’s AV receivers as well as Sony’s STB (see the table on the following page with the available devices). - Page 29 AVAILABLE SONY’s AV MODELS CODE MAIN FUNCTIONS AVAILABLE DIGITAL TERRESTRIAL RECEIVER Power On/Off, Channel selection, Volume MODEL: control, Teletext, Fastext, EPG (Electronic VTX-D800 Programme Guide), Menu and cursors. DAV MODELS: DAV-DS1000 DAV-SC8 Power On/Off, Play, Fast Forward, Rewind, Stop, Volume control, Menu, Cursors.
-
Page 30: Optimum Viewing Area
Optimum Viewing Area For the best picture quality, try to position the TV set so that you can view the screen from within the areas shown below. Horizontal viewing area 60º 60º (Optimum viewing position) Vertical viewing area 20º 20º (Optimum viewing position) Additional Information... -
Page 31: Technical Specifications
Technical Specifications TV system: Rear Terminals Sound Output: • AV1 2 x 20 W (music power) 2 x 10 W (RMS) Colour system: 21-pin scart connector (CENELEC standard) Power Consumption: SECAM, NTSC 3.58, 4.43 (only including audio/video input, 170 W Video In) RGB input, TV audio/video output. -
Page 32: Troubleshooting
Troubleshooting Here are some simple solutions to problems which may affect the picture and sound. Problem Solution No picture (screen is dark) and no • Check the aerial connection. sound. • Plug the TV in and press the button on the front of the TV. •... - Page 33 27 - 29. • Replace the batteries. The standby indicator on the TV • Contact your nearest Sony service centre. flashes. • If you continue to experience problems, have your TV serviced by qualified personnel. • Never open the casing yourself.
- Page 34 Television Channel Number Guide channels Only the main transmitters are listed. Information regarding the regional sub-relay channel numbers can be obtained by contacting The BBC Engineering Information Dept., Telephone Number 020 7852 5040. MAIN TRANSMITTERS BBC1 BBC2 London & South East Bluebell Hill Crystal Palace Dover...
- Page 35 Sony España, S.A. Printed in Spain...
Need help?
Do you have a question about the KP-44PX3U and is the answer not in the manual?
Questions and answers