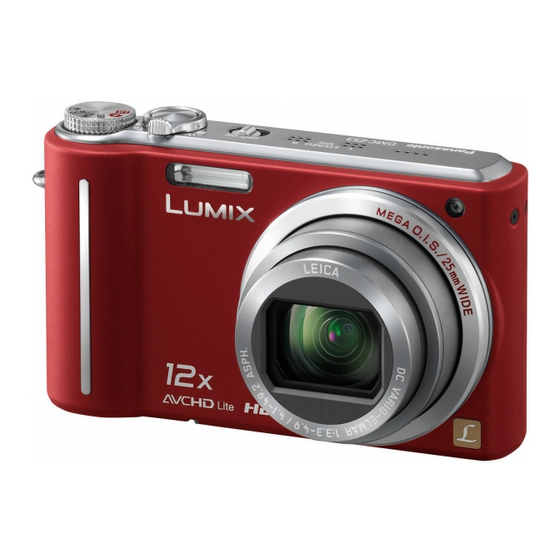
Panasonic Lumix DMC-ZS1 Operating Instructions Manual
Hide thumbs
Also See for Lumix DMC-ZS1:
- Operating instructions manual (144 pages) ,
- Instrucciones de funcionamiento (36 pages) ,
- Basic operating instructions manual (19 pages)
Table of Contents
Advertisement
Before connecting, operating or adjusting this product, please read
All descriptions and logos pertaining to HDMI, VIERA Link, AVCHD Lite,
For USA and Puerto Rico assistance, please call: 1-800-211-PANA(7262) or,
contact us via the web at: http://www.panasonic.com/contactinfo
For Canadian assistance, please call: 1-800-99-LUMIX (1-800-995-8649) or
send e-mail to: lumixconcierge@ca.panasonic.com
P
PC
Operating Instructions
Digital Camera
DMC-ZS3
Model No.
DMC-ZS1
the instructions completely.
and Dolby pertain to DMC-ZS3 only.
VQT1Z82-1
Advertisement
Table of Contents

Related Manuals for Panasonic Lumix DMC-ZS1


Summary of Contents for Panasonic Lumix DMC-ZS1
-
Page 1: Operating Instructions
All descriptions and logos pertaining to HDMI, VIERA Link, AVCHD Lite, and Dolby pertain to DMC-ZS3 only. For USA and Puerto Rico assistance, please call: 1-800-211-PANA(7262) or, contact us via the web at: http://www.panasonic.com/contactinfo For Canadian assistance, please call: 1-800-99-LUMIX (1-800-995-8649) or send e-mail to: lumixconcierge@ca.panasonic.com... - Page 2 HDMI Licensing LLC. radio/TV technician for help. THE FOLLOWING APPLIES ONLY IN (OR BACK); THERE ARE NO USER • VIERA Link is a trademark of Panasonic Corporation. CANADA. SERVICEABLE PARTS INSIDE. • EZ Sync is a trademark of Panasonic...
- Page 3 Quick start guide -If you see this symbol- About the battery charger Information on Disposal in other CAUTION! Countries outside the European Union DO NOT INSTALL OR PLACE THIS This symbol is only valid in the UNIT IN A BOOKCASE, BUILT- European Union.
- Page 4 Record, view, save those precious moments. ● Enjoy crisp pictures on large Record View P.28 P.107 screens! AV cable HDMI mini cable (sold separately) Taking picture with ● Easy operation with VIERA remote control automatic settings ‘VIERA Link’ support ● Camera automatically detects the scene ●...
-
Page 5: Table Of Contents
Contents Face Detection and Face Recognition ..34 Taking pictures with the face FAVORITE ..........95 Before use AF TRACKING ..........34 PRINT SET ..........96 recognition function ....65 Taking pictures with your own settings ... 35 PROTECT/ AUDIO DUB....97 Face Recognition function ......65 Before use .......... -
Page 6: Before Use
• Do not leave in direct sunlight. Panasonic will not provide compensation • Do not press the lens or the LCD monitor. for video or image damage caused by (referred to in this manual as ‘charger’) -
Page 7: Names Of Parts
Damage hand strap to avoid STEREO MIC resulting from the use of non-Panasonic batteries is not covered under the warranty. dropping the camera. P.61 ( 64), 78, 97) •... -
Page 8: Inserting Battery And Card
Mode) • Full flash used for every other picture and card • Using Panasonic SD memory card (32 MB) • Zoom operation for each picture • Using the supplied battery (max. W → max. T, or max. T → max. W) (both click into place) •... -
Page 9: Picture Save Destination (Cards And Built-In Memory)
‘PLEASE SET THE CLOCK’ will be displayed Compatible memory cards (sold separately) SD memory card/ when power is turned on for the first time. The following SD standard-based cards (Panasonic brand recommended) SDHC memory card • SD memory cards (8 MB - 2 GB) (sold separately) •... -
Page 10: Using Menus
Using menus To enable optimum usage of the camera, various functions can be activated and setting can be changed from the menus. (Example) Change ‘VOLUME’ in SETUP menu when in NORMAL PICTURE Mode. Menu type (REC/PLAY switch , Mode dial Bring up the menu Camera ON/OFF switch REC menu... -
Page 11: Using Quick Menu
Using menus Using SETUP menu (Continued) Make general camera settings such as adjusting the clock, extending the battery life, Using Quick menu and changing the beep sounds. ‘CLOCK SET’, ‘AUTO REVIEW’ and ‘ECONOMY’ are important for clock setting and Recording menu items can be called up easily. battery life. -
Page 12: Lcd Mode/ Display Size/ Guide Line/ Histogram/ Rec Area
Using SETUP menu See P.18 for the setting procedure in the SETUP menu. (Continued) Item Settings, notes Item Settings, notes POWER SAVE ECONOMY LCD MODE OFF: Normal (cancel setting) OFF/2MIN./5 MIN./10MIN. : Turn off LCD monitor Make LCD monitor easier AUTO POWER LCD: Automatically shut off power while not in use. -
Page 13: Reset/ Usb Mode
Using SETUP menu See P.18 for the setting procedure in the SETUP menu. (Continued) Item Settings, notes Item Settings, notes OFF/ON ZOOM RESUME TV ASPECT Remember the zoom Change the aspect ratio • Cannot be set when using ‘SELF PORTRAIT’ scene •... -
Page 14: Viera Link / Version Disp./ Format/ Language
Using SETUP menu See P.18 for the setting procedure in the SETUP menu. (Continued) Item Settings, notes Item Settings, notes JITTER, SUBJ. MOVE DEMO.: (Only during recording) DEMO MODE OFF: Operations must be performed via the camera’s own VIERA Link Extent of jitter and of subject movement are shown on buttons. -
Page 15: Basic Shooting Operation
Basic shooting operation Please set the clock before shooting (P.17). Turn on the power Holding the camera/Direction detection function Status indicator illuminated for approx. 1 second. AF assist lamp • Stand with your arms close to your body and with Shutter button your legs apart. -
Page 16: Basic Shooting Operation
Basic shooting operation Please set the clock before shooting (P.17). Turn on the power Holding the camera/Direction detection function Status indicator illuminated for approx. 1 second. AF assist lamp • Stand with your arms close to your body and with Shutter button your legs apart. -
Page 17: Taking Picture With Automatic Settings
Taking picture with automatic settings Optimum settings are made automatically from information such as ‘face’, ‘movement’, ‘brightness’, and ‘distance’ just by pointing the camera at the subject, meaning that clear ‘INTELLIGENT AUTO Mode’ pictures can be taken without the need to make settings manually. Mode: Turn on the power Backlight compensation... -
Page 18: Face Detection And Face Recognition
Taking picture with automatic settings Taking pictures with your own settings ‘INTELLIGENT AUTO Mode’ (Continued) ‘NORMAL PICTURE Mode’ Mode: Mode: Using REC menu (P.69) to change settings and set up your own recording environment. Face Detection and Face Recognition Turn on the power If the camera automatically identifies the scene and determines that people appear as subjects in the image ( ), Face Detection is activated, and the focus and... -
Page 19: Align Focus For Desired Composition
Taking pictures with your own settings Taking pictures/motion pictures with zoom ‘NORMAL PICTURE Mode’ (Continued) Mode: Mode: You can zoom in up to 12 times with ‘optical zoom’, and up to 21.4 times with ‘Extended Align focus for desired composition optical zoom’... -
Page 20: Digital Zoom
Taking pictures/motion pictures with zoom (Continued) Mode: Maximum zoom ratios by picture size Enlarging further ‘DIGITAL ZOOM’ Optical zoom Extended optical zoom 10 M 0.3 M Zoom 4 times further than optical/extended optical zoom (maximum 48 x – 85.5 x). PICTURE SIZE 9.5 M... -
Page 21: Viewing Your Pictures (Normal Play)
Viewing your pictures Deleting pictures (NORMAL PLAY) REC/PLAY switch: REC/PLAY switch: When there is no card inserted, the pictures played back from the built-in memory. Pictures deleted will be from card if card is inserted, or from built-in memory if the card is (Clipboard pictures can only be played back in CLIPBOARD Mode (P.81).) not inserted. -
Page 22: Changing Recording Information Display
Taking pictures with flash Changing recording information display Mode: Change between different LCD monitor displays, such as histograms. Display ‘FLASH’ Press to change display Select the desired type In recording mode Recording Motion picture recording 1, 2 1, 3 information information No display Guide lines... -
Page 23: Taking Close-Up Pictures/Motion Pictures
Taking pictures with flash Taking close-up pictures/motion pictures (Continued) Mode: Mode: Available types in each mode ( : default setting) When you want to enlarge the subject, setting to ‘AF MACRO ( )’ enables you to take images at an even closer distance than the normal focus range (up to 3 cm (0.10 feet) for SCENE MODE max. -
Page 24: Macro Zoom
Taking close-up pictures/motion pictures Positioning camera and subject within (Continued) accessible range for focus alignment Mode: Focus range for (NORMAL PICTURE Mode) Taking images at even closer range ‘MACRO ZOOM’ Focus range To take even larger images of the subject, setting to ‘MACRO ZOOM’ enables the subject to appear even larger than when using AF MACRO. -
Page 25: Taking Images With Self-Timer
Taking pictures/motion pictures with exposure Taking images with self-timer compensation Mode: Mode: EXPOSURE only We recommend using a tripod. This is also effective for correcting jitter when pressing the Corrects exposure when adequate exposure cannot be obtained (if difference between shutter button, by setting the self timer to 2 seconds. -
Page 26: Taking Pictures By Automatically Changing The Aspect Ratio
Taking pictures by automatically changing the Taking pictures according to the scene aspect ratio ‘MULTI ASPECT’ ‘SCENE MODE’ Mode: Mode: In this mode, pressing the shutter button once automatically takes three pictures in each Using SCENE MODE enables you to take pictures with optimum settings (exposure, of three aspect ratios: 4:3, 3:2, and 16:9. -
Page 27: Sports
Taking pictures according to the scene How to select a scene (P.51) ‘SCENE MODE’ (Continued) Using flash in scene modes (P.44) Mode: Scene Uses, Tips Notes Scene Uses, Tips Notes Improves the skin tone of subjects for a • ‘AF MODE’ default setting is Takes clear pictures of wide, distant subjects. -
Page 28: Night Portrait/ Night Scenery/ Food/ Party/ Candle Light
Taking pictures according to the scene How to select a scene (P.51) ‘SCENE MODE’ (Continued) Using flash in scene modes (P.44) Mode: Scene Uses, Tips Notes Scene Uses, Tips Notes Takes pictures of people and nightscapes • Interference may be noticeable Uses weak flash to bring out skin colors. - Page 29 Taking pictures according to the scene How to select a scene (P.51) ‘SCENE MODE’ (Continued) Using flash in scene modes (P.44) Mode: Scene Uses, Tips Notes Scene Uses, Tips Notes Prevents blurring of subject in dark, indoor • Pictures may appear slightly Enables continuous recording in dim •...
-
Page 30: Aerial Photo/ Pin Hole
Taking pictures according to the scene How to select a scene (P.51) ‘SCENE MODE’ (Continued) Using flash in scene modes (P.44) Mode: Scene Uses, Tips Notes Scene Uses, Tips Notes Takes clear pictures of fireworks in the night • Shutter speed can be set to 1/4 Produces black and white pictures with a •... -
Page 31: Setting Frequently-Used Scene Modes On The Mode Dial
Setting frequently-used scene modes on the Taking motion pictures mode dial ’ ‘MY SCN MODE/MY SCENE MODE Mode: Mode: Enables motion pictures to be recorded with (stereo) audio. (Recording with muted sound Frequently-used scene modes can be preset to ) on the mode dial. is not possible.) Zoom can also be used during recording. - Page 32 Taking motion pictures (Continued) Mode: Using a card of SD speed ‘Class 6’ or above is recommended for recording motion (INTELLIGENT AUTO Mode) pictures. The camera automatically detects the scene to record motion pictures with optimal The SD speed class is a speed rating for continuous writing. Using a high-speed card with a specified speed (e.g.
-
Page 33: Taking Pictures With The Face Recognition Function
Taking motion pictures Taking pictures with the face recognition function ‘MOTION PICTURE Mode’ Mode: Mode: This enables recording of (monaural) audio motion pictures. (Recording with muted Face Recognition function sound is not possible.) Zoom can also be used during recording. If the motion picture is recorded on a memory card, one that is marked as ‘10 MB/s’... -
Page 34: Useful Features For Travel
Taking pictures with the face recognition Useful features for travel function (Continued) Mode: Mode: Recording only. (Cannot set.) Face recognition editing screen TRAVEL DATE (Record travel date and destination) Select items with ▲▼, and press ► to set. Record information as to what day and where pictures were taken by setting departure •... -
Page 35: World Time
Useful features for travel Using REC/MOTION PICTURE menu (Continued) Mode: REC/PLAY switch: Recording only. (Cannot set.) See P.18 for menu setting procedure. WORLD TIME ‘Quick menu’ (P.20) is useful to easily call up frequently-used menus. (Registering local time at your travel destination) REC menu items will be synchronized with items of the same names in the MOTION PICTURE menu (i.e. -
Page 36: Intelligent Iso
Using REC/MOTION PICTURE menu See P.18 for menu setting procedure. (Continued) REC/PLAY switch: Slow-moving subject Fast-moving subject QUALITY Set quality of picture. MODE: → REC menu → REC menu Settings: Fine (High quality, priority to picture quality) ISO sensitivity 200 ISO sensitivity 800 Standard (Standard quality, priority to the number of pictures) (Shutter speed 1/30) -
Page 37: White Balance
Using REC/MOTION PICTURE menu See P.18 for menu setting procedure. (Continued) REC/PLAY switch: WHITE BALANCE FACE RECOG. Adjust coloring to suit light source if colors otherwise appear unnatural. Registering people that appear frequently in your pictures allows them to be given priority when aligning focus, and allows all pictures featuring them to be viewed collectively. -
Page 38: Pre Af/ Metering Mode
Using REC/MOTION PICTURE menu See P.18 for menu setting procedure. (Continued) REC/PLAY switch: PRE AF Determined position for 1-area-focusing (High speed)/ Spot-focusing: focus 1-area-focusing: Focuses on smaller, Focus is continually aligned according to movement of subject even when shutter button Focuses on AF area in center of limited area. -
Page 39: Digital Zoom/ Color Mode/ Stabilizer
Using REC/MOTION PICTURE menu See P.18 for menu setting procedure. (Continued) REC/PLAY switch: I.EXPOSURE DIGITAL ZOOM Automatically adjusts contrast and exposure to give more lifelike colors when there is Multiplies effect of optical zoom or extended optical zoom by up to 4 times. (See P.39 for details) significant contrast between background and subject. -
Page 40: Af Assist Lamp
Please confirm the detailed information on the following website. TEXT STAMP, RESIZE, TRIMMING, LEVELING, and ASPECT CONV. cannot be http://panasonic.co.jp/pavc/global/cs used with pictures with audio. (This Site is English only.) Separate setting to AUDIO REC. in CLIPBOARD menu (P.82). -
Page 41: Rec Quality/ Continuous Af/ Wind Cut
Using REC/MOTION PICTURE menu Taking/viewing clipboard pictures (Continued) ‘CLIPBOARD Mode’ REC/PLAY switch: See P.18 for menu setting procedure. Mode: Useful for taking pictures of timetables and maps instead of taking memos. REC QUALITY Regardless of presence of card, pictures will always be saved to clipboard folder of built-in memory, so that they can be distinguished from normal pictures and viewed Sets the picture quality of the motion picture that is recorded. -
Page 42: Zoom Mark/Clipboard Menu
Taking/viewing clipboard pictures Viewing as list (Multi playback/Calendar playback) ‘CLIPBOARD Mode’ (Continued) REC/PLAY switch: Mode: You can view 12 (or 30) pictures at once (multi playback), or view all pictures taken on a Zoom mark certain date (calendar playback). Useful for enlarging and saving parts of maps, etc. Set to To register zoom enlarged size and position •... -
Page 43: Viewing Motion Pictures/Pictures With Audio
Viewing motion pictures/pictures with audio Different playback methods ‘PLAYBACK MODE’ REC/PLAY switch: REC/PLAY switch: Motion pictures and pictures with audio can be played back in the same way as pictures. Recorded pictures can be played back in a variety of ways. Set to Set to Set to a position other than... - Page 44 Different playback methods ‘PLAYBACK MODE’ See P.85 for switching PLAYBACK MODE procedure. (Continued) REC/PLAY switch: Operations during slide show SLIDE SHOW During motion picture playback During picture playback Automatically play images in order and to music. Recommended when viewing on TV screen. Pause/play Pause/play (When paused)
-
Page 45: Using Playback Menu
Different playback methods Using PLAYBACK menu ‘PLAYBACK MODE’ (Continued) REC/PLAY switch: REC/PLAY switch: (Set mode dial to any except See P.85 for switching PLAYBACK MODE procedure. For the PLAYBACK menu setting procedure, see P.18. CATEGORY PLAY CALENDAR Images can be classified automatically and viewed by category. Automatic classification starts when ‘CATEGORY PLAY’... -
Page 46: Text Stamp
Using PLAYBACK menu (Continued) For the PLAYBACK menu setting procedure, see P.18. REC/PLAY switch: (Set mode dial to any except To check stamped text ‘playback zoom’ (P.40) To edit select ‘SINGLE’ in step → select picture with ◄►, and press ‘MENU/SET’... -
Page 47: Resize
Using PLAYBACK menu (Continued) For the PLAYBACK menu setting procedure, see P.18. REC/PLAY switch: (Set mode dial to any except MULTI LEVELING Select ‘MULTI’ in step Select picture (up to 50 pictures) Slight slanting in the picture can be corrected. the previous page Set-up: Press ‘MENU/SET’... -
Page 48: Aspect Conv. / Rotate Disp
Using PLAYBACK menu (Continued) For the PLAYBACK menu setting procedure, see P.18. REC/PLAY switch: (Set mode dial to any except FAVORITE ASPECT CONV. Convert pictures taken in for printing. Mark your favorite pictures and enable the following functions. Favorites-only slide show (P.86) Set-up: Press ‘MENU/SET’... -
Page 49: Print Set
(Ask at shop to check compatibility) Set-up: Press ‘MENU/SET’ → ‘ PLAYBACK menu’ → Select ‘PROTECT’ For more information visit: http://panasonic.jp/dc/dpof_110/white_e.htm Select ‘SINGLE’ or ‘MULTI’ Set-up: Press ‘MENU/SET’ → ‘ PLAYBACK menu’ → Select ‘PRINT SET’... -
Page 50: Copy
DPOF settings will not be copied. Files and folders containing copied ‘AVCHD Lite’ motion pictures cannot be played back Only pictures from Panasonic digital cameras (LUMIX) may be copied. or edited if they have been deleted, modified, or moved using Windows Explorer or Original pictures will not be deleted after copying (to delete pictures →... -
Page 51: Using With Your Pc
Using with your PC Some computers can read directly from the camera’s memory card. For details, see the manual for your computer. Still/motion pictures can be copied from the camera to your computer by connecting the Copying still pictures and motion pictures two together. -
Page 52: Using The Multi Conversion Adaptor (Sold Separately)
• It may not be possible to read if there are 1000 or more pictures on the card. Do not use any other AV cables except the supplied one. • Motion pictures recorded in ‘AVCHD Lite’ format cannot be read. Do not use any other adaptors except a genuine Panasonic multi conversion adaptor (DMW-MCA1; optional). VQT1Z82... -
Page 53: Printing
Printing Some printers can print directly from the camera’s memory card. For details, see the manual for your printer. You can connect directly to a PictBridge- Turn on power of both Printing multiple pictures compatible printer for printing. camera and printer Select ‘MULTI PRINT’... -
Page 54: Making Print Settings On Camera
Insert the SD memory card into the SD card slot • Pictures only can be played back. • Motion pictures recorded in ‘AVCHD Lite’ may be played on Panasonic televisions Items may not be displayed if incompatible with printer. (VIERA) displaying the AVCHD logo. -
Page 55: Viewing On A Tv With Hdmi Socket
(sold separately) Do not use any other cables except a genuine Panasonic HDMI mini cable (RP-CDHM15/RP-CDHM30; optional). Playback cannot be performed in CLIPBOARD Mode. Blank stripes may appear at the sides or at the top and bottom of the screen, depending on aspect ratio setting. - Page 56 Viewing on TV screen (Continued) Available functions Other related operations Use your television’s remote control to operate the camera. Power OFF (1) Multiple playback The camera’s power can also be switched off when switching the television’s power Press the red button on your television’s remote off with the remote control.
-
Page 57: List Of Lcd Monitor Displays
List of LCD monitor displays Press the display button to change display (P.12, 42). In recording In playback 5 Number of recordable pictures 6 Exposure compensation (P.49) P.124, P.126) 7 Favorites settings (P.95) 6 Save destination (P.16) 8 Recorded date and time 7 Recording state Travel destination setting (P.67)/Name (P.55)/ 100–0001... -
Page 58: Message Displays
THIS BATTERY CANNOT BE USED BUILT-IN MEMORY ERROR FORMAT BUILT-IN MEMORY? Use a genuine Panasonic battery (DMW-BCG10PP). Displayed when formatting built-in memory via computer, etc. Battery cannot be recognized as terminal is dirty. → Reformat directly using camera (P.26). Data will be deleted. -
Page 59: Q&A Troubleshooting
Try checking these items (P.116 - 121) first. Q&A Troubleshooting (Restoring menu settings to default values may solve certain problems. Try using ‘RESET’ in SETUP menu in recording mode (P.24).) Battery, power Recording (continued) Camera does not work even if power is turned on. Focus not aligned correctly. - Page 60 (Automatically rotates pictures from portrait to landscape. Some pictures taken facing played in Panasonic digital cameras (LUMIX) that were sold before July 2008. up or facing down may be interpreted as being portrait.) Motion pictures recorded in ‘AVCHD Lite’...
- Page 61 Q&A Troubleshooting (Continued) TV, computer, printer TV, computer, printer (continued) No image appears on TV. Image blurred or not colored. Edges cut off pictures when printing. Not connected correctly (P.107, 108). Release any trimming or edgeless printing settings on printer before printing. TV input setting not set to auxiliary input.
-
Page 62: Usage Cautions And Notes
Do not allow camera to come into contact with pesticides or volatile substances (can Panasonic will not be liable for any damage that occurs, direct or indirect, as a result cause surface damage or coating to peel). -
Page 63: Recording Picture/Time Capacity
Recording picture/time capacity Figures given are estimates. May vary according to conditions, card type, and subject. Recording capacities/times displayed on LCD monitor may not be reduced regularly. Recording picture capacity (still pictures) Varies according to ‘ASPECT RATIO’ (P.70), ‘PICTURE SIZE’ (P.69), or ‘QUALITY’ When the number of recordable pictures exceeds 99,999, ‘+99999’... - Page 64 Recording picture/time capacity Figures given are estimates. May vary according to conditions, card type, and subject. Recording capacities/times displayed on LCD monitor may not be reduced regularly. Recording picture capacity (still pictures) Varies according to ‘ASPECT RATIO’ (P.70), ‘PICTURE SIZE’ (P.69), or ‘QUALITY’ When the number of recordable pictures exceeds 99,999, ‘+99999’...
-
Page 65: Specifications
Number of recordable pictures Depends on the remaining capacity of the built-in memory or the card (Unlimited). Battery charger Hi-speed burst (Panasonic DE-A65B): Information for your safety Approx. 10 pictures/second (Speed priority) Burst speed Output CHARGE 4.2 V 0.65 A Approx. - Page 66 (Unlimited). Hi-speed burst Battery charger Burst speed Approx. 10 pictures/second (Speed priority) (Panasonic DE-A65B): Information for your safety Approx. 7 pictures/second (Image priority) Output CHARGE 4.2 V 0.65 A Number of recordable Approx.
-
Page 67: Optional Accessories
SD memory cards. When connecting to other devices or requesting printing in stores, please verify SDHC memory card compatibility in advance. MAIL THIS ORDER TO: PANASONIC SERVICE AND TECHNOLOGY COMPANY (Always read your device’s operating instructions before proceeding) ACCESSORY ORDER OFFICE 20421 84th Avenue South Kent, WA. -
Page 68: Request For Service Notice (For Usa And Puerto Rico Only)
If your product does not work properly because of a defect in materials or Mail this completed form and your Proof of Purchase along with your unit to: workmanship, Panasonic Consumer Electronics Company (referred to as “the Panasonic Camera and Digital Service Center warrantor”) will, for the length of the period indicated on the chart below, which... -
Page 69: Customer Services Directory (United States And Puerto Rico)
Accessory Purchases (United States and Puerto Rico) that is attributable to acts of God. Purchase Parts, Accessories and Instruction Books online for all Panasonic Products by visiting our Web Site at: THERE ARE NO EXPRESS WARRANTIES EXCEPT AS LISTED UNDER http://www.pstc.panasonic.com... - Page 70 PLACEZ SUR L’APPAREIL AUCUN Panasonic (DMW-BCG10PP). N’utilisez pas l’appareil à proximité d’un OBJET REMPLI DE LIQUIDE, TEL Si une batterie autre que Panasonic est ATTENTION! émetteur radio ou de lignes à haute UN VASE. utilisée, nous ne pouvons garantir le bon NE PAS INSTALLER CET APPAREIL tension.
-
Page 71: Index
Index List of LCD monitor displays (P.112) Display Size ..........22 Motion JPEG .......... 79 Resizing ..........91 Motion picture menu ......69 Rotate Display ........94 Aerial Photo Mode ........58 Motion Picture Mode ....... 64 AF Assist Lamp........78 Motion Picture Playback ...... - Page 72 MEMO MEMO VQT1Z82 VQT1Z82...
- Page 73 QuickTime and the QuickTime logo are trademarks or registered trademarks of Apple Inc., used under license therefrom. Panasonic Consumer Electronics Company, Division of Panasonic Corporation of North America One Panasonic Way, Secaucus, NJ 07094 Panasonic Canada Inc. 5770 Ambler Drive, Mississauga, Ontario, L4W 2T3 ©...
Need help?
Do you have a question about the Lumix DMC-ZS1 and is the answer not in the manual?
Questions and answers