Panasonic Lumix DMC-ZS10 Owner's Manual
Advanced features
Hide thumbs
Also See for Lumix DMC-ZS10:
- Owner's manual (150 pages) ,
- Operating instructions manual (76 pages) ,
- Basic owner's manual (35 pages)

Related Manuals for Panasonic Lumix DMC-ZS10


Summary of Contents for Panasonic Lumix DMC-ZS10
- Page 1 Panasoni( Owner's Manual for advanced features Digital Camera DMC-ZSIO Model No. Before connecting, operating or adjusting this product, please read the instructions completely. VQT3G90...
- Page 2 Contents Taking motion pictures ....... Viewing your pictures Before use ..........[Normal Play] ........About GPS ............ 7 Viewing motion pictures ......Zooming in and viewing "Playback Zoom"...34 Standard Accessories ......Viewing a list of pictures "Multi Playback"...34 Names of parts ........Viewing pictures by their recording date "Calendar Playback".
-
Page 3: Table Of Contents
[Beach] ............[Snow] ............[Aerial Photo] ..........Taking pictures with zoom ....[Pin Hole] ............. Using the zoom by performing touch [Film Grain] ..........operations ........... [High Dynamic] ....:......67 Zoom types and use ........[Photo Frame] ..........Taking pictures with flash .... - Page 4 Contents co.t ° od Using the [Rec] menu ......Using the [Playback] menu ....[Aspect Ratio] ..........[Upload Set] ..........[Picture Size] ..........[Title Edit] ..........[Quality] ............[Place-Name Edit] ........[Sensitivity] ..........[Text Stamp] ..........[White Balance] ........... [Video Divide] ..........[AF Mode] ............
- Page 5 mCamera handling ==Condensation (lens clouding) VQT3G90...
- Page 6 _efore (Continued) =Always take a test shot first Before important events when you will use the camera (at weddings, for example), always take a test shot to make sure that pictures and sound record correctly. BNo compensation for missed shots We cannot compensate for missed shots if technical problems with the camera or card prevent recording.
- Page 7 [] About the camera's location name information Before using the camera, read "User LicenseAgreement for Location Name Data". (--,145) [] When [GPS Setting] is [ON], the GPS function works even if the camera's power is off. • Electromagnetic waves from the camera can affect instruments and meters. During airplane takeoff and landing or in other restricted area, set [GPS Setting] to [OFF] or _'_s,then turn the camera's...
- Page 8 • Cards are optional. You can record or play back pictures on the built-in memory when you are not using a card. (-+14) • If any accessories are lost, customers in the USA and Puerto Rico should contact Panasonic's parts department at 1-800-833-9626 and customers in Canada should...
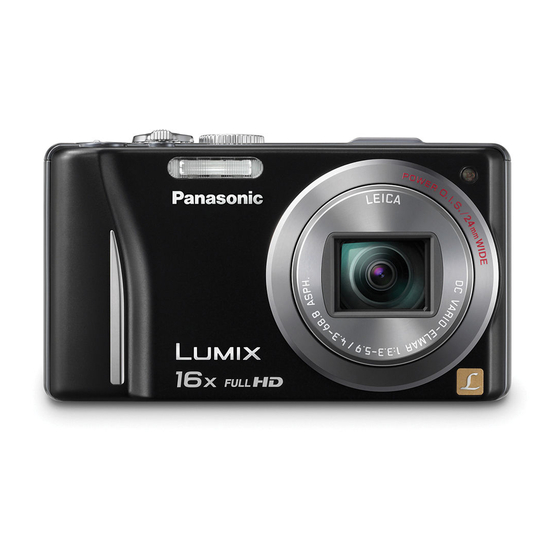
- Page 9 Mode dial Flash (-_52) indicator (_56)/AF Assist Lamp (493) barrel (_5, 143) GPS status indicator lever (--*78) picture button GPS antenna (-W5) ON/OFF switch Speaker (-,43) Shutter button Microphone (-_21) We recommend using the supplied hand strap to avoid dropping the camera.
-
Page 10: Charging Battery
Please be advised that we are not liable for any accident or failure occurring as a result of use of a counterfeit battery pack. To ensure that safe products are used we recommend that a genuine Panasonic battery pack is used. • Use the dedicated charger and battery. - Page 11 50 %RH when LCD monitor is on. Rotating the zoom lever from Tele to Wide or • Using a Panasonic SD Memory Card vice versa in every recording. (32 MB). Turning the camera off every 10 recordings °...
-
Page 12: Inserting And Removing The Card
• To remove card: • To remove battery: move lever in Lever press down in direction of arrow. center. _AIways use genuine Panasonic batteries. If you use other batteries, we cannot guarantee the quality of this product. ÷ Remove battery from camera after use. - Page 13 AC adaptor Alig_ marks to connect _Always use a genuine Panasonic AC adaptor (optional). Use the AC adaptor and DC coupler specifically for this camera. Using other adaptors or couplers could cause camera failure. It may not be possible to install camera on a tripod or unipod when the DC coupler is...
- Page 14 _The access time for the built-in memory may be longer than the access time for a card. [] Compatible memory cards (optional) The following SD standard-based cards (Panasonic brand recommended) 8 MB - 2 GB SD Memo_ CaMs - Using a card of SD speed "Class 4"* or above is recommended...
- Page 15 (flashes red) Remaining battery (only when using battery) If the batter,! mark flashes red, recharge or replace battery. remaining pictures or recording time capacity (press [DISP.] button to switch display) Displayed when no card is inserted (pictures will be saved to built-in memory) When in operation (Card) or ._...
-
Page 16: How To Operate The Camera
How to operate the camera Mode dial Use thisto select the recordingmode. Shutter button Use thisto focus and recordstillpictures. Zoom lever Operate this when zooming in on a distant subject to record it larger. picture button Record motionpictures. Camera ON/OFF switch Use this to turn the camera's power on and off. - Page 17 This camera's touch panel senses pressure that is applied to the screen. Touch Drag To "touch" is to press the touch panel and To "drag" is to touch and slide your finger across the touch panel surface. then pull the finger back again. Touching is used to select icons or pictures, Dragging (sliding your finger across the screen) among other actions.
-
Page 18: Setting The Clock
Setting the clock Set REC/PLAY switch to I_1 before turning on the power. Turn on the power The power is turned on. If the language select screen is not displayed, proceed to step _. Press [MENU/SET] while the message is displayed Press •... - Page 19 (The clock is not set when the camera is shipped.) Press < to select [Yes] and press [MENU/SET] if automatically correcting time of day using the GPS function • To manually set date and time -, select [No]. When [Please set the home area] is displayed, press [MENU/ SET] Press <...
- Page 20 Turn on the power Set to I_1 Set to the desired Recording Mode Align the mode dial correctly to the mode that you want to use. [Intelligent Auto] Mode Take pictures with automatic settings. (-*26) Record pictures with your own settings. [Program AE] Mode (-*-,22)
- Page 21 Aim the camera and shoot Motion picture mTaking still pictures button (_Press the shutter button halfway to focus @Press and hold the shutter button to take the picture =Recording motion pictures (])Press the motion picture button to start recording Microphone @Press the motion picture button again to Shutter button finish recording...
-
Page 22: Program Ae] Mode
Using the [Rec] menu to change settings and set up your own recording environment. Set to ([Program AE] Mode) Take a picture Press halfway Press fully (press lightly to focus) (press the button all the way to record) [] Changing recording information display... - Page 23 Useful when subject is not in center of picture. First adjust focus according to subject Align the AF area Focus display with the subject (When focus is aligned: illuminated When focus is not aligned: flashing) area Hold down halfway (when focus is aligned: green W11enfocus is not aligned: red) Return to desired composition _Subjects/environments...
-
Page 24: Touch Shutter Function
This function enables you to focus and record still pictures simply by touching the subjects that appear on the screen. Touch _ on the screen • The icon changes to _, and you can now proceed with touch shutter recording. Touch the subject you want to record •... -
Page 25: Focus And Exposure
This function enables the focus and exposure to be set when you touch the subject displayed on the screen. Touch the place where you want to set the focus and exposure • When [AF Mode] is set to re.'. (Face Detection), the Face Detection function continues to operate, but the focus is adjusted to the place where you touched. -
Page 26: Ihandheld Nite Shot
Taking pictures with automatic settings [Intelligent Auto] Mode Recording Mode: {_ Optimum settings are made automatically from information such as "face", "movement", "brightness", and "distance" just by pointing the camera at the subject, meaning that clear pictures can be taken without the need to make settings manually. Set to I_1 Auto]Mode) ([Intelligent... -
Page 27: Motion Deblur
Press I_ to select _ or []. OWhen ! is selected, the optimum flash is selected automatically depending conditions. (452) OWhen _ or _ is selected, the shutter speed is reduced. If [Color Mode] (--,93) is set to [Happy], both still and motion pictures are clearer, with more vivid coloring. - Page 28 Taking pictures with automatic settings [Intelligent Auto] Mode (Continued) Recording Mode: This function enables the camera to continue to focus on the subject and adjust the exposure of the subject even when the subject is moving. ==With cursor button operations Press •...
-
Page 29: Vqt3G90
OOnly menu items which are displayed in the [Intelligent Auto] Mode can be set. OThe settings selected in the [Program AE] or other modes are reflected for not displayed menu items on the [Setup] menu. _The settings for the following items are different from other recording modes: [Picture Size] and [Color Mode] on the [Rec] menu, [Burst], and [Beep] on the [Setup] menu... -
Page 30: Taking Motion Pictures
Taking motion pictures Recording Mode: _ I_ [] _ {_] I_ _ Enables motion pictures to be recorded with (stereo) audio. Press motion picture button to start recording [Rec Mode] (--_96)i[RecQuality](_97) Elapsed recording time Remaining recording time (approx.) e Immediately release the motion picture button after pressing it. - Page 31 ==Recording motion pictures in [_ Records a motion picture at your preferred settings. • Aperture and shutter speed are automatically set. ==Recording motion pictures in The camera automatically detects the scene to record motion pictures with optimal settings. l!_! When scene does not correspond t o any on the right.
- Page 32 Viewing your pictures [Normal Play] When a card is in the camera, pictures are played back from the card, and without a card, pictures are played back from the built-in memory. Drag your finger across the screen, and select the picture to be played back Scrolling to the next picture: Drag your finger across the...
- Page 33 Select a picture with the motion picture icon, and press i Playback now starts. Motion picture recording time When playback starts, the elapsed playback time is displayed in the top right of the screen. Example: After 10 minutes and 30 seconds: [10m30s] Motion picture icon (differs depending on the recording mode and picture quality setting) ==Operations...
-
Page 34: Normal Play]
Viewing your pictures [Normal Play] (Continued) Playback Mode: [] Touch the area that you want to magnify Each time you touch, the magnification increases through four levels after l x, 2x, 4x, 8x, and 16x. (The picture quality displayed becomes successively lower.) •... - Page 35 Turn the zoom lever toward W several times Touch the recording date to be displayed, and touch [Set] to enter the date Select the month The pictures recorded on the selected date appear on the 12-picture screen. ° The recording date can also be selected by using the cursor button, and press [MENU/SET].
-
Page 36: Deleting Pictures
Deleting pictures Playback Mode: Pictures will be deleted from the card if the card is inserted, or from the built-in memory if the card is not inserted. (Deleted pictures cannot be recovered.) Press to delete displayed picture Q.MENU • A confirmation screen is displayed. - Page 37 A burst group is handled as one picture. (All the pictures in the selected burst group are deleted.) (after step _) Use cursor button to select [Delete Multi]/[Delete All] and press [MENU/SET] _[Delete Multi] Use cursor button to select picture and press [DISP.] button •...
- Page 38 ng the menu mAbout the menu screen • Menu operation flow Displaying the menu screen Selecting the menu type Select the item Buttons used in menu operations (_: [MENU/SET] (_: Cursor button (_: [_ / :_] button Changing the settings Menu screen configuration (_: Menu description (_: Menu items...
- Page 39 Example: Changing [AF Mode] in the [Rec] menu in [Program AE] Mode Press [MENU/SET] The menu selection screen is displayed. Select [Rec] menu and press [MENU/SET] • The menu type can also be selected by touch operations. Press A T to select [AF Mode] and press [MENU/SET] <_): Pages The pages can also be selected with the zoom lever.
-
Page 40: Setting The Menu
Setting the menu (Continued) [Rec] menu (REC/PLAY switch: O) Changing picture preferences (485) • Displays settings such as White Balance, Sensitivity, Aspect Ratio, and Picture Size. [Motion Picture] menu (REC/PLAY switch: O) Recording motion pictures using your own settings (496) •... - Page 41 During recording, you can easily call some of the menu items and set them. Press [Q.MENU] button ([_ / :_] button) Press _1!_ to select a menu item Press • V to select the settings Press [MENU/SET] _The menu items and setting items that are displayed differ depending on the recording mode.
-
Page 42: Using The [Setup] Menu
Using the [Setup] menu [Clock Set], [Economy] and [Auto Review] are important for clock setting and battery life. Please check these before use. Settings, notes Set time, date, and display format. [ON]/[OFF] [Destination]: Set the local time at travel destination. [Home]: Set date and time at home area. - Page 43 Settings, notes [0] 1 [1] / [2] / [3] / [4] / [5] / [6] • Cannot be used to adjust TV speaker volume when connected to TV. [C1] /[C2] /[C3] A_ [Auto Power LCD]: The brightness is adjusted automatically depending how bright it is around the camera.
- Page 44 Using the [Setup] menu (Continued) Settings, notes [ON]i[OFF] A peak in the center (Example) represents correct brightness (correct exposure). This can be used as a reference exposure correction, etc. Dark _ -_ Bright • Histogram from time of recording is different to Histogram in playback and displayed in orange, when recording with...
- Page 45 Settings, notes _z [Sleep Mode] [2 MIN.]I[5 MIN.]/[10 MIN.]/[OFF]: Automatically shut off power while not in use. • To restore --, Press the shutter button halfway, or turn on the power again. • Cannot be used in the following cases: When using AC adaptor (optional) and DC coupler (optional), when connected to computer/printer, during motion picture recording/playback,...
- Page 46 Using the [Setup] menu (Continued) Settings, notes . The_folder number is updated and the file number starts IIOLrlIUUUI • A folder number between 100 and 999 can be assigned. Numbers cannot be reset once folder number reaches 999. in this case, save all necessary pictures to your computer, and format the built-in memory/card (-->48),...
- Page 47 For details about the setting procedure in the [Setup] menu (-,38) Settings, notes [TV Aspect] (Operates when AV cable is connected.) Iml/ [ON]: Operations may be performed via the remote control of the VIERA Link-compatible device, (Not all operations will be available.) Operability of the camera's own buttons will be...
- Page 48 Using the [Setup] menu (Continued) Settings, notes E_I_I: Rotate Display is turned on. Rotate Display is turned on for TV output only. [OFF] • [Rotate Disp.] cannot be used with motion pictures. • Some pictures taken facing up or facing down may not be rotated automatically.
- Page 49 Settings, notes OPress [MENU/SET]. (_Touch [+] which is displayed on the screen (in 5 places) in sequence using the stylus pen (supplied). @Press [MENU/SET]. ° If the proper positions were not touched, the touch panel adjustments will not be performed. Touch the [+] places again.
-
Page 50: Taking Pictures With Zoom
Taking pictures with zoom Recording Mode: _ i'_'1_ _ ........You can zoom in up to 16 times with "Optical Zoom", and up to 33.8 times with "Extended Optical Zoom" (pictures only) with lower picture quality. To zoom further, you can use [i.ZOOM] or [Digital Zoom]. - Page 51 The zoom ratio changes when the number of recording pixe!s is changed. • Optical Zoom Zooming in up to 16 times is possible if pictures without [] have been selected by [Picture Size] on the [Rec] menu. (-_85) Optical Zoom ____ •...
-
Page 52: Automatically ([Auto Bracket])
ctures with flas Taki g pi Recording Mode: _1__1_ Press i_ to display [Flash] Use cursor button to select the desired type and press [MENU/ SET] [Auto] Norma! use • Automatically iud.qes whether or not to flash [Aut°/Red'Eye] • Automatically judges whether or not to flash Taking pictures of subjects in dark (reduce red-eye) - Page 53 ==The available flash range when [Sensitivity] setting is [AUTO] 0.6 m-5.0 m (1.97 feet-16.4 feet), t.0 m-2.8 m (3.28 feet-9,18 feet) @Shutter speeds are as follows: • Ell, r'E_, pll B[_ : 1/60 _ - 1/4000th • _, : 1 *-_,_- 1!4000th •3Varies according to [Min.
- Page 54 Taking close-up pictures Recording Mode: I_ [] _ I_] _]_ When you want to enlarge the subject, setting to [AF Macro] (AFt) enables you to take pictures at an even closer distance than the normal focus range (up to 3 cm (0.10 feet) for max.
- Page 55 When is too close to the camera, the picture may not be properly focused. The a subject shortest recording distance differs depending on the zoom ratio and the setting in macro recording mode. 1× 3 cm (0.10 feet) 50 cm (1.64 feet) 10 cm (0.33 feet) 50 cm (1.64 feet) 20 cm (0.66 feet)
- Page 56 We recommend using a tripod. This is also effective for correcting jitter when pressing the shutter button, by setting the self-timer to 2 seconds. Press < to display [Selftimer] Use cursor button to select time duration and press [MENU/ SET] Take a picture Press the shutter button fully to start recording after the preset time.
- Page 57 Corrects exposure when adequate exposure cannot be obtained (if difference between brightness of object and background, etc.). [] Recording Mode: I_ [] _ I_ _ Press & to display [Exposure] Use cursor button to select a value and press [MENU/SET] •...
- Page 58 Determine aperture and shutter speed and record Recording Mode: _ When recording, you can control the range of focus (depth of field) to meet your recording purposes. Shutter speed is automatically adjusted to be appropriate for the set aperture value. Set mode dial to Mode) ([Aperture-Priority]...
- Page 59 This mode of recording lets you set any aperture value and shutter speed when exposure adjustment prevents you from recording at the desired exposure (brightness/darkness). Also, long-exposure recording of up to 60 seconds is possible. Set mode dial to ([ManualExposure] M ode) •...
-
Page 60: Cust.set Mem.]
Registering your preferred Recording Mode, [Rec] menu settings, etc. to [Cust.Set Mem.] and setting the mode dial to CUST allows you to switch quickly to those settings. Up to 3 current camera settings can be registered. m Recording Mode: _]_ __] Select the Recording Mode you wish to register and set the [Rec] menu, [Setup] menu, etc. - Page 61 Using [Scene Mode] enables you to take pictures with optimum settings (exposure,. coloring, etc.) for given scenes. Set mode dial to SCN Use cursor button to select the scene and press [MENU/SET] (When the scene menu is not displayed -,38) IRecording motion pictures...
-
Page 62: Reset]
Taking pictures according to the scene [Scene Mode] (Continued) Recording Mode: _ "You can register a commonly used Scene Mode in MS1MS2 on the mode dial. After the settings are made, pictures can be taken in the preset Scene Mode by simply setting the mode dial to MS1MS2. - Page 63 Using flash in Scene Modes (-_52) How to select a scene (461) II ullll II II I,, I1!!1 : Illl IIII Ill I1'11 ' I' I 1111111!1!' !jIll ......!11! I! !1 Take pictures of yourself. _..__p [Self Portrait] • Press shutter button halfway _ self-timer indicator illuminates --> press shutter button fully (if self-timer indicator flashes, focus is not correctly aligned) •...
- Page 64 Taking pictures according to the scene [Scene Mode] (Continued) Recording Mode: Takes pictures of scenes with fast movement, e.g. sports. • Stand at least 5 m (16.4 feet) away. [Sports] ° Shutter speed may slow down up to 1 second. Takes pictures of people and nightscapes with close to actual brightness.
-
Page 65: Language]
How to select a scene (_61) Using flash in Scene Modes (--,52) Brighten subjects and background in pictures of indoor events, such as weddings. • Stand approx. 1.5 m (4.92 feet) away. [Party] • Zoom: Wide (W side) • Use flash. •... - Page 66 Taking pictures according to the scene (Continued) [Scene Mode] Takes clear pictures of scenes such as sunsets. [Sunset] Prevents blurring of subject in dark, indoor conditions. Select the aspect ratio and the picture size with cursor button and press [MENU/ [High Sens.] SET].
-
Page 67: [Beach]
How to select a scene (-->61) Using flash in Scene Modes (-->52) Takes clear pictures of fireworks in the night sky. * Stand at least 10 m (32.8 feet) away. , Tripod recommended. [Fireworks] • Shutter speed is fixed to 1/4 or 2 seconds, (Setting of shutter speed changes if exposure compensation is operated) Brings out the clear blues of thesky... -
Page 68: [Photo Frame]
A frame is superimposed over the image. Use cursor button to select the frame, and then press [MENU/SET]. [Photo Frame] • The recording pixel level is 2 M (El). • Guide lines cannot be displayed. Achieve natu'ral colors under water. •... -
Page 69: Still Pictures
The camera continuously records multiple still pictures while being moved horizontally, and combines them into a 3D still picture. (The pictures are played back on the camera as 2D still pictures.) To view 3D still pictures, you need a 3D-capable TV. - Page 70 rst function Mode: 1_ I_ _ _ I_] I_ i_ Recording A burst of still pictures can be recorded while the shutter button is pressed fully. Select [Burst] from the [Rec] menu Use cursor button to select the burst setting, and press [MENU/SET] •...
- Page 71 ePictures taken with the [] or J_ setting are recorded together as a group (burst group). (-->99) _Depending on changes in the brightness of the subject, the second and subsequent pictures may be recorded brighter or darker when using the burst function at the J_, or J_ setting.
-
Page 72: Information
Recording with the Face Recognition function [Face Recog.] Recording Mode: __'I IHow the Face Recognition function works During recording (When [AF Mode] is _A,_(Face Detection)) • The camera recognizesa registered face and adjustsfocus and exposure. • When registered faces that have set names are recognized, the names are displayed (up to 3 people). - Page 73 Default [Face Recog.] setting is [OFF]. When the face pictures are registered, the setting will be [ON] automatically. Up to 6 people's face pictures can be registered along with such information as name and birth date. You can facilitate Face Recognition by the way you register faces: for example, register multiple face pictures of the same person (up to 3 pictures in one registration).
-
Page 74: [Travel Date]I
Interface are trademarks or registered trademarks HDMI Licensing LLC in the United States and other countries. HDAVI Control is a trademark of Panasonic Corporation. ITI DOLBY The "AVCHD" and the "AVCHD" logo are trademarks DIGITAL I STEREO EREATOR Panasonic Corporation and Sony Corporation.
Need help?
Do you have a question about the Lumix DMC-ZS10 and is the answer not in the manual?
Questions and answers