Advertisement
Table of Contents
- 1 Assembly Instructions
- 2 Table of Contents
- 3 Warnings
- 4 Warnings
- 5 Tools and Parts
- 6 Exploded View
- 7 Hardware
- 8 Assembly Instructions
- 9 Operating Instructions
- 10 Trouble Shooting
- 11 Care and Maintenance
- 12 Care and Maintenance
- 13 Frequently Asked Questions
- 14 Warranty Information
- Download this manual
Assembly Instructions
& User's Manual
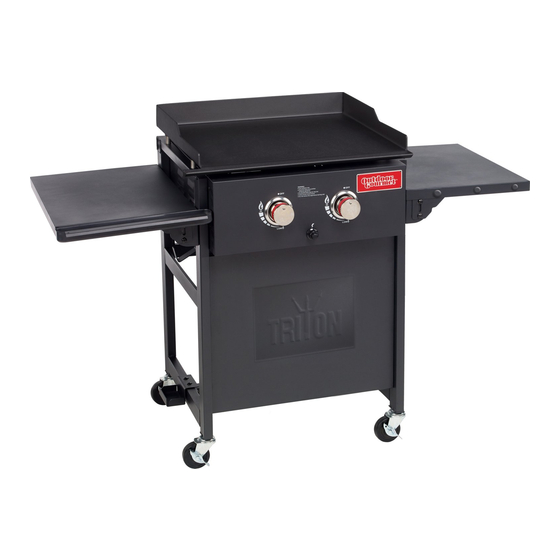
TRITON 2 BURNER GRIDDLE
Model #: FSOGBG1207
Please keep this instruction manual for future reference
Customer Service: (888) 922-2336, 7:00 am to 12:00 am daily CST
Live Chat on Academy Website (www.academy.com) 24/7 or email
customerservice@academy.com
(Made in China)
Advertisement
Table of Contents

Related Manuals for Outdoor Gourmet FSOGBG1207


Summary of Contents for Outdoor Gourmet FSOGBG1207
-
Page 1: Assembly Instructions
Assembly Instructions & User’s Manual TRITON 2 BURNER GRIDDLE Model #: FSOGBG1207 Please keep this instruction manual for future reference Customer Service: (888) 922-2336, 7:00 am to 12:00 am daily CST Live Chat on Academy Website (www.academy.com) 24/7 or email customerservice@academy.com... -
Page 2: Table Of Contents
Table of Contents Warnings…………………………………………………………………..3-7 Tools and Parts…………………………………………………...………8-9 Exploded View…………………………………………………………..10 Hardware…………………………………………………………………...11 Assembly Instructions………………………………………….……..12-17 Operating Instructions……………………………………………..18-21 Trouble Shooting……………………………………………………..…...21 Care and Maintenance…………………………………………..…...22-23 Frequently asked questions……………………………………...…..….24 Warranty Information………………………………………....25 Page 2 of 25... - Page 3 Page 3 of 25...
-
Page 4: Warnings
Warnings Page 4 of 25... - Page 5 Warnings Page 5 of 25...
- Page 6 Warnings Page 6 of 25...
-
Page 7: Warnings
Warnings Page 7 of 25... -
Page 8: Tools And Parts
Tools Required Adjustable wrench (not included) Screwdriver (not included) Page 8 of 25... - Page 9 Parts List Page 9 of 25...
-
Page 10: Exploded View
Exploded View Page 10 of 25... -
Page 11: Hardware
Hardware Page 11 of 25... -
Page 12: Assembly Instructions
Assembly Instructions Step 1: Assemble the Fence Rails (1)-2PCS to the left leg (2) and right leg (3) using BOLT M6X15 (AA)-8PCS Step 2: Install directional casters (4)- 4PCS onto legs by twisting clockwise until tight. Turn over the bottom assembly when complete and lock all casters to prevent from movin. - Page 13 Assembly Instructions Step 3: Assemble the body (5) to legs using BOLT M6X15 (AA)- 10PCS. Step 4: Assemble Side bracket (LF,RB) (7)-2PCS and Side bracket (RF,LB) (8)-2PCS to left side shelf (6)-1PCS snd right side shelf (14)-1PC using BOLT M6X12 (AA)-8PCS Page 13 of 25...
- Page 14 Assembly Instructions Step 5: Install the side shlef onto body using BOLT M6 (CC)-8PCS. Step 6: Assemble front panel (9) to the legs using BOLT M6X15 (AA)-4PCS. Page 14 of 25...
- Page 15 Assembly Instructions Step 7: Screw BOLT M6 (BB) -3PCS to the right side shelf. Step 8: Put the oil cup (10) on the left side shelf as shown. Page 15 of 25...
- Page 16 Assembly Instructions Step 9: Put the griddle top (11) onto the body. Step 10: Install the gas tank hook (13) onto the griddle body using BOLT M6X15 (AA)-2PCS Then install the gas tank holder (12) on to the bottom using BOLT M6X60 (DD)-2PCS and NUT M6 FLANGE LOCK (EE)- 2PCS.
- Page 17 FULLY ASSEMBLED Page 17 of 25...
-
Page 18: Operating Instructions
Operating Instructions General Information and Instructions Your new Outdoor Gourmet Griddle has been designed and manufactured to high quality standards. It will provide you with many years of enjoyment with a minimal amount of maintenance. Please keep in mind the following FOR YOUR SAFETY. - Page 19 Operating Instructions Page 19 of 25...
- Page 20 Operating Instructions Page 20 of 25...
-
Page 21: Trouble Shooting
Operating Instructions & Trouble shooting Page 21 of 25... -
Page 22: Care And Maintenance
Care and Maintenance Griddle Surface- 1.Immediately after using the griddle turn heat to “Low” position. While hot, the griddle top should be washed with water and a lint-free cloth. 2.Keep the griddle on “Low” heat until the griddle is completely dry. 3.Now turn off the griddle and allow to cool before proceeding. -
Page 23: Care And Maintenance
Care and Maintenance Page 23 of 25... -
Page 24: Frequently Asked Questions
Frequently Asked Questions Can I restore my griddle if it has gotten rusty? It is important to maintain griddles and keep them seasoned to minimize rusting. There are numerous suggested guides to bring a griddle cooking surface back to cooking grade. If the rust is not to extensive, it usually takes a fine brush. -
Page 25: Warranty Information
Warranty Information This product has been manufactured under the highest standards of quality and workmanship. We warrant to the original consumer purchaser that all aspects of this product will be free of defects in material and workmanship for one year from the date of purchase. A replacement for any defective part will be supplied free of charge for installation by the consumer.
Need help?
Do you have a question about the FSOGBG1207 and is the answer not in the manual?
Questions and answers