
Related Manuals for CBTL DESTO S07


Summary of Contents for CBTL DESTO S07
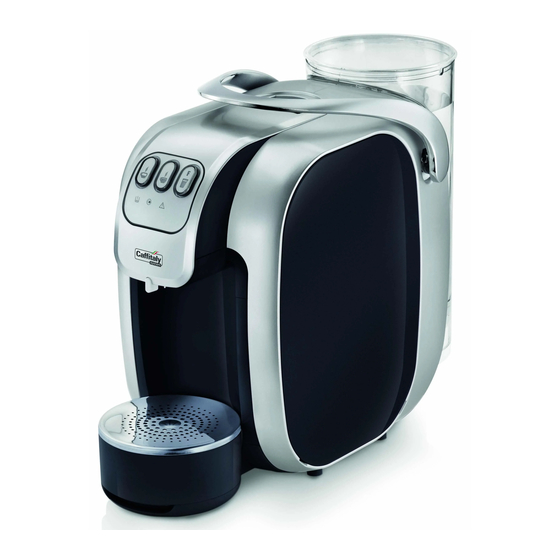
- Page 1 E S T A B L I S H E D 1 9 6 3 Instructions Model: Desto White/Silver Model: Desto Red/Silver Model: Desto Black/Silver DESTO Model No: S07 SINGLE SERVE BEVERAGE SYSTEM Designed in Italy 13CBV_BB_ManualS07_PH.r1a.indd 1 7/30/13 5:31 PM...
-
Page 2: Table Of Contents
Safety warnings _ _ _ _ _ _ _ _ _ _ _ _ _ _ _ _ _3 Your CBTL™ System contact _ _ _ _ _ _ _ _ _ _ _ _4 Instructions for use and disposal _ _ _ _ _ _ _ _ _ _5... -
Page 3: Safety Warnings
Safety warnings Please keep these instructions safe. It is necessary to pay attention to these warnings in order to reduce the risk of personal injury and damage to the appliance. The manufacturer will not be responsible for injury or damage resulting from improper use of the appliance. -
Page 4: Your Cbtl™ System Contact
Never submerge the appliance in water. Protect the appliance from sprays and drips. Water and electricity together constitute a risk of electrocution. If you do not expect to use the appliance for a long period of time (leaving on vacation, etc.), unplug it. Your CBTL™ System contact Country Contact Number... -
Page 5: Instructions For Use And Disposal
Instructions for use and disposal The appliance has been manufactured using high quality materials that can be reused or recycled. Dispose of the appliance in a suitable waste collection center. This appliance is intended to be used in household and similar applications such as: –... -
Page 6: Desto Overview
Desto Overview Capsule compartment access Lever for opening/closing capsule compartment Water tank lid Water tank Power cord Dispensing spout Used capsule drawer Power on/off switch Adjustable drip tray Long espresso & tea latte button Espresso button Brewed coffee/ tea button No water indicator light Multifuction indicator light... -
Page 7: Priming Machine Before First Use
Priming machine before first use Plug power cord into the socket located on the bottom of the machine. Fit capsule drawer inside the drip tray and slide it into the machine. Fill water tank with filtered/bottled water. The beverage buttons and 'No Water' indicator Place an ample container under the beverage light will blink simultaneously. -
Page 8: Preparing Your Beverage
Preparing your beverage Fill the water tank with filtered/bottled water. Turn the appliance on. The beverage buttons will blink simultaneously to indicate that the machine is warming up. When the buttons remain steadily lit, the machine is ready for use. Warning! Before you start brewing, make sure the used capsule drawer is not full. - Page 9 Preparing your beverage Espresso Brewed coffee/tea Press your desired beverage button. Brewing will begin in Once the machine has stopped and beeped, carefully remove your approximately 3 seconds and will last 1-3 minutes depending on hot cup. your beverage choice. The selected button will light up. NOTE: Cup and liquid may be quite hot.
-
Page 10: Indicator Light Guidelines
Indicator light guidelines DESCALE INDICATOR When the 'Descale' indicator light blinks and the machine beeps 3 times, it is advisable to carry out a descaling cycle. Refer to page 15 for descaling instructions. NO WATER TANK INDICATOR When the ‘No Water’ indicator light blinks and the machine beeps 3 Fill the tank with filtered/bottled water. - Page 11 Indicator light guidelines INTERRUPTED OPERATION INDICATOR If the lever is raised while a beverage is being dispensed— The 'Multifunction' indicator light will blink and beep and the machine will immediately stop dispensing. Danger of scalding! May cause splashes of hot water. Close the lever.
-
Page 12: Resetting To Factory Standards
Resetting to factory standards Turn machine off. Raise the lever to open the capsule compartment. Press and hold the espresso button while simultaneously switching the machine on. Continue to hold the espresso button and quickly close and open the Release the espresso button. After a few seconds, the beverage lever. -
Page 13: Adjusting For Different Cup Sizes
Adjusting for different cup sizes The machine is initially set for the use of large cups. To fit travel For the best possible results when using espresso cups, raise the drip tray, expand the bottom part and fix it in place by turning it clockwise. mugs, remove drip tray completely. -
Page 14: Descaling The Machine
Do not use vinegar: it could damage your appliance! During descaling, do not turn the machine off. CBTL™ recommends using the CBTL™ Descaler to descale your machine. Turn the machine off. Empty and rinse out the used capsule drawer and drip tray. - Page 15 Descaling the machine Place a container under the beverage dispensing spout. Make sure the lever is lowered and that there is no capsule inside the capsule compartment. Press and hold the espresso and long espresso buttons while The long espresso, 'Descale' and 'Multifunctional' indicator lights simultaneously switching the machine on.
- Page 16 Descaling the machine At the end of the descale cycle, the long espresso button will light Carefully rinse the water tank and fill it with filtered/bottled water. up and the machine will beep once and the ‘Multifunctional’ and ‘Descale’ indicator lights will blink alternately. Empty and rinse the used capsule container and drip tray and put ’Multifunctional’...
-
Page 17: Troubleshooting
Lift lever to eject capsule into used capsule drawer, insert new espresso capsule, and use Espresso or Long Espresso/Tea Latte button. Beyond the recommended cleaning and maintenance procedures, the CBTL™ Machine is not user serviceable. For additional options, please refer to the CBTL™ Limited Warranty (p.18). -
Page 18: Cbtl™ Limited Warranty
During the warranty period, CBTL™ will either repair or replace, at its option, any defective product at no charge to the owner provided that you return your product, at your sole cost and expense, in accordance with the CBTL™ Limited Warranty Claims Process. - Page 19 13CBV_BB_ManualS07_PH.r1a.indd 19 7/30/13 5:33 PM...
- Page 20 One touch. One perfect cup. ™ cbtl.com 13CBV_BB_ManualS07_PH.r1a.indd 20 7/30/13 5:33 PM...
Need help?
Do you have a question about the DESTO S07 and is the answer not in the manual?
Questions and answers