Table of Contents
Advertisement
Advertisement
Table of Contents

Related Manuals for pitsco tetrix prime


Summary of Contents for pitsco tetrix prime
- Page 1 By Ray Grissom Setup Guide 66796...
-
Page 3: Table Of Contents
Content advising by Paul Uttley. Graphics by Todd McGeorge. ©2014 Pitsco, Inc., 915 E. Jefferson, Pittsburg, KS 66762 All rights reserved. This product and related documentation are protected by copyright and are distributed under licenses restricting their use, copying, and distribution. No part of this product or related documentation may be reproduced in any form by any means without prior written authorization of Pitsco, Inc. -
Page 4: Preface
TETRIX PRIME parts to construct a robot of their own designs. Grade Level Appropriateness TETRIX PRIME materials are targeted toward middle school students. With some additional instruction, upper elementary students should be able to successfully use the materials. Additionally, secondary... -
Page 5: Using This Guide
Using This Guide The instructions in this guide will enable you to properly create subassemblies of parts needed for students to successfully construct the three basic robots described in the TETRIX® PRIME Builder’s Guide in a timely manner. The assemblies are simple to construct but might consume too much time and attention to detail for some students to complete. -
Page 6: Safety Information
Safety Information Mechanical • Keep fingers, hair, and loose articles of clothing clear of gears and moving parts. • Never pick up the robot while it is moving or the servo motors are running. • Remove any burrs caused by cutting the metal beams. Electrical •... -
Page 7: Parts Identification
The beams are named by the number of small holes on one side of the beam. Do not select beams by counting the larger holes. Beams To identify TETRIX PRIME beams, count the small holes. The example above is a 4-Hole Beam. 2X – 15-Hole Beam 40207 2X –... - Page 8 Internal Connectors 4X – 3-Way Beam Connector 40212 4X – 90-Degree Beam Connector 40211 4X – Tee Beam Connector 40213 4X – Beam End Connector 40214 4X – Beam Extension 40322 4X – Straight Beam Connector 40215...
- Page 9 Brackets and Fasteners 10X – 90-Degree Bracket 40208 10X – 60-Degree Bracket 40209 10X – Tee Bracket 40210 24X – Quick Rivet Peg 40220 24X – Quick Rivet Connector 40219 25X – Thumbscrew 40323 24X – Wing Nut 40221 10X – 90-Degree Block Connector 40217 10X –...
- Page 10 Motion Parts 4X – 90 mm Wheel & Tire 40222 4X – 80-Tooth Gear 40224 4X – 40-Tooth Gear 40223 4X – Servo Shaft Hub 40230 2X – Battery Holder 40236 6X – 80 mm Axle 40225 6X – 40 mm Axle 40226 12X –...
-
Page 11: Teacher Parts Setup
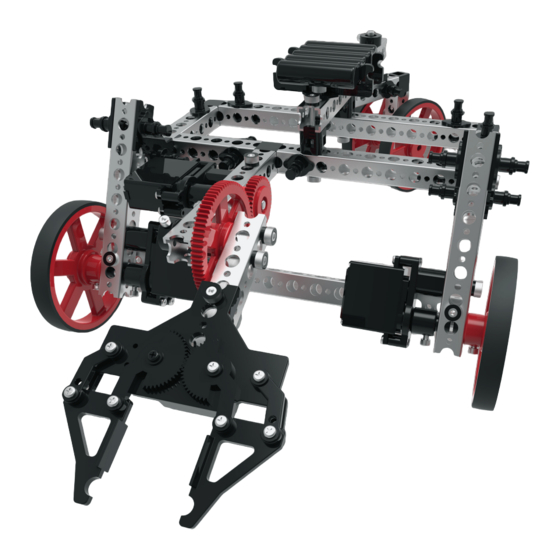
Teacher Parts Setup Servo Mount 4X – Gripper Pivot Arm Left Gripper Gear Arm Self-Tapping Screw 11X – Self-Tapping Screw Gripper Pincer 12X – Pivot Washer Gripper Plate Servo Hub Adapter Right Gripper Gear Arm... -
Page 12: Remote Control Setup
Remote Control Setup Your TETRIX PRIME robot is controlled by a standard 2.4 GHz remote controller and an accompanying receiver mounted to the robot. Transmitters are connected to specific receivers, allowing multiple transceiver combinations to be used in the same area. -
Page 13: Continuous Run Servo Assembly
Continuous Run Servo Assembly In order to facilitate ease of construction, the servo motors require preassembly. Locate the continuous run servo kit, which can be identified using the label attached to the servo. You will need the continuous run servo with screw, the servo mount with screws, a servo shaft hub, and a setscrew. You will also need Phillips-head and socket-head screwdrivers. - Page 14 Step 1 Step 2 Step 3...
-
Page 15: Standard Servo Assembly
Standard Servo Assembly Locate the standard servo kit, which can be identified using the label attached to the servo. You will need the standard servo with screw, the servo mount with screws, a servo shaft hub, and a setscrew. You will also need Phillips-head and socket-head screwdrivers. Assemble the standard servo as indicated in the illustrations. - Page 16 Step 1 Step 2 Before attaching the servo hub, you must make Step 3 sure the server is in the neutral position. To do this, connect both the servo and the battery to the receiver and turn on the power to the remote transmitter.
- Page 17 Step 4 Step 5 Step 6 Using the remote transmitter, verify the operation of the servo. If the servo operates properly, disconnect the battery from the receiver and the servo. Your servos are ready for use.
-
Page 18: Gripper Assembly
Gripper Assembly Locate the gripper assembly parts bag. The gripper assembly must be assembled and properly adjusted to function. This part should not be disassembled by students in the normal operation in this activity. Use the four longer screws to attach the servo to the gripper plate. Use only the shorter, self-tapping screws included in the gripper assembly package. - Page 19 Step 5 Step 6 Align the left and right gripper gear arms to be parallel, align the gears to mesh, and place the gear onto the pivot. Install the washer and screw to hold the left gear in place. Before continuing the assembly process, remove the power from the servo.
- Page 20 Step 11 Step 12 Step 13 Step 14 Step 15 Step 16...
- Page 21 Step 17 Step 18 After completing the assembly, verify the operation of the gripper. Connect the servo to a battery and receiver and operate the controller to fully open and close the pincers. The pincers should move parallel to each other and close completely. If necessary, adjust the position of the gripper gear arms for correct operation.
-
Page 22: Construction Tips
Construction Tips Connectors fit inside beams and come in straight, 90-degree, tee, and corner designs. - Page 23 Quick rivets and pegs are a quick option to use when securing connectors. Press the rivet in place on the beam and use the peg to spread the rivet to secure the connection. Using quick rivets on two sides of the connection will make it more stable.
- Page 24 Joints can be made more permanent by using a thumbscrew and wing nut to secure the beams and connectors.
- Page 25 Brackets can also be used to connect beams. Brackets are available for a tee connection, 60-degree connection, or 90-degree connection. Brackets should be used in pairs, with two brackets on opposite sides of a beam. Brackets are secured using quick rivets and pegs or thumbscrews and wing nuts.
- Page 26 End connectors, straight, and 90-degree cross block connectors are secured using a thumbscrew through the beam and into the connector.
- Page 27 After the thumbscrew is used to secure the end of the connector, a quick rivet and peg or a thumbscrew and wing nut are used to secure the intersecting beam.
- Page 28 Anytime an axle is used, it should be supported at two points. Place a bronze bushing on opposite sides of a beam and place the axle through the bushings. Secure the axle to a stop collar, wheel, gear, or hub.
- Page 30 Setup Guide Call Toll-Free FreeFax Visit Us Online at 800•835•0686 800•533•8104 shop.pitsco.com...
Need help?
Do you have a question about the tetrix prime and is the answer not in the manual?
Questions and answers