
Related Manuals for Redwood ETG500A


Summary of Contents for Redwood ETG500A
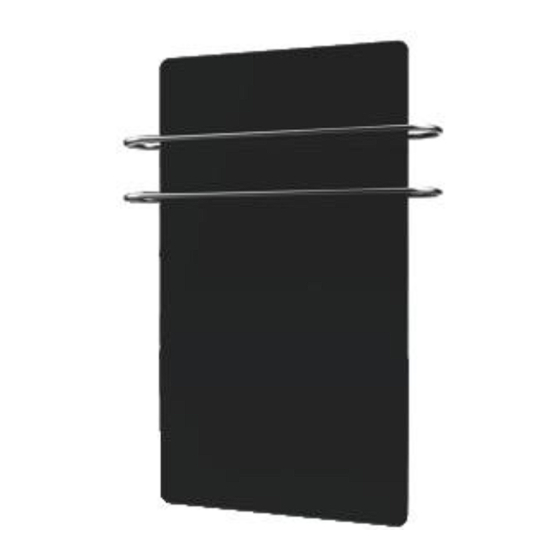
- Page 1 Black Glass Towel Radiator User manual This picture is for reference only. Please carefully read this instruction before using the product. MODEL: ETG500A...
- Page 2 The appliance is not intended for use by persons (including children) with reduced physical sensory or mental capabilities, or lack of experience and knowledge, unless they have been given supervision or instruction concerning use of the appliance by a person responsible for their safety. Children should be supervised to ensure that they do not play with the appliance.
- Page 3 PART CODE NAME QUANTITY Bathroom Heater 1 pcs Hook 2 pcs Expansion Screw 4 pcs Screw 4 pcs Product specication and model Output DuS tproof and ModeL Frequency Rated V oLtaGe Po Wer Waterproof Grade ETG500A 50Hz 220~240V IP24...
-
Page 4: Safety And Cautions
Safety and cautions 1. The quality guarantee service excludes damages caused by failure to abide by this instruction. 2. The product must be connected to a power supply that conforms to the rated voltage marked on the label of the electrical apparatus. 3. - Page 5 Safety and cautions 12. Residual current protective devices (RCDs) with a rated residual operating current not exceeding 30mA shall be provided protection for all the circuits. 13. Keep the Towel Rail clean. Do not allow any objects to enter any ventilation or exhaust opening as this may cause electric shock, fire or damage to the heater.
- Page 6 Selection of use site 1. This wall-mounted heater should be installed at a proper position. 2. It should not be installed near furniture, curtains or other electrical appliances. 3. It should not be installed at a corner of wall. 4. It should be installed far away from doors and windows. 5.
- Page 7 Installation instruction for a wall-mounted heater THIS FITTING SHOULD BE INSTALLED AT LEAST 0.6M away from A BATHROOM SINK. ZONE 2 ZONE 3 EXTERIOR ZONES ZONE 1 ZONE 2 ZONE 3 ZONES 2,25 m ZONE 0 0,60 m 2,40 m HO WEVER, IF YOU WISH TO FIT THIS PRODUCT IN A BATHROOM, IT IS SUITABLE FOR USING IN ZONE 3 AND OUT SIDE ZONE A S PER THE DIA GRAM.
- Page 8 Model Distance E Distance F ETG500A 360MM Hang the host machine of heater over the hook fixed on the wall through hook cover on the back of the heater. See Figure 1-2. Then screw down the set screws and fix the product and...
-
Page 9: Description Of Control Panel
Installation instruction for a wall-mounted heater Figure 1-5 Description of control panel LCD Screen Program/Set Time Power ON/OFF Increase Decrease Heating Mode Towel Drying... -
Page 10: Description Of Keys
Description of keys 1. Time Set key: Keep pressing “PROG“ 3 second to set local time, reserved time and reserved working mode. Under the setting mode, keep pressing “PROG “ 3 second to quit from setting; short press it to switch over among local time, reserved time and reserved working mode. -
Page 11: Lcd Display
LCD DISPLAY Key Locking Heating Mode Power Range Towel Drying Time Mode Reserved Time Reservation Mode Reserved Time Start Operation instruction 1. Power: Press power key. Then the power indicator will be illuminated and the heater will enter the standby state. 1)Press “... - Page 12 Operation instruction 1.2. Press “ ” to start machine; then press “ ” to enter towel drying mode. The towel rails will heat separately. “ ” will be displayed and the heater will start operation. as shown in Figure 1-7. Or under “ “...
- Page 13 Operation instruction Then short press “PROG “ to set timer Start. Press “(+)” or “(-)” to increase or de- crease the time on the basis of 0.5 h. Refer to Figure 1-11. Short press “PROG “ to set working mode, press “ “ or “ ” to set heating mode ( default full power) or towel drying mode which can work separately(refer to Figure 1-11 or Figure 1-12)or together (refer to Figure 1-13).
-
Page 14: Daily Maintenance And Cleaning
Daily maintenance and cleaning Wipe the surface of the housing with soft cloth or special cleaning cloth for glass. Before cleaning wait for complete cooling of radiator body. Do not use the towel rack before drying and after cleaning. Troubleshooting - Ensure that power supply is connected;...
Need help?
Do you have a question about the ETG500A and is the answer not in the manual?
Questions and answers