Table of Contents
Advertisement
WARNING
Improper installation,
adjustment, alteration, service or
maintenance can cause injury or
property damage.
Read the installation,
operation and maintenance
instructions thoroughly before
installing or servicing this
equipment.
DANGER
Failure to follow these
instructions could result in fire
or explosion that could cause
property damage, personal
injury or death.
DANGER
DO NOT use gas barbecue for
indoor cooking or heating.
TOXIC fumes can accumulate
and cause asphyxiation. DO
NOT use in or on boats or
recreational vehicles.
PROP 65 WARNING
Chemicals known to cause
cancer, birth defects or other
reproductive harm are created
by the combustion of propan
WARNING
FOR YOUR SAFETY:
For Outdoor Use Only
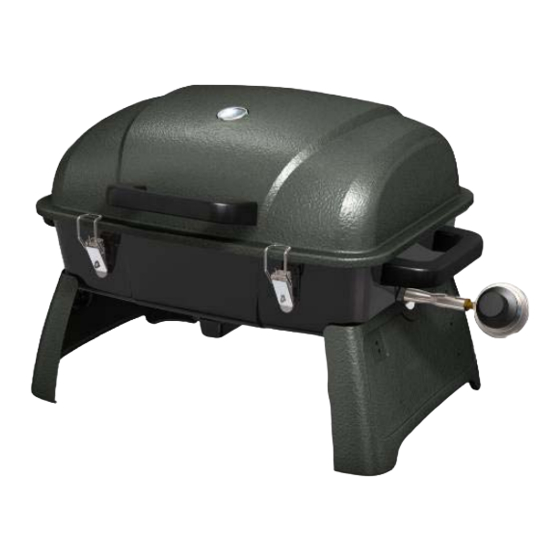
Owner's Manual
Portable Propane Barbecue
085-3602-8
SAVE THESE INSTRUCTIONS FOR FUTURE REFERENCE.
IF YOU ARE ASSEMBLING THIS UNIT FOR SOMEONE
ELSE, GIVE THIS MANUAL TO HIM OR HER TO SAVE FOR
FUTURE REFERENCE.
FOR CUSTOMER SERVICE, EMAIL TO
e.
SERVICE@BBQTEK.COM OR
CALL 1-877-885-8227 (TOLL-FREE),
7:00 A.M. – 4:00 P.M. (PST), MONDAY-FRIDAY.
1
Advertisement
Table of Contents

Related Manuals for Master Chef 085-3602-8


Summary of Contents for Master Chef 085-3602-8
- Page 1 Portable Propane Barbecue 085-3602-8 WARNING Improper installation, adjustment, alteration, service or maintenance can cause injury or property damage. Read the installation, operation and maintenance instructions thoroughly before installing or servicing this equipment. DANGER Failure to follow these instructions could result in fire...
-
Page 2: Grill Operation
Grill Operation 1-2-3 Before Barbecuing Step 1 Keep your barbecue a safe distance away from your property.* Step 2 Always perform a Leak Test on all connections. * Step 3 Keep children away from the grill. During Barbecuing (To avoid tripping safety valves, please follow these instructions carefully.) Step 1 First open lid and turn gas tank on slowly. -
Page 3: Table Of Contents
Table of Contents For Your Safety ......................4 Illustrated Parts List....................6 Hardware List......................7 Assembly Instructions..................8-11 Operating the Barbecue..................11 ..................11 Connecting gas cylinder....................12 Checking for leaks.....................12 Lighting your barbecue..Excess Flow Safety Valve Reset Procedure............13 Care and Maintenance...................13 Troubleshooting.....................14 Warranty Program....................15 Owner’s Manual... -
Page 4: For Your Safety
For Your Safety Dear Valued Customer, Congratulations on your new barbecue purchase! You’ve made the right choice. In this manual, you will find assembly instructions, suggestions for grilling and helpful hints, as well as guidelines for the safe operation, proper care and use of your barbecue. - Page 5 50” 50” WARNINGS Do not use this appliance under overhead combustible surface or covered area (e.g., awnings, umbrellas, porches or gazeboes). Always confirm that this barbecue is not positioned under the overhang of a house, a garage or other structure before lighting it.
-
Page 6: Illustrated Parts List
Illustrated Parts List Part Description Part Description Part Description Lid handle 1 PC Heat plate 1 PC Right handle 1 PC 1 PC Burner 1 PC Body assembly 1 PC Upper hinge 2 PCS Regulator 1 PC Left leg 1 PC Lower hinge 2 PCS Heat plate support... -
Page 7: Hardware List
Hardware List AA: 1 PC BB: 14 PCS CC: 14 PCS Wrench M5 × 10 Bolt M5 Spring washer DD: 14 PCS EE: 14 PCS FF: 1 PCS Flat washer M5 Nut M6X7Bolt GG: 7 PCS HH: 7 PCS II: 6 PCS M6 Spring washer Flat washer M6 Nut... -
Page 8: Assembly Instructions
Assembly Instructions Remove all contents from the carton packaging. Make sure all parts are present before attempting assembly. Once the barbecue is fully assembled, go back and check to make certain all the bolts are secure. Tighten again using the screwdriver provided if necessary. - Page 9 Step 3 a) Align the holes on the left side of the body with the holes on the heat plate support (I). b) Insert the bolts on the left handle (J) into each pre-drilled hole and seal one flat washer (HH), one spring washer (GG), and one nut (II) in sequence.
- Page 10 Step 6 a) Insert the grease cup (O) into the two guides underneath the body and push forward until it is in place. Step 7 a) Insert the pre-attached bolts on the lid handle (A) into the holes on the front of the lid and seal with one flat washer (HH), one spring washer (GG), and one nut (II).
-
Page 11: Operating The Barbecue
Step 9 a) Screw the gas cylinder counterclockwise into the thread underneath the regulator valve until it is in place. b) Make certain the connection is secure and conduct the leak test on page 12. Fully Assembled View Left Side Right Side Operating the Barbecue CAUTION:... -
Page 12: Checking For Leaks
DANGER To prevent fire or explosion hazard when testing for a leak: Always perform the leak test on page 10 before lighting the barbecue and each time the cylinder is connected for use. Do not smoke or allow other sources of ignition in the area while conducting a leak test. Conduct the leak test outdoors in a well-ventilated area. -
Page 13: Excess Flow Safety Valve Reset Procedure
FIG. A FIG. B FIG. C Normal: Soft blue flames with yellow Out of adjustment: Noisy hard blue Poor combustion: Wavy, yellow flames - tips between I-2” high. flames – too much air. too little air. Flare-ups: “Flare-ups” sometimes occur when food drippings fall onto the hot heat plate or burner and ignite. Some flaring is normal and desirable as it helps impart the unique flavours associated with grilled foods. -
Page 14: Troubleshooting
Outside surfaces Use a mild dishwashing detergent and hot water solution to clean. Rinse thoroughly with water. Inside surfaces If the inside surface of the barbecue lid has the appearance of peeling paint, baked-on grease has turned to carbon and is flaking off. Clean thoroughly with a strong solution of detergent and hot water. Rinse with water and allow it to completely dry. -
Page 15: Warranty Program
Inside of lid is peeling – Carbon build up. Baked-on grease buildup has turned to carbon like paint peeling. and is flaking off. Clean thoroughly. Burner accidentally extinguished. Tank empty. Check to see if tank is empty. If empty, replace. If tank is not empty refer to section “Excess flow safety valve reset procedure”.
Need help?
Do you have a question about the 085-3602-8 and is the answer not in the manual?
Questions and answers
Putting BBQ together and unable to screw the regulator into the burner. There is no threads at the end of the burner tube. The instructions show to screw into the tube.
The regulator does not screw into the end of the burner tube because it is designed to screw into the threaded venturi tube of the burner, not the end. The connection point for the regulator is at the venturi tube, which is part of the burner's assembly.
This answer is automatically generated
How can I order the upper 2 hinges as my master chef BBQ didn't have them in it as I found out once we got to our cabin at Horn Lake.
Where h is plugged into g there is a hole why? and wont it leak gas? Should it not be covered? What is it?