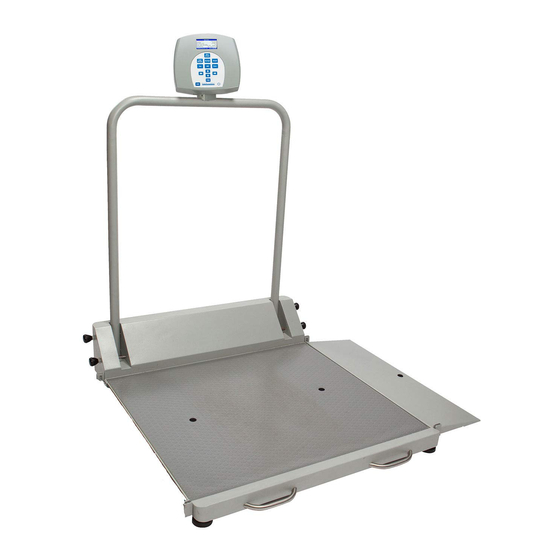
Health O Meter 2500KL Use Instruction
Gigital patient wheelchair scales
Hide thumbs
Also See for 2500KL:
- User instructions (28 pages) ,
- Operation manual (103 pages) ,
- User manual (24 pages)

Related Manuals for Health O Meter 2500KL


Summary of Contents for Health O Meter 2500KL
-
Page 1: User Instructions
Model 2500KL / 2600KL Digital Patient Wheelchair Scales User Instructions P/N UM2500KL / 2600KL Rev 20150217... -
Page 2: Table Of Contents
Model 2500KL / 2600KL Thank you for your purchase of this Health o meter® Professional product. Please read this manual carefully, and keep it for easy reference or training. TABLE OF CONTENTS Caution and Warning....................3 Specifications ......................4 Certifications / Connectivity / Disposal ..............5 2500KL Assembly Instructions .................6... -
Page 3: Caution And Warning
CAUTION AND WARNING To prevent injury and damage to your scale, please follow these instructions very carefully. Assemble and operate the scale per the enclosed user instructions. Operate these scales exclusively with the AC adapter provided by Health o meter. -
Page 4: Specifications
For easy mobility, the 2500KL Scale has 2 built-in wheels, along with the 2600KL Scale with 4 built-in wheels. Each scale can be powered using an AC adapter (ADPT30 included), or by 6 - AA batteries (not included). -
Page 5: Certifications / Connectivity / Disposal
Technical Support, available during normal business hours at 1-800-683-3722. 2500KL / 2600KL Scale Disposal These Health o meter® Professional scales must be disposed of properly as electronic waste. Follow the national, regional or local regulations which apply to you for disposal of electronic... -
Page 6: 2500Kl Assembly Instructions
2500KL ASSEMBLY INSTRUCTIONS Before Assembly Each 2500KL scale is shipped disassembled in a single carton. Carefully inspect the carton for shipping damage before unpacking. If damage is found, contact your shipper or a Health o meter® Professional representative immediately at 1-800-815-6615. Claims must be filed with the shipper as soon as possible after receipt of the package. - Page 7 5. Feed the cable through the large center hole of the handrail mounting holes (located on the right side of the “Health o meter” logo). Be sure not to pinch the cable. 6. Fasten the handrail to the platform using the (8) M8 1.25 x ¾ screws (A), (8) M8 washers (D) and the included 5mm Allen wrench (see Figure 1).
- Page 8 2500KL ASSEMBLY INSTRUCTIONS (CONTINUED) 14. Align the four mounting holes on the back of the display assembly with the four mounting holes in the display support. Fasten the display assembly onto the metal display support. Use the (4) Phillips pan head #5 x 3/8 screws (C) (see Figure 1).
- Page 9 2500KL ASSEMBLY INSTRUCTIONS (CONTINUED) Ramp Assembly Instructions 1. Follow these instructions for moving the ramp to the opposite side of the scale, or for adding a second ramp to the scale (B2500RAMP option): 2. On the side of the platform opposite to the ramp, remove the guardrail mounted to the end of the platform by unscrewing and then removing the 4 guardrail assembly screws (see Figure 3).
- Page 10 2500KL ASSEMBLY INSTRUCTIONS (CONTINUED) Figure 1 Figure 2...
- Page 11 2500KL ASSEMBLY INSTRUCTIONS (CONTINUED) Handrail Mounting Holes Left Right Guardrail Figure 3 Load Cell Port Shield Figure 4...
-
Page 12: Figure
2500KL ASSEMBLY INSTRUCTIONS (CONTINUED) Figure 5 Figure 6... - Page 13 2500KL ASSEMBLY INSTRUCTIONS (CONTINUED) Rear of Display Head on 2500KL and 2600KL Figure 7...
-
Page 14: 2600Kl Assembly Instructions
2600KL ASSEMBLY INSTRUCTIONS Before Assembly Each 2600KL scale is shipped disassembled in a single carton. Carefully inspect the carton for shipping damage before unpacking. If damage is found, contact your shipper or a Health o meter® Professional representative immediately at 1-800-815-6615. Claims must be filed with the shipper as soon as possible after receipt of the package. - Page 15 2600KL ASSEMBLY INSTRUCTIONS (CONTINUED) Assembling the 2600KL Scale (Refer to Figures 7-10) Caution: It is recommended that the assembly be performed by two persons. 1. Remove the scale assembly from the carton by first removing the inserts, then tucking the bag down around the end of the box, and finally tilting the carton up on its end.
- Page 16 2600KL ASSEMBLY INSTRUCTIONS (CONTINUED) Ramp Assembly Instructions 1. Follow these instructions for moving the ramp to the opposite side of the scale, or for adding a second ramp to the scale (B2600RAMP option): 2. On the side of the platform opposite to the ramp, remove the guardrail mounted to the end of the platform by unscrewing and then removing the 4 guardrail assembly screws (see Figure 3).
- Page 17 2600KL ASSEMBLY INSTRUCTIONS (CONTINUED) Figure 8 Figure 9...
- Page 18 2600KL ASSEMBLY INSTRUCTIONS (CONTINUED) Figure 10 Load Cell Port...
-
Page 19: Setup / Batteries
In addition, to avoid damage to the pin assemblies, tighten the two lower locking pin assemblies as well. Preparing the 2500KL / 2600KL Scale for Use 1. Remove the protective plastic film covering the display (the film says “FACTORY CALIBRATED”). - Page 20 2. Remove the battery cover on the side of the display head by unscrewing the (2) battery cover screws (see Figure 11). 3. Replace or install the batteries with new units. Health o meter recommends using an alkaline or lithium battery, rated for 130°F (54°C) operation. Do not use Zinc-Carbon batteries.
-
Page 21: Quick Start Instructions
QUICK START / OPERATING INSTRUCTIONS Keypad Figure 12 Function Description ON/OFF Turns scale on and off. ZERO Zeros the scale prior to a weighing. Holds the weight value of the patient on the display until the button is HOLD/RELEASE pressed again to clear the value. Also moves the cursor from left to right ►... - Page 22 The Tare Function automatically performs this subtraction. The 2500KL and 2600KL scales allow tare weight to be entered manually by using the keypad, or automatically, as outlined in this section.
- Page 23 Exercise caution when transporting patient onto and off of the scale. 5. Once a weight has been displayed, while the patient is still on the scale, Health o meter recommends performing a second weighing by pressing the REWEIGH button.
- Page 24 5. Once a weight has been displayed, while the patient is still on the scale, Health o meter recommends performing a second weighing by pressing the REWEIGH button.
-
Page 25: Maintenance
Maintenance The following pages provide instructions for maintenance, cleaning, calibrating, and troubleshooting for the 2500KL or 2600KL scale. Maintenance operations other than those described in this manual should be performed by qualified service personnel. Caution: Before first use, or after long periods of non-use, check the scale for proper operation and function. -
Page 26: Calibration
These scales have been factory calibrated, and do not require calibration prior to use. For maintenance, the scale can be calibrated. Calibration of your 2500KL or 2600KL scale is performed using kilograms (kg) or pounds (lb), according to the units of measure used upon entering into the calibration path. -
Page 27: Troubleshooting
TROUBLESHOOTING Troubleshooting Before contacting service personnel, refer to the following instructions to check and to correct any failures. Symptom Possible Cause Corrective Action Scale does not turn on 1. Dead Battery 1. Replace batteries 2. Faulty electrical outlet 2. Use a different outlet 3. -
Page 28: Warranty
What does the Warranty Cover? Health o meter® Professional scales are warranted from date of purchase against defects of materials or in workmanship for a period of two (2) years. If product fails to function properly, return the product, freight prepaid and properly packed to Pelstar, LLC (see “To Get Warranty Service”, below, for instructions). - Page 29 Basculas Digitales para Pacientes en Sillas de Ruedas Modelo 2500KL / 2600KL Instrucciones de Uso P/N UM2500KL / 2600KL Rev 20150217...
- Page 30 Modelo 2500KL / 2600KL ® Gracias por comprar este producto Health o meter Professional. Por favor, lea con detenimiento este manual, y manténgalo a la mano para su consulta y capacitación. Índice Precauciones……………………………………………………………………………………3 Especificaciones ……………………………………………………………………………….4 Certificaciones / Conectividad / Eliminación………………………………………………...5 2500KL Instrucciones de Ensamblaje ……………...……………………………………….6...
-
Page 31: Precauciones
Ensamble y opere la bascula conforme a las instrucciones adjuntas. Utilice la bascula únicamente con el adaptador de corriente eléctrica proporcionado por ® Health o meter Professional. Si utiliza un adaptador diferente anulará la garantía, y puede presentar un serio peligro de seguridad. ... -
Page 32: Especificaciones
180° para privacidad y fácil lectura del operador desde ambos lados de la bascula. Para transportarlas con facilidad, la bascula 2500KL tiene 2 ruedas integradas, mientras que el modelo 2600KL tiene 4 ruedas integradas. Cada bascula puede funcionar con un adaptador de corriente eléctrica (ADPT30 incluido), o con 6 baterías AA (no incluidas). -
Page 33: Certificaciones / Conectividad / Eliminación
Eléctricos Médicos 2. CSA C22.2 Número 601-1 M90: Equipo Eléctrico Médico Información de conectividad de las basculas 2500KL y 2600KL Para permitir una transmisión confiable de información de peso, altura, e índice de masa corporal (IMC), las basculas están diseñadas para conectarse a una computadora, monitor u otro dispositivo electrónico a través de un puerto USB integrado. -
Page 34: 2500Kl Instrucciones De Ensamblaje
2500KL INSTRUCCIONES DE ENSAMBLAJE Antes de ensamblar Cada bascula 2500KL se envía desarmada dentro de una sola caja. Revise la caja con detenimiento para localizar daños causados durante el envío antes de desempacar la bascula. Si encuentra algún daño, contacte de inmediato a un representante de Health o meter®... - Page 35 5. Alimente el cable a través del gran agujero central de los agujeros de montaje del pasamano (localizado al lado derecho del logo "Health o meter"). Tenga cuidado en no aplastar el cable. 6. Ajuste el pasamano a la plataforma con los (8) tornillos M8 de 1.25 x ¾ (A), las (8) rondanas (D) y la llave Allen de 5mm incluida (ver la figura 1).
- Page 36 2500KL INSTRUCCIONES DE ENSAMBLAJE (CONTINUACIÓN) 14. Alinee los cuatro agujeros de montaje de la parte posterior de la pantalla con los cuatro agujeros de montaje del soporte de la pantalla. Ajuste el ensamblaje de la pantalla en el soporte de la pantalla. Utilice los (4) tornillos Phillips #5 x 3/8 (C) (ver la figura 1).
- Page 37 2500KL INSTRUCCIONES DE ENSAMBLAJE (CONTINUACIÓN) Instrucciones de Ensamblaje de la Rampa 1. Siga las siguientes instrucciones para cambiar la rampa al lado opuesto de la bascula o para añadir una segunda rampa (opción B2500RAMP): 2. En el costado opuesto a la rampa de la plataforma, retire el pasamano por la parte inferior de la plataforma quitando los 4 tornillos que ensamblan el pasamano (ver la figura 3.
- Page 38 2500KL INSTRUCCIONES DE ENSAMBLAJE (CONTINUACIÓN) Figura 1 Soporte de la Empaque de Rampa Agarradera rampa Soporte de hule Plataforma Empaque de la rampa hule Rampa Figura 2...
- Page 39 2500KL INSTRUCCIONES DE ENSAMBLAJE (CONTINUACIÓN) Agujeros de montaje del pasamano Izquier Derech Pasamano Figura 3 Puerto de la célula Protección Figura 4...
- Page 40 2500KL INSTRUCCIONES DE ENSAMBLAJE (CONTINUACIÓN) Montaje de la pantalla Cubierta para el tornillo del pivote Cubierta para el tornillo del derecho pivote izquierdo Cubierta frontal y posterior del soporte de la pantalla Pasamano Soporte del adaptador de corriente Adaptador de corriente Plataforma de la báscula...
- Page 41 2500KL INSTRUCCIONES DE ENSAMBLAJE (CONTINUACIÓN) Parte trasera de la pantalla principal en la 2500KL y 2600KL Figura 7...
-
Page 42: 2600Kl Instrucciones De Ensamblaje
Cada bascula 2600KL se envía desarmada dentro de una sola caja. Revise la caja con detenimiento para localizar daños causados durante el envío antes de desempacar la bascula. Si encuentra algún daño, contacte de inmediato a un representante de Health o meter® Professional al teléfono 1-800-815-6615. Debe presentar cualquier queja ante el transportista al momento de recibir el paquete. - Page 43 2600KL INSTRUCCIONES DE ENSAMBLAJE (CONTINUACIÓN) Ensamblaje de la bascula 2600KL (consulte las figuras 7-10) Atención: Se recomienda que el ensamblaje se realice por dos personas. 1. Retire fuera de la caja las partes de la bascula tomando en primer lugar los insertos, después pliegue la bolsa hacia abajo y alrededor de la parte inferior de la caja y finalmente inclinando la caja hacia su lado inferior.
- Page 44 2600KL INSTRUCCIONES DE ENSAMBLAJE (CONTINUACIÓN) Instrucciones de Ensamblaje de la Rampa 1. Siga las siguientes instrucciones para cambiar la rampa al lado opuesto de la bascula o para añadir una segunda rampa (opción B2600RAMP): 2. En el costado opuesto a la rampa de la plataforma, retire el pasamano por la parte inferior de la plataforma quitando los 4 tornillos que ensamblan el pasamano (ver la figura 3.
- Page 45 2600KL INSTRUCCIONES DE ENSAMBLAJE (CONTINUACIÓN) conector de la célula de carga Cubierta para el tornillo del Tornillo Montaje de la pantalla Soporte de la pantalla Cubierta frontal y posterior del soporte de la pantalla Cubierta para el tornillo del Adaptador de corriente Pasamano Pasador de sujeción del Pasamano...
- Page 46 2600KL INSTRUCCIONES DE ENSAMBLAJE (CONTINUACIÓN) Agarradera Plataforma Rampa Soporte de la rampa Empaque de hule Empaque de hule Soporte de la rampa Rampa Figura 10 Puerto de la...
-
Page 47: Configuración / Batería
Además, para evitar dañar los pasadores de sujeción, también ajuste las dos secciones inferiores con los pasadores. Preparar la bascula 2500KL / 2600KL para su utilización 1. Retire la capa de plástico protector que cubre la pantalla (en ella está impresa la frase: "CALIBRADO DE FÁBRICA"). - Page 48 (2) tornillos de la tapa (ver la figura 11). 3. Reemplace o instale las baterías con baterías nuevas. Health o meter recomienda utilizar baterías de litio o alcalinas, ideales para operar a 130°F (54°C). No utilice baterías de Zinc- Carbón.
-
Page 49: Guía Rápida /Instrucciones De Operación
GUÍA RÁPIDA / INSTRUCCIONES DE OPERACIÓN Teclado Figura 12 Función Descripción ON/OFF Enciende y apaga la bascula. (Encender/Apagar) ZERO (Cero) Programa la bascula en ceros antes de utilizarla. Mantiene en la pantalla el peso del paciente hasta volver a presionar el HOLD/RELEASE botón para borrar el valor. - Page 50 La función de sustracción realiza este calculo de forma automática. Las basculas 2500KL/2600KL permiten que ingrese manualmente el peso utilizando el teclado, o de forma automática como se detalla en esta sección.
- Page 51 GUÍA RÁPIDA / INSTRUCCIONES DE OPERACIÓN (CONTINUACIÓN) 7. Coloque al paciente en la silla de ruedas y desplácelos sobre la bascula. La bascula sustraerá automáticamente el valor registrado del peso total del paciente y la silla de ruedas. 8. El peso del paciente aparecerá en la pantalla. 9.
- Page 52 GUÍA RÁPIDA / INSTRUCCIONES DE OPERACIÓN (CONTINUACIÓN) Función BMI (Índice de Masa Corporal) El índice de masa corporal es otro nombre del índice de Quetelet, una fórmula que es indicadora práctica del IMC con varias categorías, como atletas, niños, personas de la tercera edad y enfermos.
-
Page 53: Mantenimiento
Mantenimiento Las siguientes páginas le mostrarán instrucciones para dar mantenimiento, limpiar, calibrar y solucionar problemas de la bascula 2500KL/2600KL. Las operaciones de mantenimiento que no aparezcan en este manual deberán realizarse por personal capacitado. Atención: Antes de utilizarse por primera vez, o después de largos periodos sin utilizarla, asegúrese que la bascula funciona correctamente. -
Page 54: Calibración
CALIBRACIÓN Calibración La bascula se calibró desde fábrica y no necesita calibrarse antes de utilizarse. En caso de mantenimiento, la bascula puede calibrarse. La calibración de la bascula 1100KL se efectúa utilizando kilogramos (KG) o libras (LB) de acuerdo con las unidades de medida utilizadas al momento de ingresar el procedimiento de calibración. -
Page 55: Solución De Problemas
SOLUCIÓN DE PROBLEMAS Solución de Problemas Antes de solicitar asistencia técnica, consulte las siguientes instrucciones para revisar y corregir cualquier falla. Problema Posible causa Acción correctiva La bascula no enciende 1. Batería descargada 1. Reemplace las baterías 2. Enchufe eléctrico 2. -
Page 56: Garantía
Pelstar, LLC., fabrica, diseña, y es dueño de los productos Health o meter Professional. ® Nos reservamos el derecho de mejorar o modificar las características o especificaciones de los productos Health o meter Professional sin previo aviso. © Pelstar, LLC 2015... - Page 57 Modèle 2500KL / 2600KL Balance Numériques pour Patients en Chaises Roulantes Instructions de l'Utilisateur P/N UM2500KL / 2600KL Rev 20150217...
- Page 58 Modèle 2500KL / 2600KL Merci d'avoir acheté ce produit Health o meter® Professional. Veuillez lire ce manuel attentivement, et le garder comme référence ou comme formation. TABLE DES MATIÈRES Précaution et Avertissement ..................3 Caractéristiques ......................4 Certifications / Connectivité / Disposition ..............5 2500KL Instructions d'Assemblage ................6...
-
Page 59: Précaution Et Avertissement
Assemblez et utilisez cette balance conformément aux instructions incluses. Utilisez exclusivement ces balances avec l'adaptateur AC fourni par ’ ’ Health o meter® Professional. L utilisation d un adaptateur non-indiqué annulera la garantie, et peut poser un sérieux risque de sécurité. ’... -
Page 60: Caractéristiques
180° pour la confidentialité et la facilité de lecture des deux côtés de la balance. Pour un déplacement facile, la balance 2500KL a deux roues intégrées, et la 2600KL a quatre roues intégrées. Chaque balance peut être alimentée en utilisant un adaptateur AC ( ADPT30 non-inclus) ou avec 6 batteries AA (inclus). -
Page 61: Certifications / Connectivité / Disposition
Professional, disponible durant les heures d affaires normales au 1-800-633-3722. Disposition Balance 2500KL / 2600KL Ces balances Health o meter® Professional doivent être jetées de façon appropriée, comme ’ déchets électronique. Suivez les régulations nationales, régionales ou locales s appliquant à... -
Page 62: 2500Kl Instructions D'assemblage
2500KL INSTRUCTIONS D'ASSEMBLAGE Avant Assemblage ’ Chaque balance 2500KL est livrée dans une seule boîte. Inspectez attentivement l extérieur de ’ ’ la boîte pour tout dommage de livraison avant de l ouvrir. S il y a du dommage, contactez votre livreur ou un représentant Health o meter®... - Page 63 5. Faites passer le câble à travers le gros trou central des trous de montage de la rampe (situé à droite du logo « Health o meter »). Assurez-vous de ne pas pincer le câble. 6. Attachez la rampe à la plateforme en utilisant les (8) vis M8 1.25 x ¾ (A), les (8) rondelles M8 (D) et la clé...
- Page 64 2500KL INSTRUCTIONS D'ASSEMBLAGE (SUITE) 14. Alignez les quatre trous de montage à l'arrière du montage de l'écran avec les quatre trous de montage dans le support de l'écran. Attachez le montage de l'écran sur le support de métal de l'écran. Utilisez les (4) vis à tête Phillips #5 x 3/8 (C) (voir Figure 1).
- Page 65 2500KL INSTRUCTIONS D'ASSEMBLAGE (SUITE) Instructions d'Assemblage de la Rampe 1. Suivez ces instructions pour bouger la rampe du côté opposé de la balance, ou pour ajouter une deuxième rampe à la balance (option B2500RAMP): 2. Sur le côté de la plateforme opposé à la rampe, enlevez la glissière de sécurité montée au bout de la plateforme en dévissant et enlevant les 4 vis d'assemblage de la glissière de...
- Page 66 2500KL INSTRUCTIONS D'ASSEMBLAGE (SUITE) Figure 1 Support de la Rampe rampe Poignée Pare-chocs en Plateforme Pare-chocs en Support de la caoutchouc caoutchouc Rampe rampe Figure 2...
- Page 67 2500KL INSTRUCTIONS D'ASSEMBLAGE (SUITE) Trous de Montage de la Rampe Gauche Droite Glissière Figure 3 Port de Cellule de Protecteur Figure 4...
- Page 68 2500KL INSTRUCTIONS D'ASSEMBLAGE (SUITE) Montage de l’Écran Couvert à vis du support pivotant droit Couvert à vis du support pivotant Couvert du Support de l’Écran Avant Rampe Support de l’adaptateur AC Adaptateur AC Plateforme de la balance Pied Figure 5 Montage de l’Écran...
- Page 69 2500KL INSTRUCTIONS D'ASSEMBLAGE (SUITE) Arrière de affichage tête sur 2500KL et 2600KL Figure 7...
-
Page 70: 2600Kl Instructions D'assemblage
S il y a du dommage, contactez votre livreur ou un représentant Health o meter® Professional immédiatement au 1-800-815-6615. Les réclamations doivent être déposées avec le livreur aussi tôt que possible après la réception ’... - Page 71 2600KL INSTRUCTIONS D'ASSEMBLAGE (SUITE) Assembler la Balance 2600KL (Se référer aux Figures 7-10) Mise en Garde: Il est recommandé que l'assemblage soit effectué par deux personnes. 1. Enlevez le montage de la balance de la boîte en commençant par enlever les plaquettes, et puis faites passer le sac jusqu'au boût de la boîte, et finalement inclinez la boîte sur son boût.
- Page 72 2600KL INSTRUCTIONS D'ASSEMBLAGE (SUITE) Instructions d'Assemblage de la Rampe 1. Suivez ces instructions pour bouger la rampe du côté opposé de la balance, ou pour ajouter une deuxième rampe à la balance (option B2500RAMP): 2. Sur le côté de la plateforme opposé à la rampe, enlevez la glissière de sécurité montée au bout de la plateforme en dévissant et enlevant les 4 vis d'assemblage de la glissière de sécurité...
- Page 73 2600KL INSTRUCTIONS D'ASSEMBLAGE (SUITE) Couvert à vis du support pivotant gauchet Montage de l’Écran Couvert à vis du support pivotant gauchet Adaptateur AC Rampe Montage de la goupille de verrouillage de la rampe Rampe Rampe Ressort de pied Support de Plateforme Poignée la rampe...
- Page 74 2600KL INSTRUCTIONS D'ASSEMBLAGE (SUITE) Support de Rampe la rampe Poignée Pare-chocs en Plateforme Support de caoutchouc Pare-chocs en la rampe Rampe caoutchouc Figure 10 Port de Cellule...
-
Page 75: Configuration / Batteries
De plus, pour éviter des dommage aux ensembles de broches, serrez les deux ensembles de broches de verrouillage du bas. Préparer les balances 2500KL/2600KL pour l'utilisation 1. Enlevez le film de plastique protecteur recouvrant l'écran (le film de plastique affiche «... - Page 76 écran en dévissant les 2 vis du couvert de la batterie (voir Figure 11). 3. Remplacez ou installez de nouvelles batteries. Health o meter® Professional recommande d'utiliser une batterie alkaline ou au lithium, classée pour une utilisation à 130°F (54°C). Ne pas utiliser de batterie zinc-carbone.
-
Page 77: Instructions De Démarrage Rapide
INSTRUCTIONS DE DÉMARRAGE RAPIDE / D'UTILISATION Clavier Figure 12 Fonction Description ON/OFF Allume et éteint la balance. ZERO Remise à zéro avant une pesée. ’ ’ Retient une valeur de poids du patient sur l écran jusqu à ce que le HOLD/RELEASE bouton soit appuyé... - Page 78 La fonction Tare effectue automatiquement ’ cette soustraction. Les balances 2500KL et 2600KL permettent au poids Tare d être entré manuellement en utilisant le clavier, ou automatiquement, tel que décrit dans la section suivante.
- Page 79 INSTRUCTIONS DE DÉMARRAGE RAPIDE / D'UTILISATION (SUITE) 7. Placez le patient dans la chaise roulante et roulez la chaise roulante sur la balance. La ’ balance déduira automatiquement le poids Tare entré manuellement de l objet du poids brut de la chaise roulante et du patient ensemble.
- Page 80 INSTRUCTIONS DE DÉMARRAGE RAPIDE / D'UTILISATION (SUITE) Fonction IMC ’ ’ indice de masse corporelle est un autre nom pour l indice Quetelet, une formule qui est un ’ indicateur convenable de l IMC avec certaines exemptions, telles que les athlètes, enfants et personnes âgées.
-
Page 81: Entretien
Entretien Les pages suivantes fournissent des instructions pour la maintenance, le nettoyage, la calibration et le dépannage des balances 2500KL et 2600KL. Les opérations de maintenance autres que celles décrites dans ce manuel devraient être effectuées par du personnel de service qualifié. -
Page 82: Calibration
Ces balances ont été calibrées en usine, et n'ont pas besoin d'être calibrées avant l'utilisation. Si requis, la balance peut être calibrée. La calibration de vos balances 2500KL et 2600KL est effectuée en utilisant des kilogrammes (KG) ou livres (LB) en conformité avec les unités de mesure utilisées lors du processus de calibration. -
Page 83: Dépannage
DÉPANNAGE Dépannage Avant de contacter du personnel de service, référez-vous aux instructions suivantes pour vérifier ou corriger tout problème. Symptômes Causes Possibles Action Corrective La balance ne s'allume pas 1. Batterie déchargée 1. Remplacer la batterie 2. Prise électrique 2. Utiliser une prise différente défectueuse 3. -
Page 84: Garantie
VEUILLEZ ENREGISTRER VOTRE BALANCE POUR LA COUVERTURE DE GARANTIE AU: www.homscales.com Health o meter® est une marque de commerce enregistré de Sunbeam Products, Inc. Utilisée sous licence. Les produits Health o meter® Professional sont manufacturés, conçus, et possédés par Pelstar, LLC.
Need help?
Do you have a question about the 2500KL and is the answer not in the manual?
Questions and answers